Quick Start
Prerequisites
Before installing, make sure that:
The server runs on a supported platform:
Linux amd64 (x86_64) — recommended for production
Linux arm64 (aarch64) — AWS Graviton, Oracle Cloud Ampere, Raspberry Pi, etc.
Docker Engine is installed:
curl -fsSL https://get.docker.com | sh
systemctl enable --now docker
At least 16 GB of RAM is available for Community (24–32 GB for Enterprise) and 50 GB of disk space.
Root access is available (or the ability to run
sudo).Ports 80 and 443 are free.
Online installation
The fastest way to install Citeck is to run a single command:
curl -fsSL https://github.com/Citeck/citeck-launcher/releases/latest/download/install.sh | bash
The install.sh script performs minimal actions:
Downloads the binary for your architecture
Verifies the SHA256 checksum
Runs
citeck install— the interactive setup wizard
Interactive installation wizard
Note
The citeck install command is an interactive TUI wizard and requires a real terminal (tty). There is currently no built-in non-interactive deployment mode; this is a planned feature — if you need it, please open an issue in the project repository.
Note
Pressing Ctrl+C at any step before step 7 (“Writing configuration”) exits the wizard without changing the filesystem. If the wizard is interrupted later, check the /opt/citeck/conf/ directory for partially written files (namespace.yml, daemon.yml) and delete them if necessary before running citeck install again.
After running citeck install, a step-by-step wizard will open:
1. Language selection
8 interface languages are available: Russian, English, Chinese, Spanish, German, French, Portuguese, Japanese. All subsequent messages will be in the selected language.
Language / Язык / 语言
> en (English)
  ru (Русский)
  zh (中文)
  es (Español)
  de (Deutsch)
  fr (Français)
  pt (Português)
  ja (日本語)
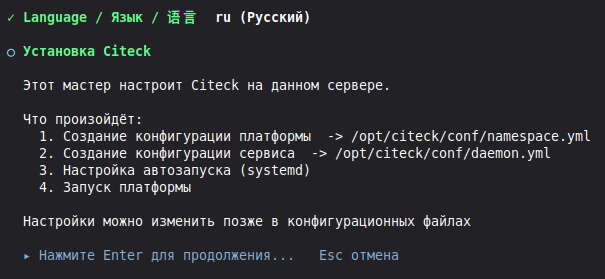
2. Welcome
An informational screen describing the installation steps:
Creating platform configuration (
namespace.yml)Creating daemon configuration (
daemon.yml)Installing the systemd service
Starting the platform
3. Hostname / IP address
The wizard automatically detects the server’s external IP address. You can confirm it or enter a domain name:
Hostname / IP address
> 203.0.113.45
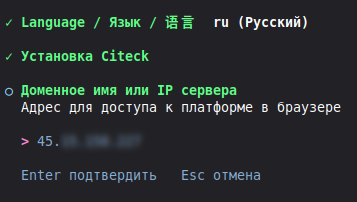
Note
If localhost or 127.0.0.1 is specified, the platform will only be accessible locally.
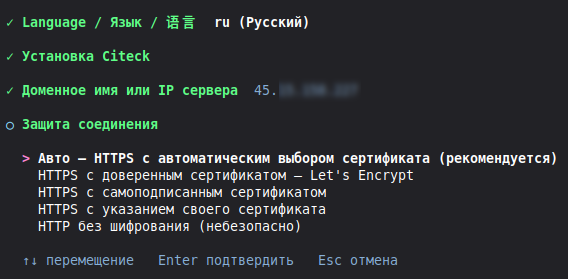
4. TLS mode
Choose how to secure the connection:
Auto HTTPS (recommended) — automatically tries Let’s Encrypt and falls back to a self-signed certificate on failure
Let’s Encrypt — obtain a trusted certificate (requires a public domain or IP)
Self-signed HTTPS — automatically generated self-signed certificate
Custom certificate — specify paths to your certificate and key files
HTTP only — no encryption (for testing only)
Warning
HTTP only mode is not recommended for production environments. All data, including passwords, is transmitted in plain text.
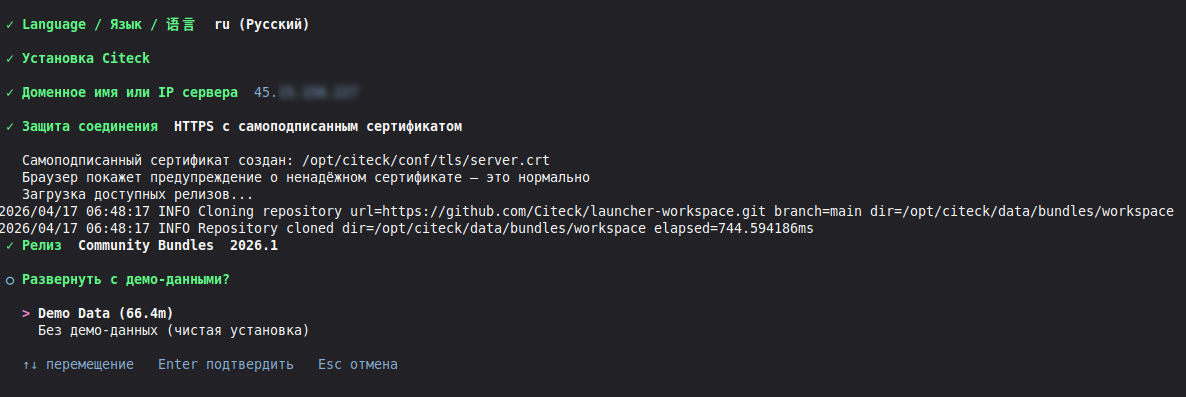
5. Release selection
The wizard displays a list of bundle repositories with the latest version of each and an “Other version…” item for selecting an older version:
Select platform release
> Community Bundles — 2026.1 (latest)
  Enterprise Bundles — 2026.1 (latest)
  Other version...
Community Bundles — free open-source edition
Enterprise Bundles — extended edition (Docker registry credentials required)
Other version… — select an earlier version (drill-down through repositories)

When Enterprise is selected, the wizard will prompt for login credentials for the Docker image registry and verify them before proceeding.
6. Demo data
Choose whether to install the platform with pre-filled demo data or without it:
With demo data — pre-configured workspaces, data types, and business processes
Without demo data — clean installation
Note
After confirming step 6, steps 7 (writing configuration) and 8 (installing the systemd service) are performed automatically — no additional input is required.
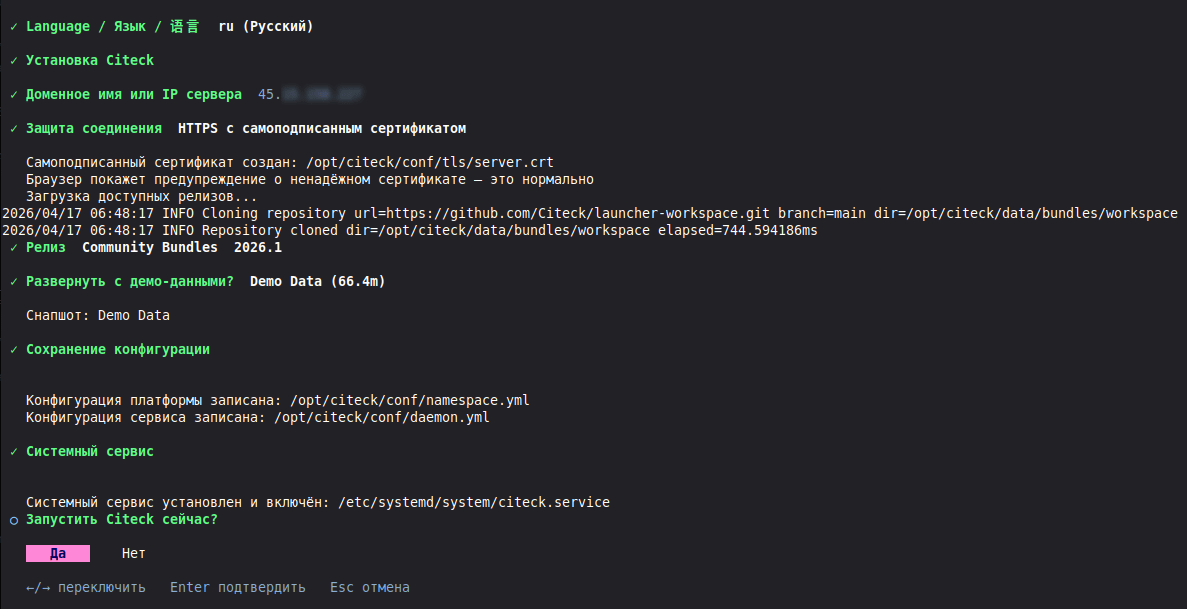
7. Writing configuration (automatically)
The wizard writes the configuration files:
namespace.yml  ->  /opt/citeck/conf/namespace.yml
daemon.yml     ->  /opt/citeck/conf/daemon.yml
8. Systemd service (automatically)
The citeck systemd service is automatically created and activated. This provides:
Automatic startup when the server boots
Daemon restart on failure
Management via standard
systemctlcommands
9. Starting the platform
On the final step the wizard will offer to start the platform immediately. Upon confirmation:
The daemon starts in the background
Docker image downloading begins
An interactive status table is displayed
GROUP          APP             STATUS        IMAGE
─────────────────────────────────────────────────────
infra          postgres        RUNNING       postgres:16
infra          zookeeper       RUNNING       zookeeper:3.9
infra          rabbitmq        RUNNING       rabbitmq:3.13
core           keycloak        RUNNING       citeck/keycloak:26
webapp         ecos-gateway    STARTING      citeck/ecos-gateway:2.0
webapp         eapps           PULLING       citeck/ecos-apps:2.0
webapp         emodel          PULLING       citeck/ecos-model:2.0
proxy          proxy           DEPS_WAITING  citeck/proxy:2.0

12/18 running
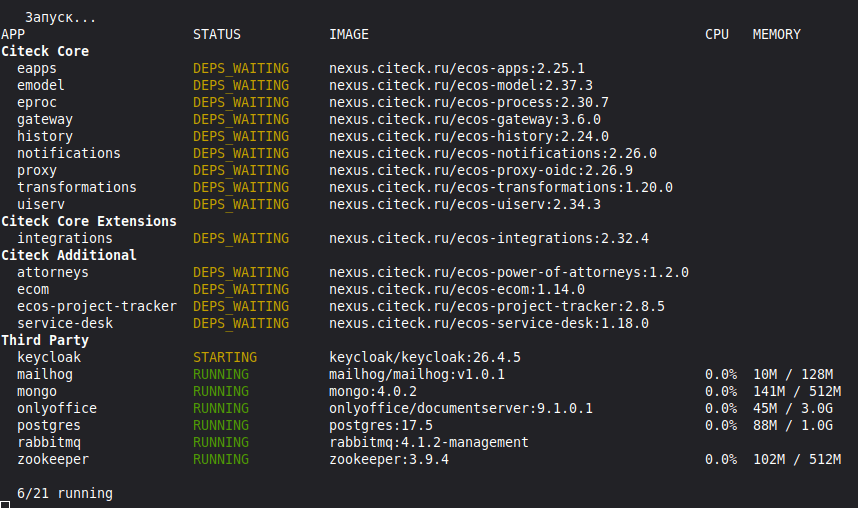
Wait until all applications reach RUNNING status.
Accessing the platform
After installation is complete, the wizard will display access information:
═══════════════════════════════════════════
Citeck установлен и работает!

Откройте в браузере:  https://203.0.113.45
Логин:  admin / Ab3xK9mP2

Сменить пароль:  citeck setup admin-password
═══════════════════════════════════════════
URL:
https://YOUR_IP(orhttp://YOUR_IPin HTTP mode)Login:
adminPassword: generated automatically on first installation and displayed in the wizard output
Note
Make sure to copy and save this password — it cannot be recovered after closing the screen. If lost, reset it via citeck setup admin-password — the command sets a new password for all services (Keycloak realm ecos-app, RabbitMQ, PgAdmin) without needing to know the old one.
Note
The generated password applies to Keycloak (realm ecos-app), RabbitMQ, and PgAdmin. The Keycloak master-realm administrator is managed by a separate service account and is not affected by this password.
Warning
When using a self-signed certificate, the browser will show a security warning. This is normal — add an exception to proceed.
Offline installation
For servers without internet access:
On a machine with internet access, download the binary from the releases page.
Download the workspace archive with bundle configuration. This step is required for offline installation, as the launcher will not be able to automatically fetch bundle definitions from git.
Source: public repository Citeck/launcher-workspace — download the archive from the Releases section or using the “Download ZIP” button on the repository main page.
Copy both files to the target server:
scp citeck-server-linux-amd64 user@server:/tmp/citeck
scp launcher-workspace.zip user@server:/tmp/launcher-workspace.zip
Run the installation with workspace import:
chmod +x /tmp/citeck
/tmp/citeck install --workspace /tmp/launcher-workspace.zip --offline
Note
If the workspace was already imported earlier (e.g. on another instance) and you only need to update it from a new ZIP, use the citeck update command:
citeck update -f /tmp/launcher-workspace.zip
What’s next
CLI Commands — full command reference
Configuration — namespace.yml and daemon.yml setup
Architecture — how the launcher works internally
Troubleshooting — common errors and their solutions