Setting up event reception from the Kontur.Diadoc box
This article will use our test box as an example to show how to add integration with Kontur.Diadoc.
First, let’s clarify the general points. What do we mean by integration in the context of this article? Specifically in this context - receiving events from the EDI provider, their initial processing (conversion), and sending the universal event structure to the handler. For details on how the integration works, see the adjacent articles.
1. Creating a DataSource to the EDI Provider
In the new integration, we do not rely on URLs hardcoded in the configuration. For this reason, when setting up the integration, you will need to specify the URL.
For a description of how DataSource works, see the child articles in the section REST Data Source. It is created via the Data Sources journal (Administrator Workspace - Integration).
First, let’s clarify that in most cases we are interested in the REST DataSource, since most EDI providers offer an HTTP API. Requirements for the DataSource of an EDI provider other than Kontur.Diadoc can be found in the relevant articles. Here is an example of a configured DataSource for the production Kontur.Diadoc:
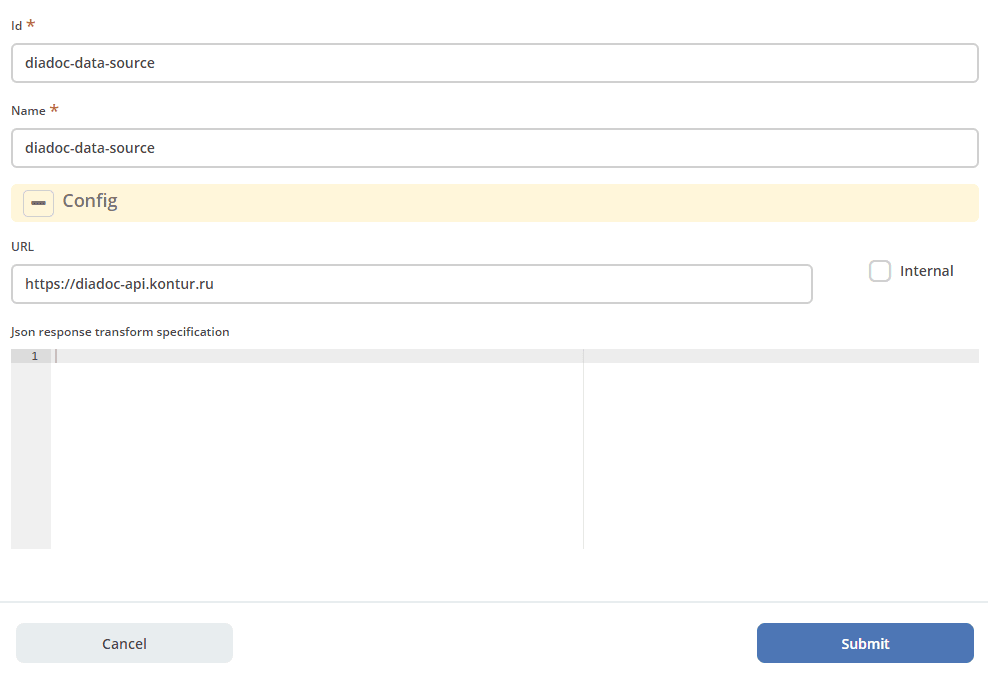
As you can easily see, only the mandatory fields (Id, Name) and the URL are filled in. It is the URL that the integration uses when making a request.
URL fill examples and explanation:
https://diadoc-api.kontur.ru - production Kontur.Diadoc, shown in the screenshot above.
https://diadoc-api-test.kontur.ru - test Kontur.Diadoc.
https://test-edi-api.kontur.ru - test Kontur.EDI.
https://courier-demo-api.esphere.ru - test Sfera.Courier (Korus).
https://courier-api.esphere.ru - production Sfera.Courier (Korus).
If REST Data Sources are insufficient for a new EDI provider, we will develop the Data Sources functionality.
2. Creating Credentials for API access to the EDI Provider
Similar to Data Sources, you also need to create an entry in the system journal Credentials.
Fill example with pre-filled credentials from the Citeck test box (Id is random):

3. Creating a Box with EDI Provider Information
Go to the EDI boxes configuration journal (Administrator Workspace - Integration) and create an entry about our box there.
Example:
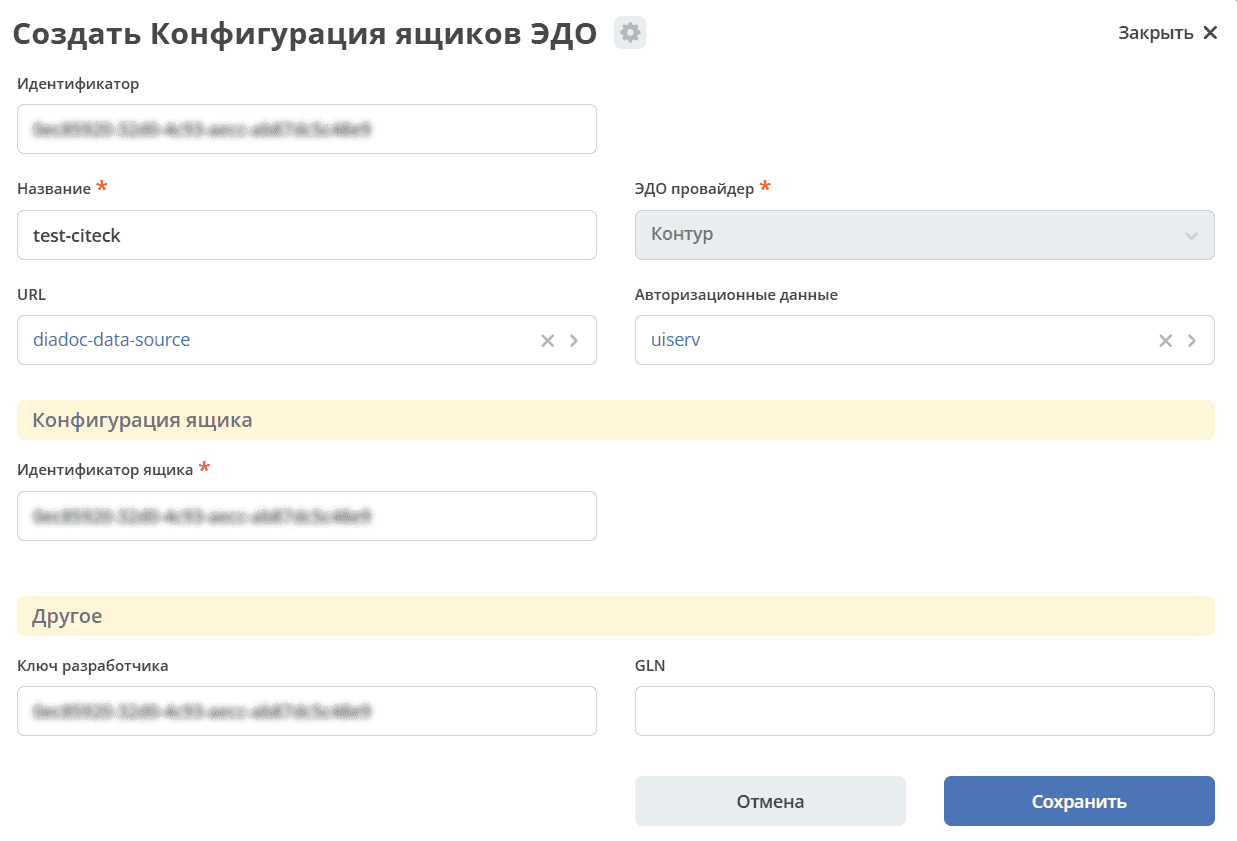
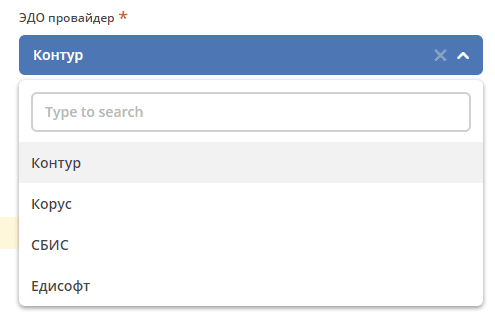
In this entry, you must select the EDI provider. The following EDI providers are currently available for selection (available for selection, but only Kontur was supported at the time of writing this article):
The URL and Authorization Data attributes contain the values created in the points above - select the corresponding data source and credentials.
After that - insert the box identifier and the developer key.
P.S. The developer key is added only to the form for the Kontur EDI provider. Other providers may require some additional data.
4. Setting up integration with the EDI provider within the box
The final setup step - go to the Synchronizations journal (Administrator Workspace - Integration). Create an EDI integration entry (this is a new separate creation option, available via the “+” button):
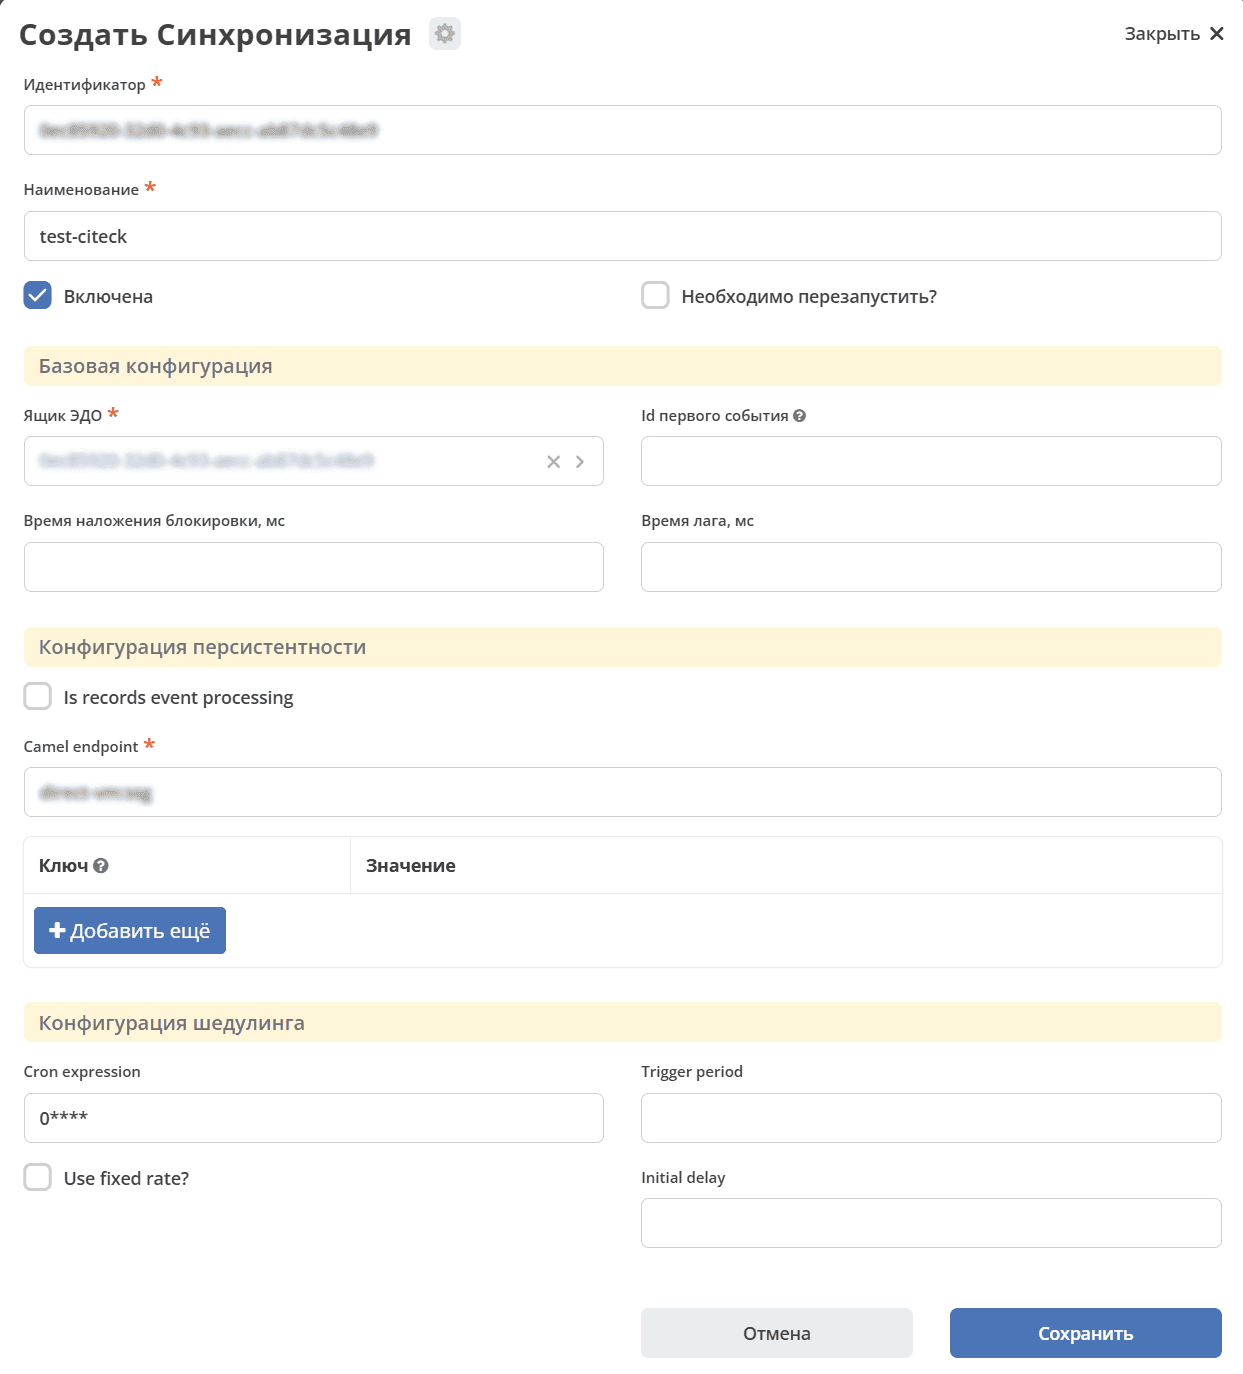
Identifier and name are arbitrary.
The Enabled and Need to restart? checkboxes are standard attributes of Citeck synchronizations.
In the Basic Configuration section - you need to select the box from point 3, and specify the lock time and lag time in milliseconds.
Lock Time - necessary to prevent more than 2 integrations for the same box from running simultaneously. If no value is set, the lock will be applied for 2 hours.
Lag Time - designed to avoid processing events that just happened. The goal is to not process events for which the transaction in the system might not have completed yet. It is recommended to set a value of at least 60 seconds (60000).
In the Scheduling Configuration section, several attributes for scheduling are specified.
Let me describe their logic here:
If CronExpression is set - the job will run according to the CronExpression. More details here: org.springframework.scheduling.support.CronTrigger.
Otherwise, the job will run periodically, every TriggerPeriod milliseconds. If InitialDelay is set - the job will not trigger for the first N milliseconds. If the FixedRate checkbox is checked - the countdown to the next trigger will only start after the work from the previous trigger has completed. More details here: org.springframework.scheduling.support.PeriodicTrigger.
The most important and interesting section is Persistence Configuration.
Camel endpoint - this is the Camel endpoint where the universal event structures (Event) will be sent. These events must be processable in the specified Camel route. It is recommended to use endpoints of the direct-vm type to enable event transfer to external contexts.
The list of parameters that can be added is a String-String map, which will be passed into the event message in the Camel route as Properties of the CamelExchange.
5. Summary
This completes the setup. It is important that the new integration works as several isolated components. Accordingly, after setting up the current integration, you need to connect to the microservice an OSGi bundle with classes for working with Diadoc and an OSGi bundle responsible for providing the Camel context supporting the route specified during integration setup. These points will be clarified and considered in more detail in the following articles of this section.