Equipment purchase request process. Adding a reference list. Non-default journal and form
Note
This article continues working with the previously created business process Equipment purchase request
Reference list “Equipment Type”
Note
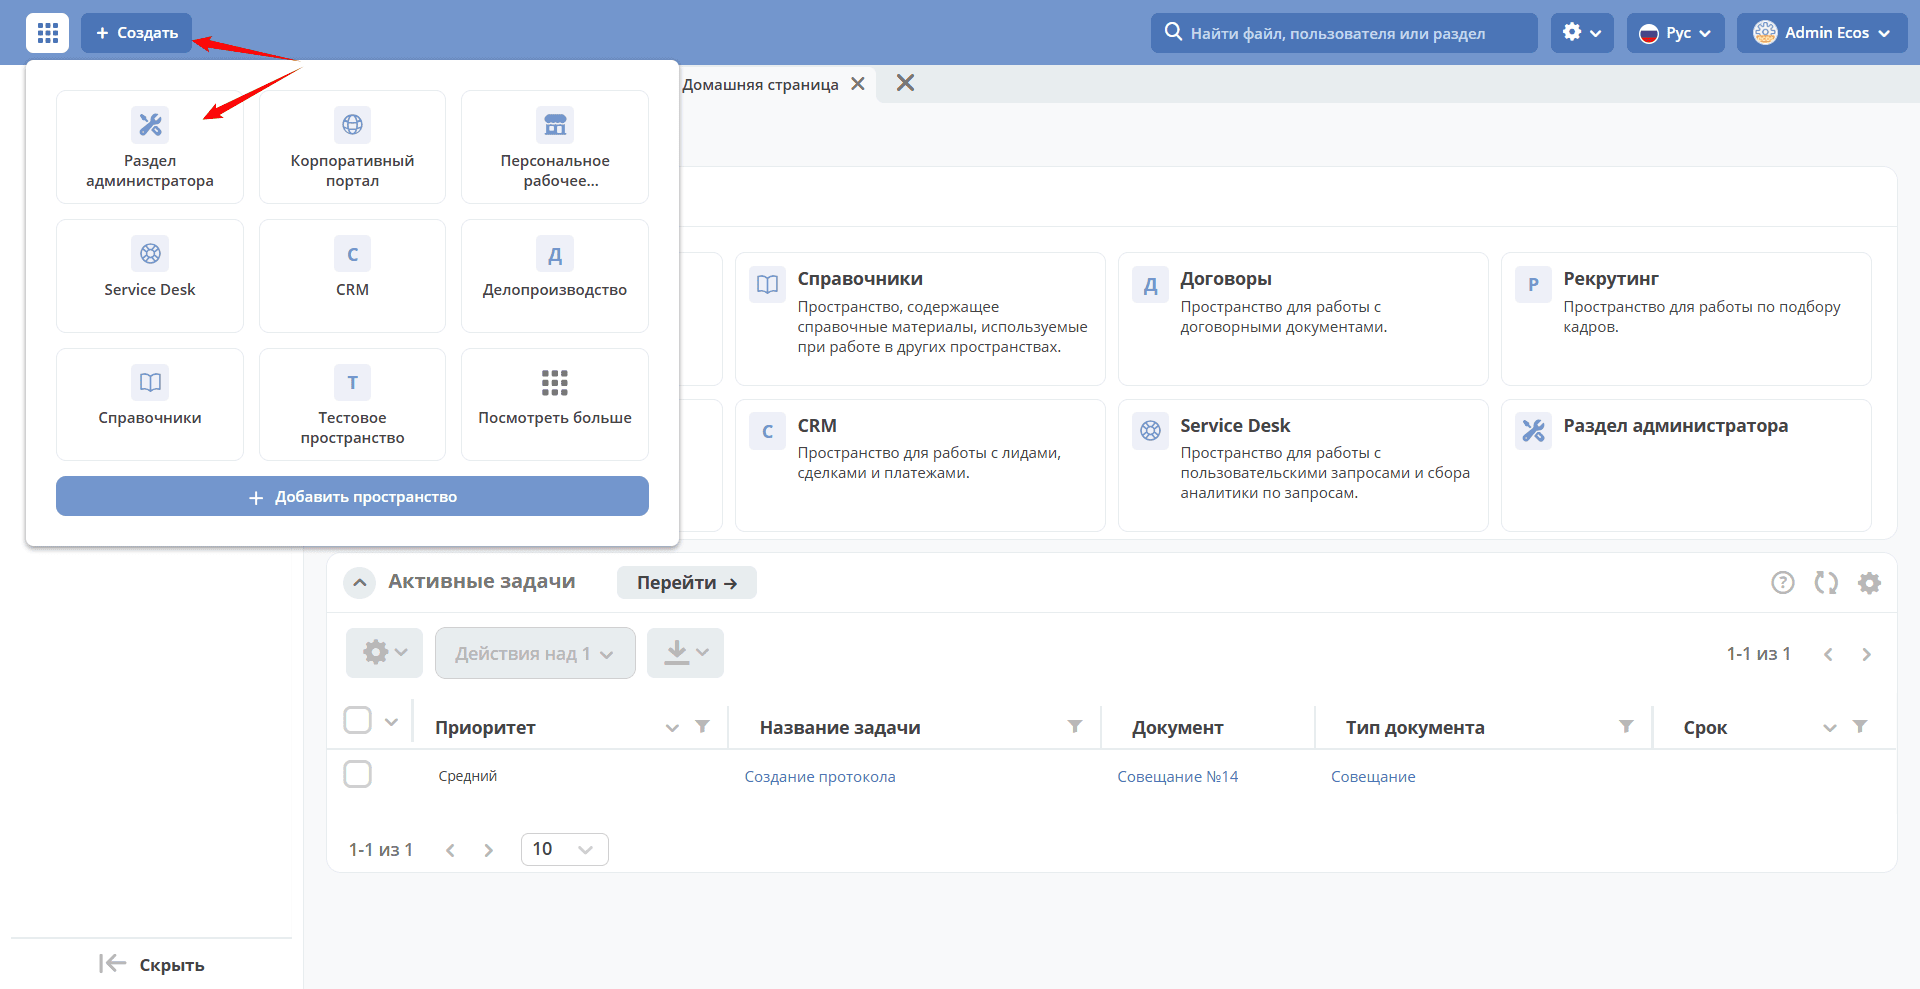
To create a data type, go to the administrator workspace, in the Model section go to Data Types:
Let’s add a reference list “Equipment Type” that we will use in the equipment purchase request.
Reference list (datalist) - a type for storing a dataset that will be used as static data for documents not directly involved in business processes.
To create a data type, go to the administrator workspace, in the Model section go to Data Types:

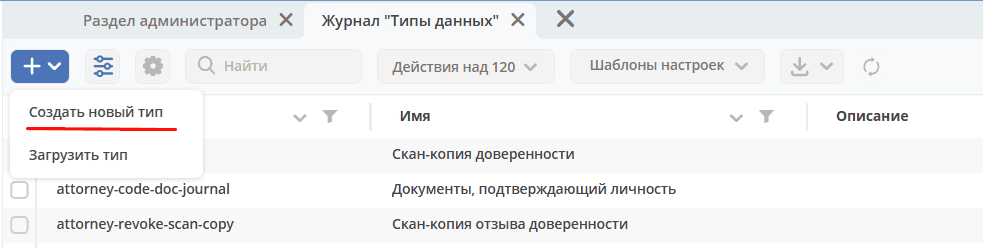
click + - Create new type:
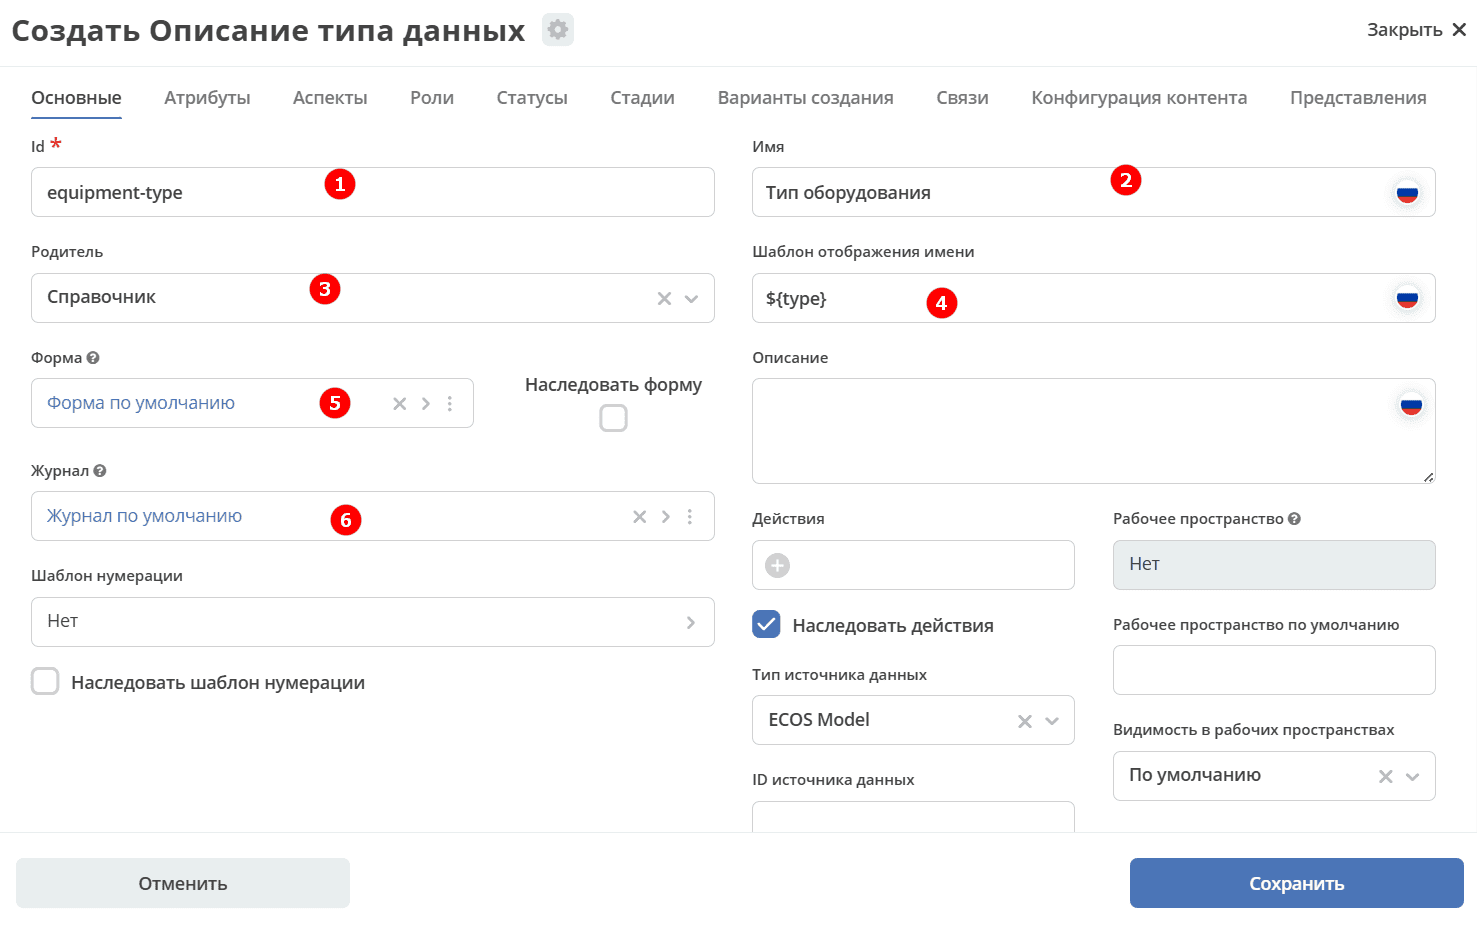
Basic
The tab contains basic data about the data type (object):
1 |
id |
equipment-type |
2 |
Name |
Equipment Type |
3 |
Parent |
Reference list |
4 |
Display Name Template |
${type} |
5 |
Form |
Leave as default (the system will automatically generate a form based on the attributes we specify later, but automatically generated forms cannot be edited) |
6 |
Journal |
Leave as default (the system will automatically generate a journal based on the attributes we specify later, but automatically generated journals cannot be edited) |
Final tab configuration:
Attributes
Fill in the following attributes (object properties):
Id (1) |
Name (2) |
Type (3) |
|---|---|---|
type |
Title |
Text |
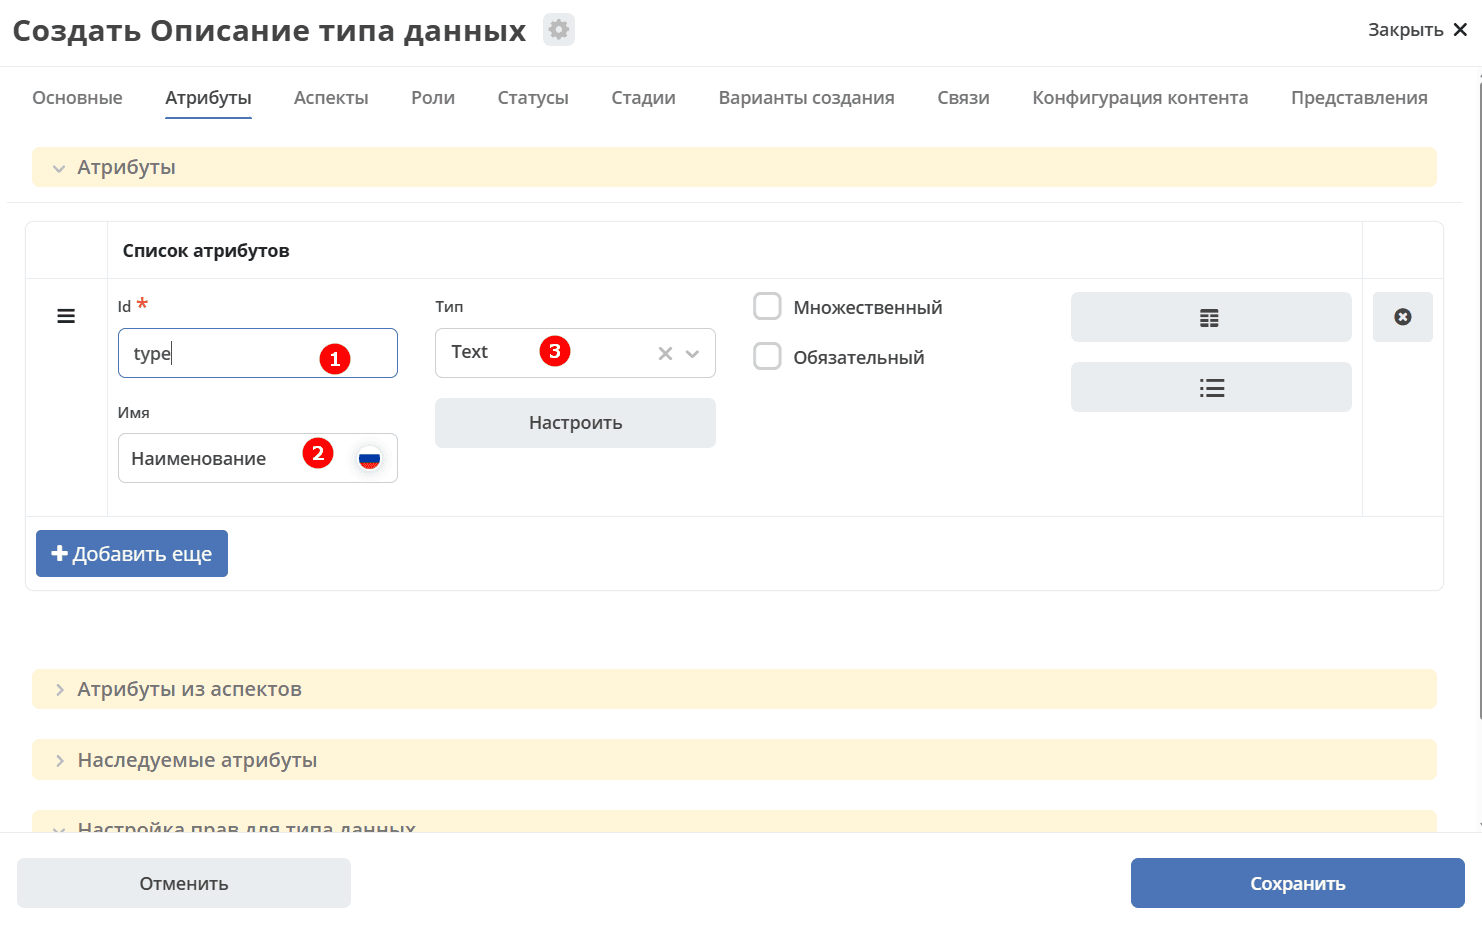
Click «Save».
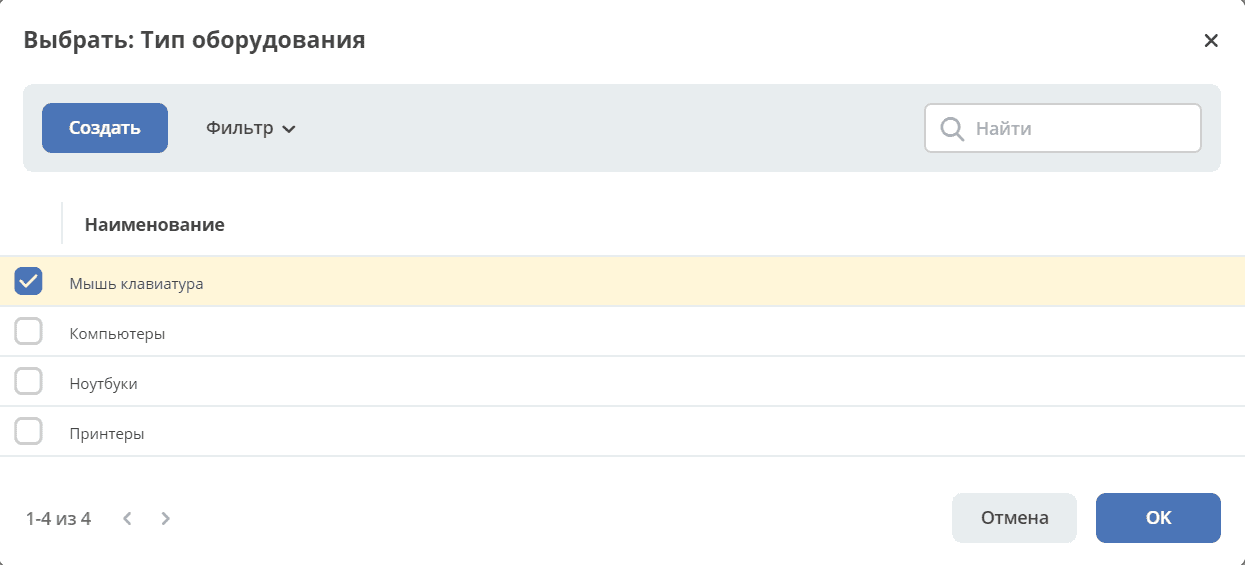
Add the type$equipment-type journal to the menu, similar to how it’s described in article and fill it with data:
Data Type
Adding an additional attribute
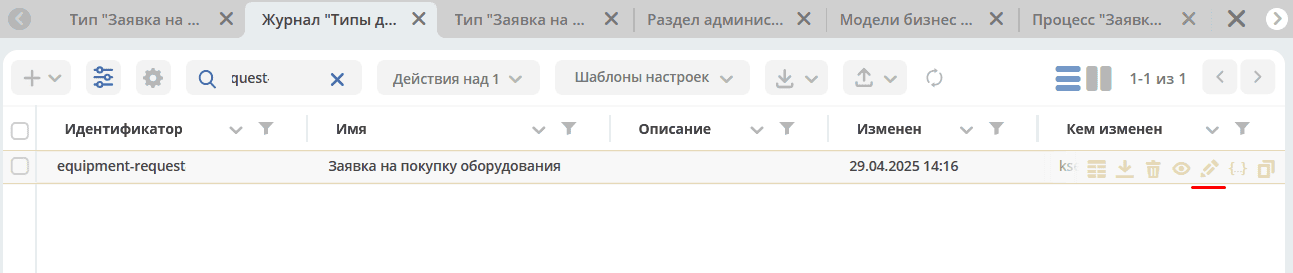
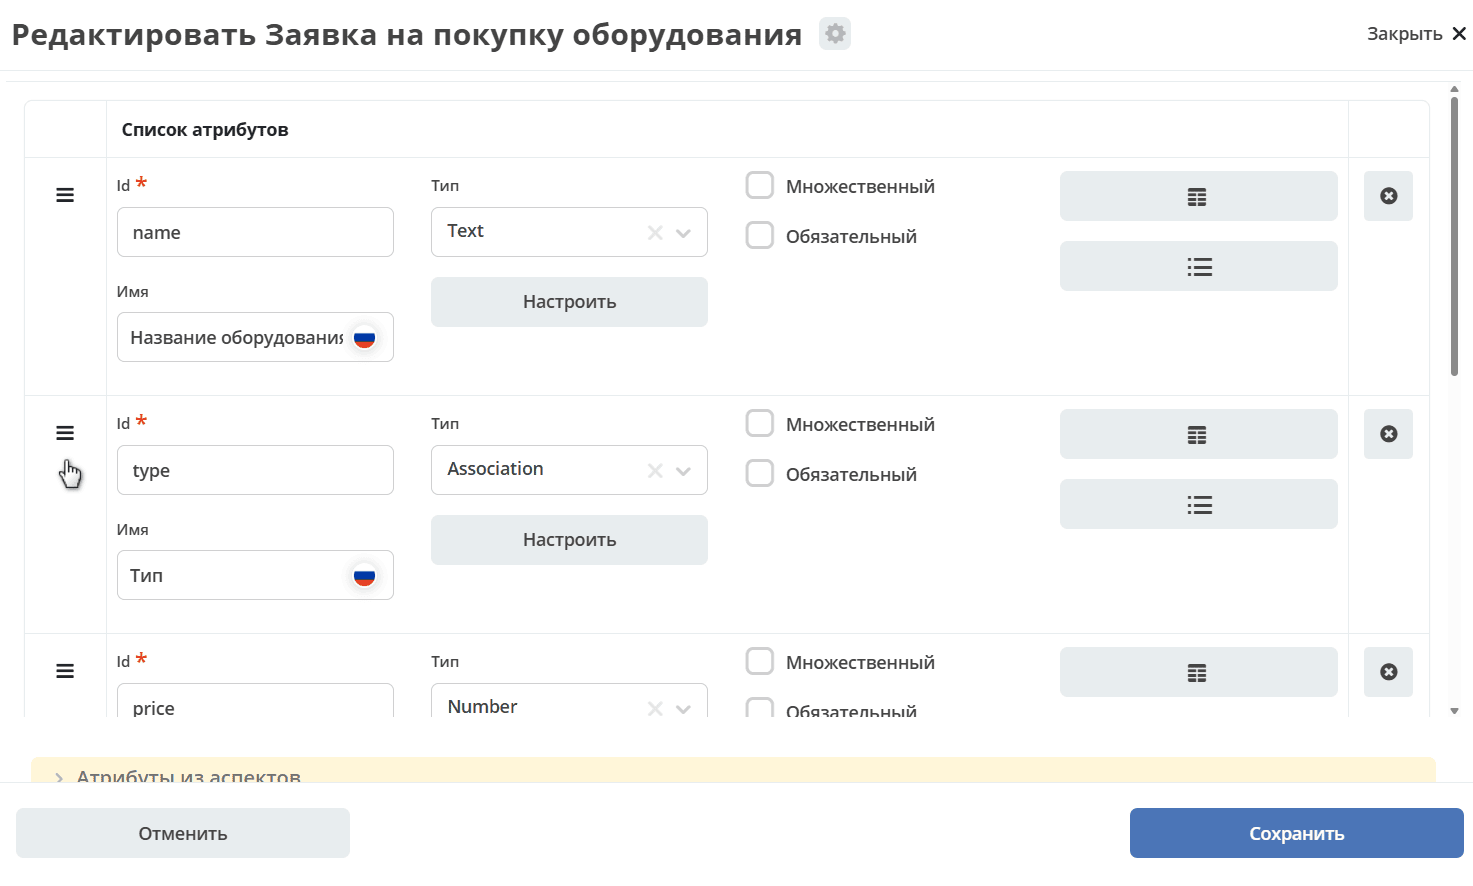
Next, add the “Equipment Type” attribute to the existing data type. Find the “Equipment Purchase Request” data type, switch to edit mode:
On the “Attributes” tab, click “+Add more” and fill the row with the following data:
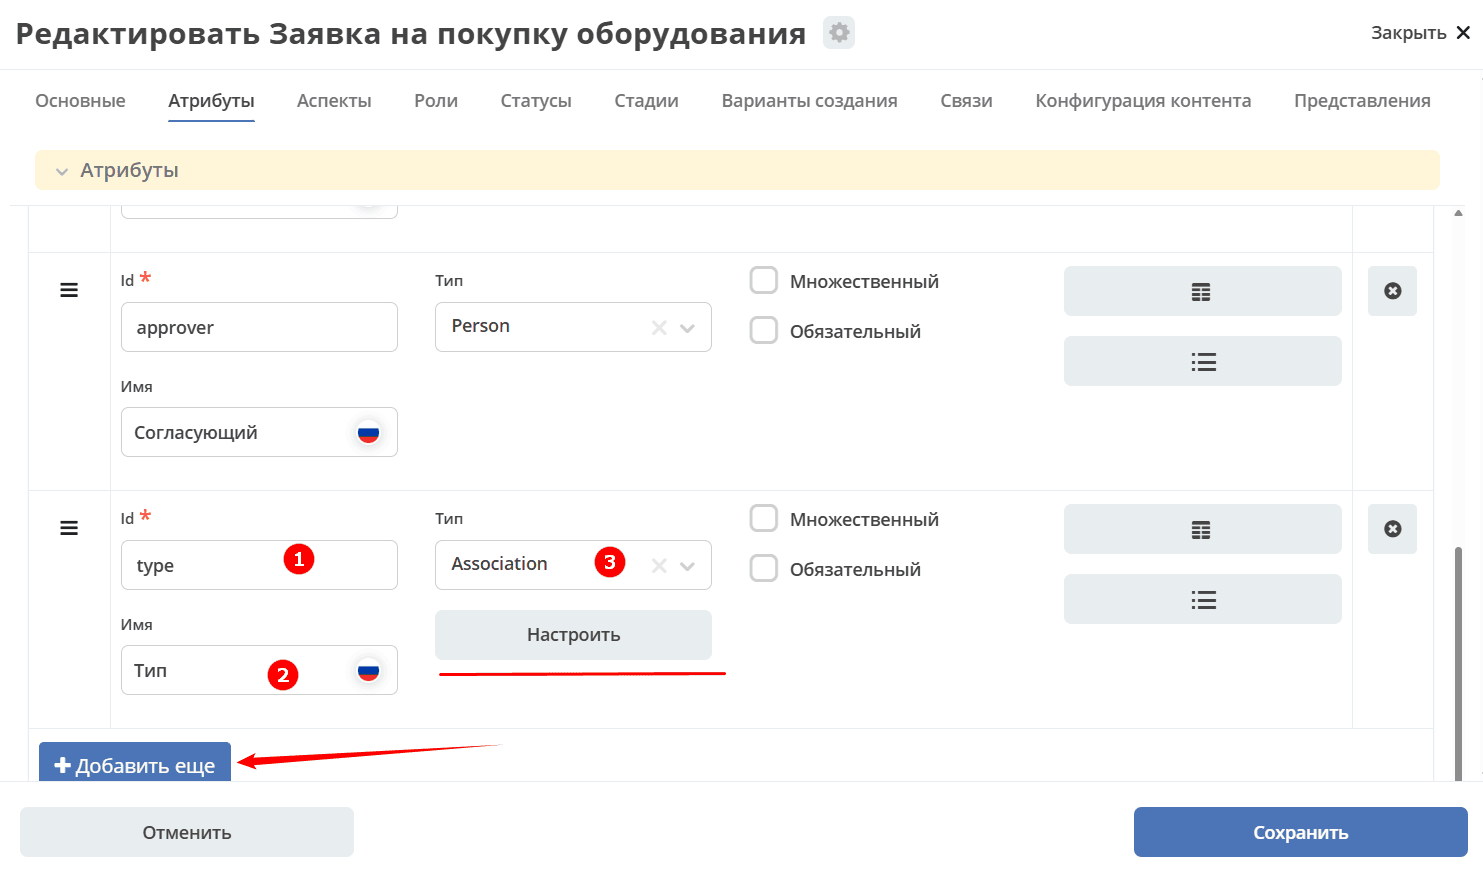
Id (1) |
Name (2) |
Type (3) |
|---|---|---|
type |
Type |
Association |
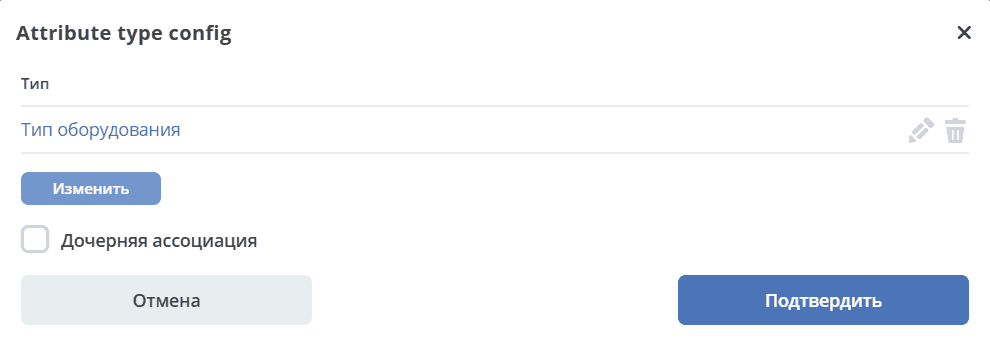
Click “Configure”:
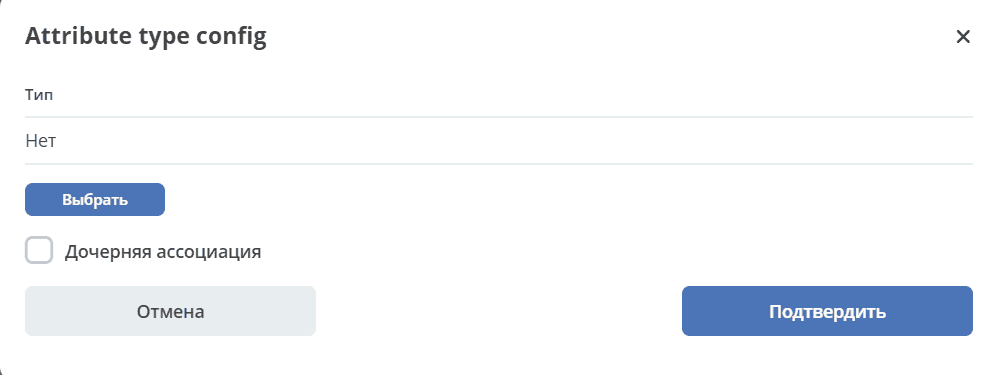
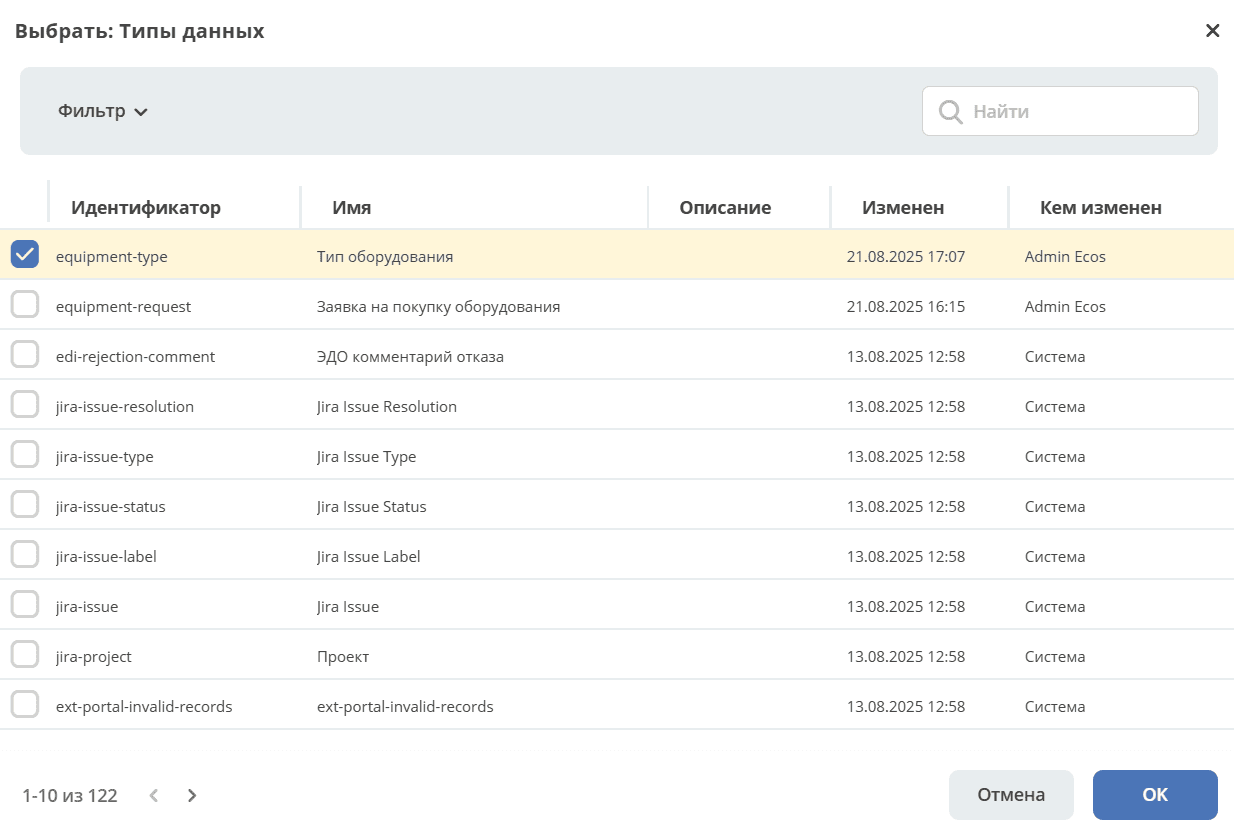
Click “Select” and choose “Equipment Type” from the data types list:
Move the added row below the Equipment Name row:
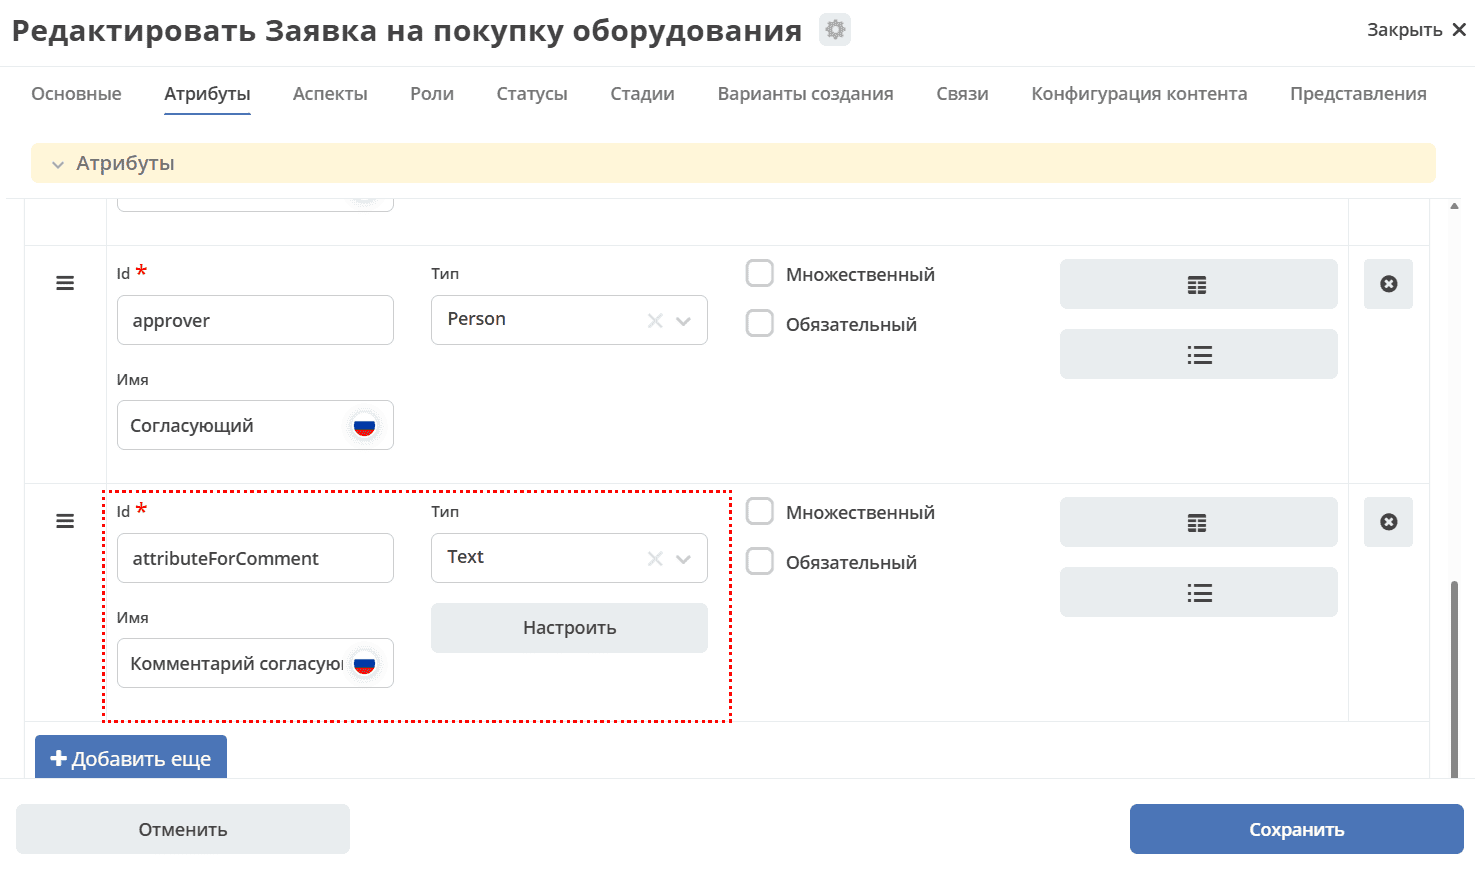
Let’s also add the Approver’s Comment attribute, which we’ll later add to the approval form as well.
Id (1) |
Name (2) |
Type (3) |
|---|---|---|
attributeForComment |
Approver’s Comment |
Text |
Numbering Template
Note
To create a numbering template, go to the local workspace, in the Administration section go to Numbering Templates.
Numbers can be assigned automatically. And the number can be reflected in the display name template. For this, you need to set up and configure Numbering Template
Go to the “Basic” tab:
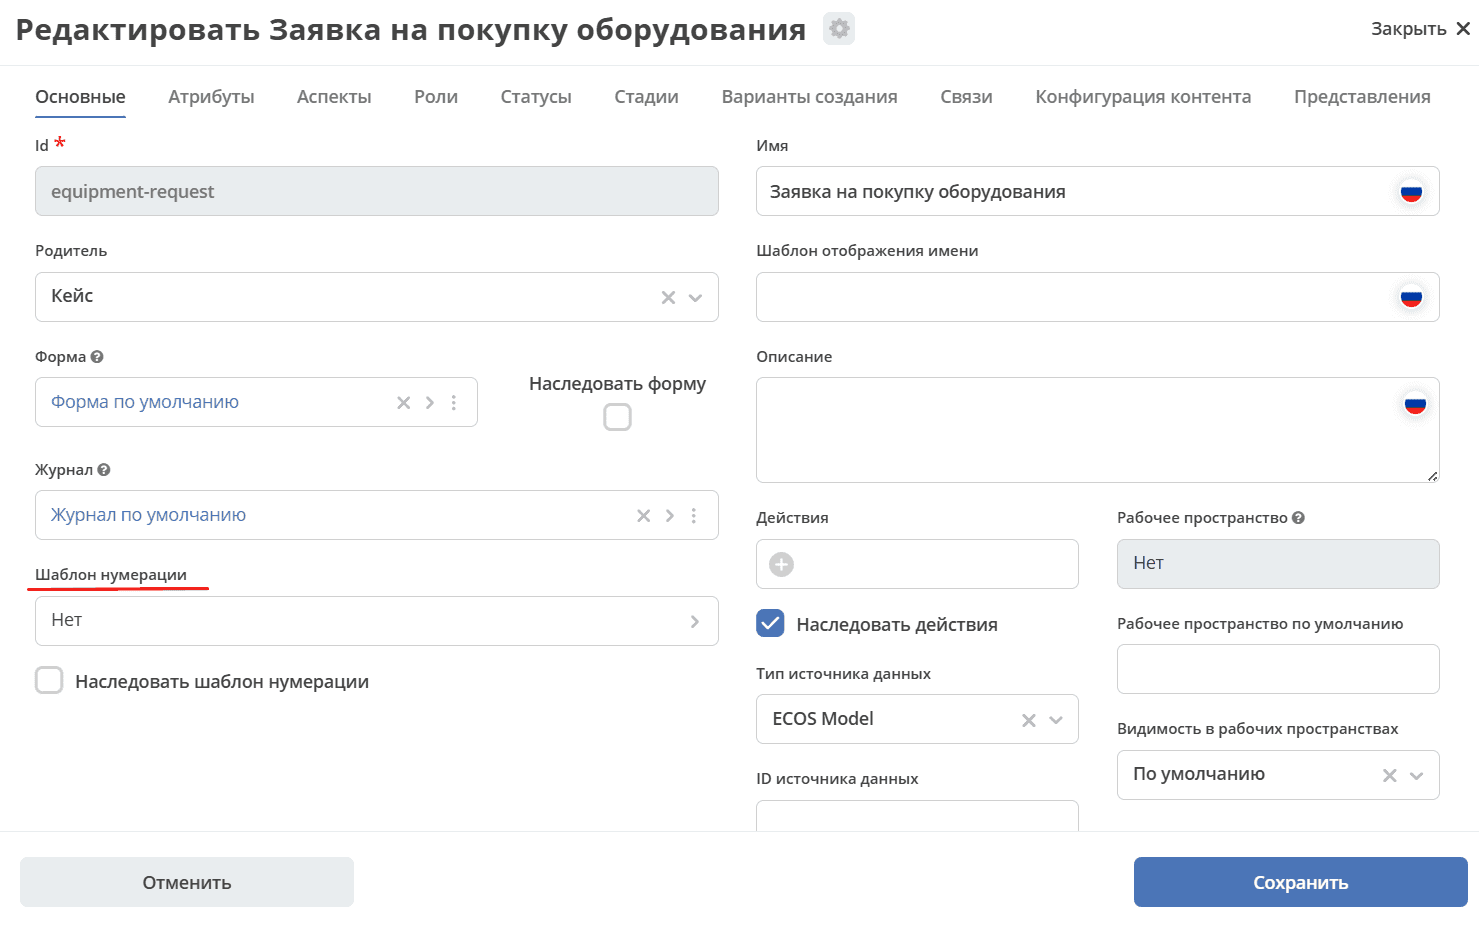
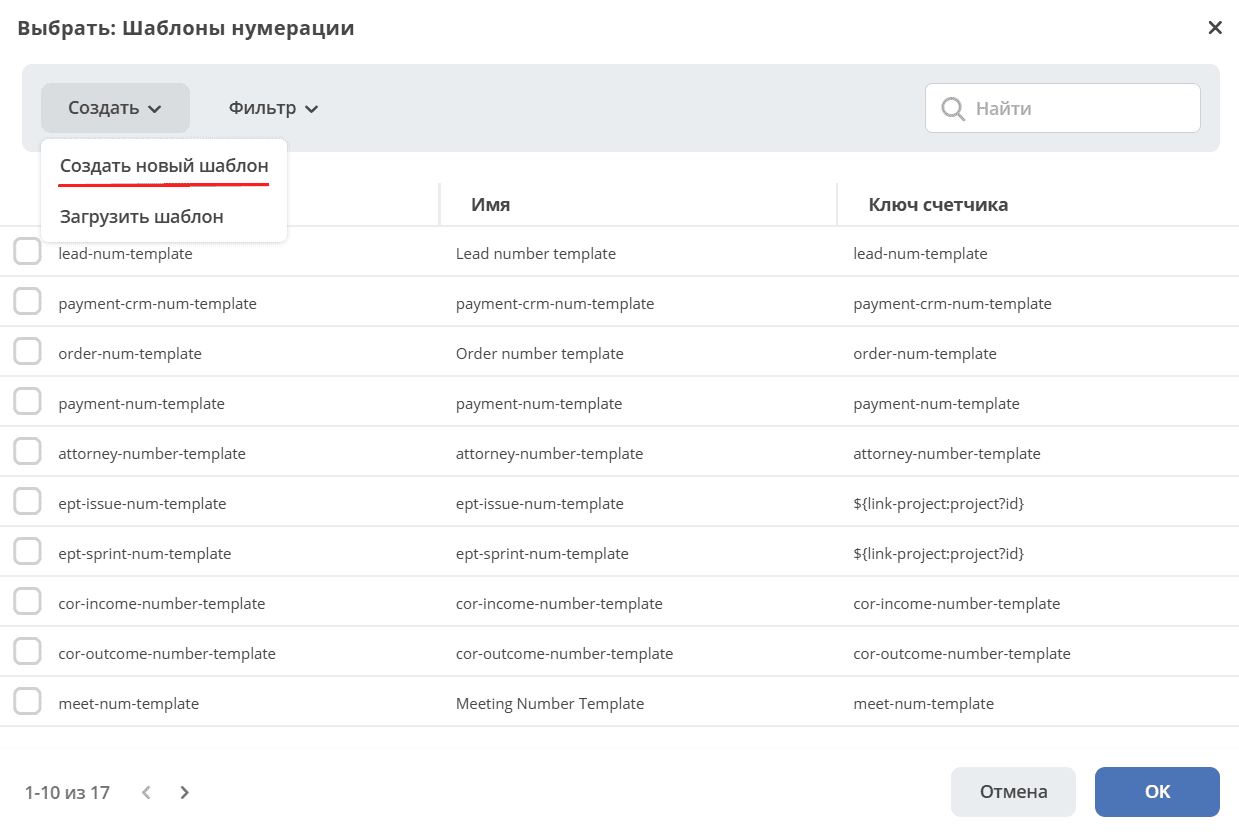
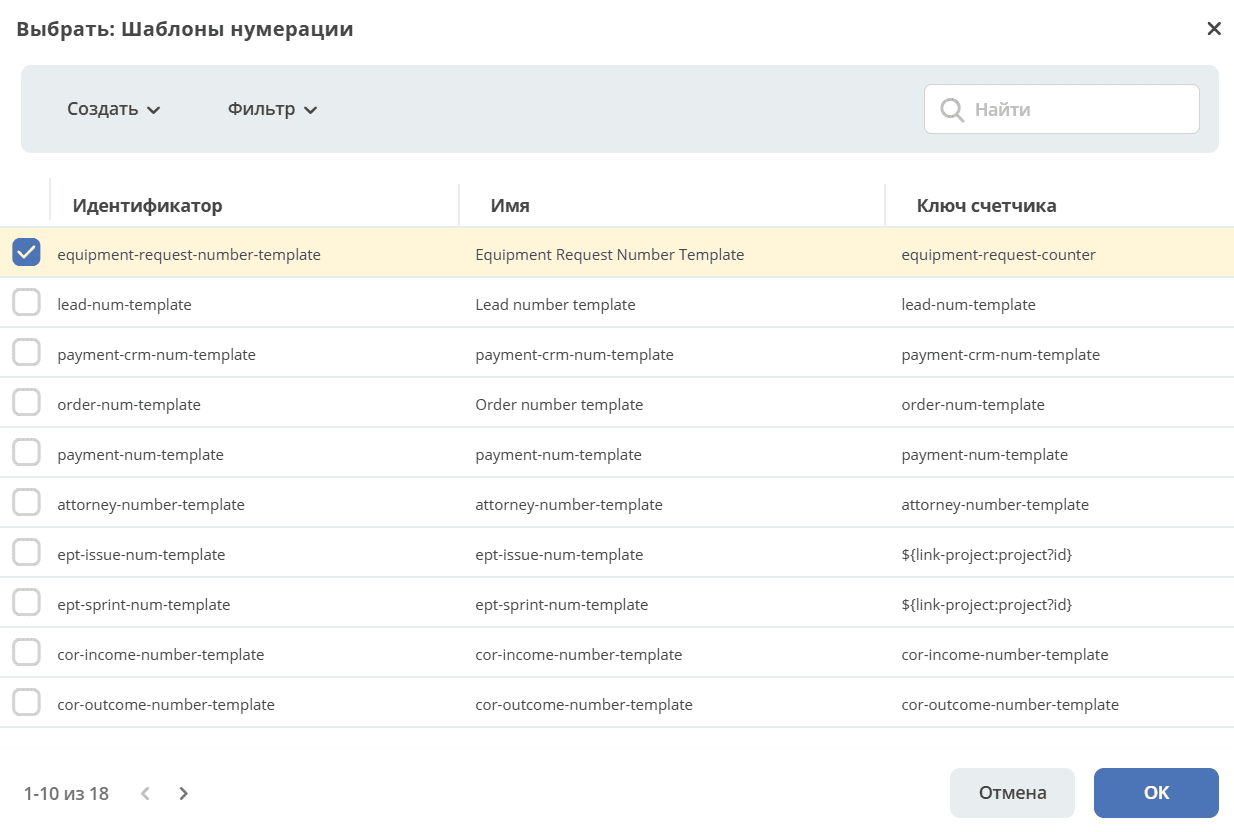
In the “Numbering Template” field, click “Select”. Then click “Create - Create new template”:
Fill in the opened form:
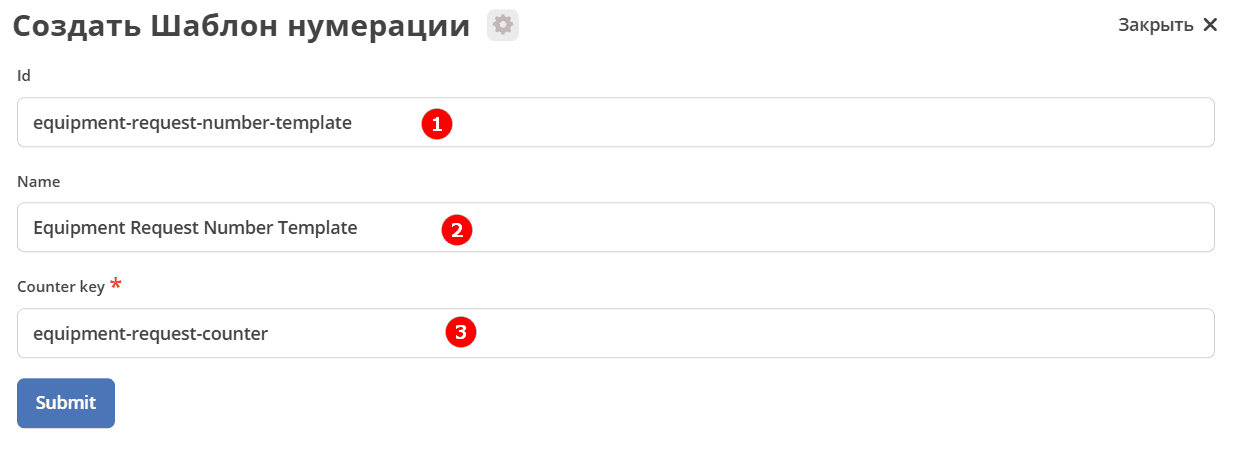
No. |
Field |
Value |
|---|---|---|
1 |
id |
equipment-request-number-template |
2 |
Name |
Equipment Request Number Template |
3 |
Counter key |
equipment-request-counter |
And select the created template:
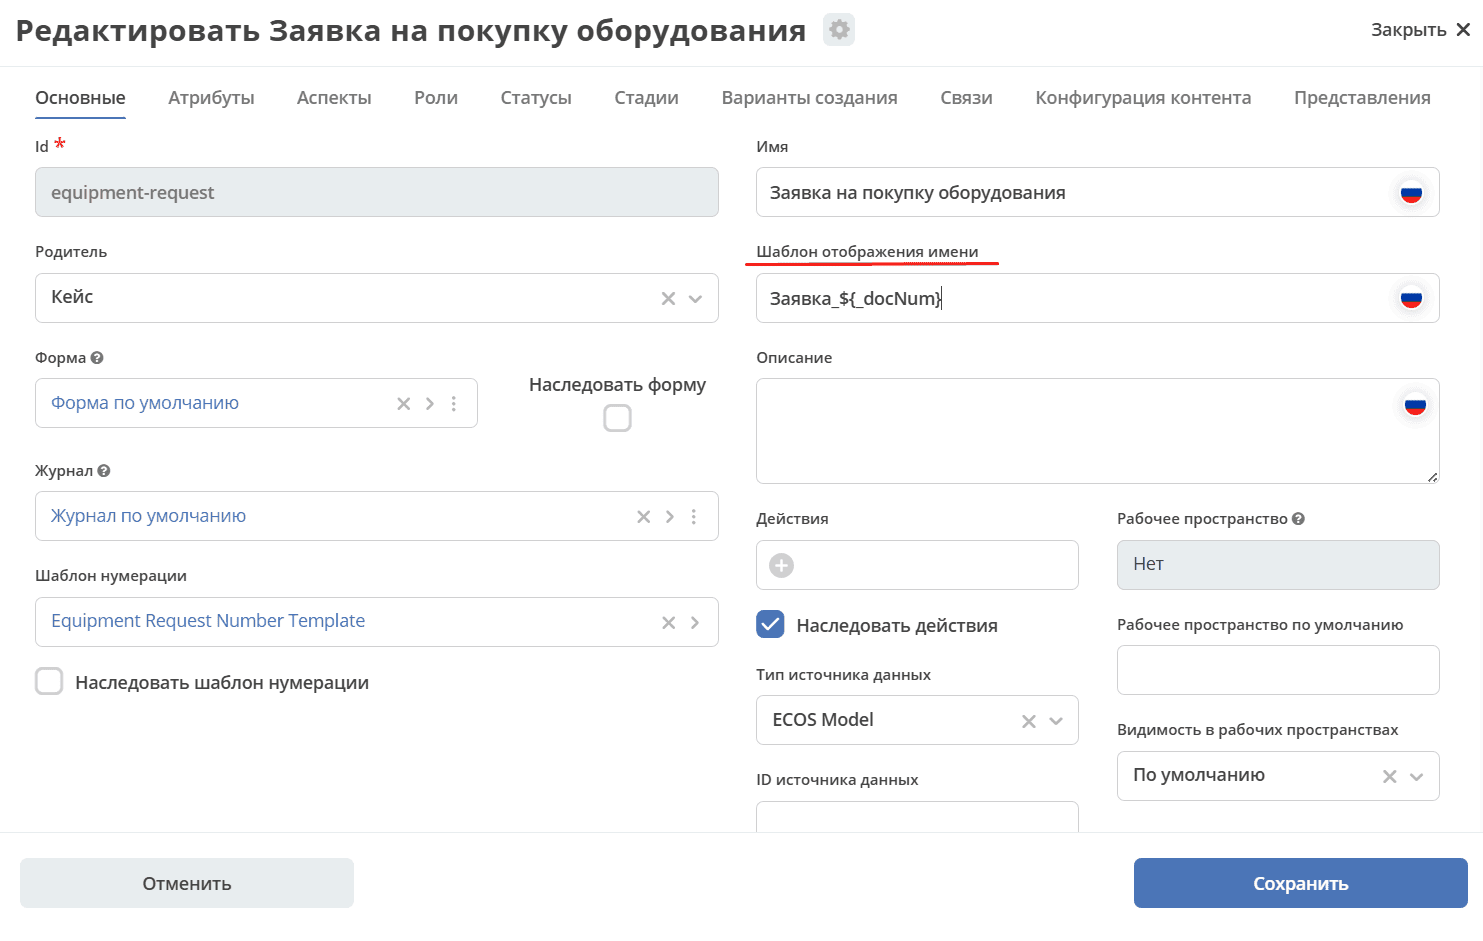
In the “Display Name Template” field, specify Request_${_docNum}:
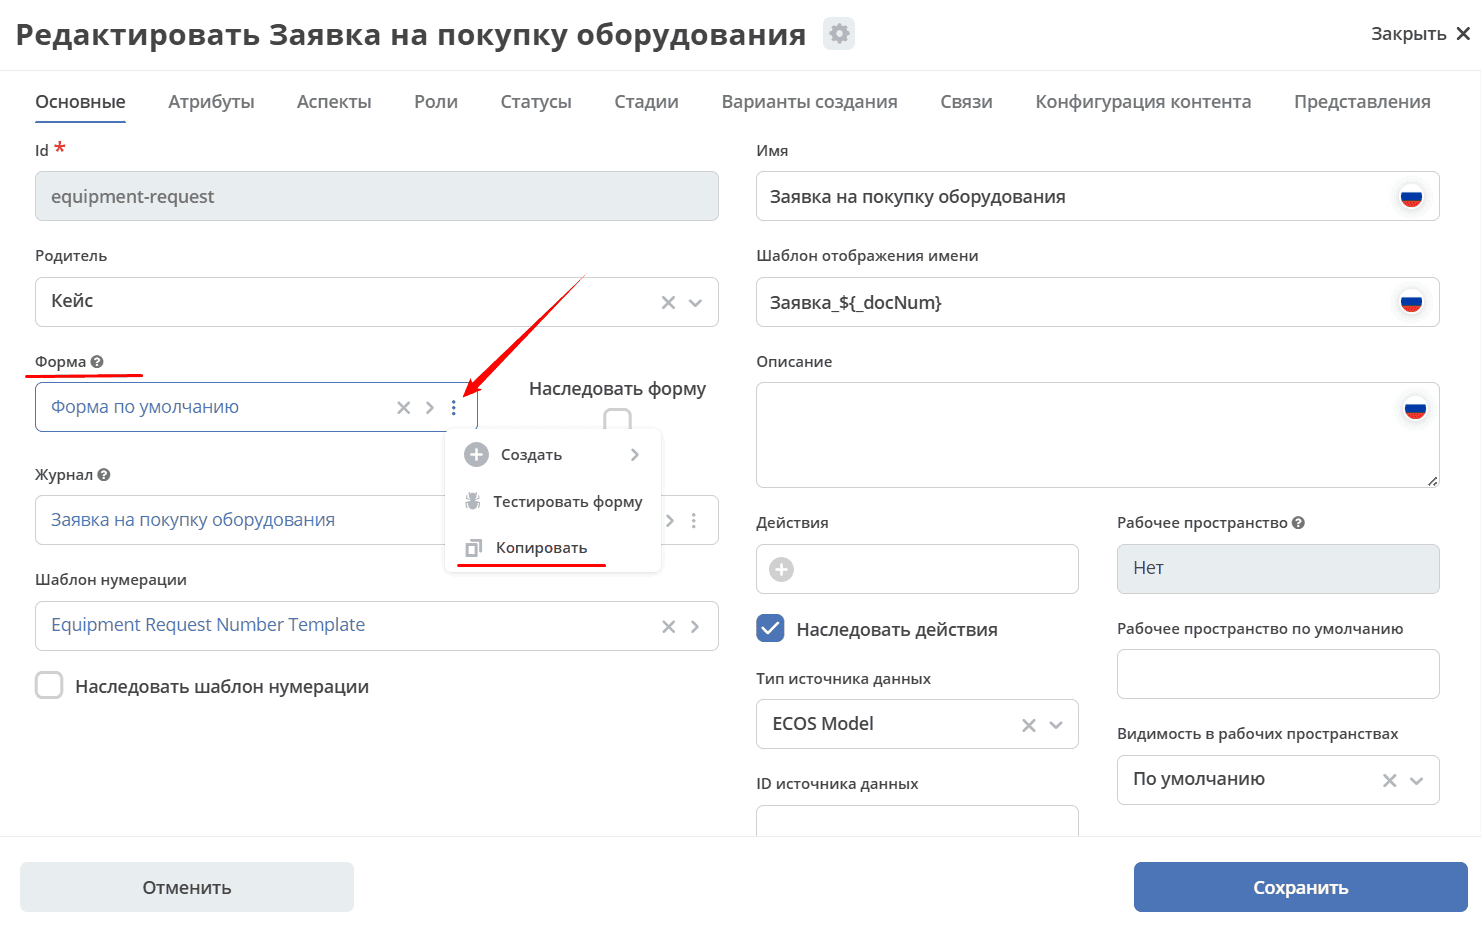
Non-default journal and form
Automatically generated form and journal were created for the data type, but they cannot be edited.
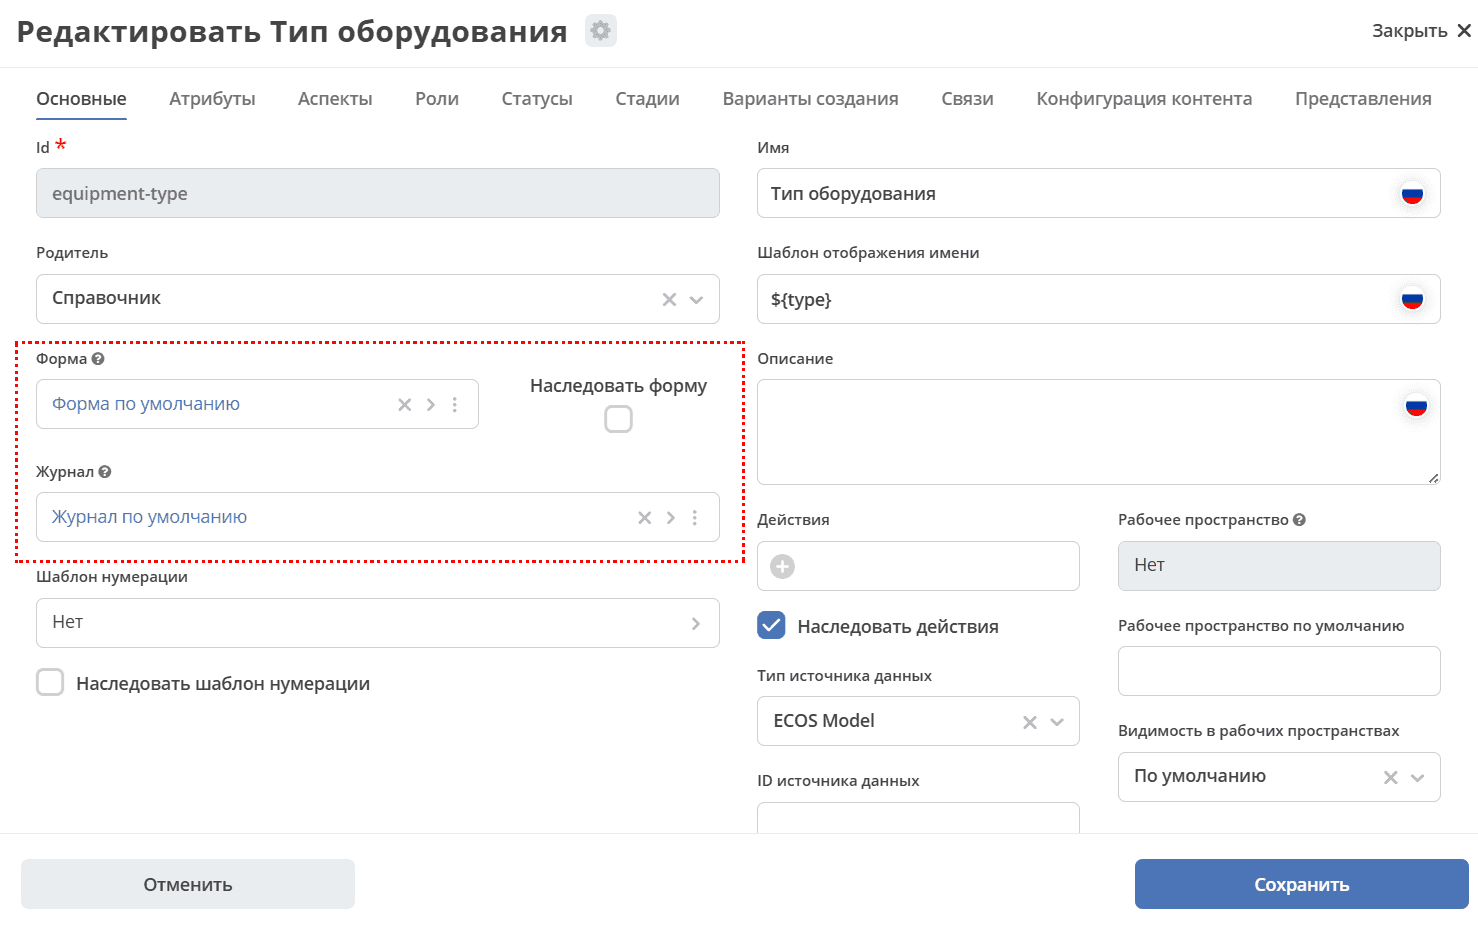
Adding fields to the journal
Go to the data type and to copy the journal, click:
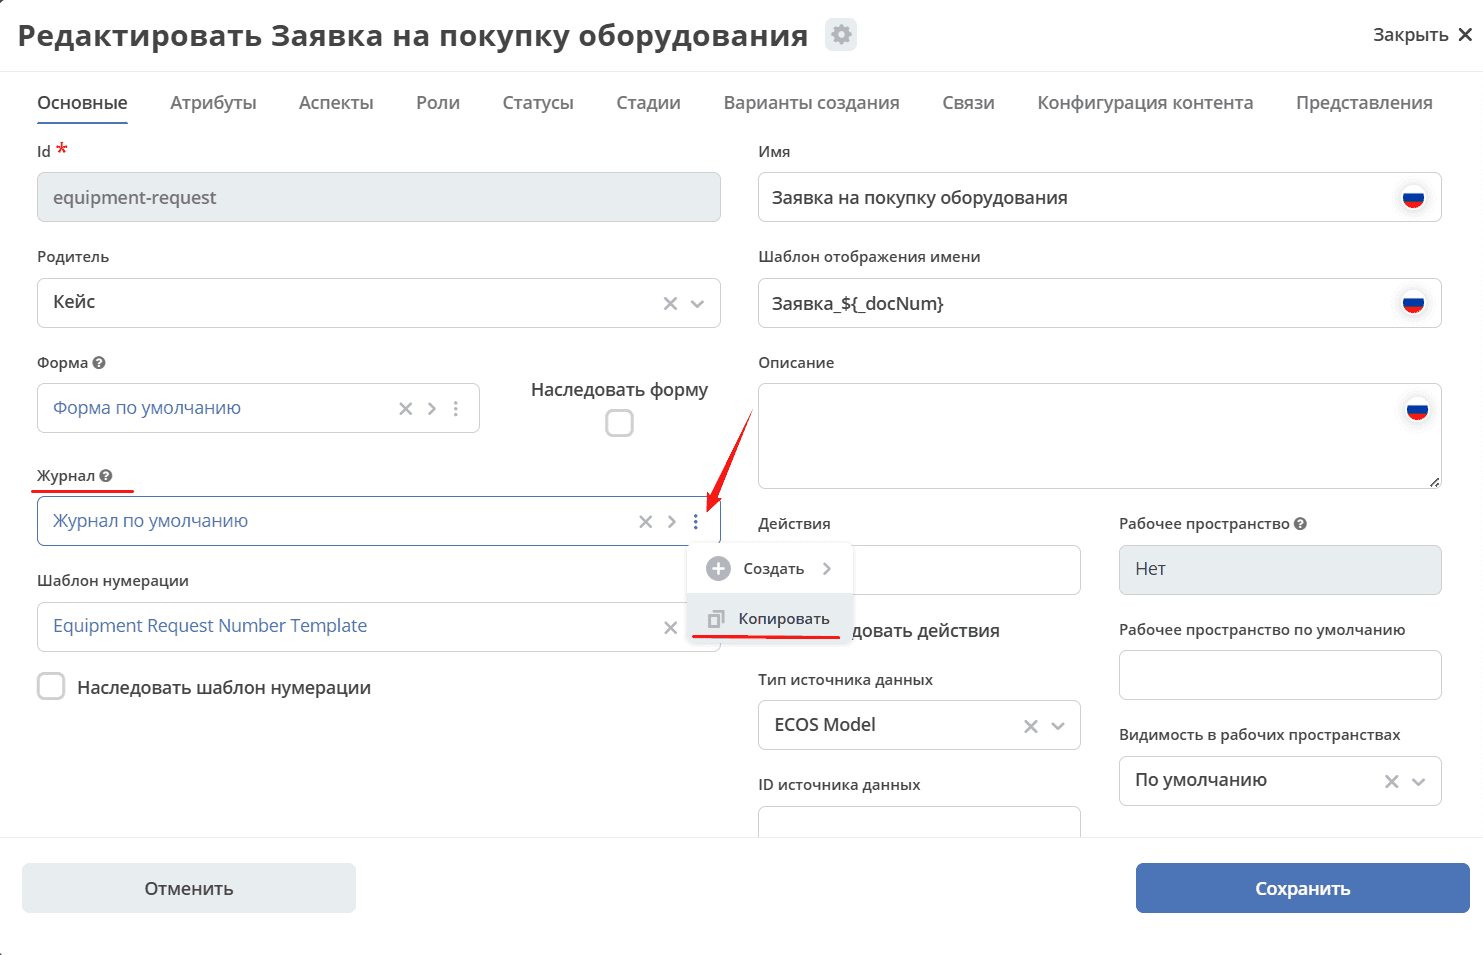
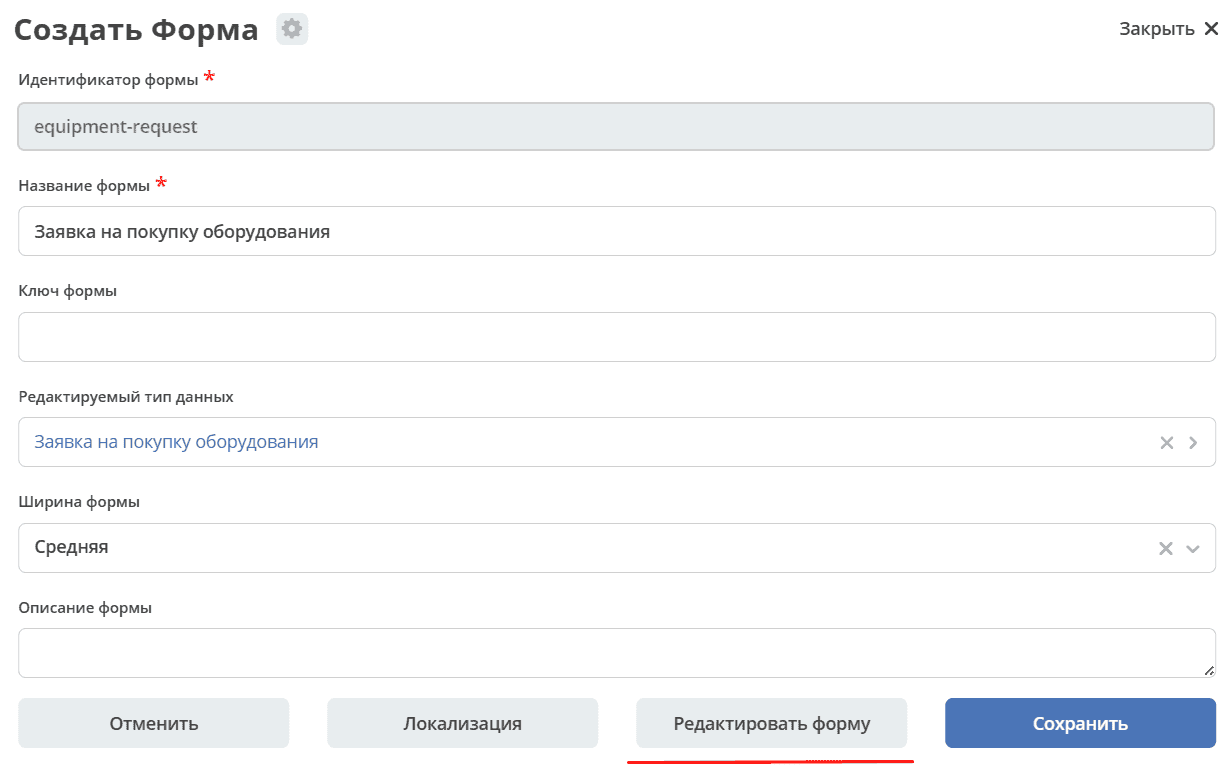
A form with a default name will open:
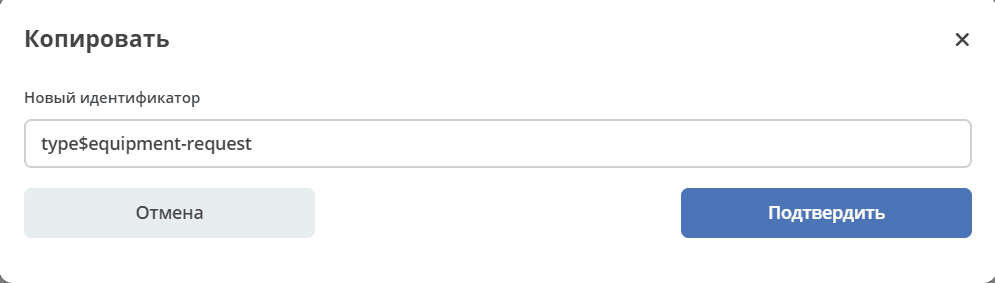
Rename to equipment-request and click “Confirm”:

After saving, a new journal is created and the auto-generated journal in the data type is replaced with the created one.
To edit it, click:

A journal will open where you can make changes:
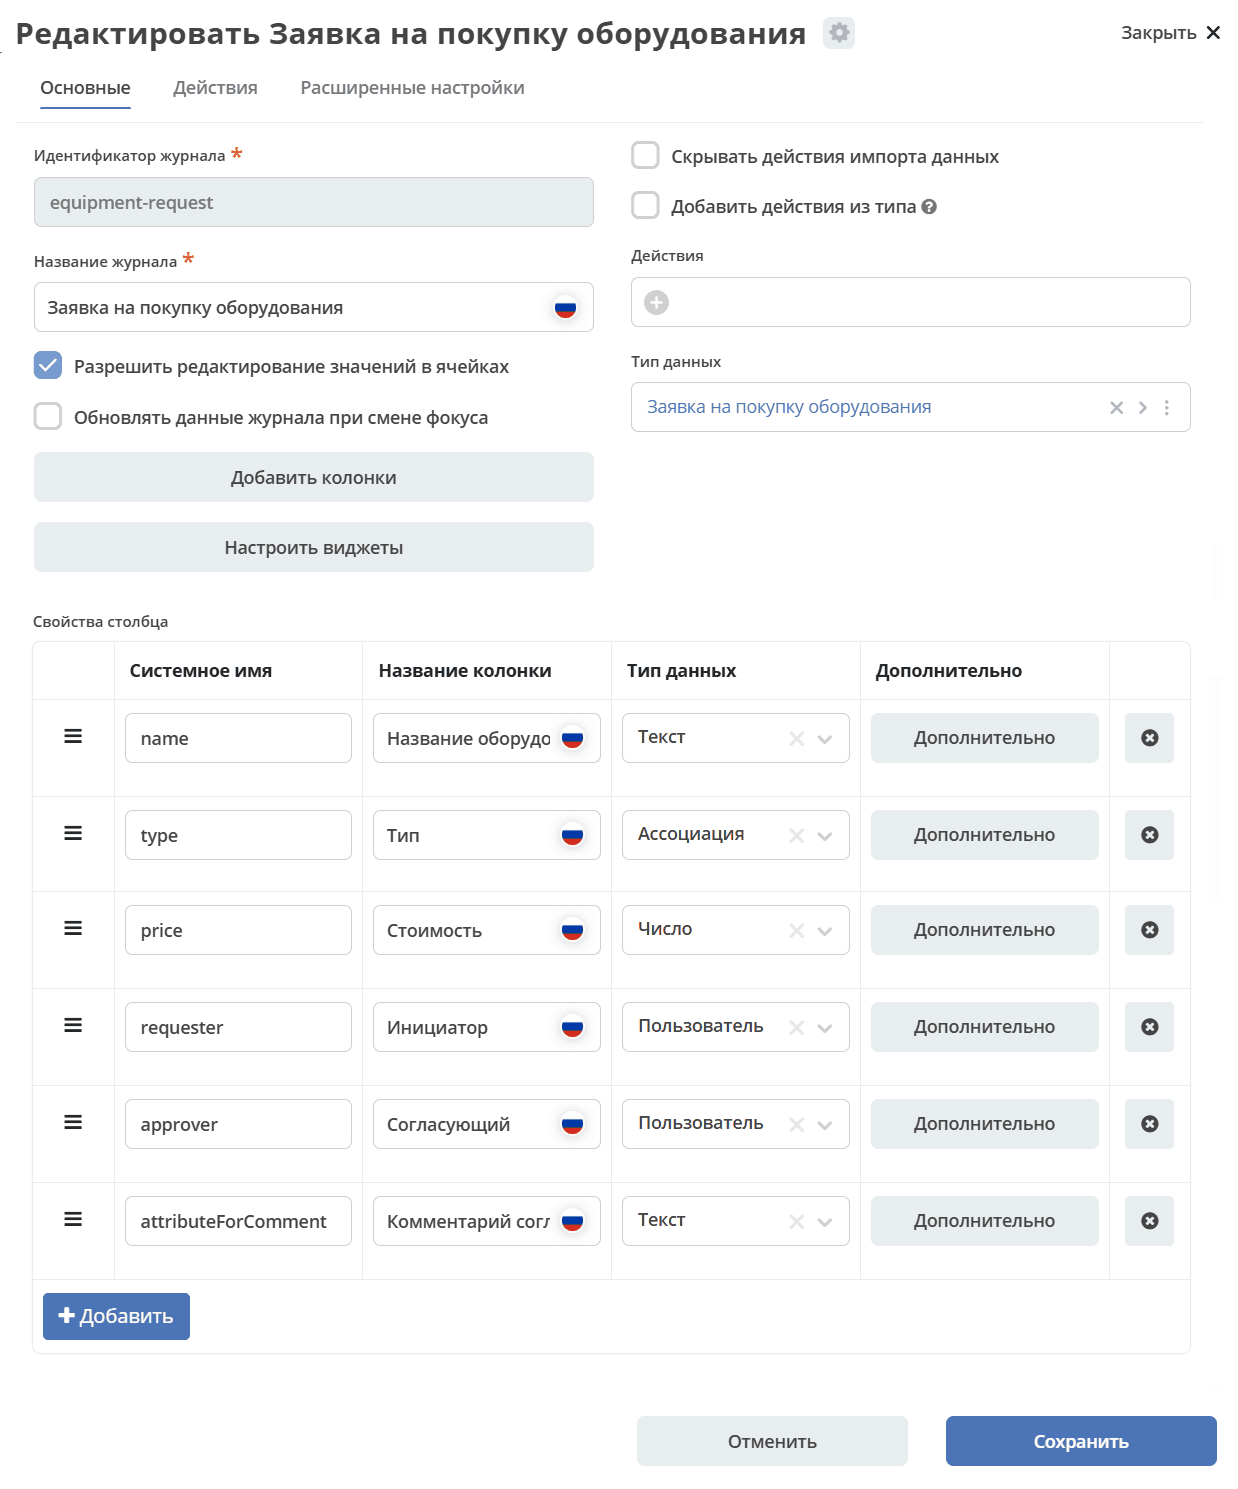
Next, let’s add system fields (link) to the journal, similar to how we added Equipment Type above:
_created- date and time of object creation. Select data type “Date”
_disp - display name (since we set the Display Name Template above, the field will show Request_ {Number})
_status - object status
Click “+Add” and fill the rows with the following data:
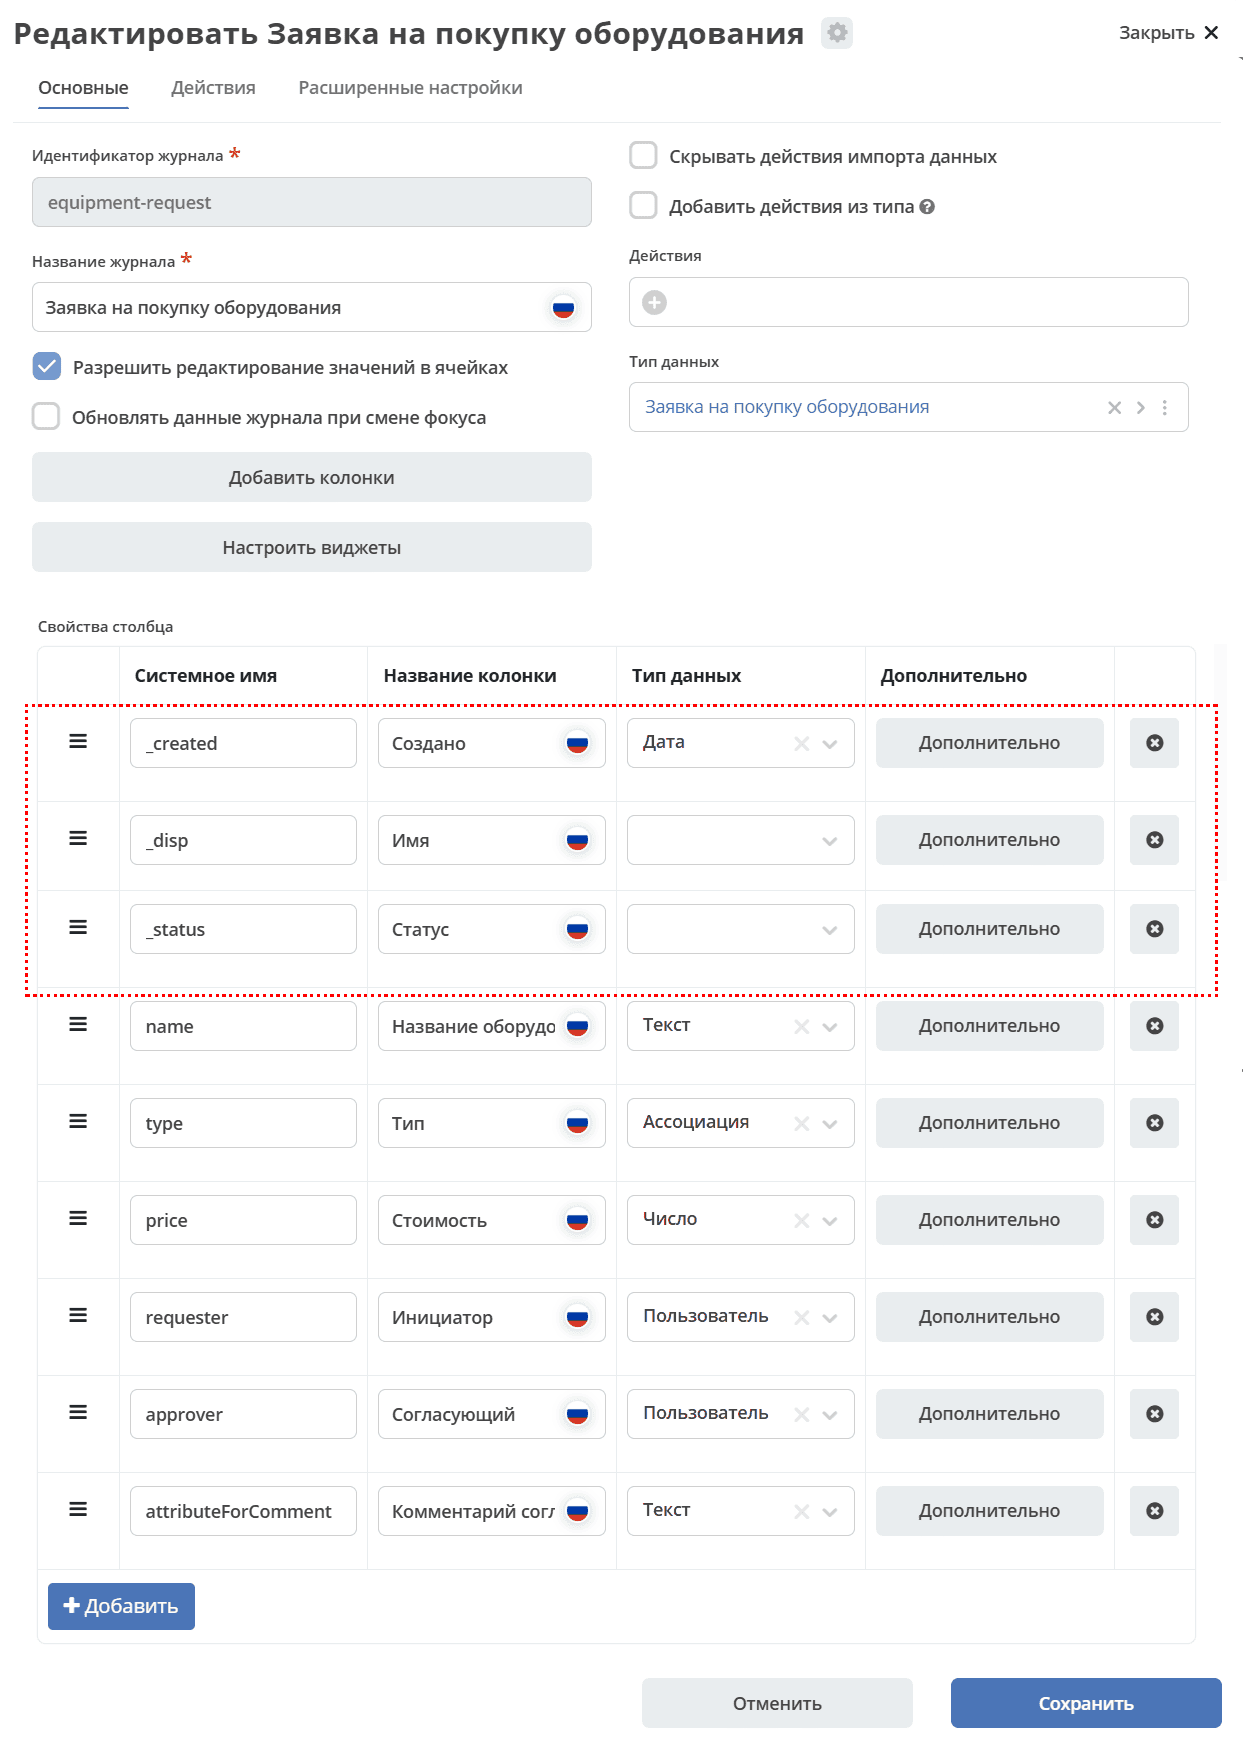
Click «Save».
Note
Add the equipment-request journal to the menu, similar to how it’s described
Remove the auto-generated type$equipment-request journal from the menu.
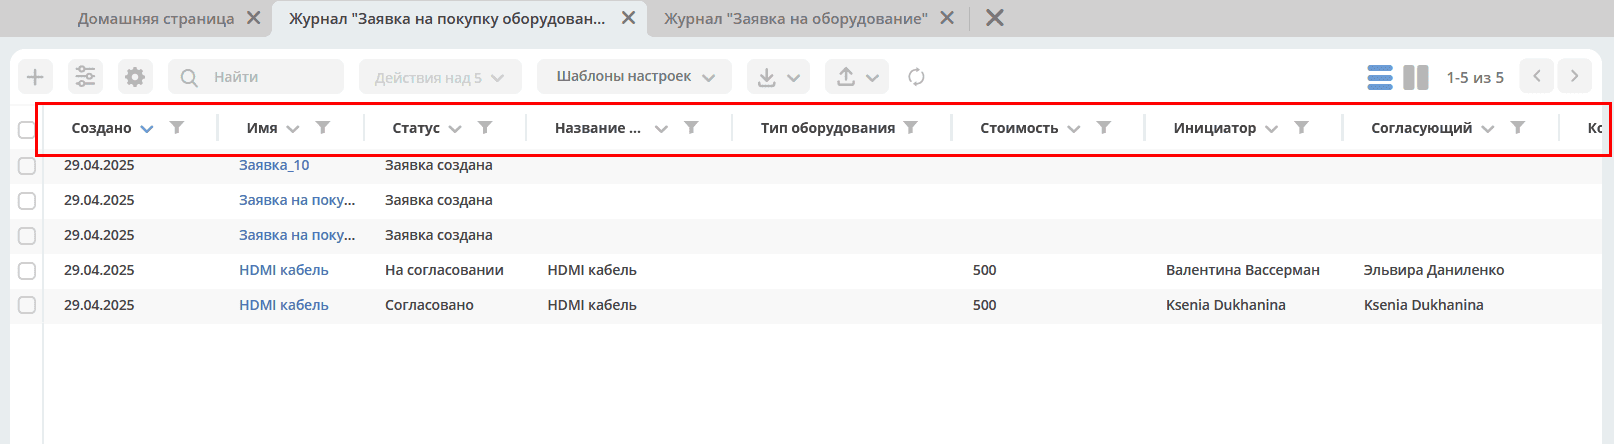
Open the “Equipment Purchase Request” journal. New columns have been added to it.
Changing form fields
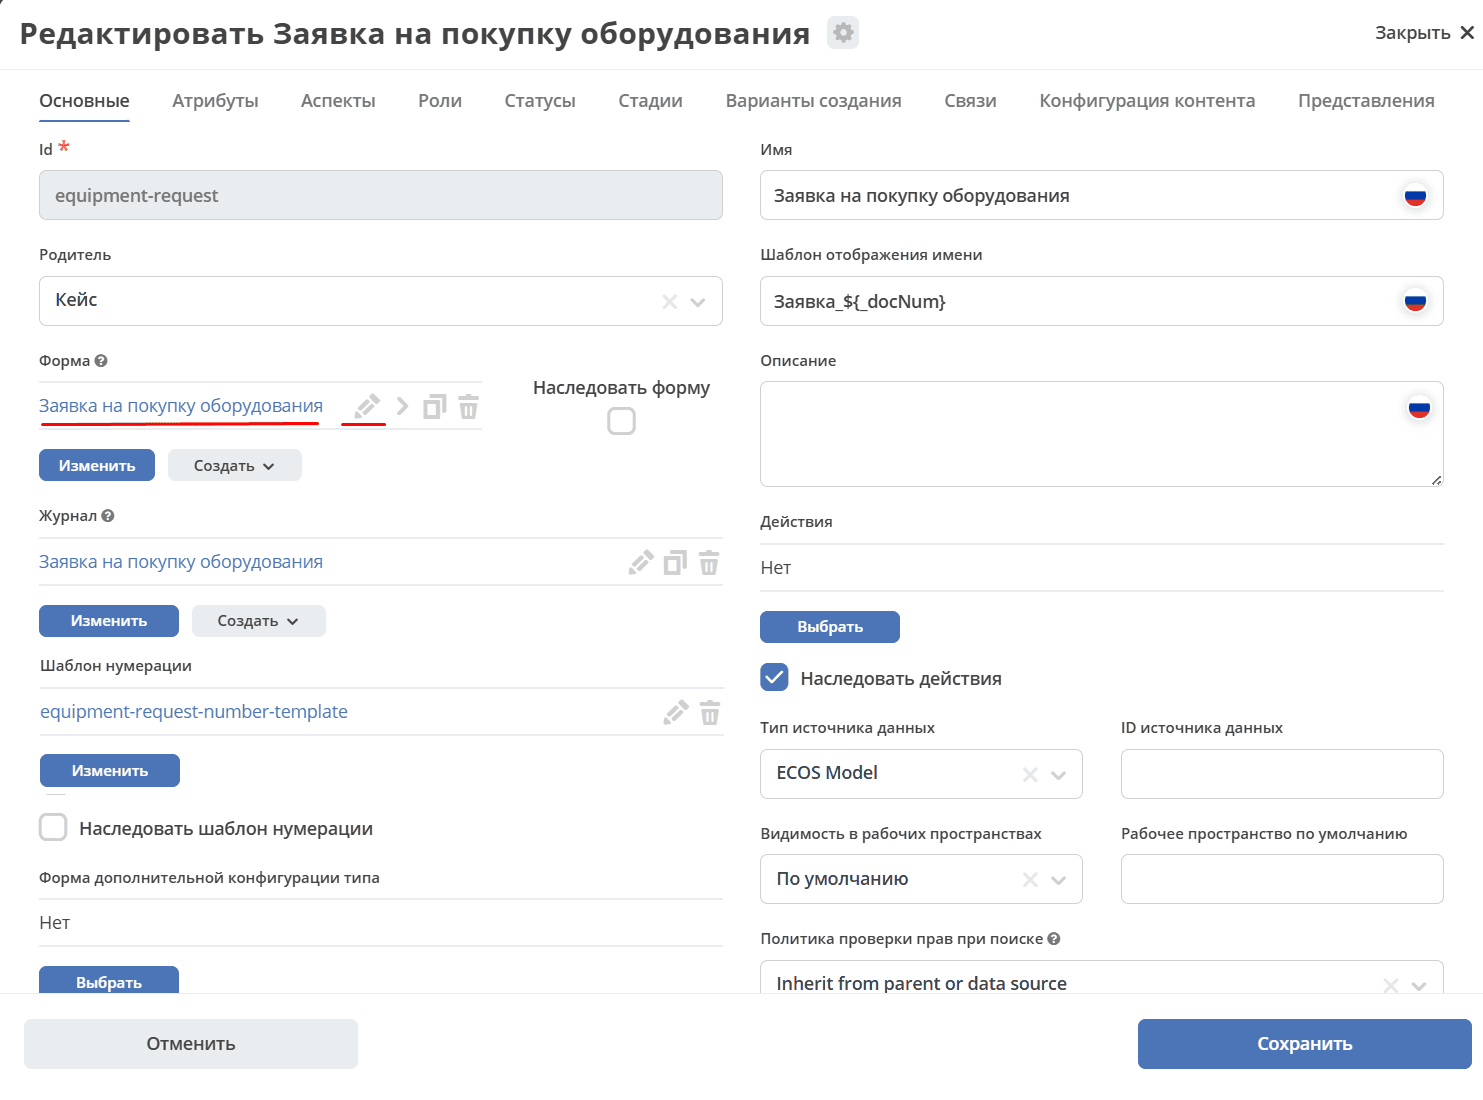
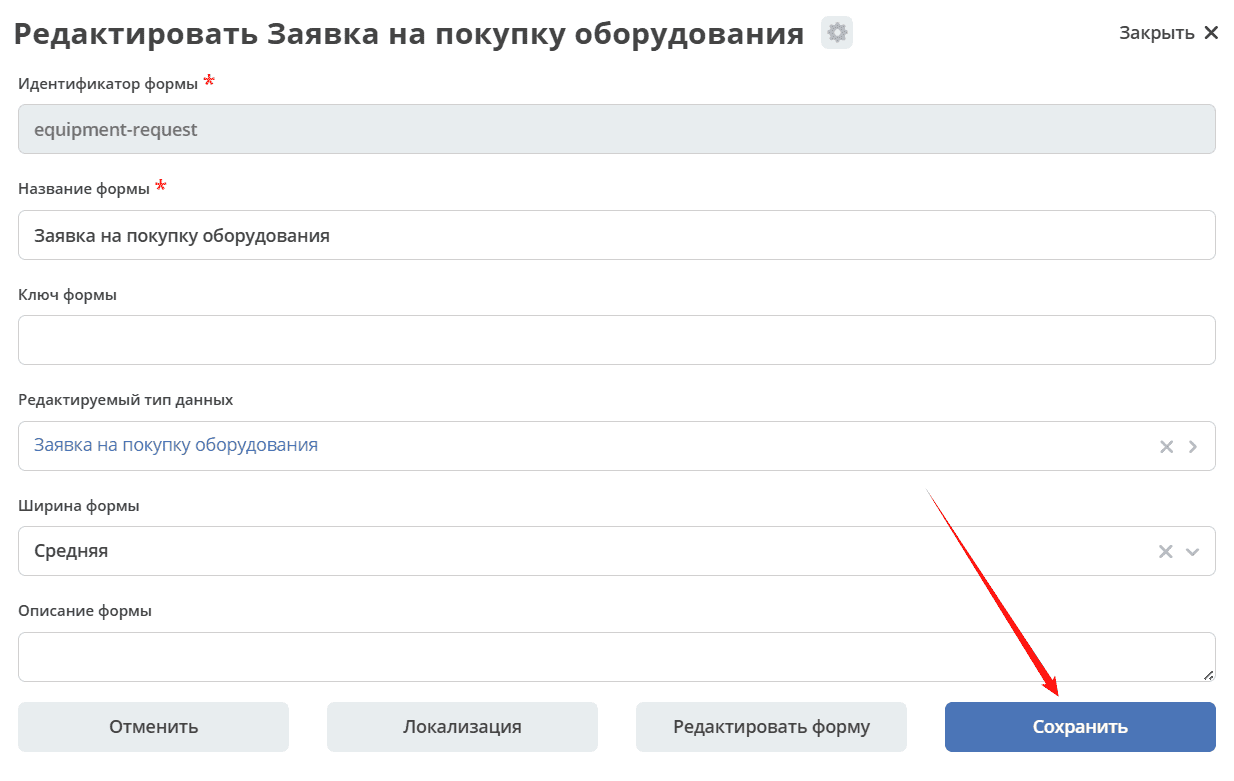
Go to the data type and to copy the form, click:
A form with a default name will open:

Rename to equipment-request and click “Confirm”:

After saving, a new form is created and the auto-generated form in the data type is replaced with the created one. To edit it, click:
A form will open where you can make changes.
To switch to component editing, click “Edit form”.
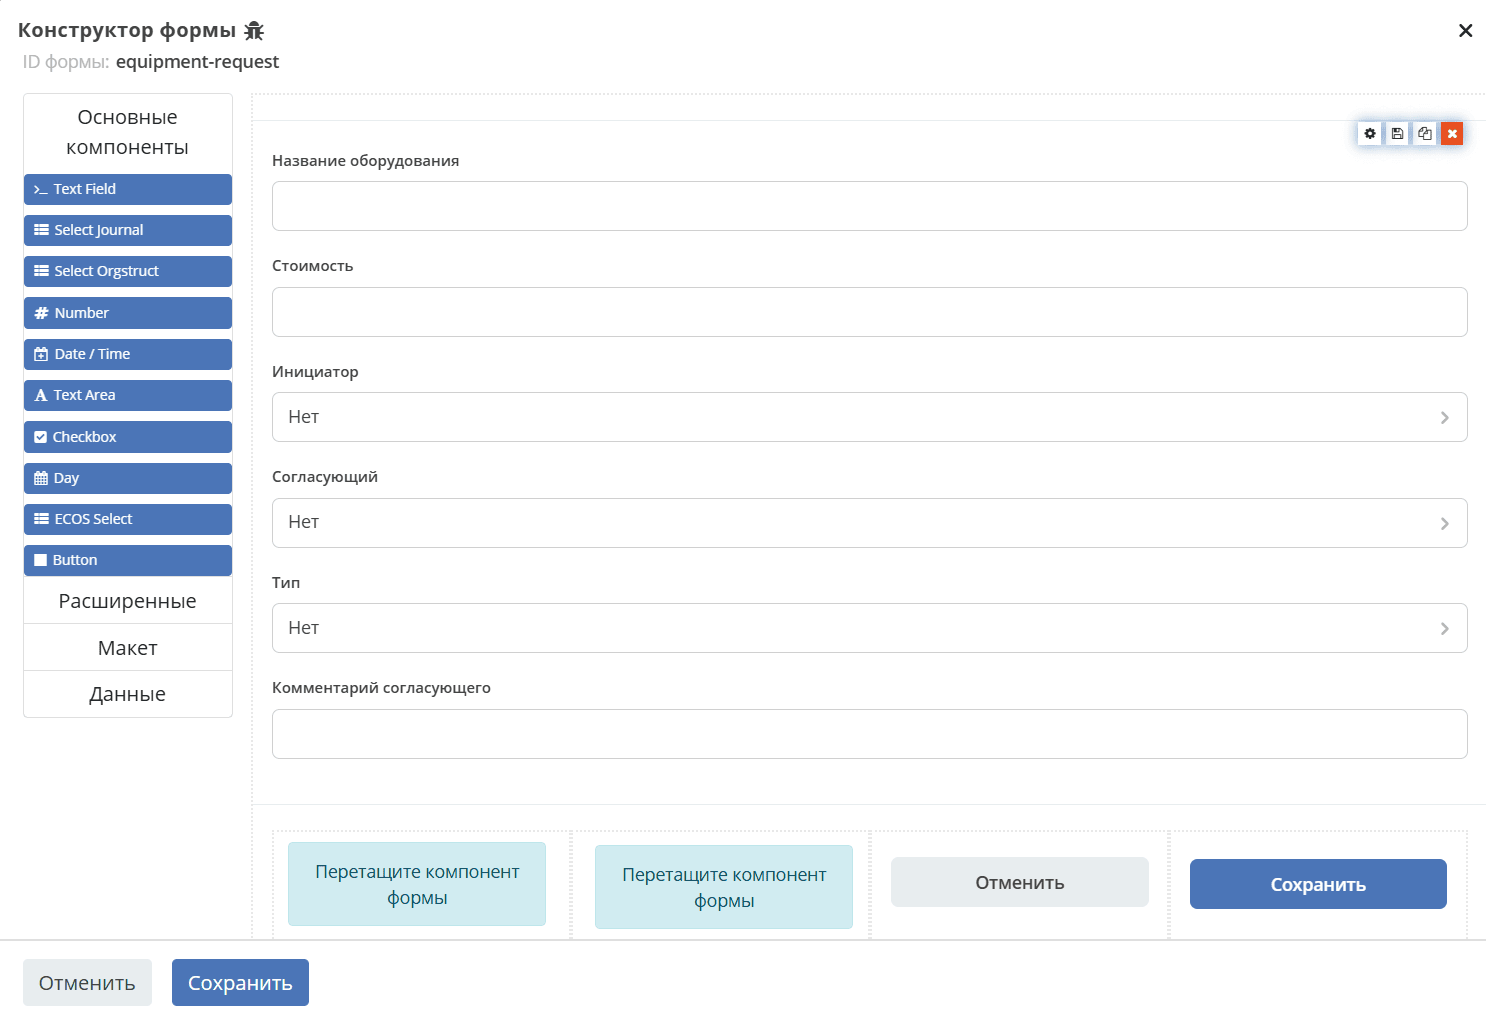
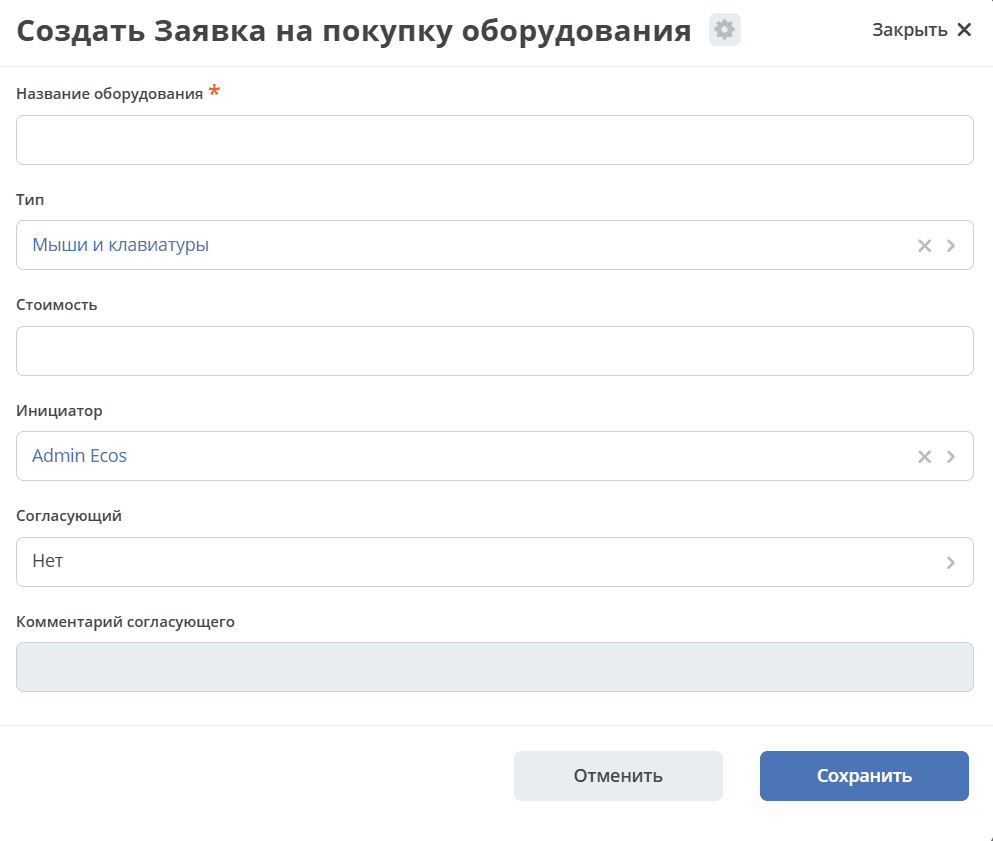
Make the following changes:
Using drag and drop, move the “Type” field above under the “Equipment Name” field.
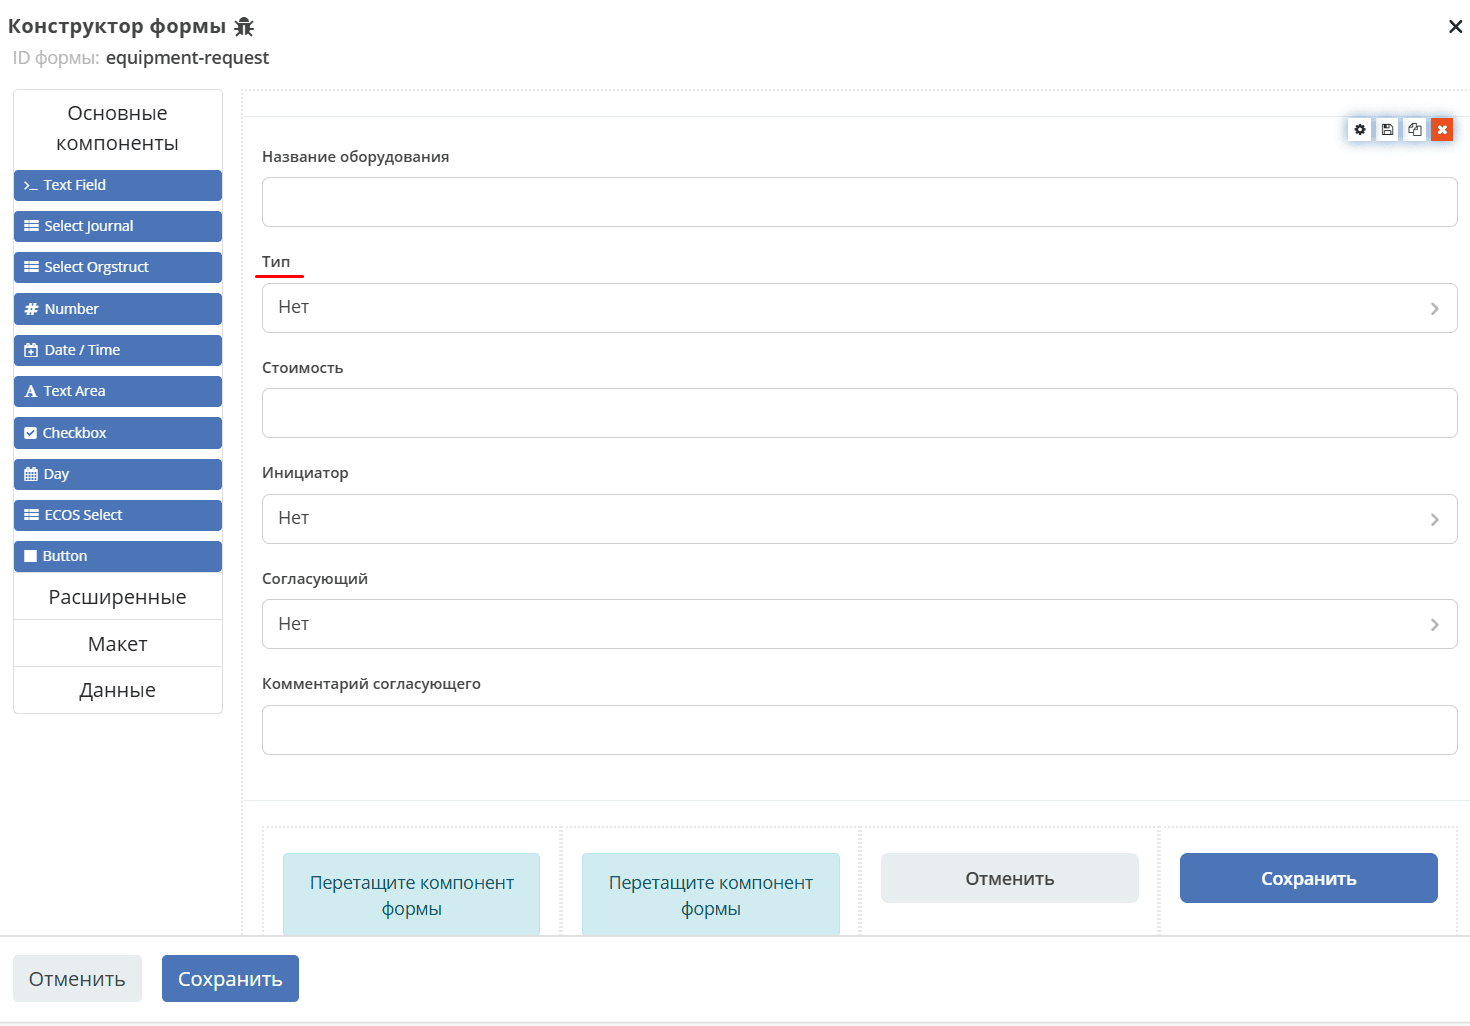
Let’s make the “Equipment Name” field mandatory. To switch to component editing, click:
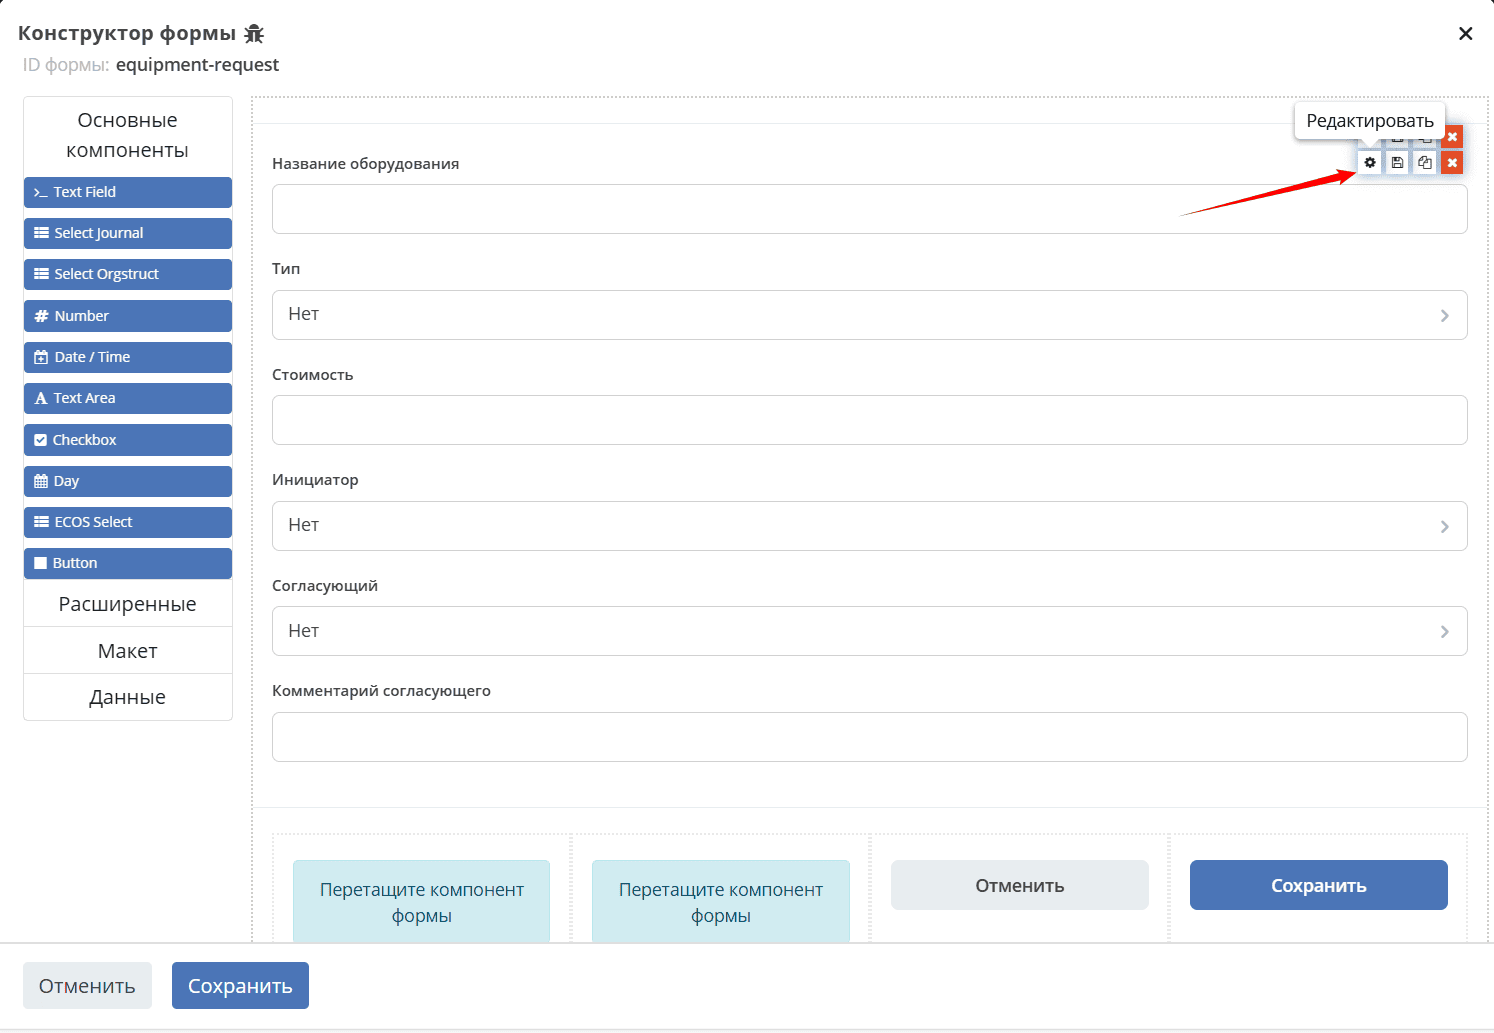
A component properties editing form will open with a preview on the right side:
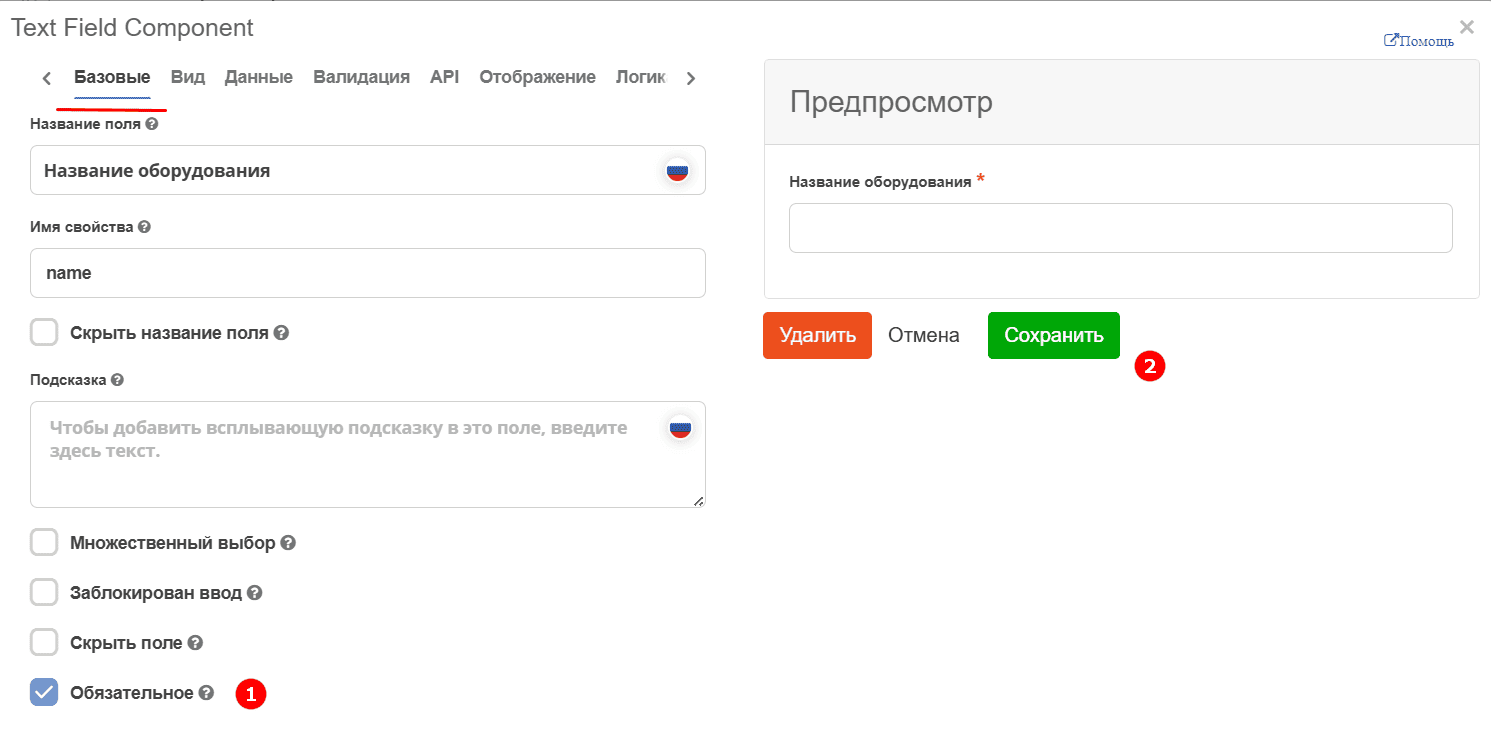
On the “Basic” tab, check the “Mandatory” (1) checkbox and save (2).
In the “Equipment Type” field, let’s specify the default type. On the “Data” tab:
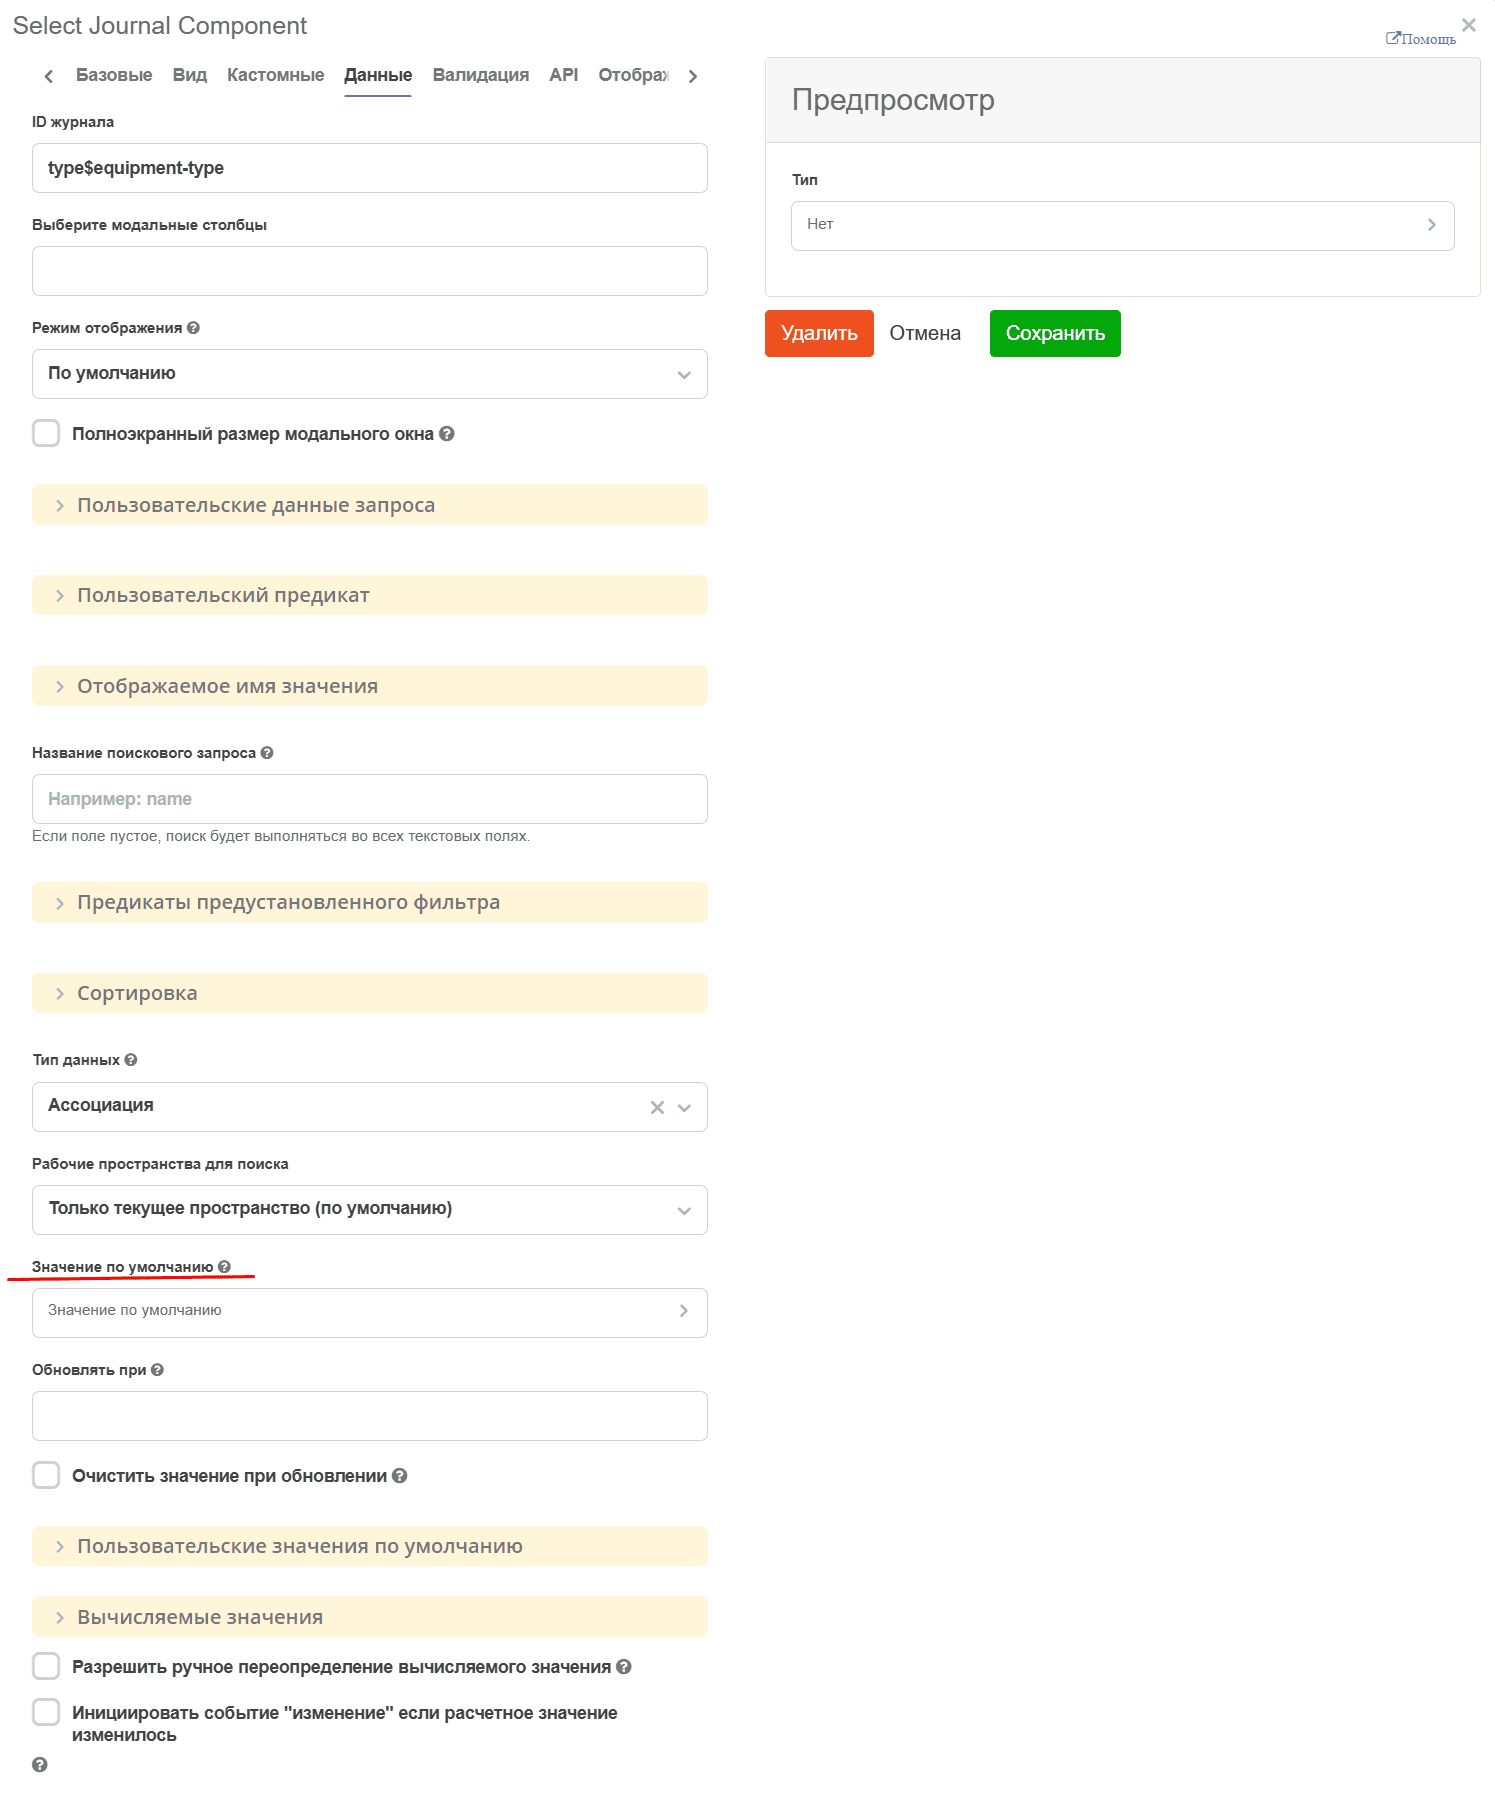
select the default value:

Click «Save».
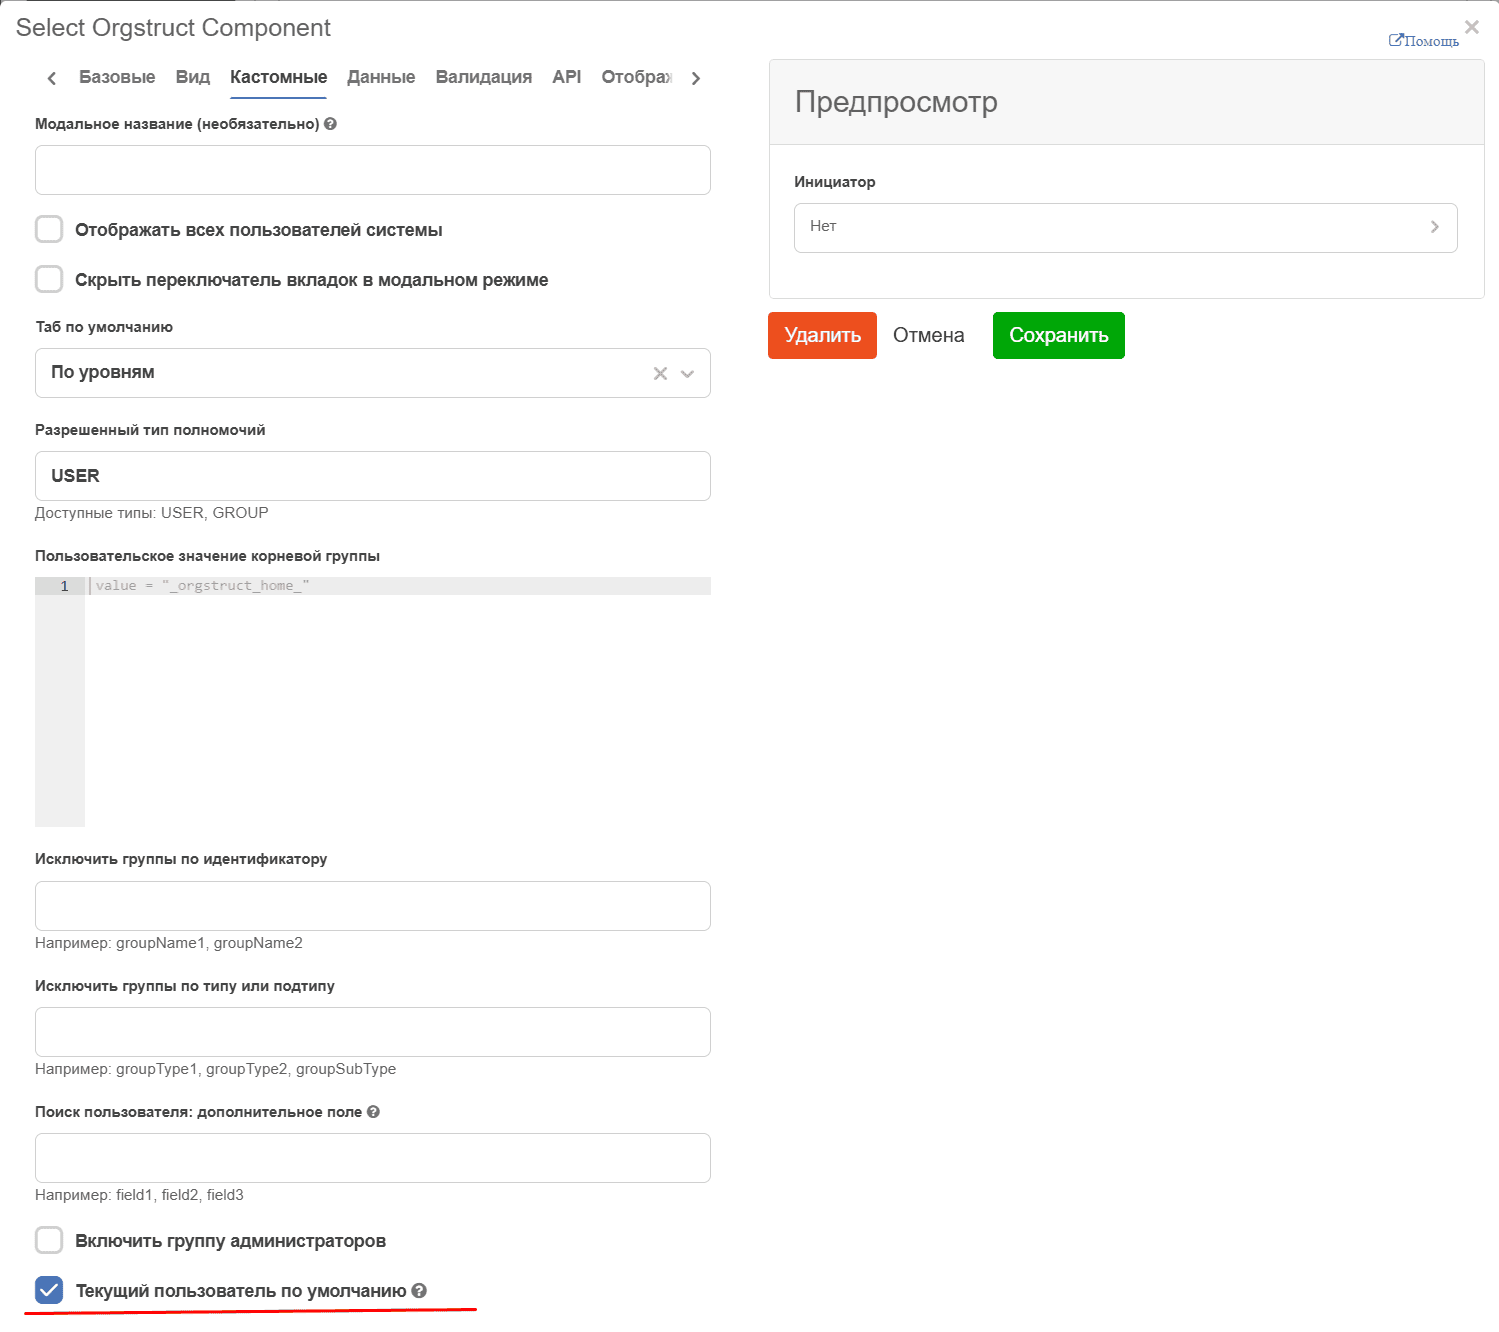
In the “Initiator” field, let’s configure it so that the user creating the request is automatically specified. On the “Custom” tab, check the “Current user by default” checkbox and save.
The “Approver’s Comment” field will be filled during approval. So when creating a request, let’s disable data entry in it:
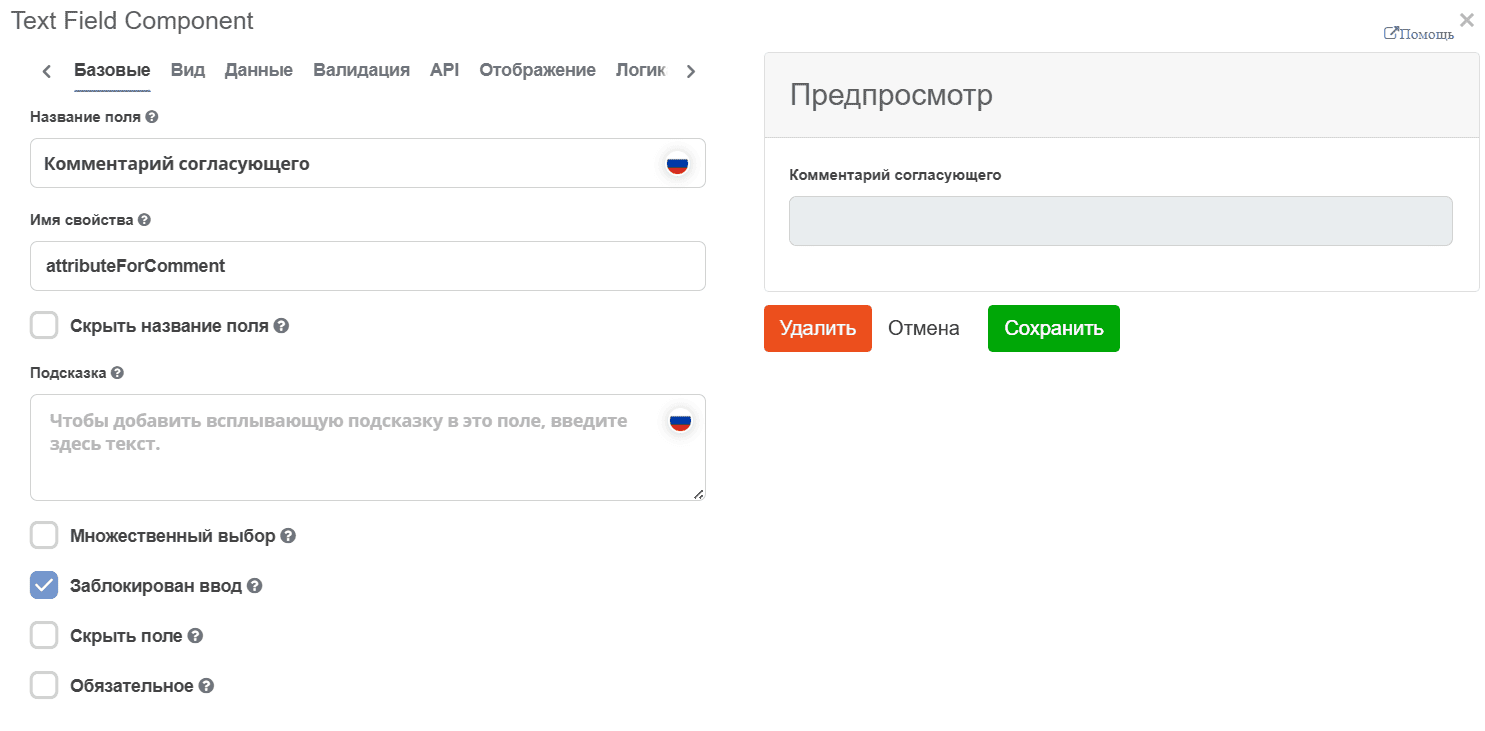
Click «Save».
Edited form:
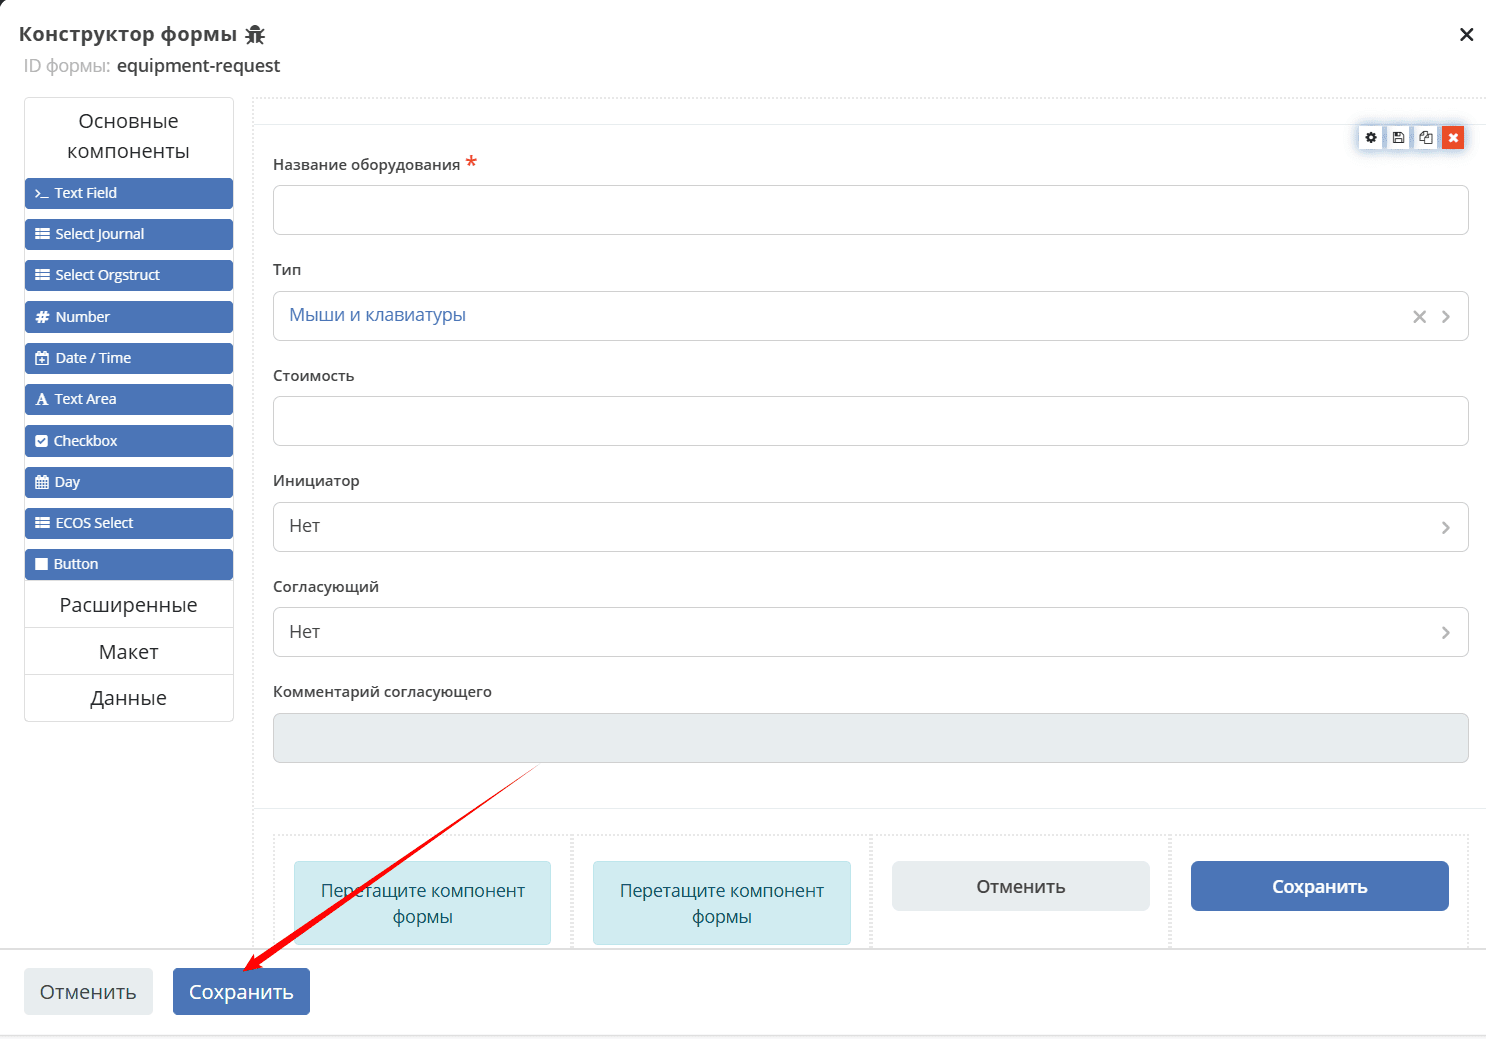
Click «Save».
Go to the “Equipment Purchase Request” journal and click +. The form fields have been changed:
Adding approver’s comment saving to the request
The “Approver’s Comment” attribute has been added to the data type and the form. Now you need to:
(1) add the attribute to the task form “Under approval by approver”;
(2) add a Script task element to the business process.
Adding attribute to form (1)
Go to the user task “Under approval by approver” component and then to form editing mode:
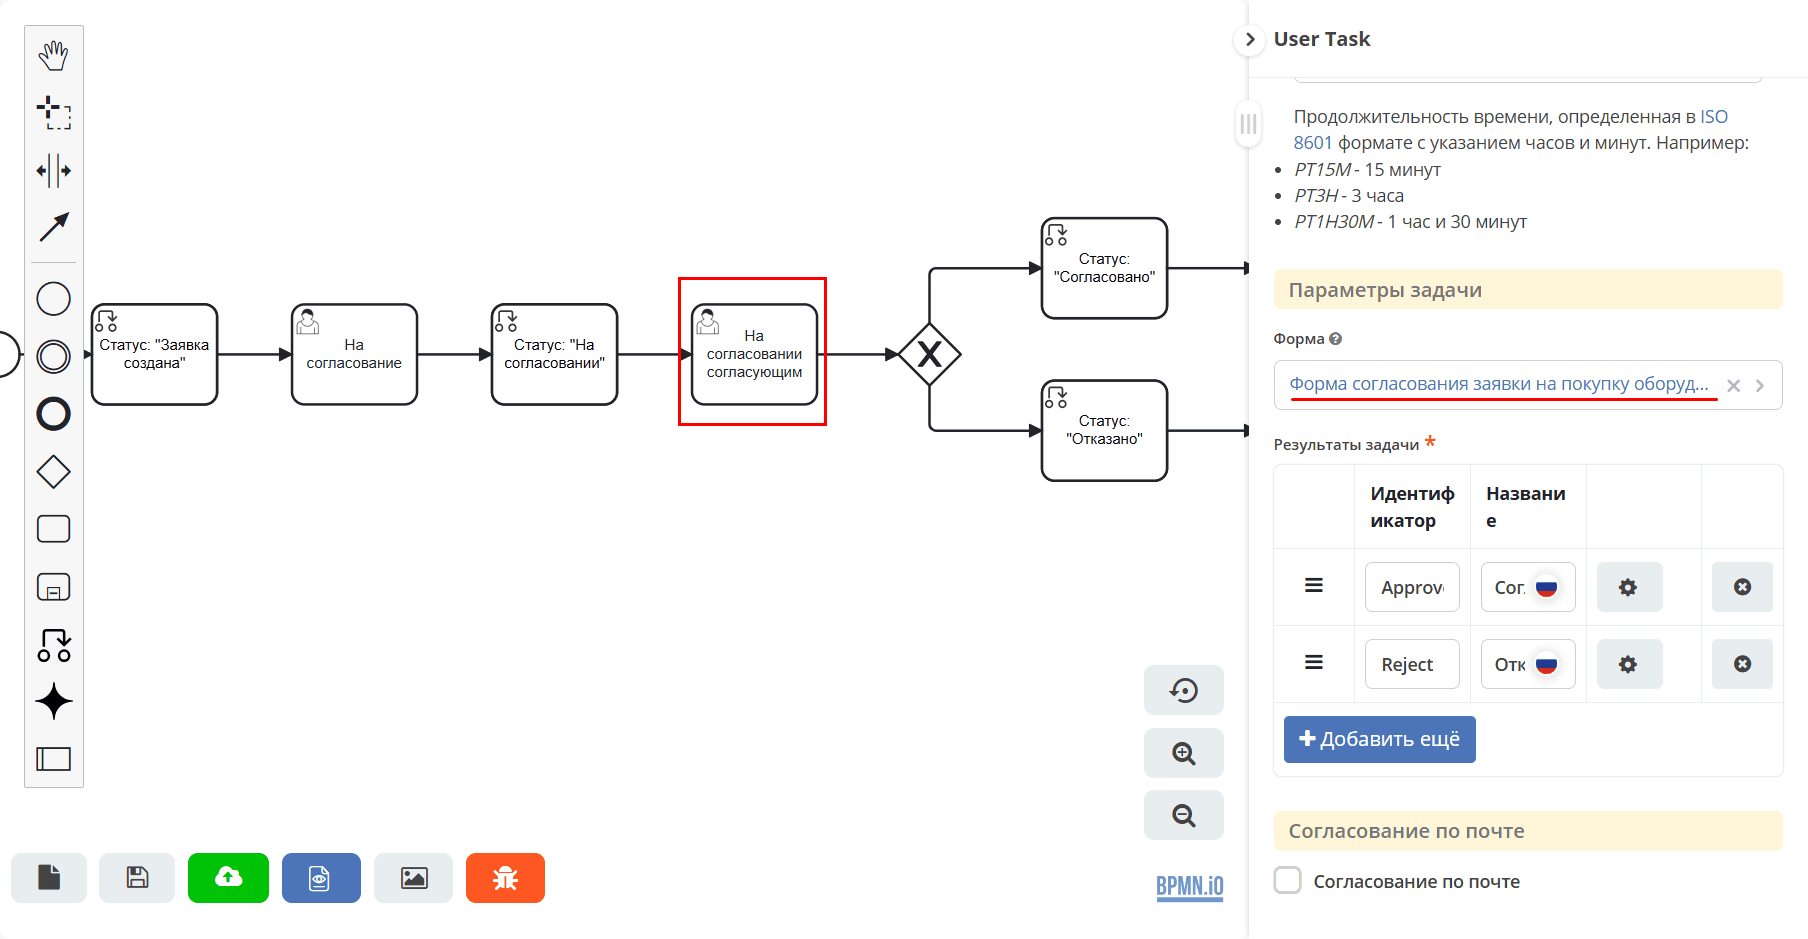
Click “Edit form”:
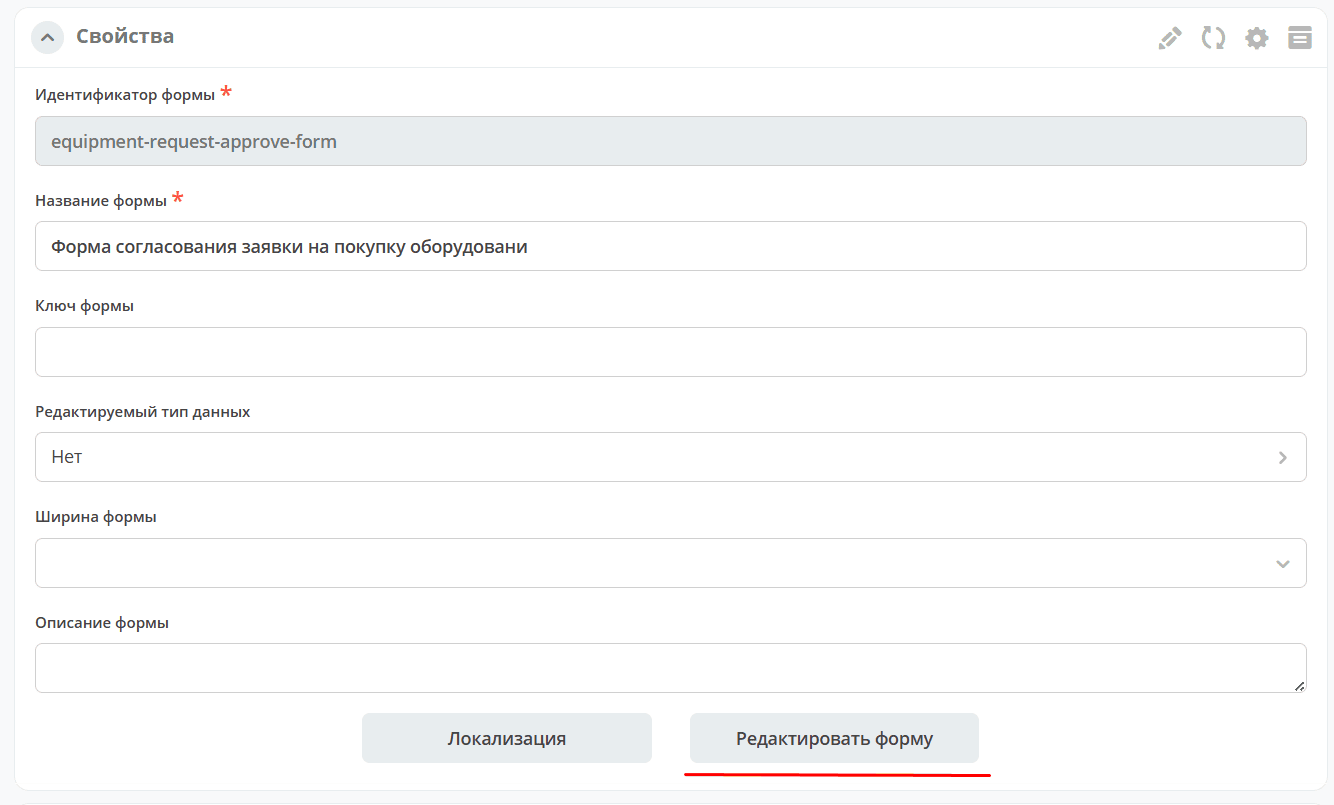
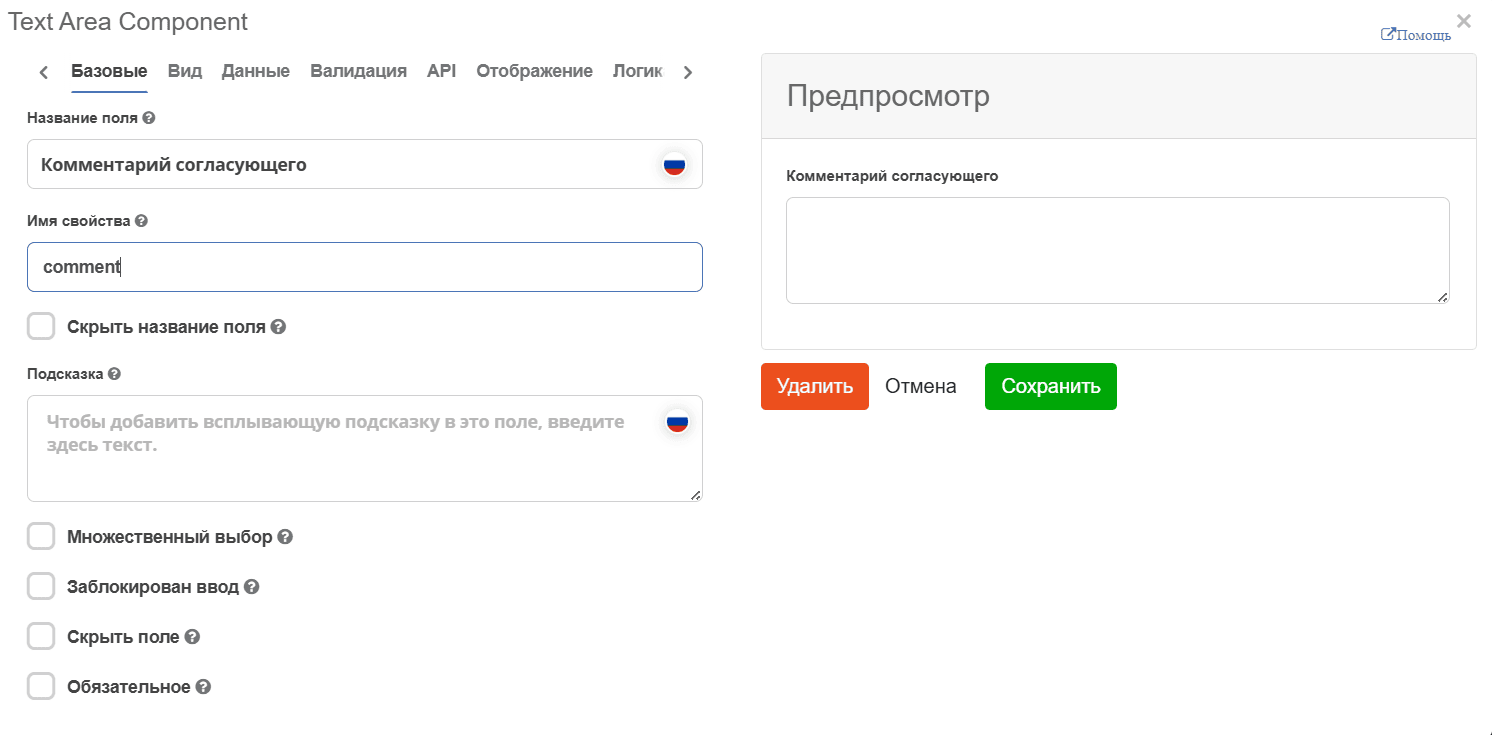
Select the Text area component, since the comment may contain many characters:
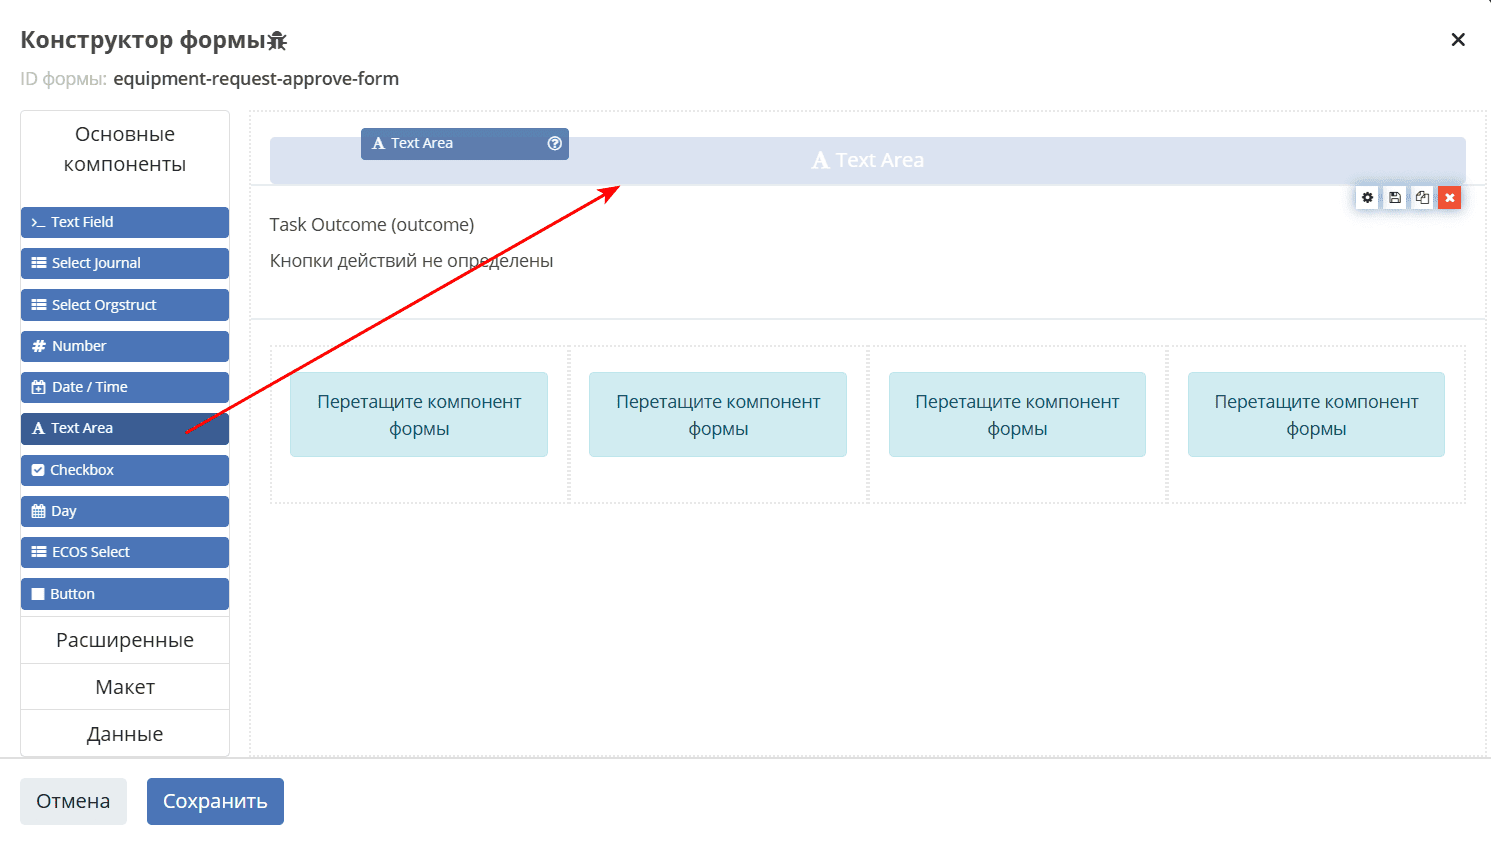
Specify:
Field name - Approver’s Comment
Property name - comment
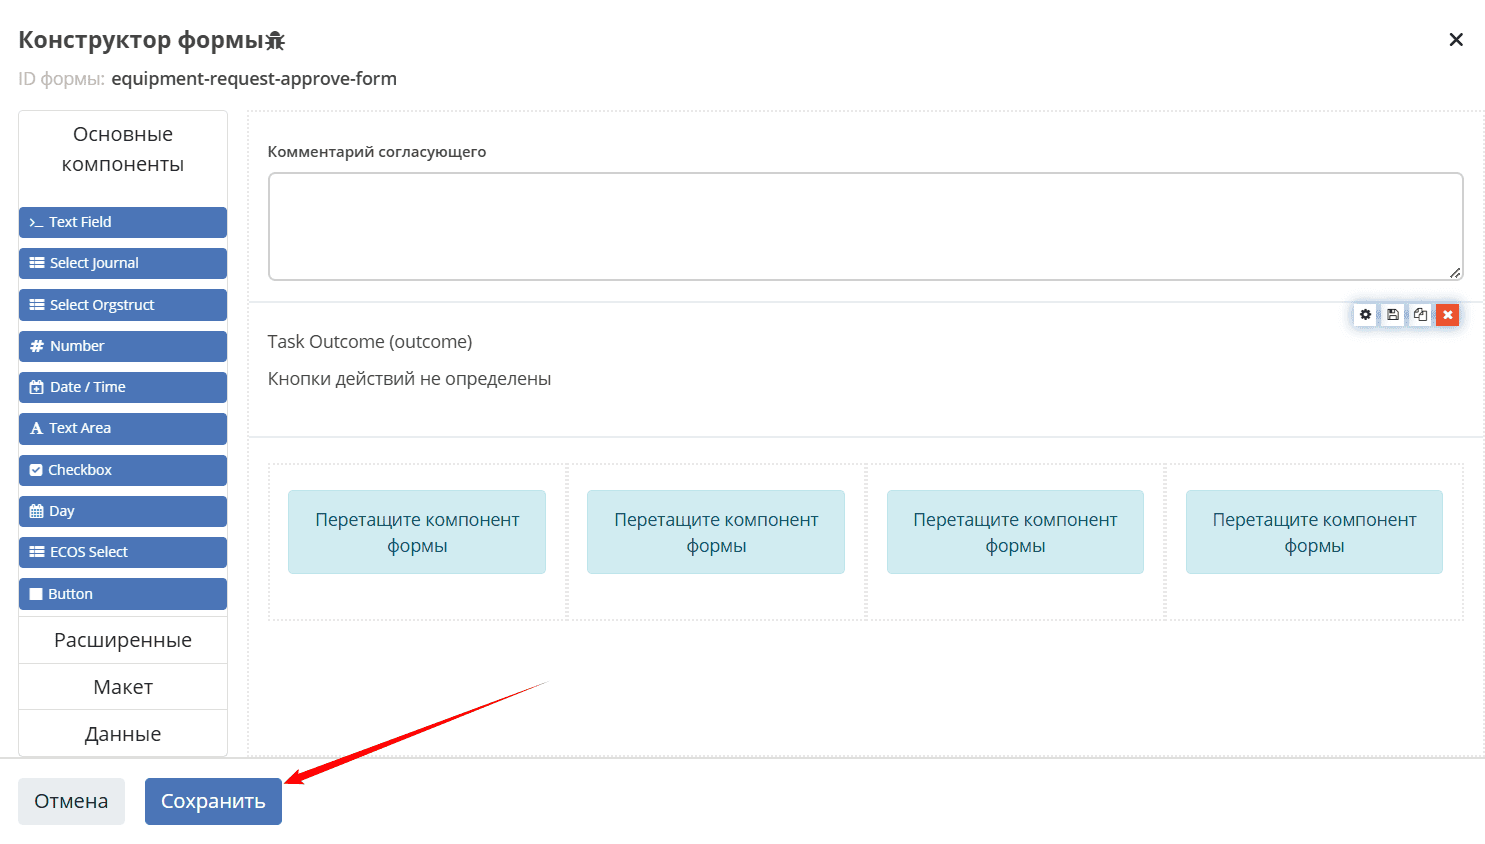
Click «Save».
Save the form:
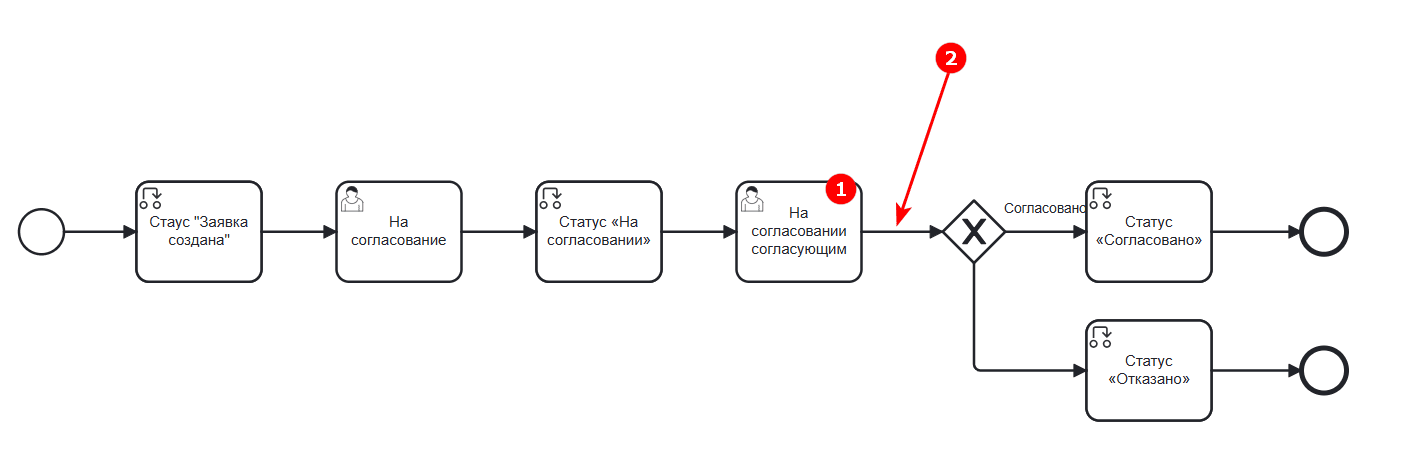
Adding script to process (2)
Between the user task “Under approval by approver” and Gateway elements, you need to add a script task.
Using free selection (1), select and move the elements to the left:
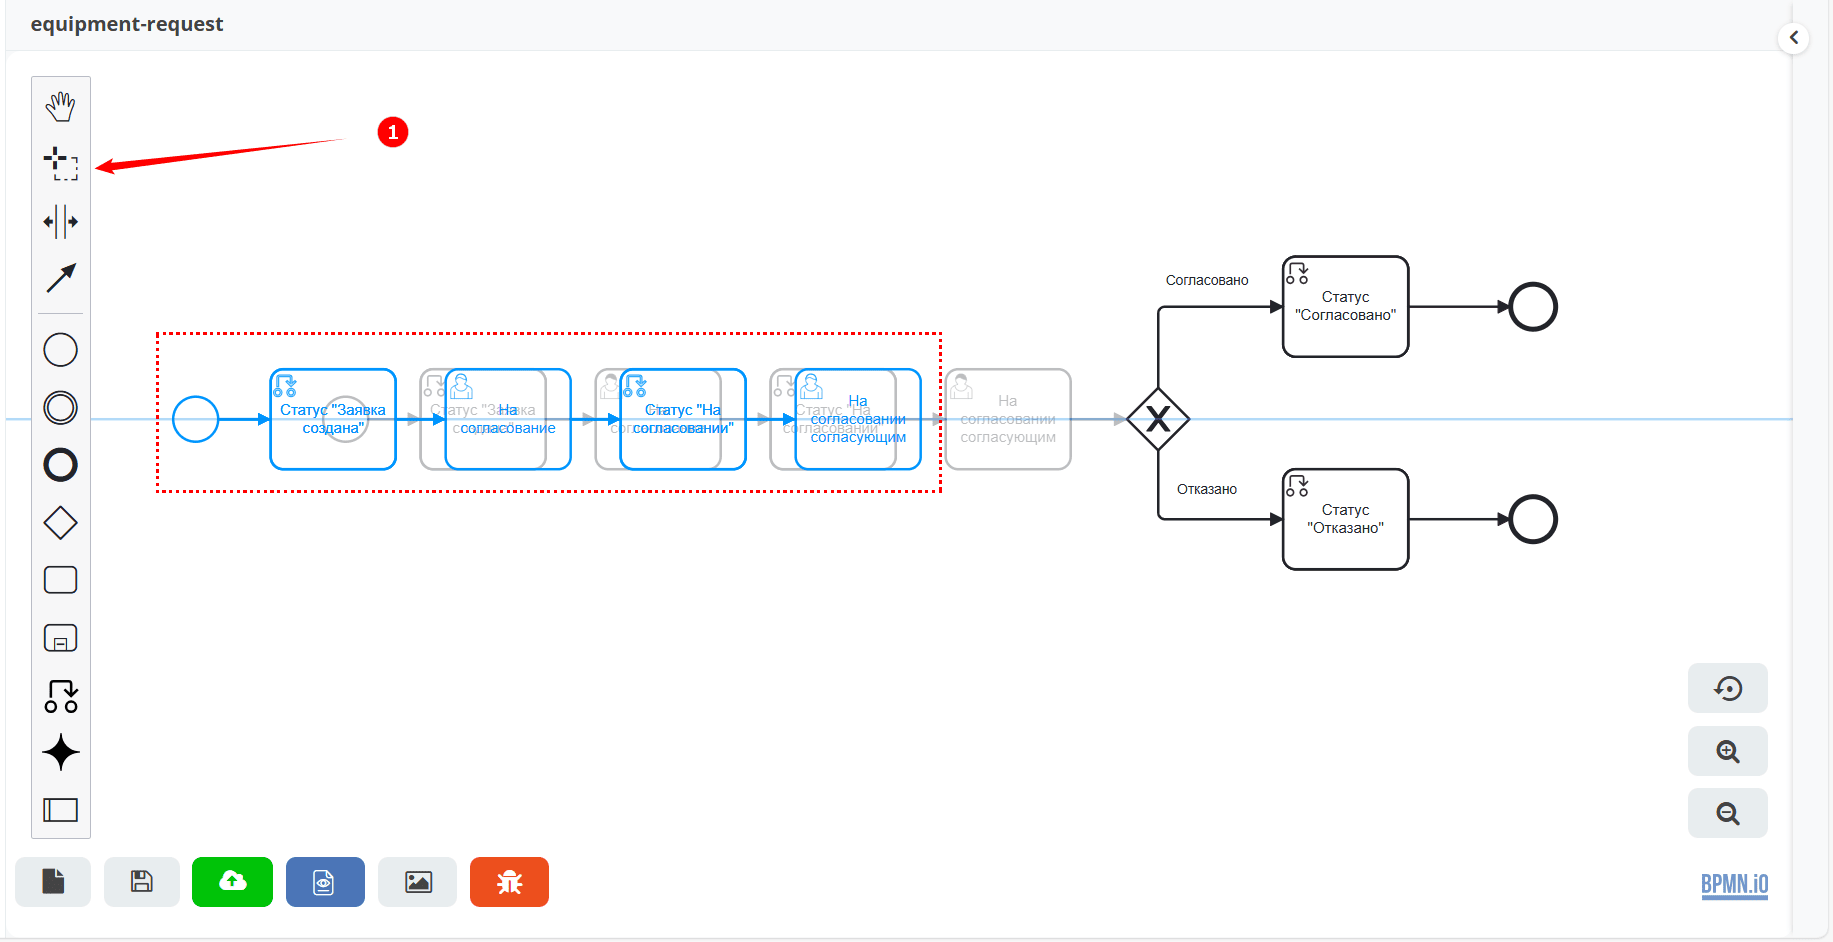
In the menu, select the “Task” element and drag it after the user task “Under approval by approver”:
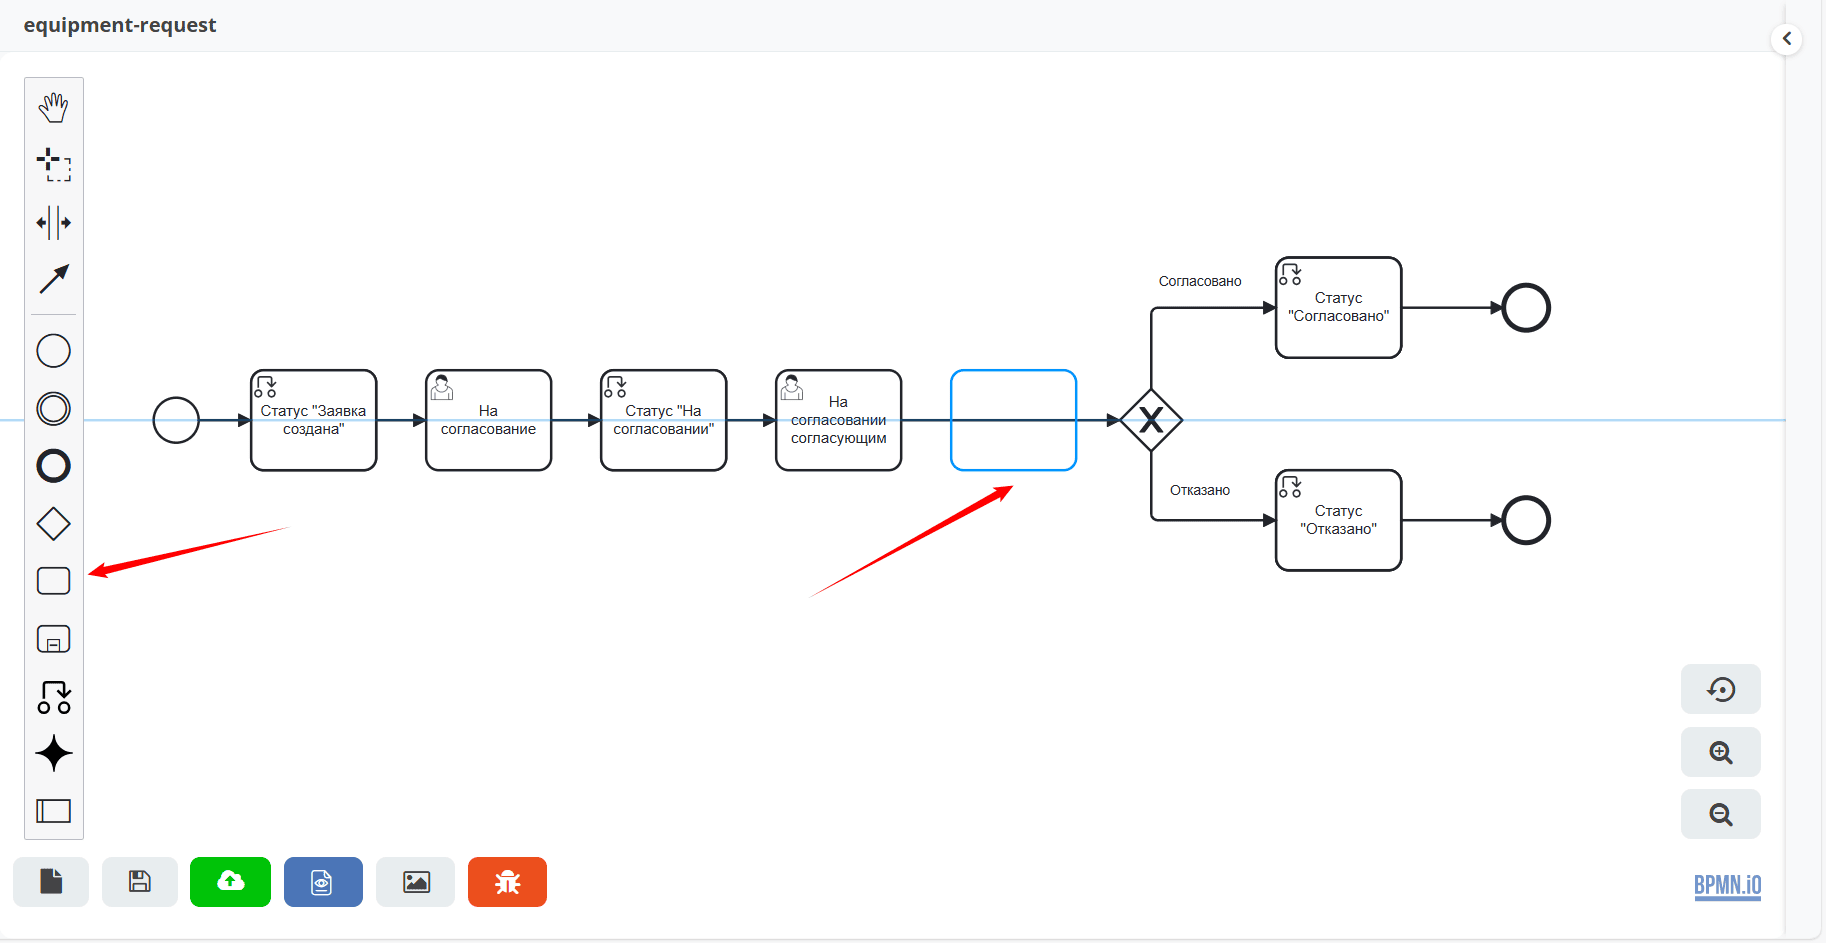
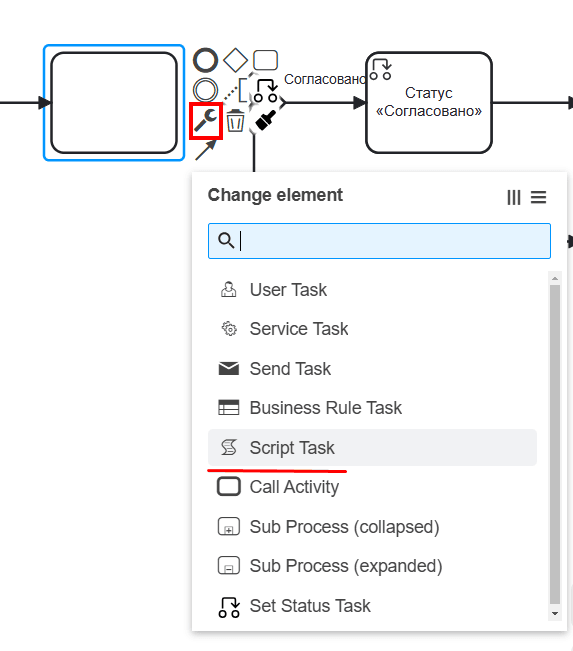
Change its type to Script task:
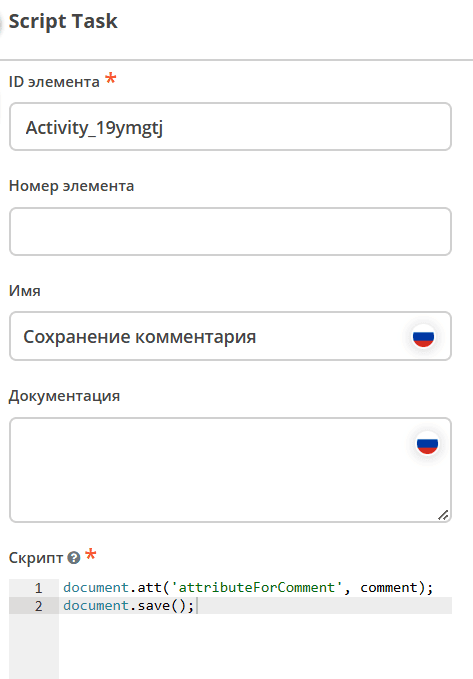
Specify:
Name - “Saving comment”,
in Script:
document.att('attributeForComment', comment);
document.save();
Save and publish the process:
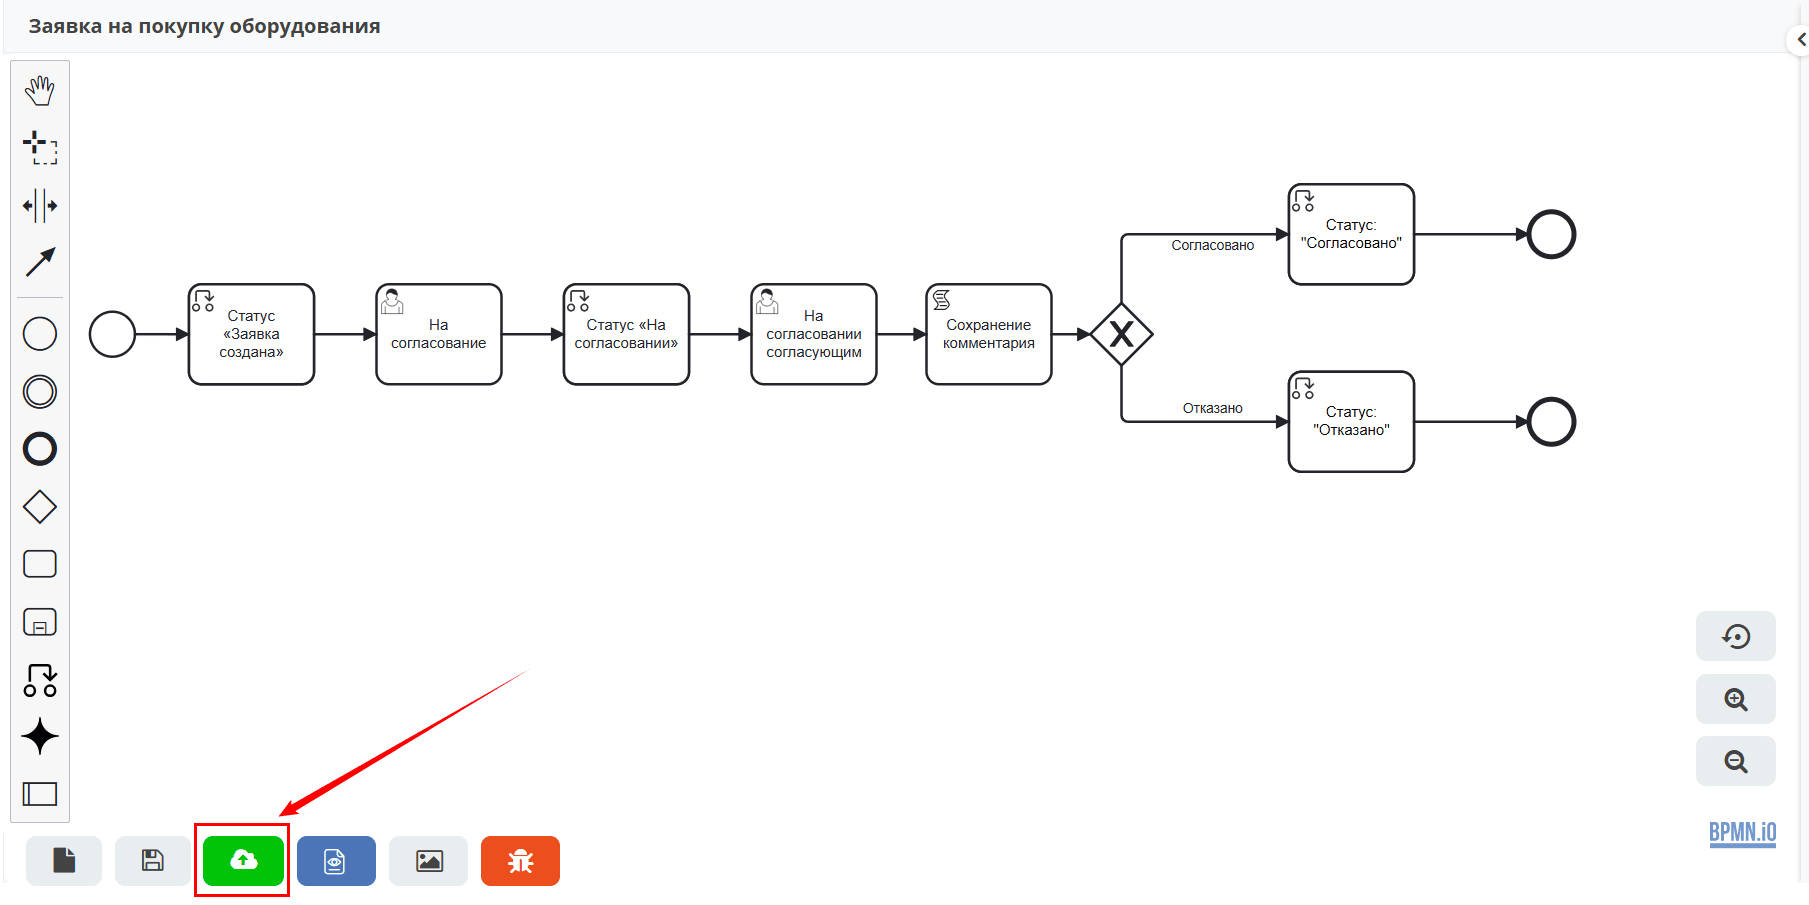
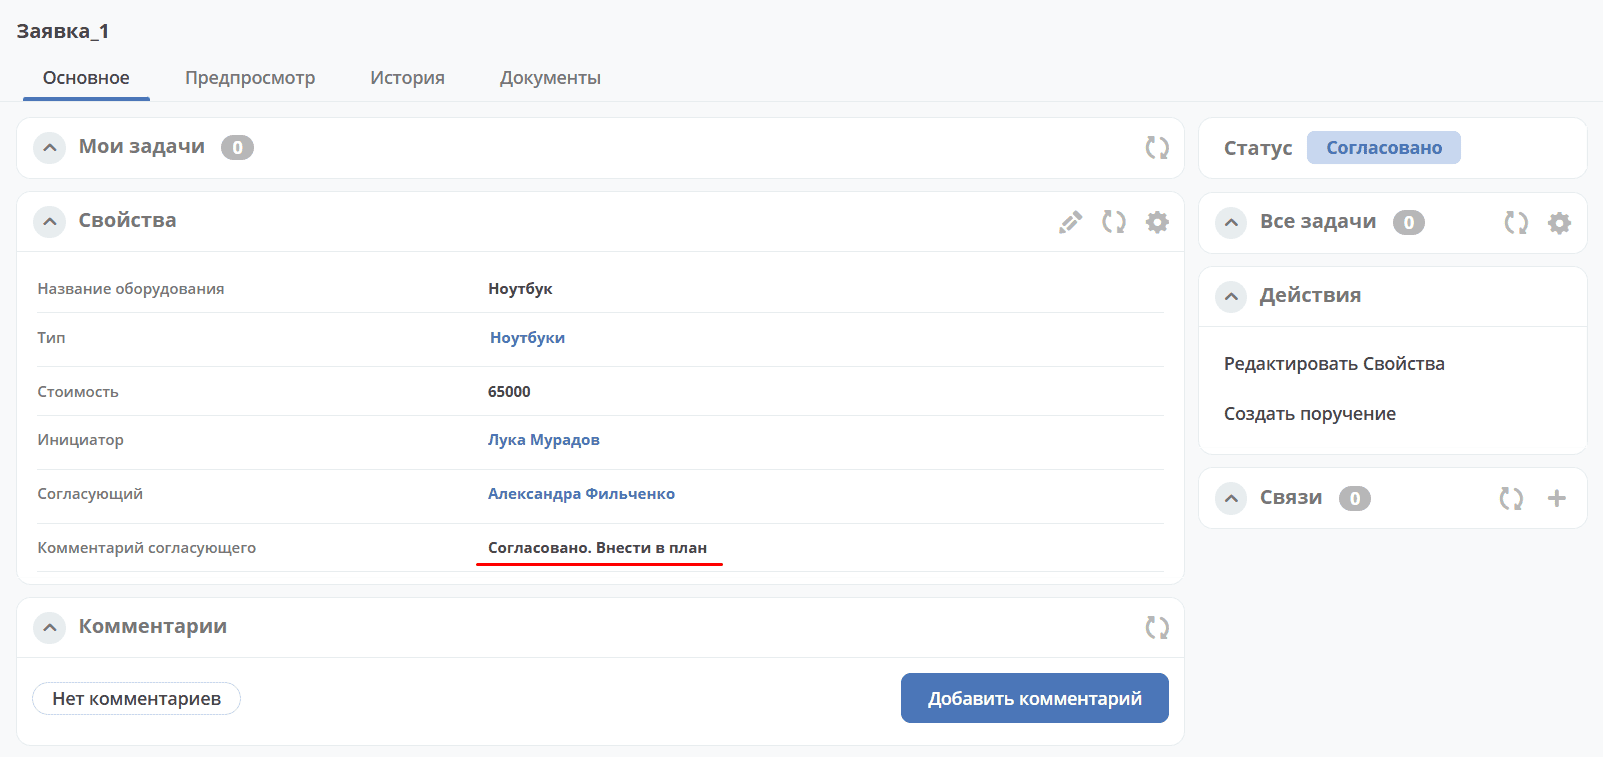
To test the process, create a request, send it for approval, it will be assigned a number like Request_N. If the approver adds a comment to the task:
If the approver adds a comment to the task:
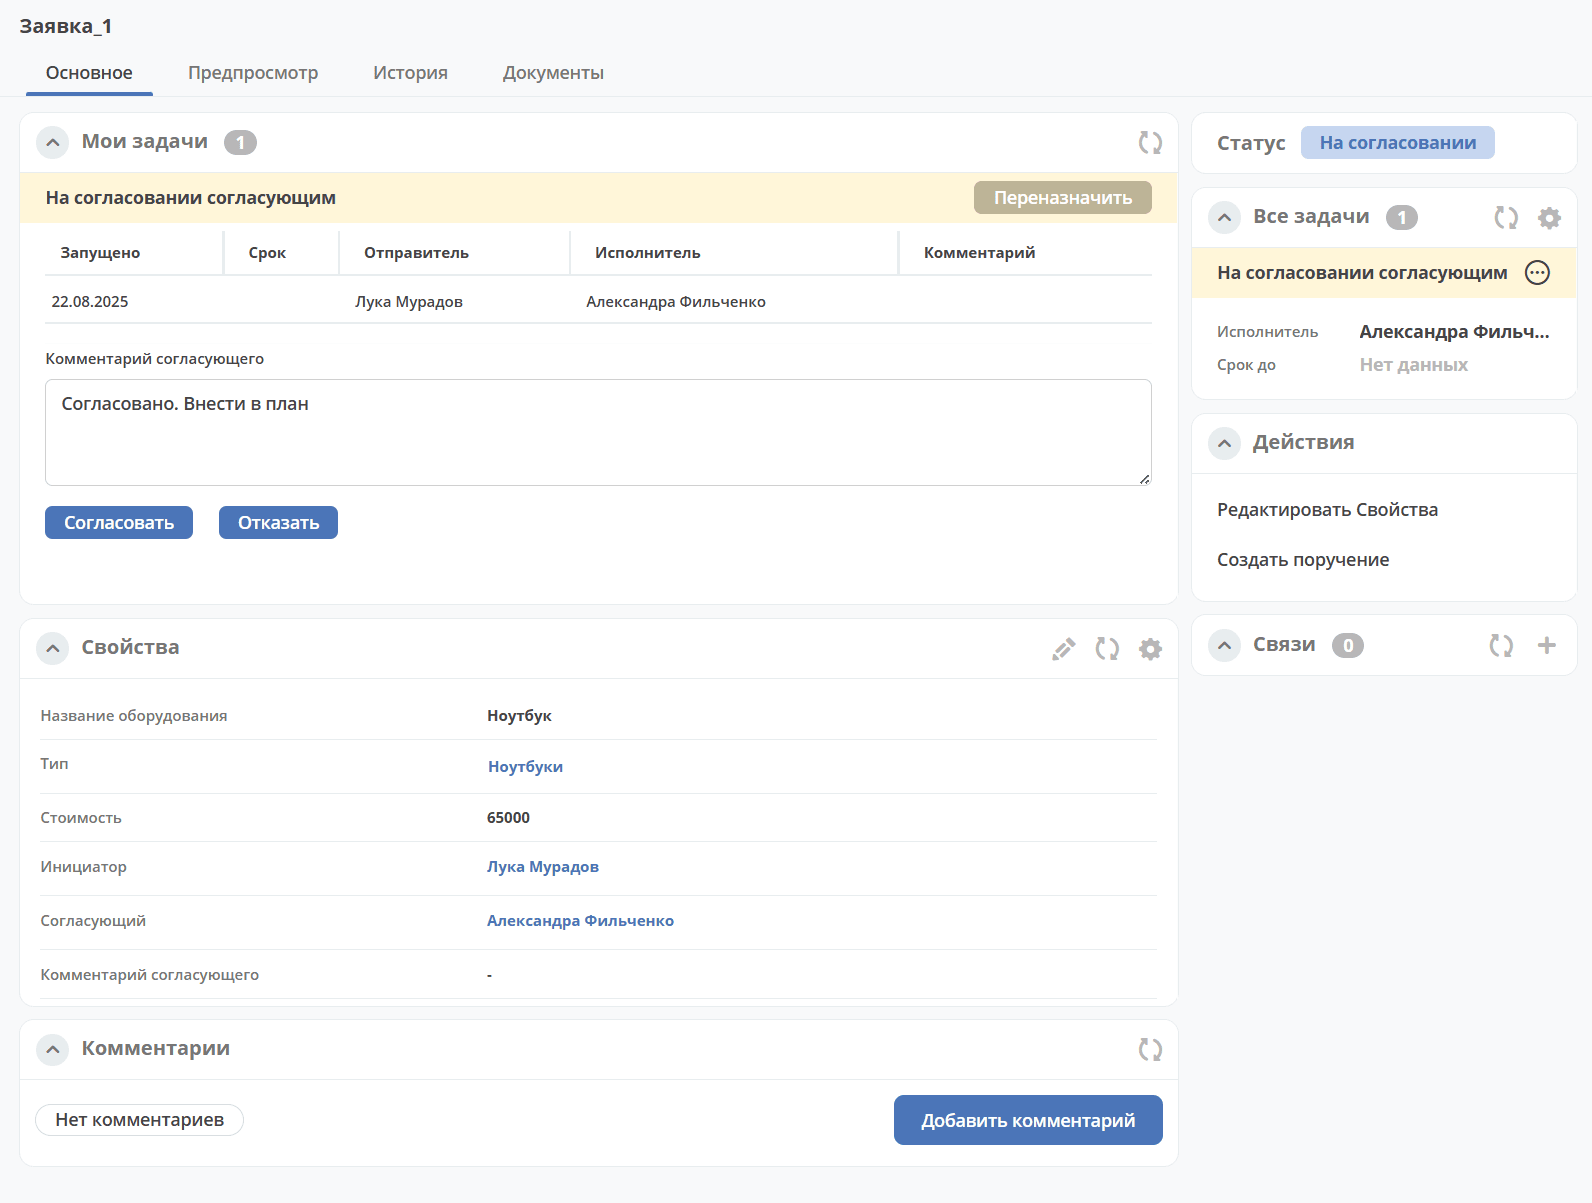
then it will be saved in the request card: