Creating a Data Type and Business Process in a Workspace
Note
Created artifacts are available only within the workspace in which they were created.
To create artifacts available across the entire system, you must have administrator rights (be a member of the ECOS Administrators group — ECOS_ADMINISTRATORS).
Let’s look at creating some artifacts using the example of the equipment procurement process.
Before creating the business process itself, it is necessary to create a number of artifacts in the following order:
Data Types
Data type — the main source of metadata for working with an object.
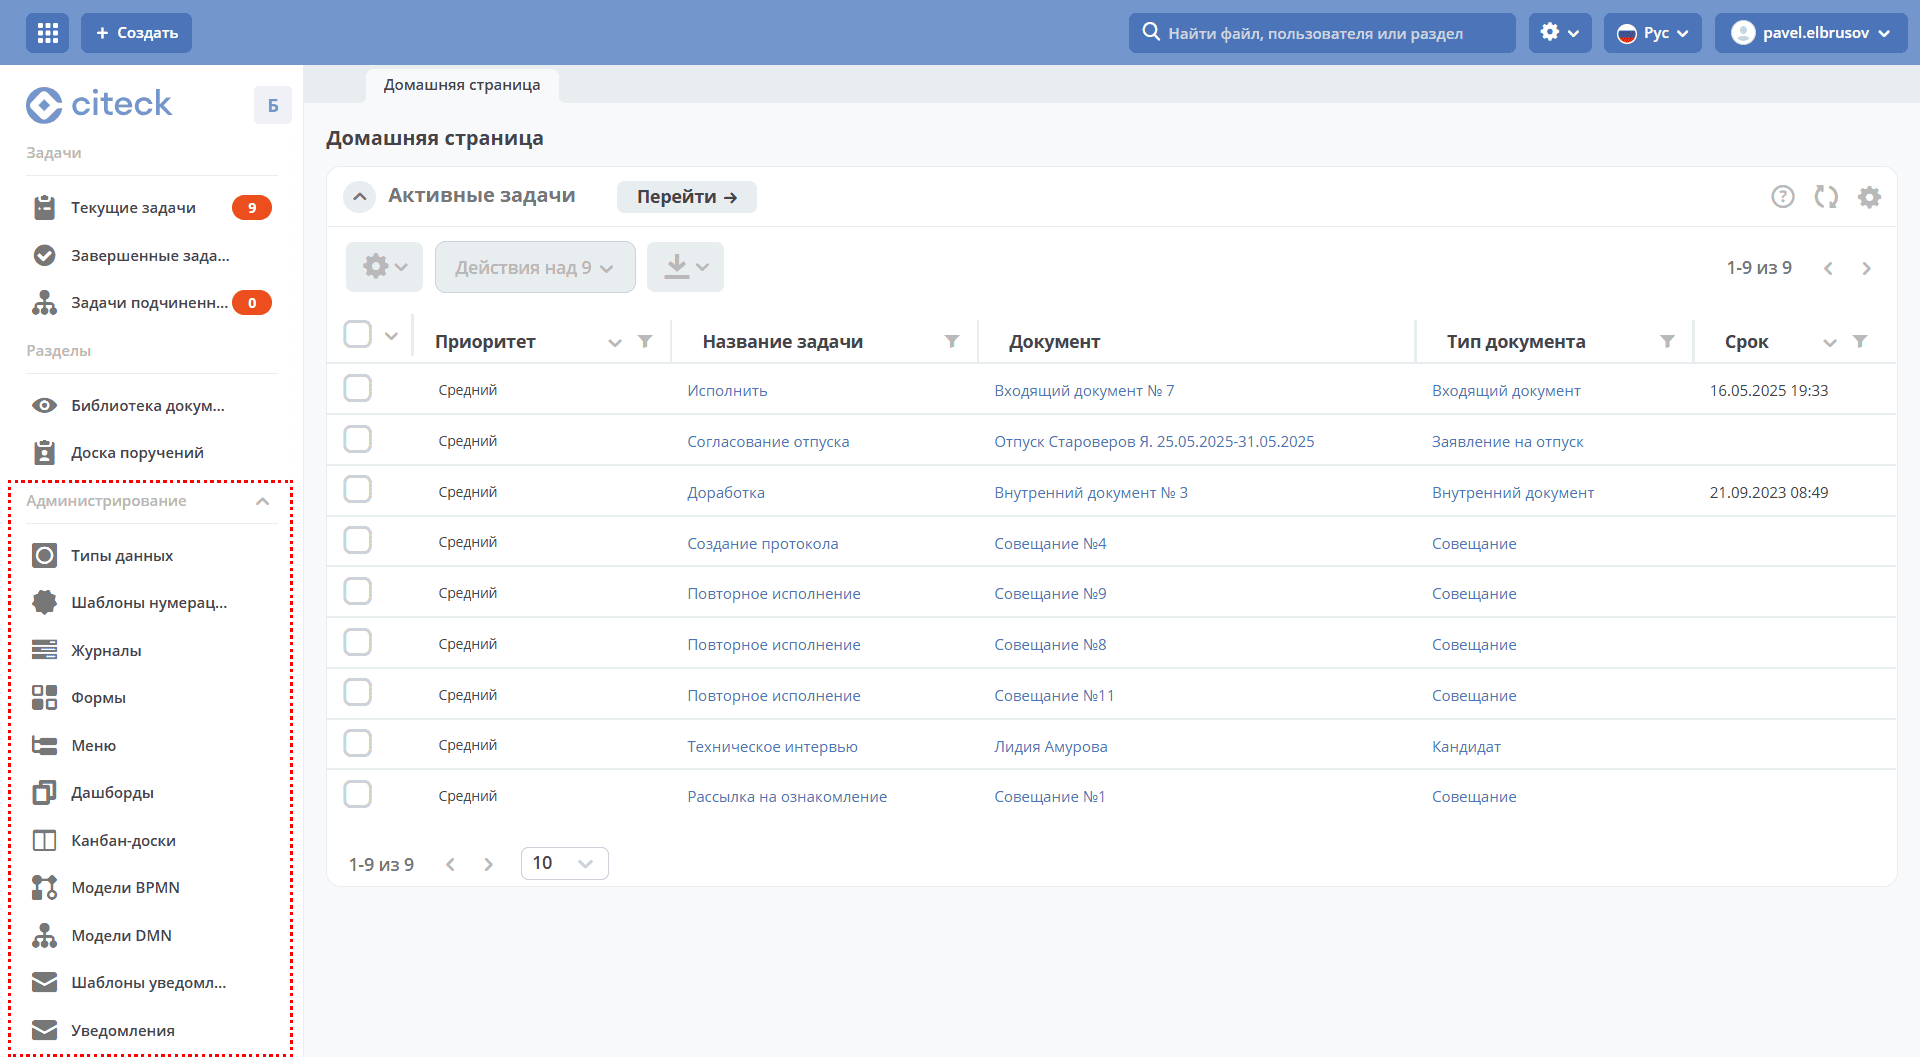
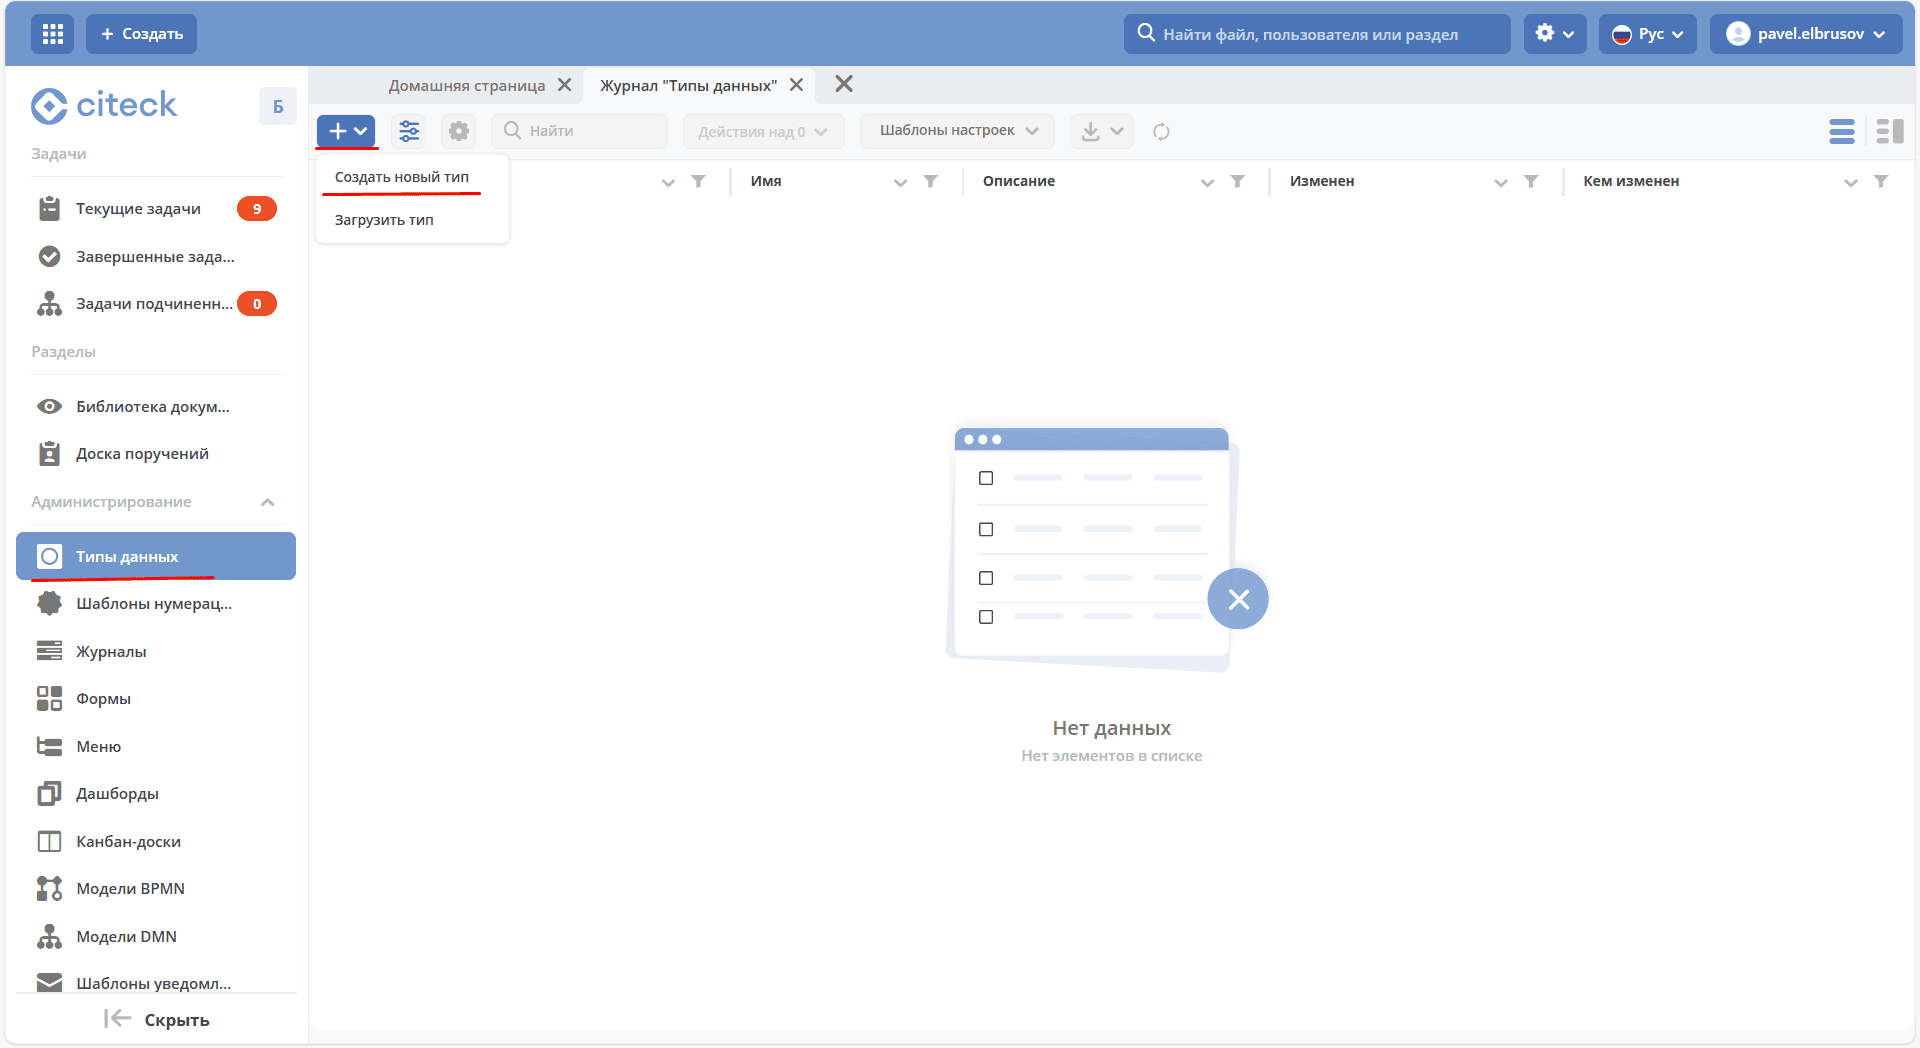
In the Administration section, go to Data Types and click + → Create new type:
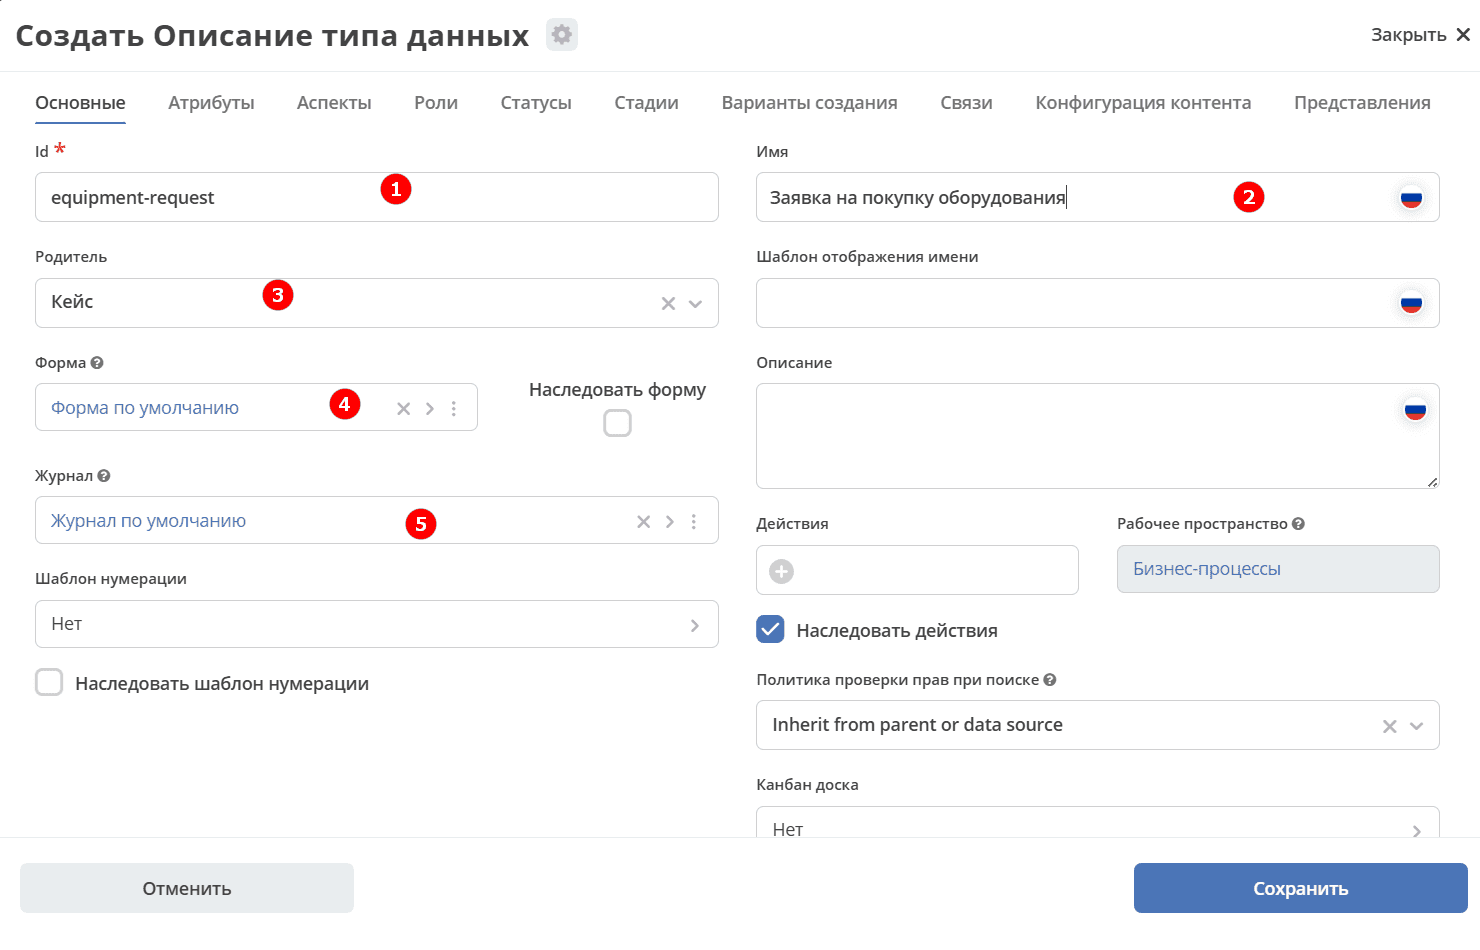
General
The tab contains the main data for the data type:
No. |
Field |
Value |
|---|---|---|
1 |
id |
|
2 |
Name |
Equipment Purchase Request |
3 |
Parent |
Case |
4 |
Form |
Leave as default — the system will automatically generate a form based on the specified attributes. Automatically generated forms cannot be edited. |
5 |
Journal |
Leave as default — the system will automatically generate a journal based on the specified attributes. Automatically generated journals cannot be edited. |
Final tab configuration:
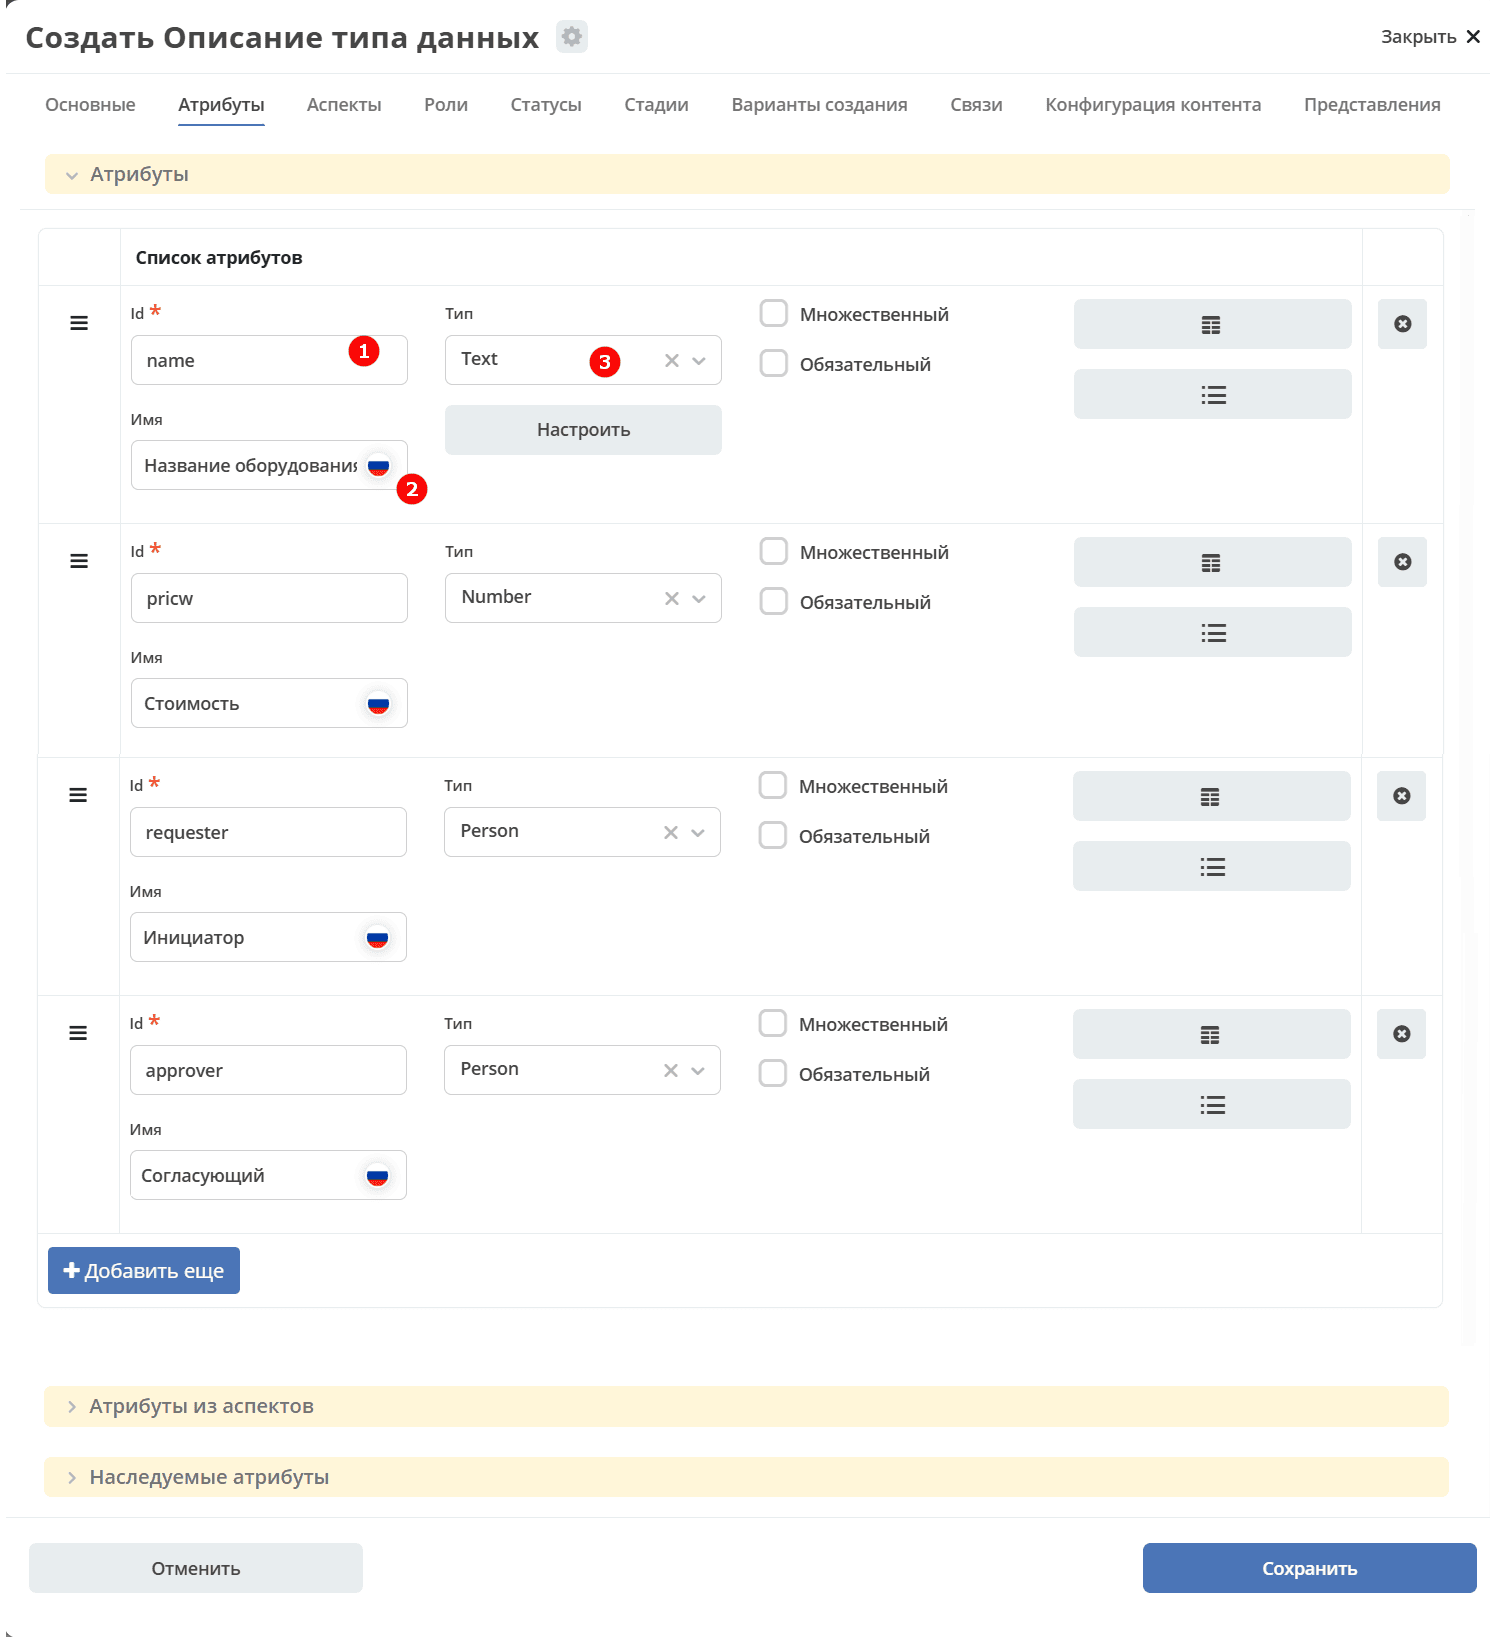
Attributes
The tab describes the properties that will be used to interact with the object.
The following information is required to create a request:
what needs to be purchased;
how much it costs;
who is requesting it;
who will approve the purchase.
The corresponding attributes (object properties):
Id (1) |
Name (2) |
Type (3) |
|---|---|---|
|
Equipment Name |
Text |
|
Cost |
Number |
|
Initiator |
Person |
|
Approver |
Person |
Final tab configuration:
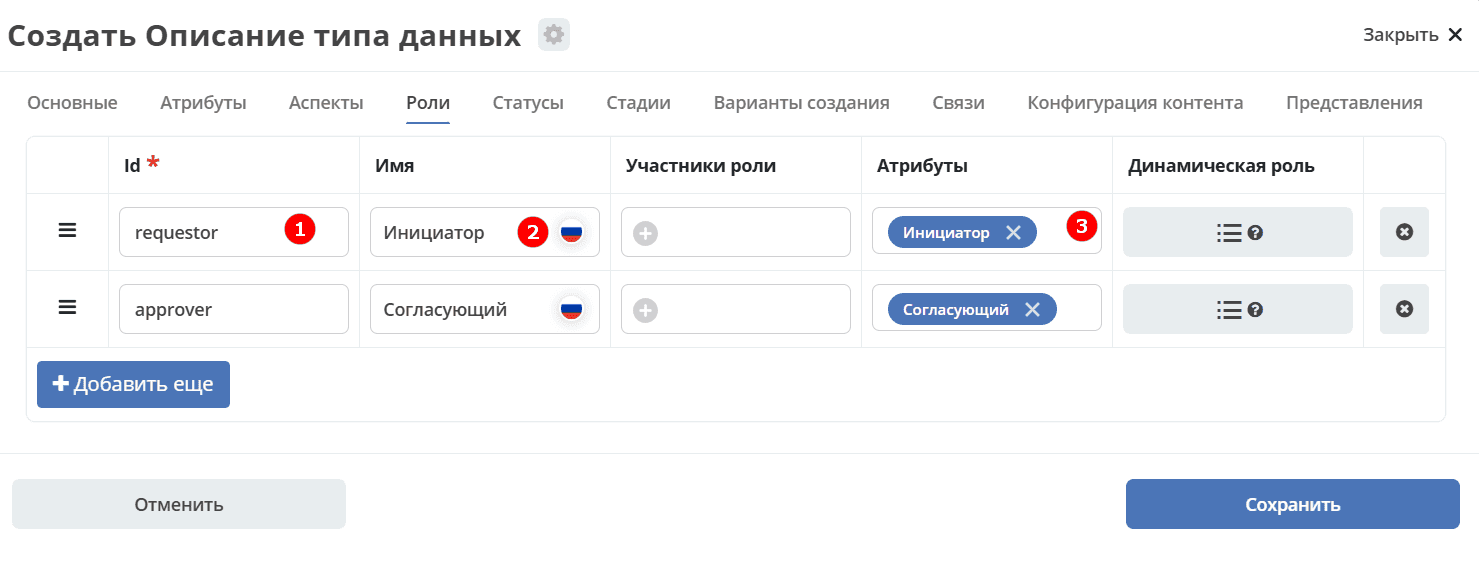
Roles
The tab describes the roles involved in working with the object — in this case, with the request.
Based on the attributes, two roles are required: Initiator and Approver.
Note
The Attribute field is populated from the attributes added on the «Attributes» tab. Clicking the field displays the list of available attributes.
Id (1) |
Name (2) |
Attribute (3) |
|---|---|---|
|
Initiator |
Initiator |
|
Approver |
Approver |
Final tab configuration:
Statuses
The tab describes the statuses through which the object (request) will move during the business process.
Let’s consider a simple successful scenario: the initiator creates a request (status «Request Created»), sends it for approval (status «Pending Approval»), and the approver approves it (status «Approved»).
Id (1) |
Name (2) |
|---|---|
|
Request Created |
|
Pending Approval |
|
Approved |
|
Rejected |
Final tab configuration:

Click «Save». The basic data type for the request has been created.
Intermediate Summary
As a result of configuring the data type:
basic information has been specified: the data type id and name;
the form and journal were automatically generated by the system based on the entered data;
the request properties for further interaction have been described;
the roles of request participants have been added;
the request lifecycle statuses have been defined.
The «Equipment Purchase Request» journal has been automatically added to the menu.
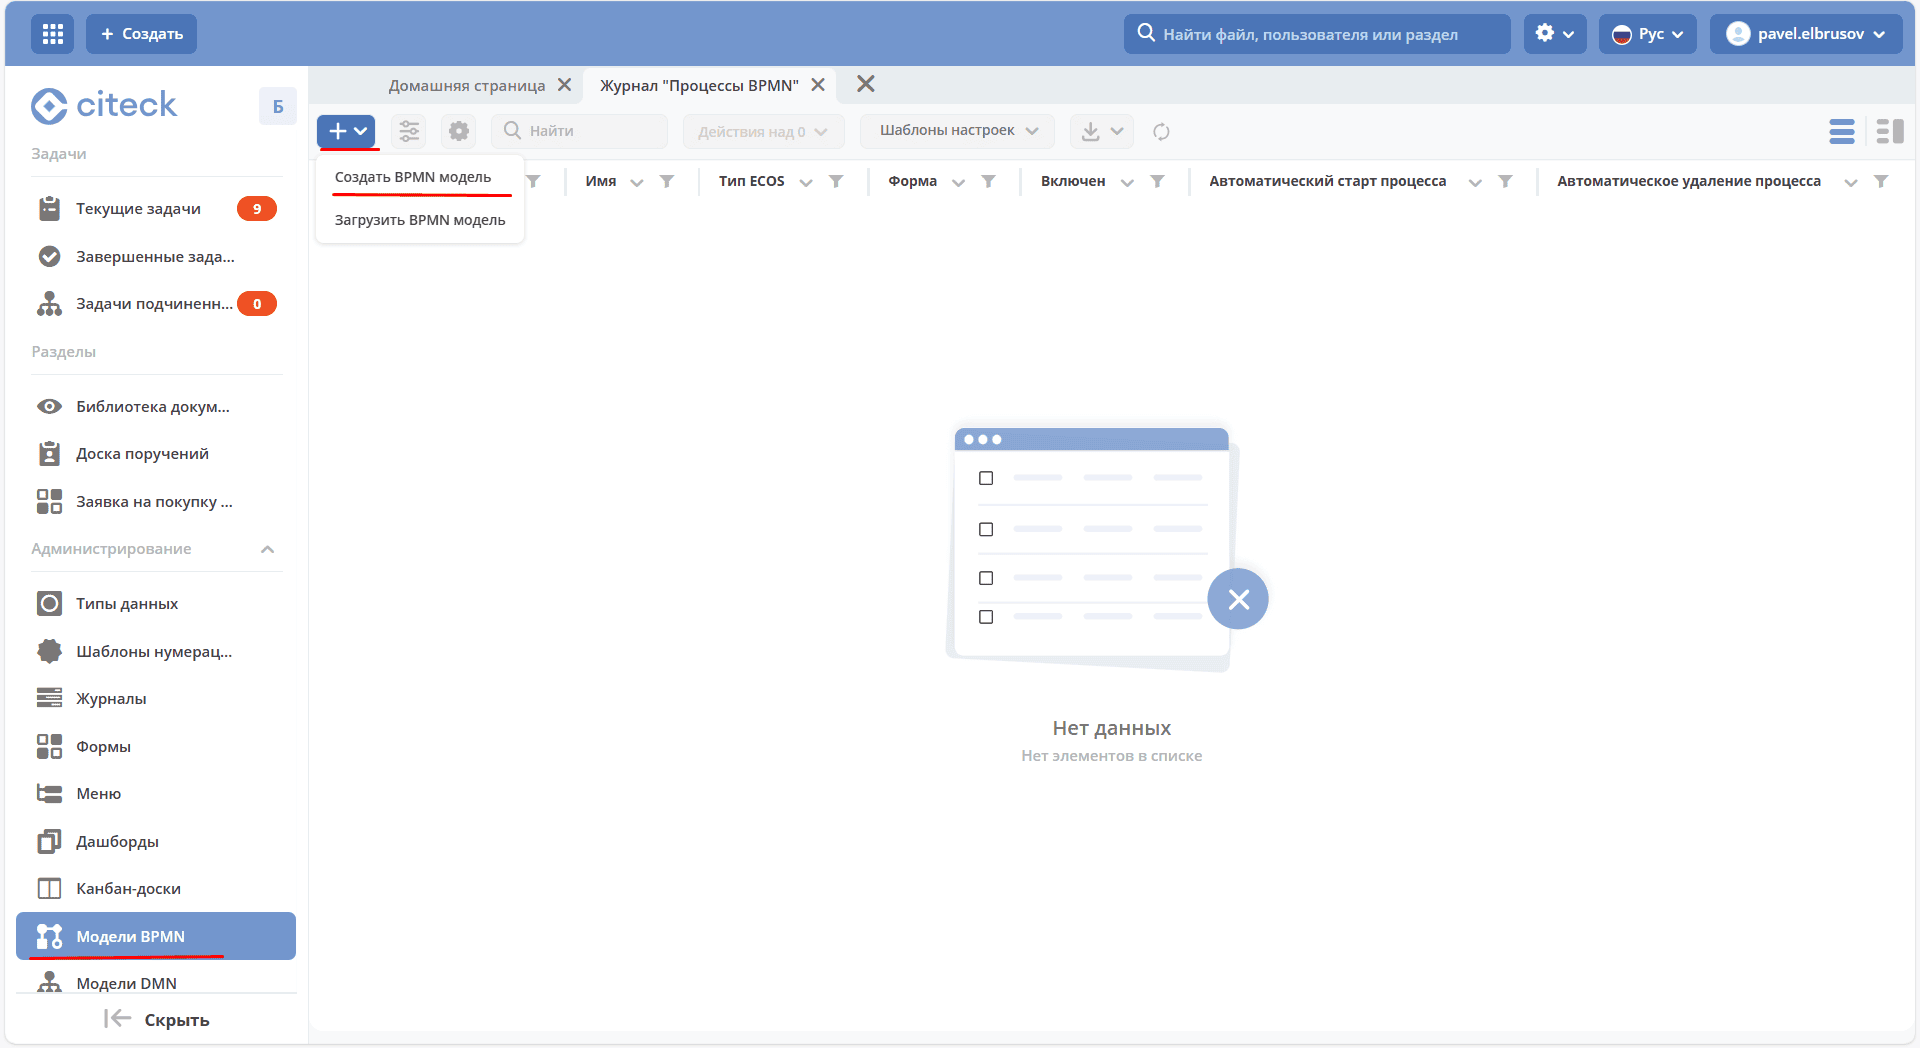
BPMN Models
In the Administration section, go to BPMN Models and click + → Create BPMN model:
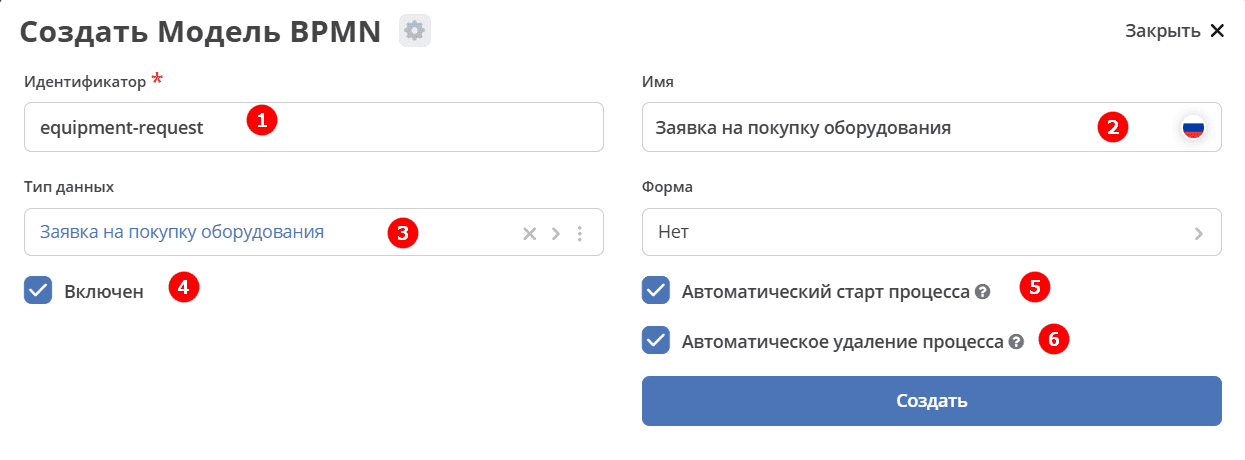
In the opened modal window, fill in the fields:
No. |
Field |
Value |
|---|---|---|
1 |
Identifier |
|
2 |
Name |
Equipment Purchase Request |
3 |
Data Type |
|
4 |
Enabled |
True — marks the process as active |
5 |
Automatic Process Start |
Check the box so that the process starts automatically. For details, see process start |
6 |
Automatic Process Deletion |
When an object of the specified type is deleted, the process will be deleted automatically. Enabled by default. |
Note
Be sure to check the Enabled (4) and Automatic Process Start (5) boxes.
Final business process configuration:
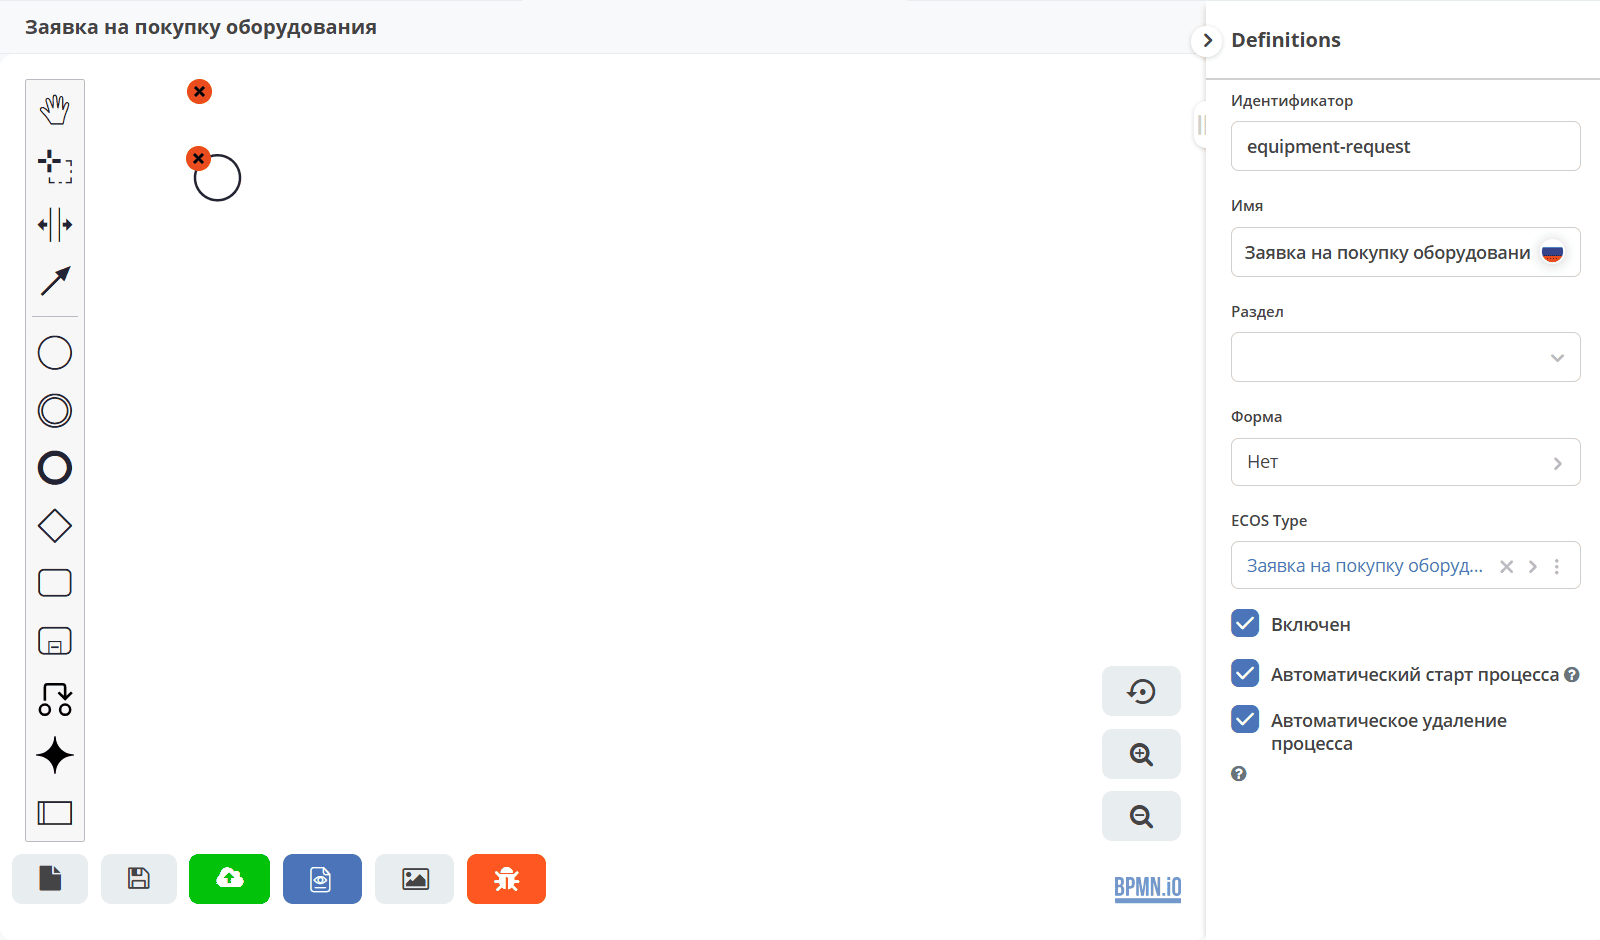
Click «Create». The business process designer will open:
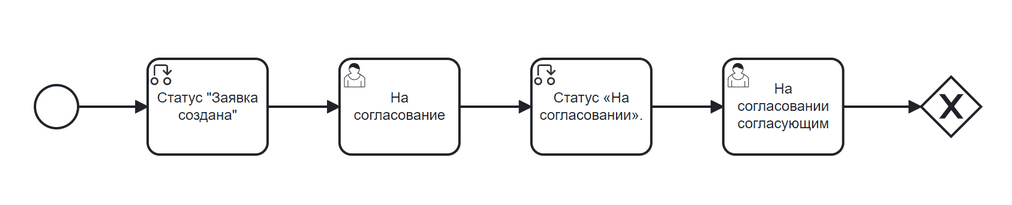
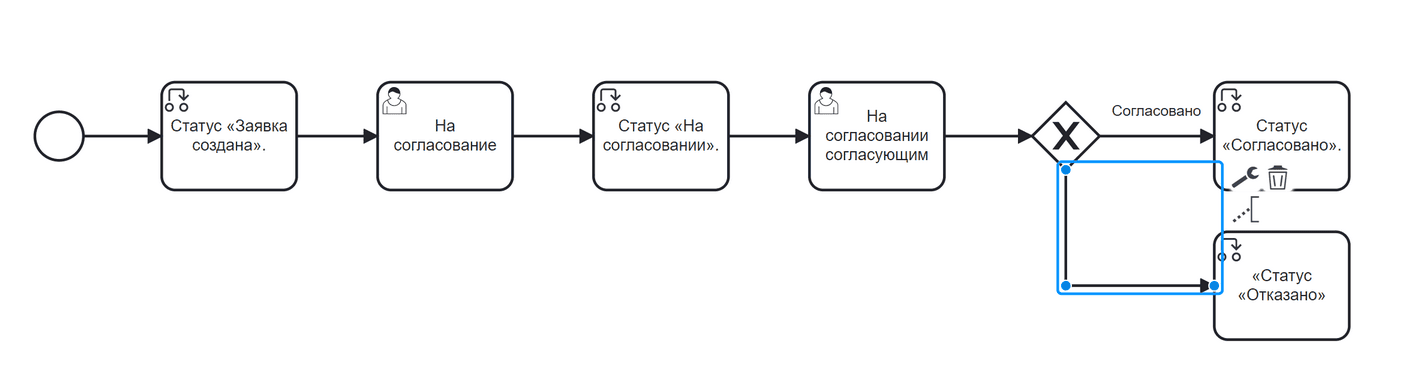
We will describe the process diagram in the business process editor. The request route:
Create Request → Send for Approval → Approve / Reject Request
Step 1. Start Event
The process start element — Start Event — is automatically added to the diagram. It monitors the appearance of a new object with the required data type in the system.
Select Start Event — a context menu will open next to the element for adding new elements, configuring connections, or editing the current element.
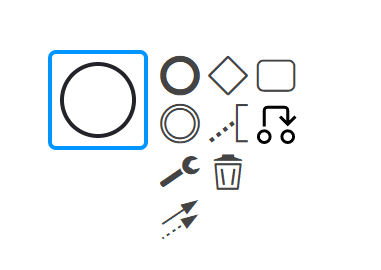
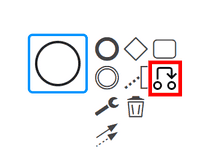
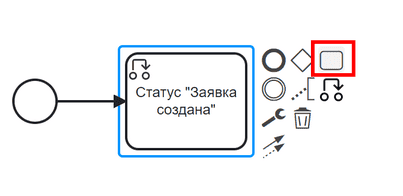
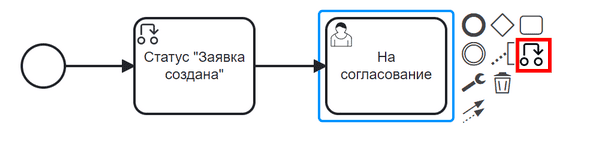
Step 2. Status Change — «Request Created»
Immediately after creation, the request must receive the «Request Created» status. In the context menu, click the Set Status element:
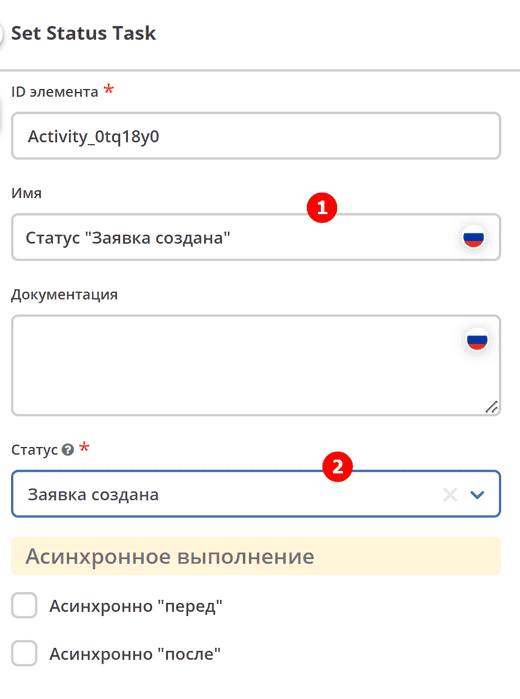
In the settings panel on the right, specify:
Name — Status «Request Created»;
Status — Request Created.
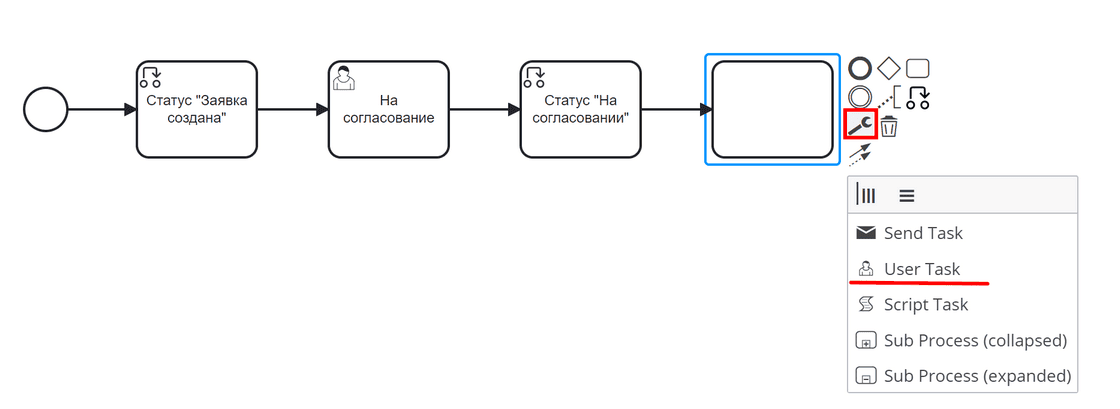
Step 3. User Task — Initiator’s Task
When the request is created, the initiator must review its contents and send it for approval. To do this, create a user task.
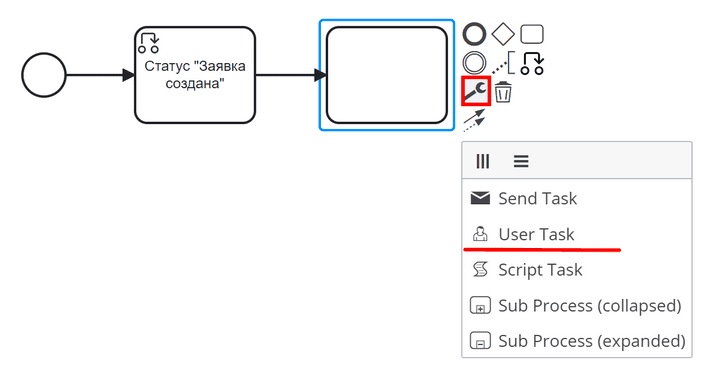
In the context menu, click the Task element:
The element type must be changed from «Task» to User Task. Click the wrench icon and select «User Task»:
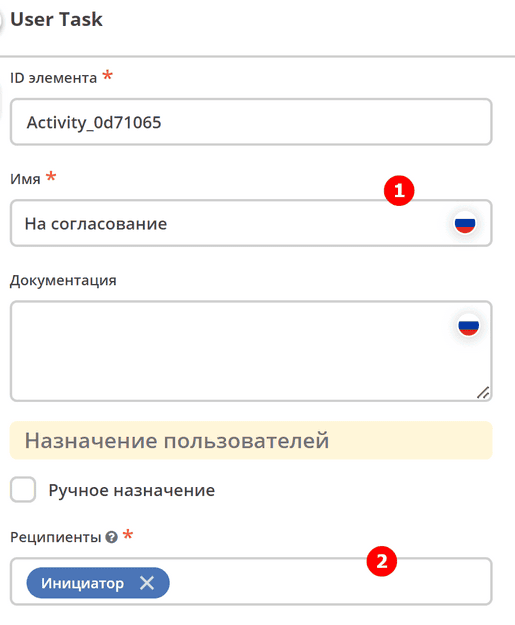
In the settings panel, specify:
Name — For Approval;
Assignee — Initiator.
Note
A form for the task does not need to be created manually — the system will automatically generate a simple form with buttons configured in the Task Outcome field.
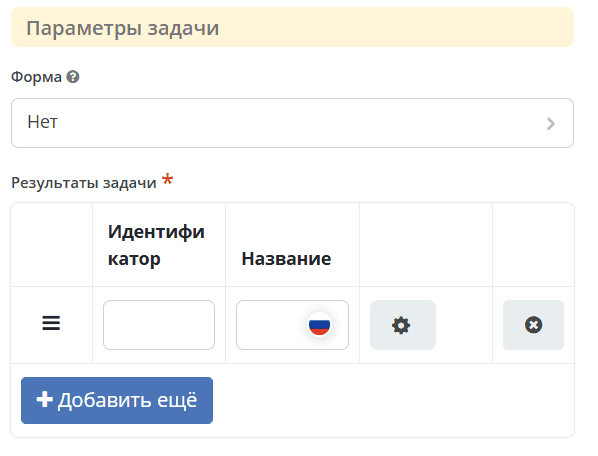
The default Priority is Medium.
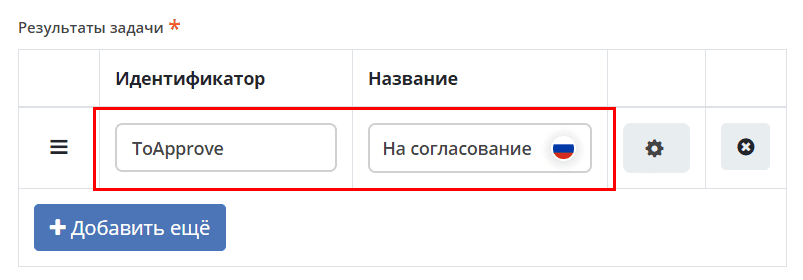
In the «Task Outcomes» list, specify:
Identifier —
ToApprove;Name — For Approval.
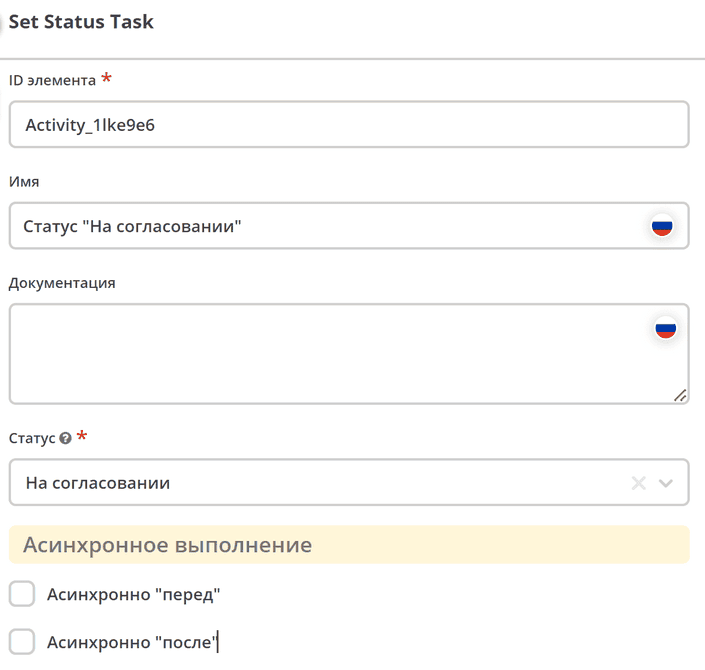
Step 4. Status Change — «Pending Approval»
After sending for approval, change the task status. In the context menu, click the Set Status icon:
In the settings panel, specify:
Name — Status «Pending Approval»;
Status — Pending Approval.
Step 5. User Task — Approver’s Task
Create a similar task for the approver.
Add a Task element via the context menu:
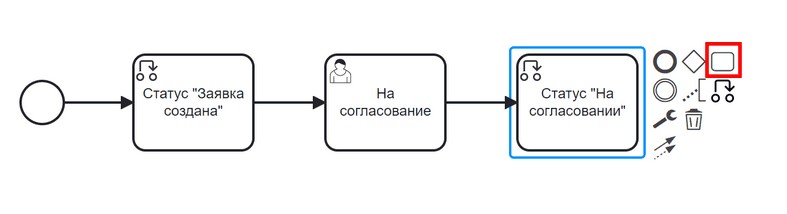
Change the element type from Task to User Task:
In the settings panel, specify:
Name — Pending Approval by Approver;
Assignee — Approver.
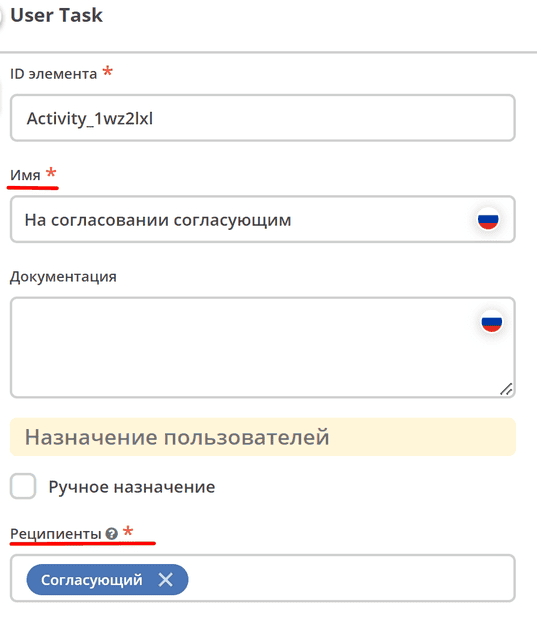
The default Priority is Medium.
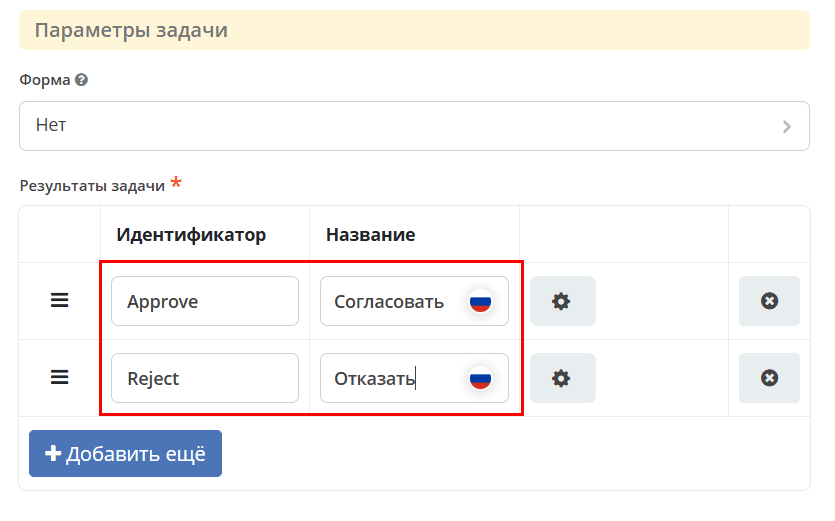
In the «Task Outcomes» list, specify two options:
Identifier —
Approve, Name — Approve;Identifier —
Reject, Name — Reject.
Note
A form for the task does not need to be created manually — the system will generate it automatically and display the verdicts from the Task Outcome field.
In this example, we will create a custom form to get acquainted with the form designer.
Forms for tasks usually contain comments and verdict buttons. In this case, the outcome buttons of the «Pending Approval» task are sufficient.
Steps to follow:
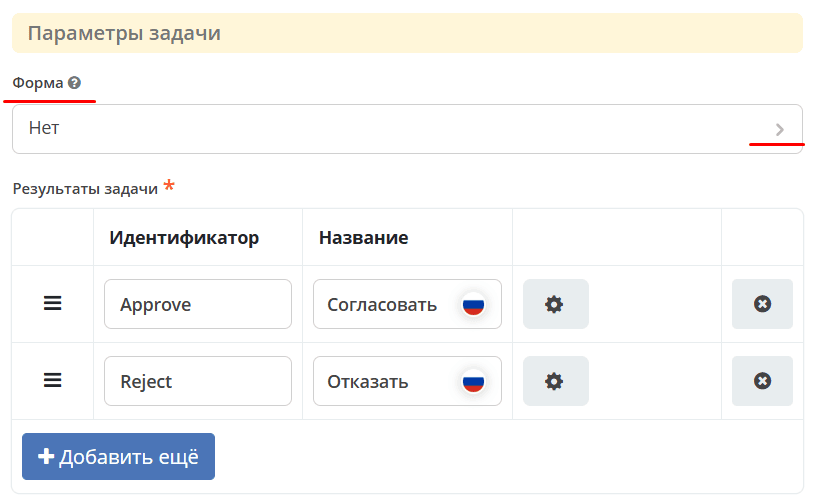
On the settings panel of the User Task element, click «Select» under the «Task Form» field:
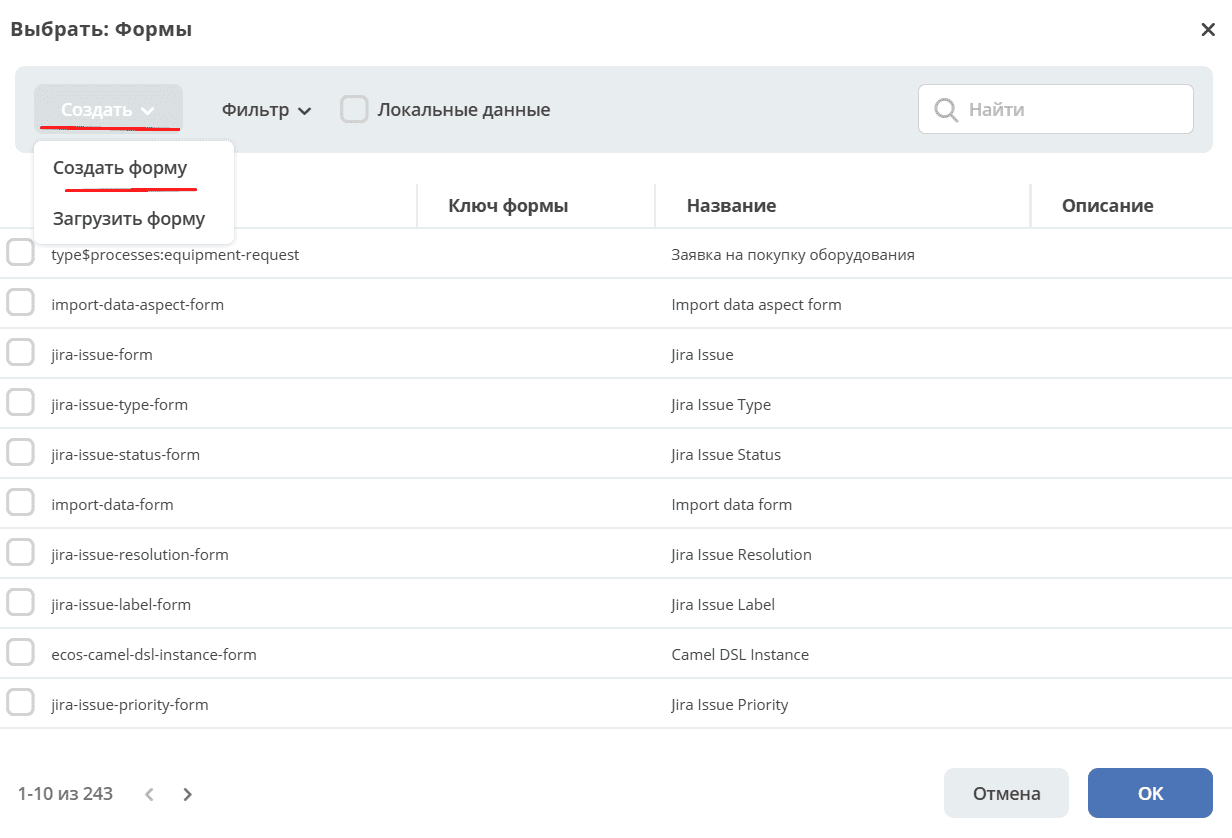
At the top, click «Create» and select «Create form»:
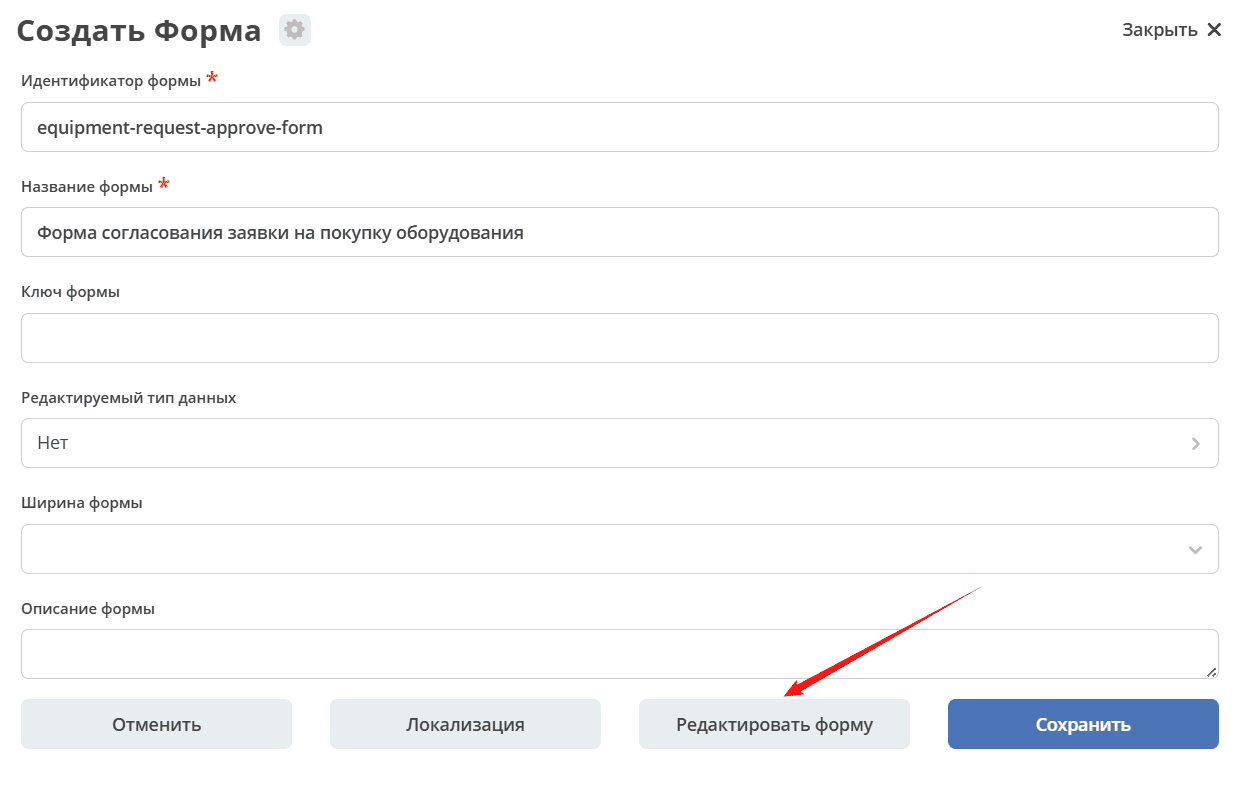
Fill in the fields:
Form identifier —
equipment-request-approve-form;Form name — Equipment Purchase Request Approval Form.
Click «Edit Form»:
Delete the «Title» text element and the buttons:

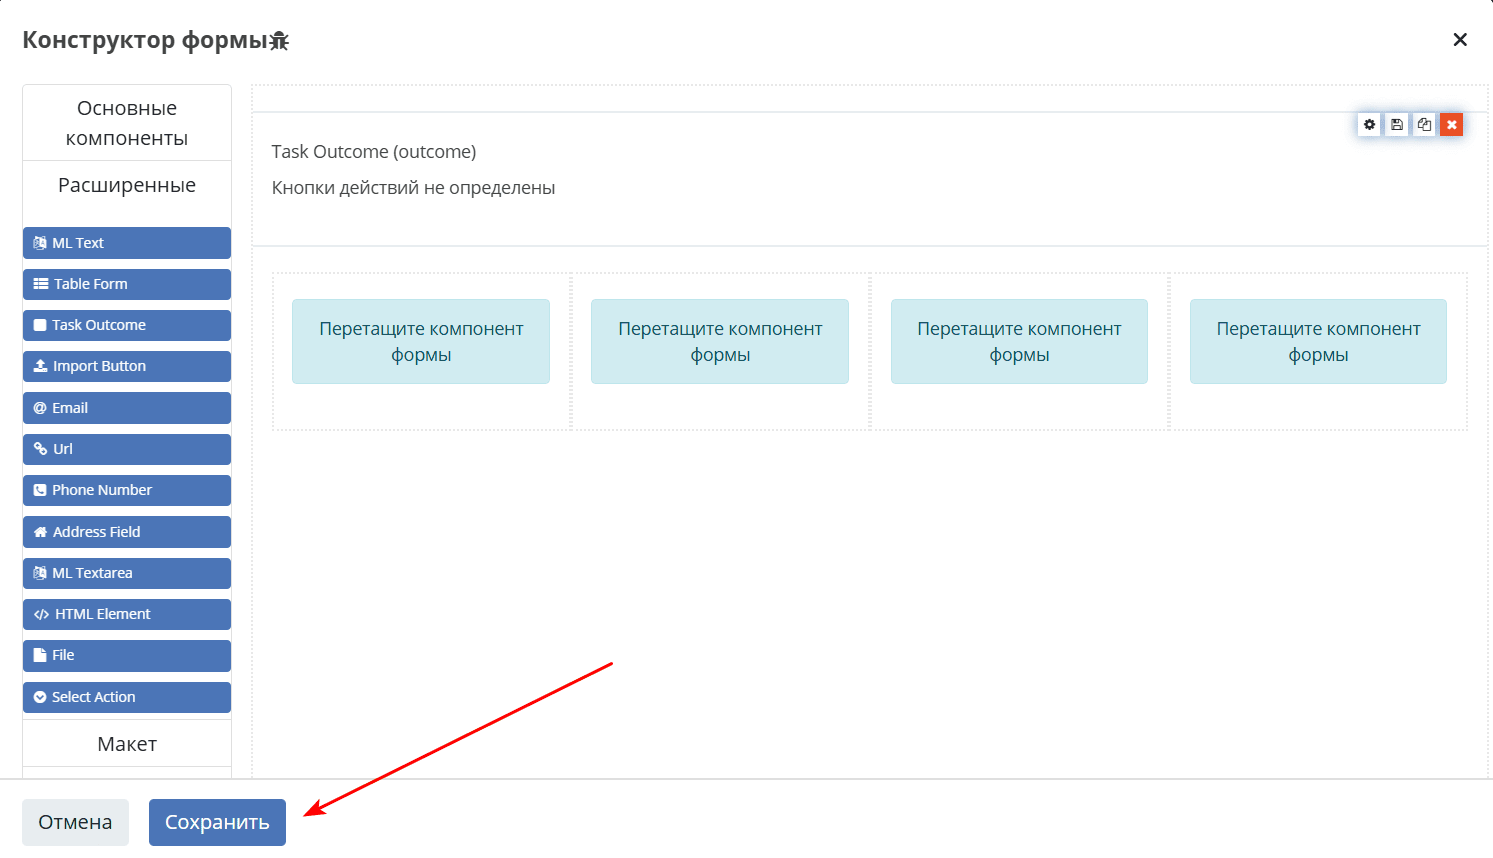
Go to «Advanced» and drag the Task Outcome element onto the form:

In the «Property name» field, enter
outcomeand click «Save»: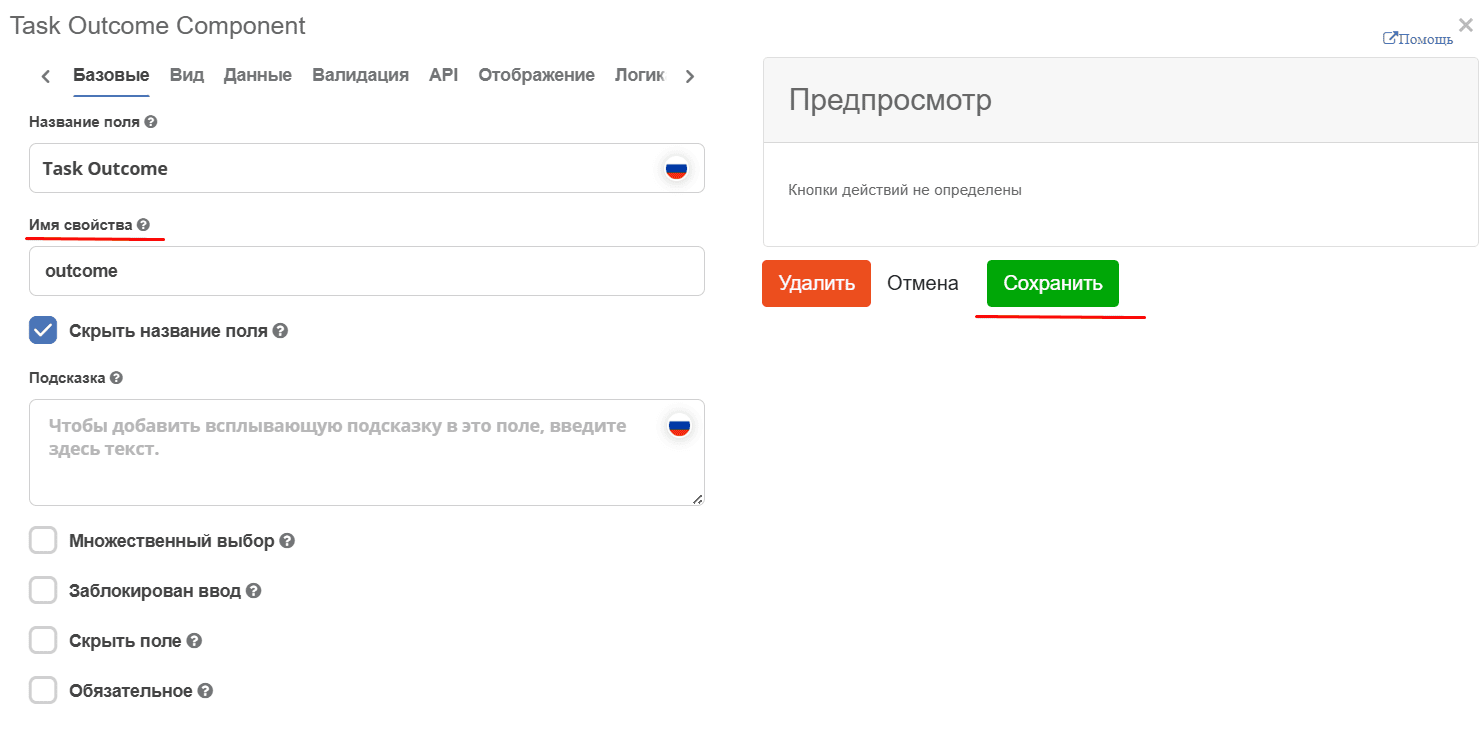
The Task Outcome element will automatically generate verdict buttons based on the Task Outcomes settings.
Click «Save»:
Select the created form.
Step 6. Gateway — Route Branching
After the approver completes their work, the process can take two paths: the request is approved or rejected. Add a branching element — Gateway.
Gateway controls the branching and merging of flows. Add it from the context menu or from the left panel:

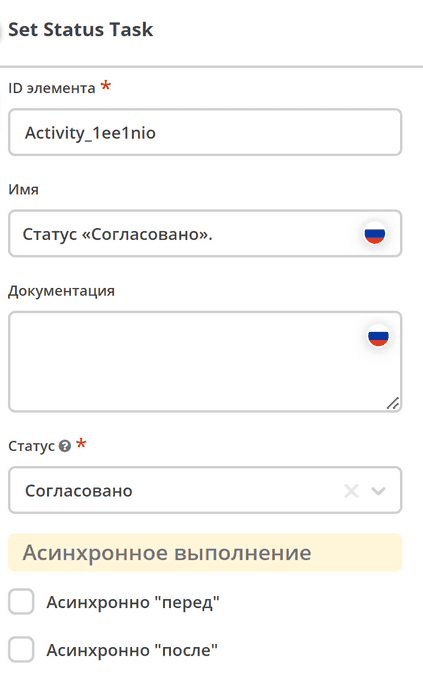
Step 7. Status Change — «Approved» and «Rejected»
Add two status change elements after the Gateway.
For the «Approved» status: in the Gateway context menu, click the Set Status icon:

Specify:
Name — Status «Approved»;
Status — Approved.
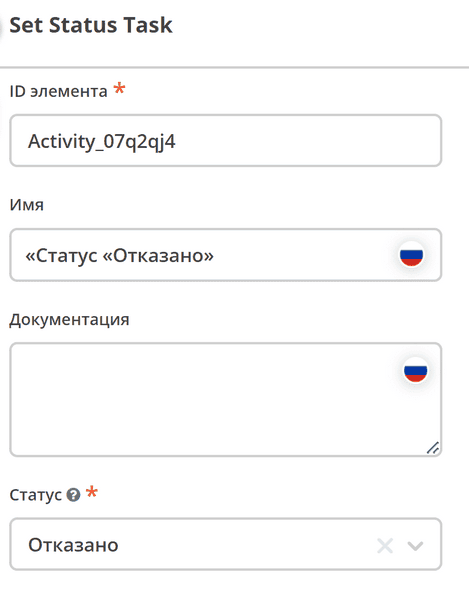
For the «Rejected» status: similarly add a second Set Status from the Gateway context menu:
Name — Status «Rejected»;
Status — Rejected.
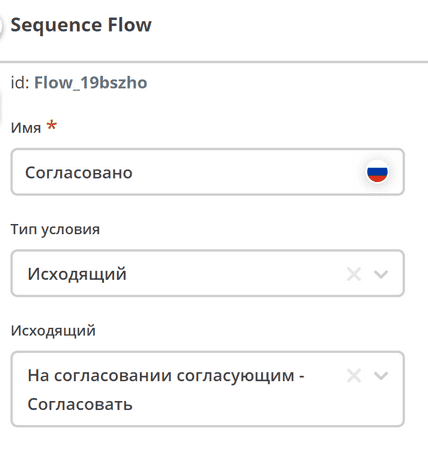
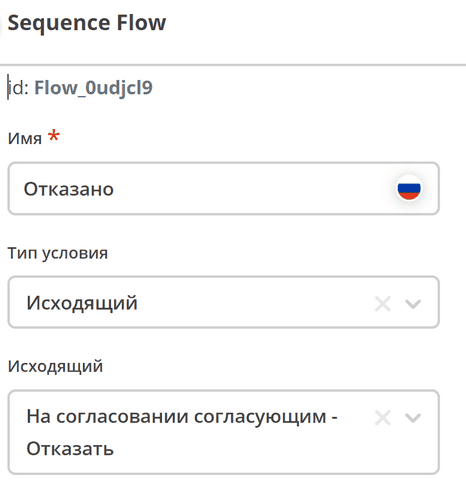
Step 8. Configuring Sequence Flows
The system determines the route based on conditions on the arrows (Sequence Flow) leaving the Gateway. Select the required arrow and configure the condition.
For the «Approved» flow:

Name — Approved;
Condition type — Outgoing;
Outgoing — Pending Approval by Approver - Approve.
Note
Options in the «Outgoing» field are generated automatically from two parts: the task name (the Name field) and the task outcome name.
For the «Rejected» flow:
Name — Rejected;
Condition type — Outgoing;
Outgoing — Pending Approval by Approver - Reject.
Step 9. End Event — Process Completion
Add a process end element End Event after each status change element — «Status «Approved» and «Status «Rejected».

Save and publish the process:

See also
Decision-making on a request can be automated using a decision table. See details.
Launching and Testing the Process
After creating the data type, journal, form, and business process, you can test the workflow.
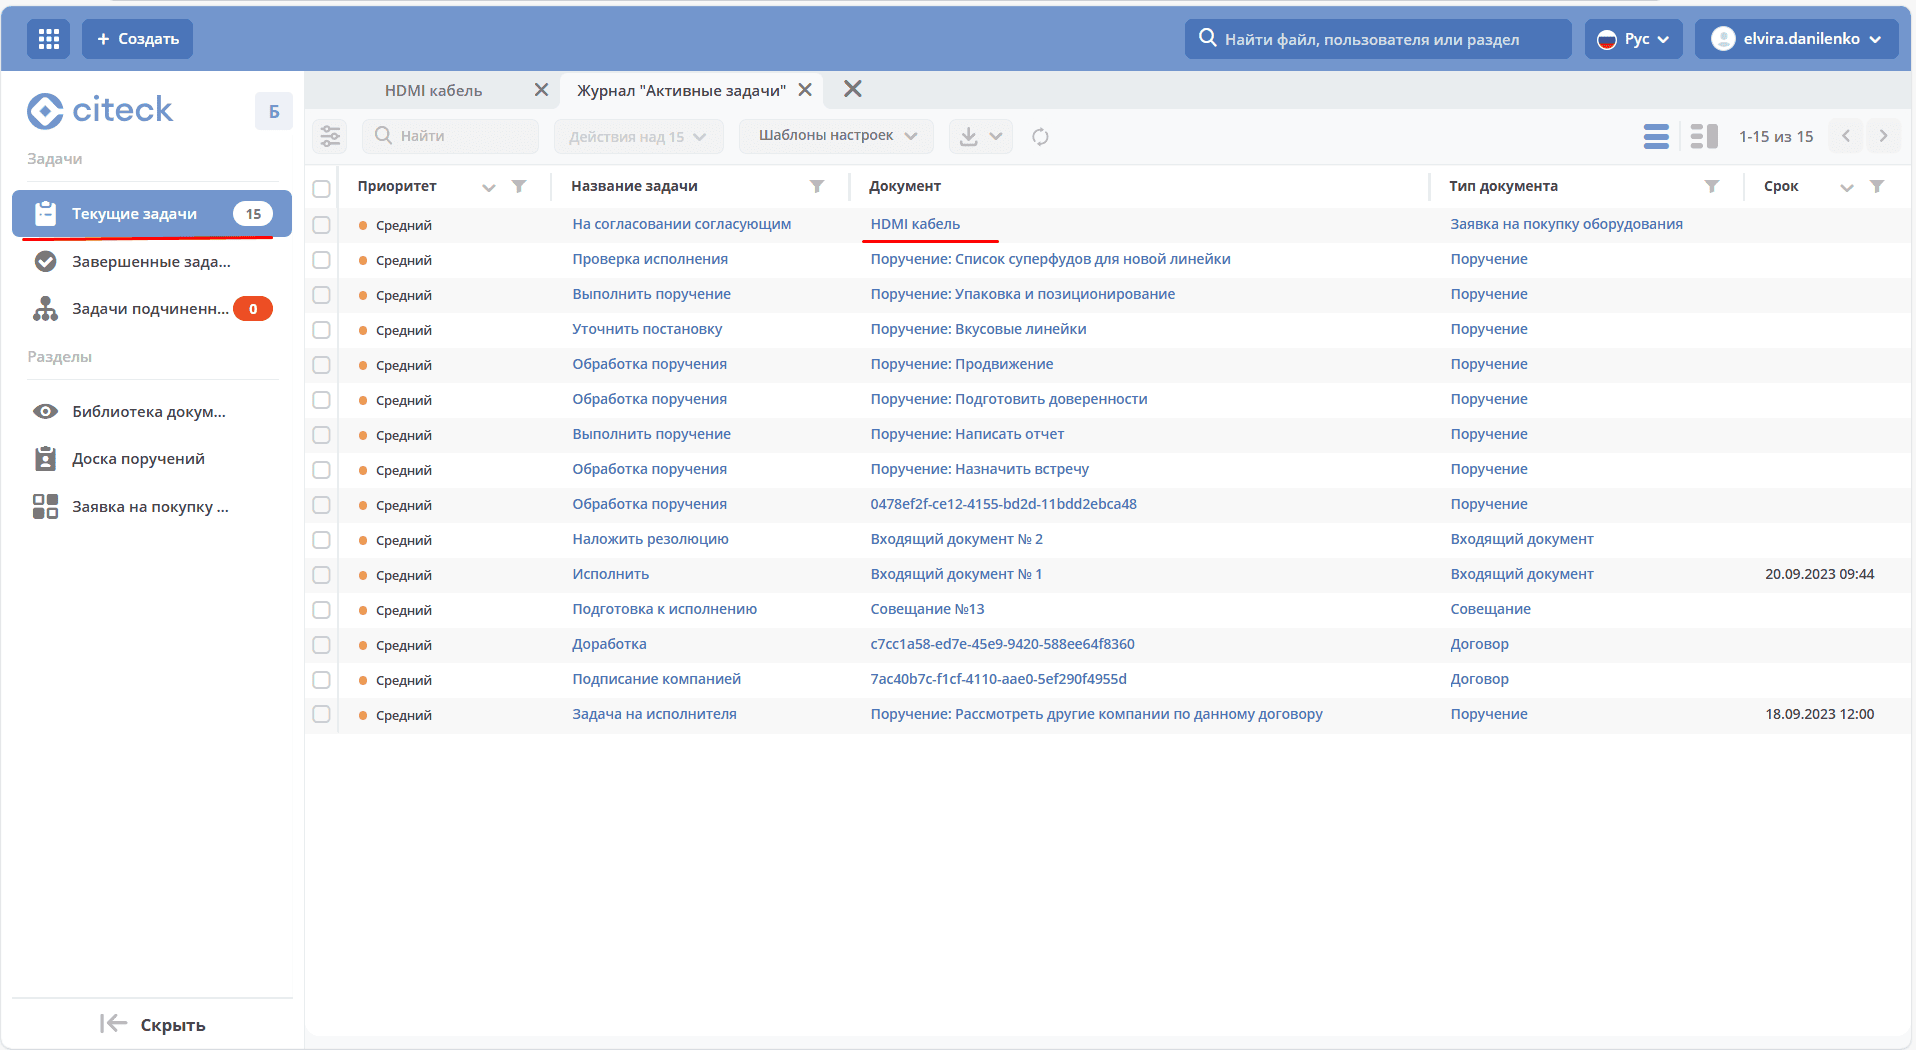
In the left menu, select «Equipment Purchase Request» — an empty journal will open. Click «+» to create a new request:
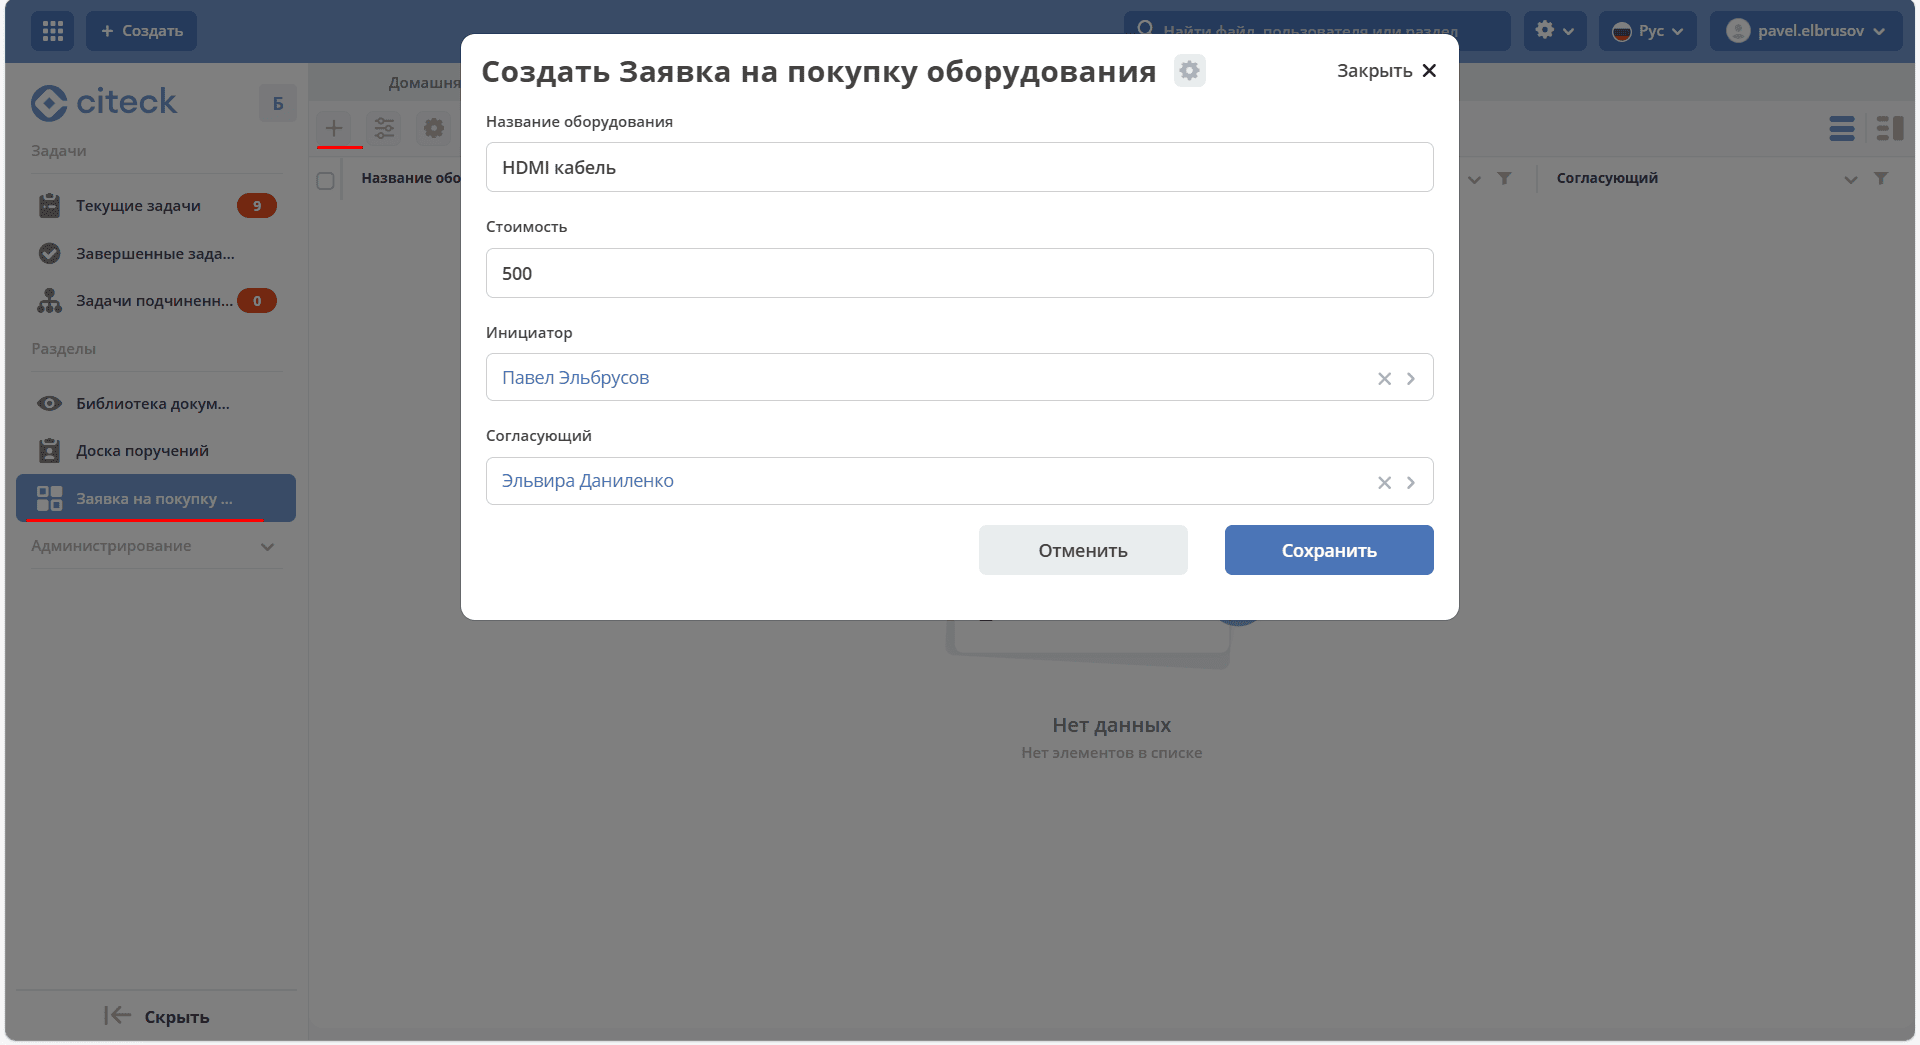
Fill in the fields, for example:
Equipment name — HDMI cable;
Cost — 500;
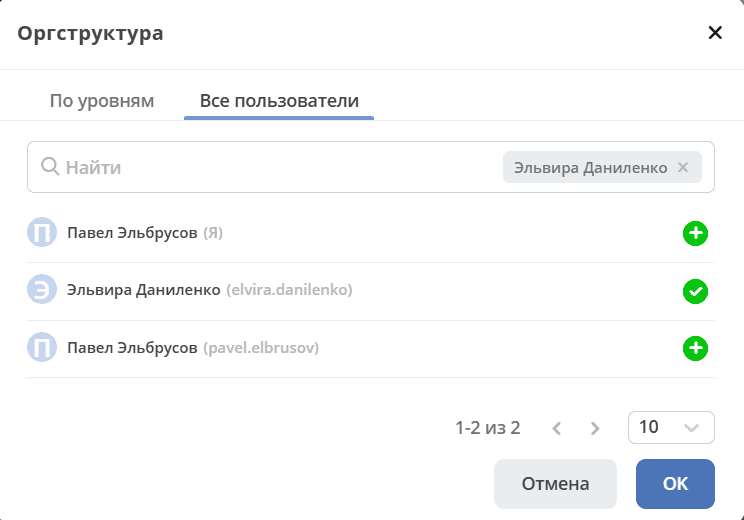
Initiator — select an employee from the org structure;
Approver — select an employee from the org structure (only workspace members are displayed on the All Users tab).
Click «Save». The request will transition to the «Request Created» status and its card will open.
In the «My Tasks» widget, click the «For Approval» button:
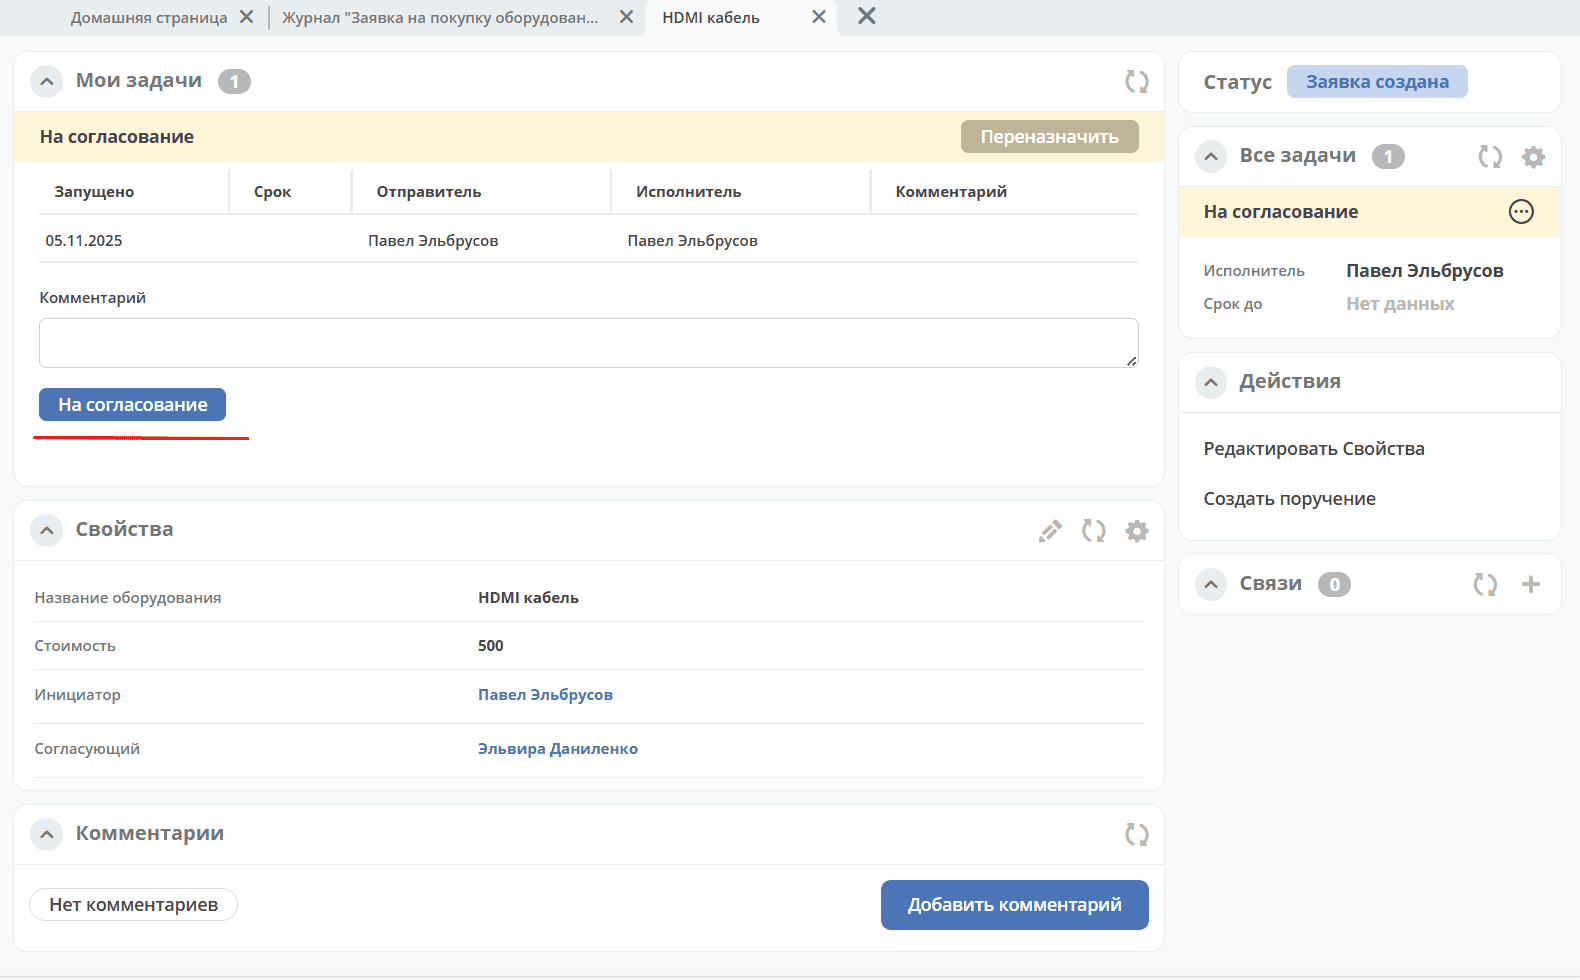
The request will transition to the «Pending Approval» status, and a task will be assigned to the approver.
Log in as the approver, open the personal workspace, go to Current Tasks, and open the task:
In the «My Tasks» widget, click «Approve»:
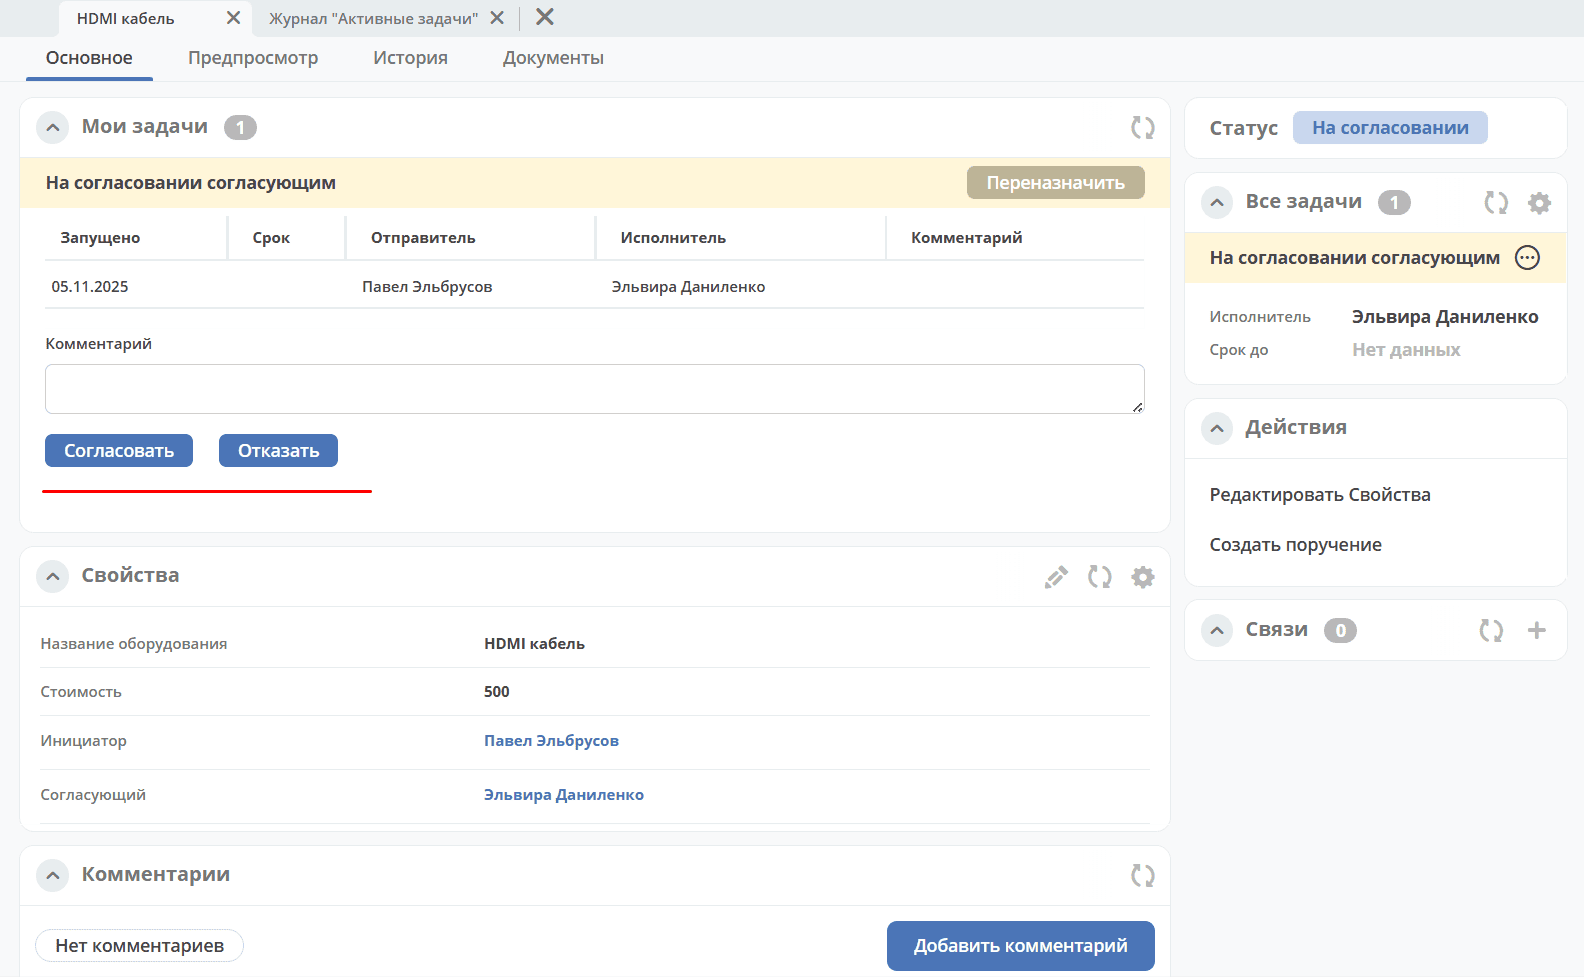
The request will transition to the «Approved» status — the process has been successfully completed.
DMN Models
Automatic Approval/Denial Decision
Let’s extend the created process: we will add a decision table for automatic approval or denial for certain types of equipment.
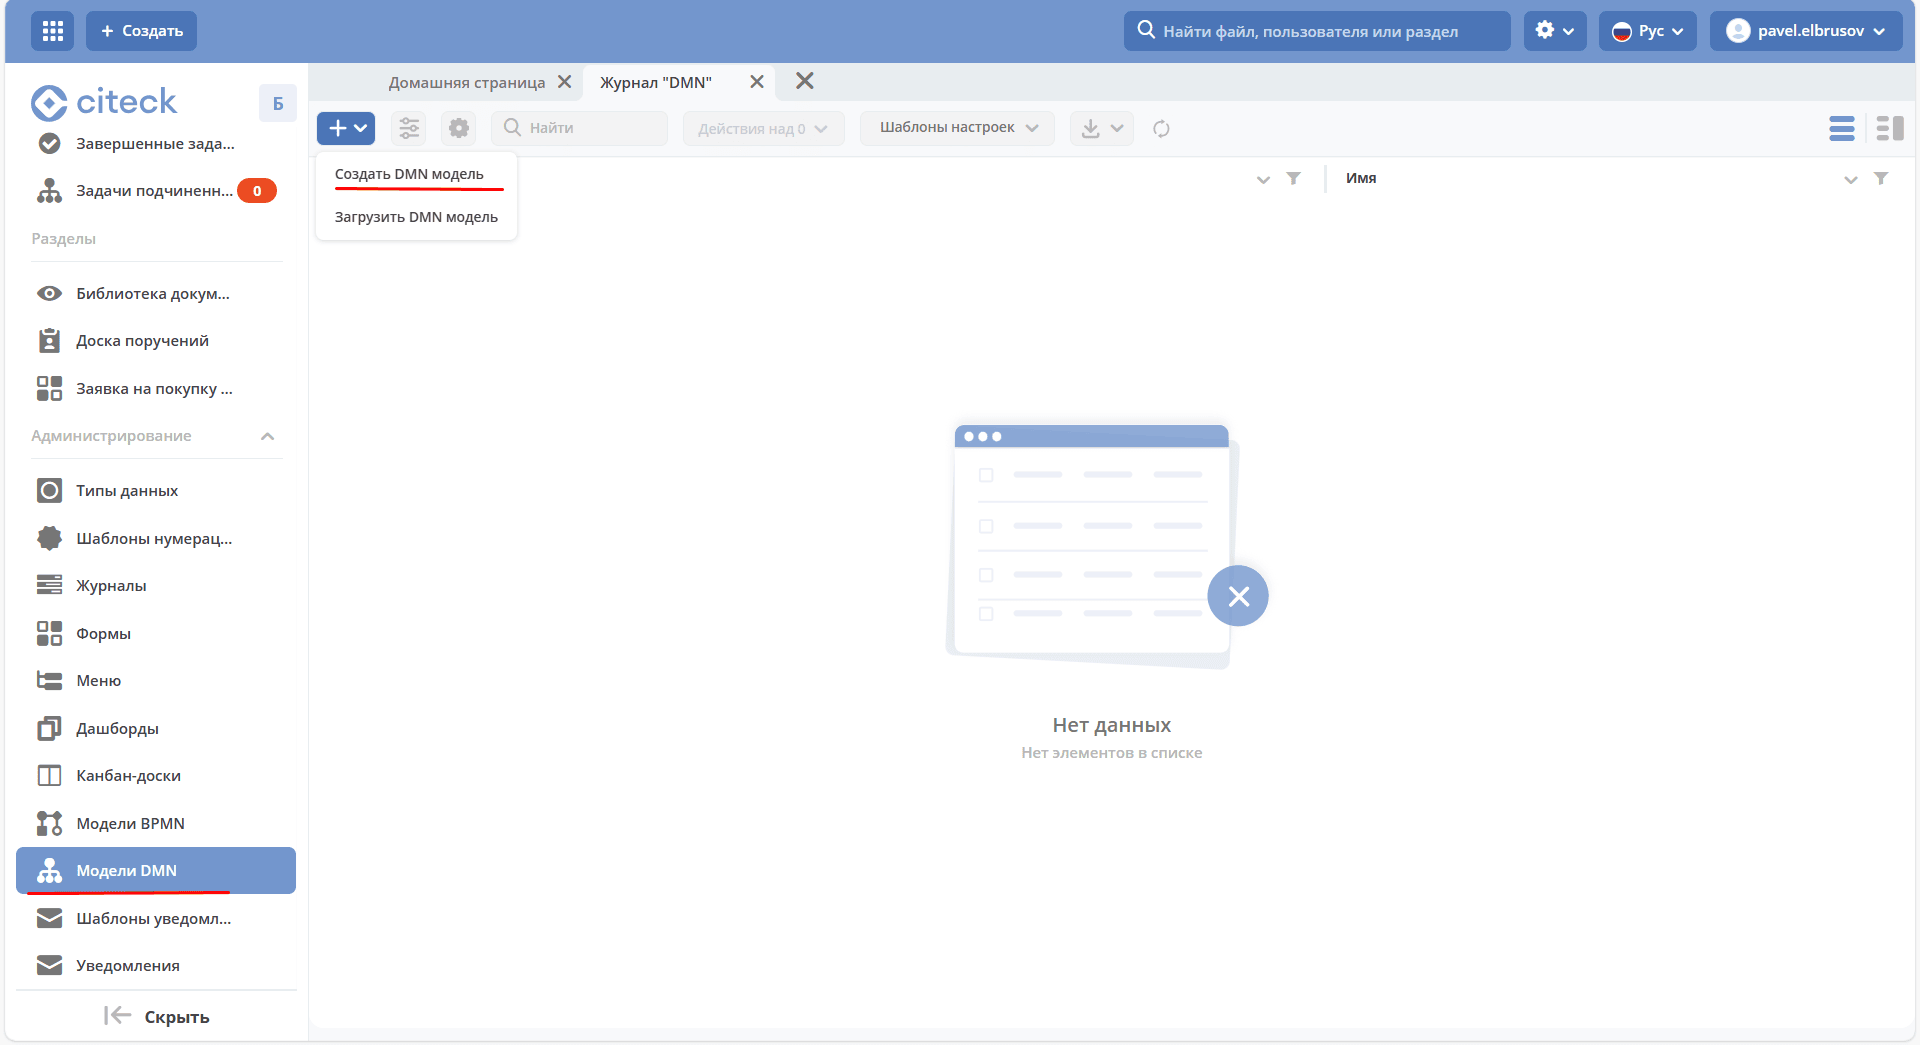
In the Administration section, go to DMN Models and click + → Create DMN model:
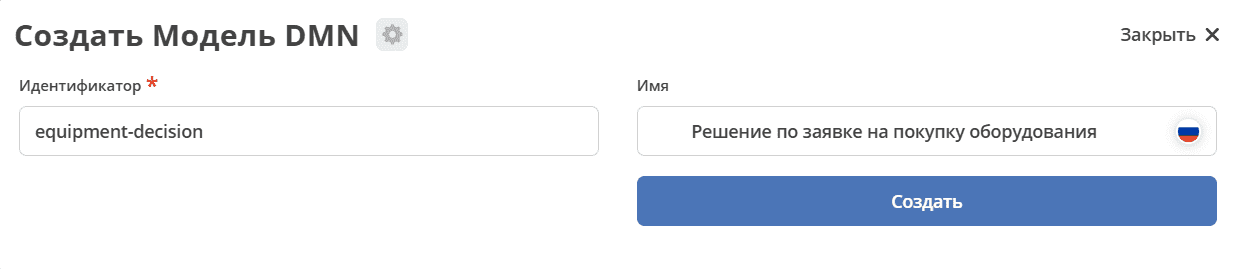
Fill in the fields:
No. |
Field |
Value |
|---|---|---|
1 |
Identifier |
|
2 |
Name |
Decision on Equipment Purchase Request |
Click «Create». The decision editor will open:
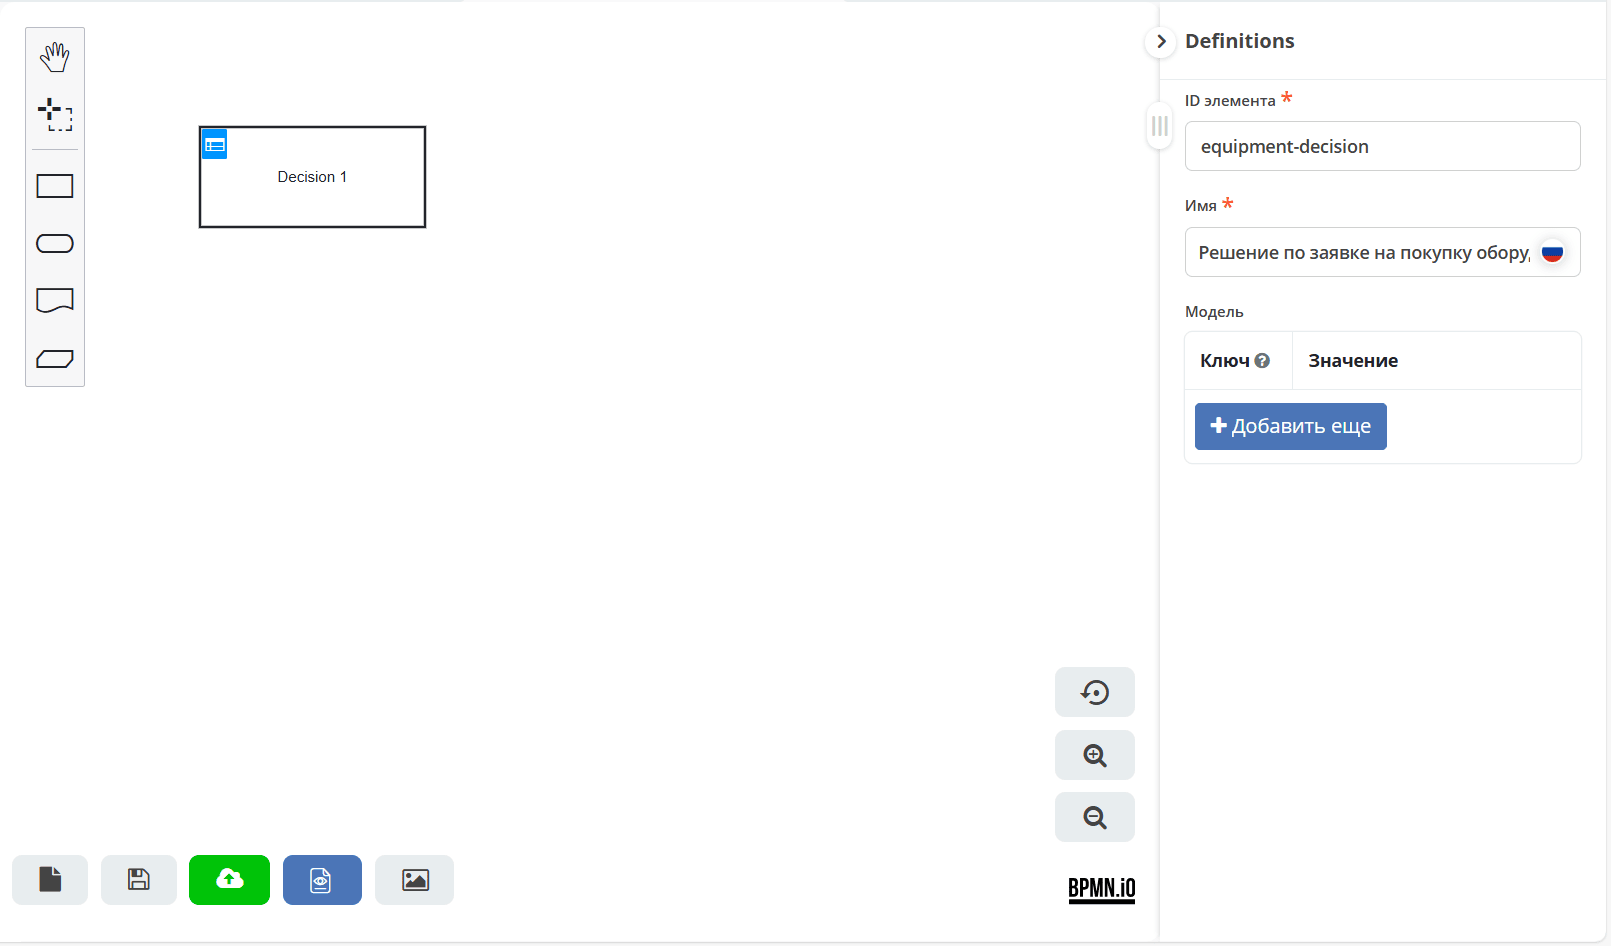
See also
Further steps are described in the article.
Using a DMN Dynamic Role in a Business Process
A dynamic role can be added to the process for automatic selection of an approver depending on conditions. The role rules are defined in a DMN table, and the role itself is configured in the data type.
See also
The procedure is described in the article.
ECOS Artifacts
«ECOS Artifacts» is designed to manage the created local artifacts. This journal includes all artifacts that have reached the ecos-apps microservice.
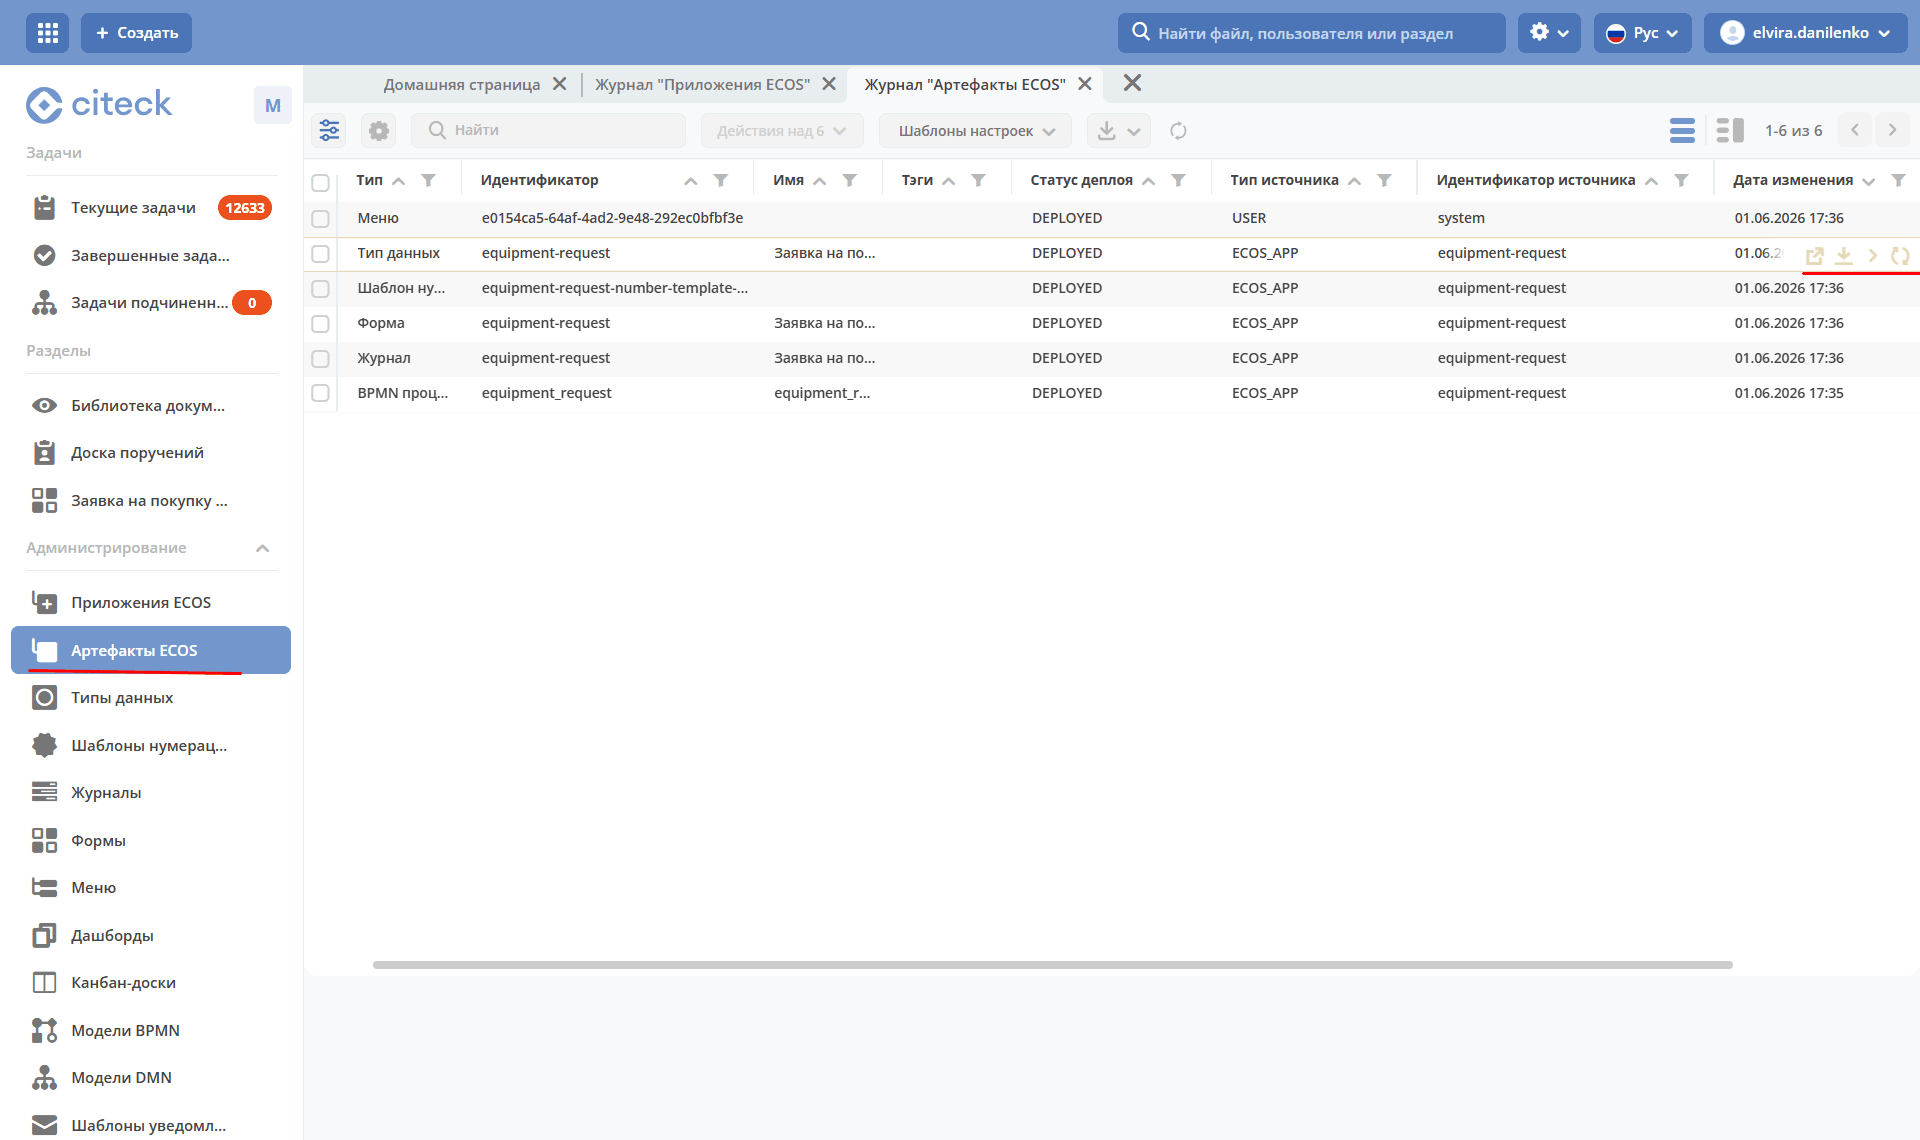
Available Actions
1. Download Artifact History
When clicking the action, you can select the date from which to export the artifact history.
A zip archive is downloaded containing all artifact versions from the specified date.
If the last artifact was uploaded before the selected date, only that version will be exported (i.e., there will always be at least 1 artifact).
2. Download Artifact
A zip archive with the selected artifact is always downloaded.
3. Redeploy Artifact Manually
Sends the artifact from ecos-apps to the microservice. Can be useful during development or after a failure in the target microservice’s database, i.e., ecos-apps does not pass the artifact if it was previously successfully deployed.
4. Reset User Version of Artifact
The reset reverts to the version installed from the application (APPLICATION or ECOS_APP). Only artifacts with USER in the Source Type column can be reset.
See also
For details about artifacts and their sources, see the article.
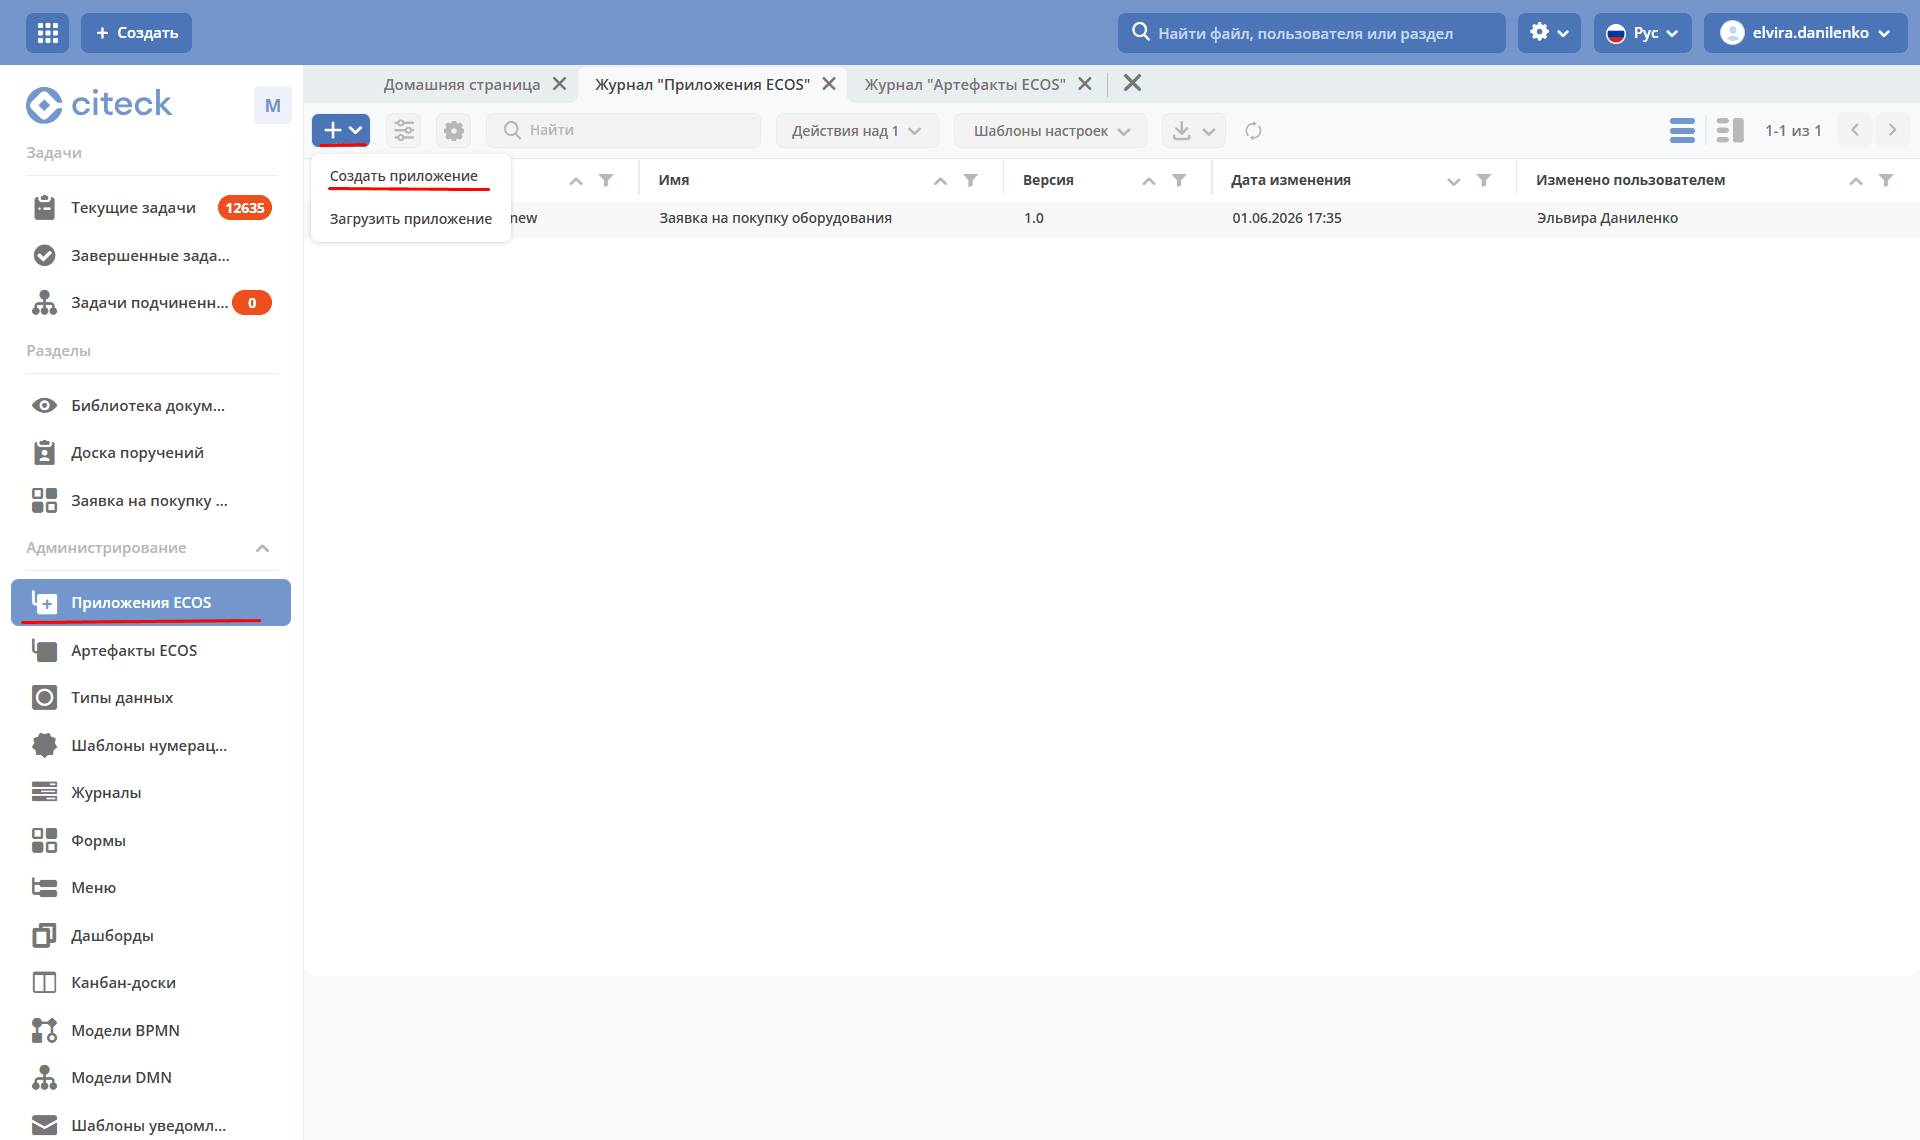
Packaging an Application for Artifact Transfer
In the workspace, go to the Administration section, select ECOS Applications, and click + — Create Application:
Fill in the fields in the form that opens:
Id — application identifier.
Name — application name.
Select all created data types for the “Equipment Purchase Request” process.
Click «Load Artifacts for Selected Types» — the artifact list will be populated automatically.
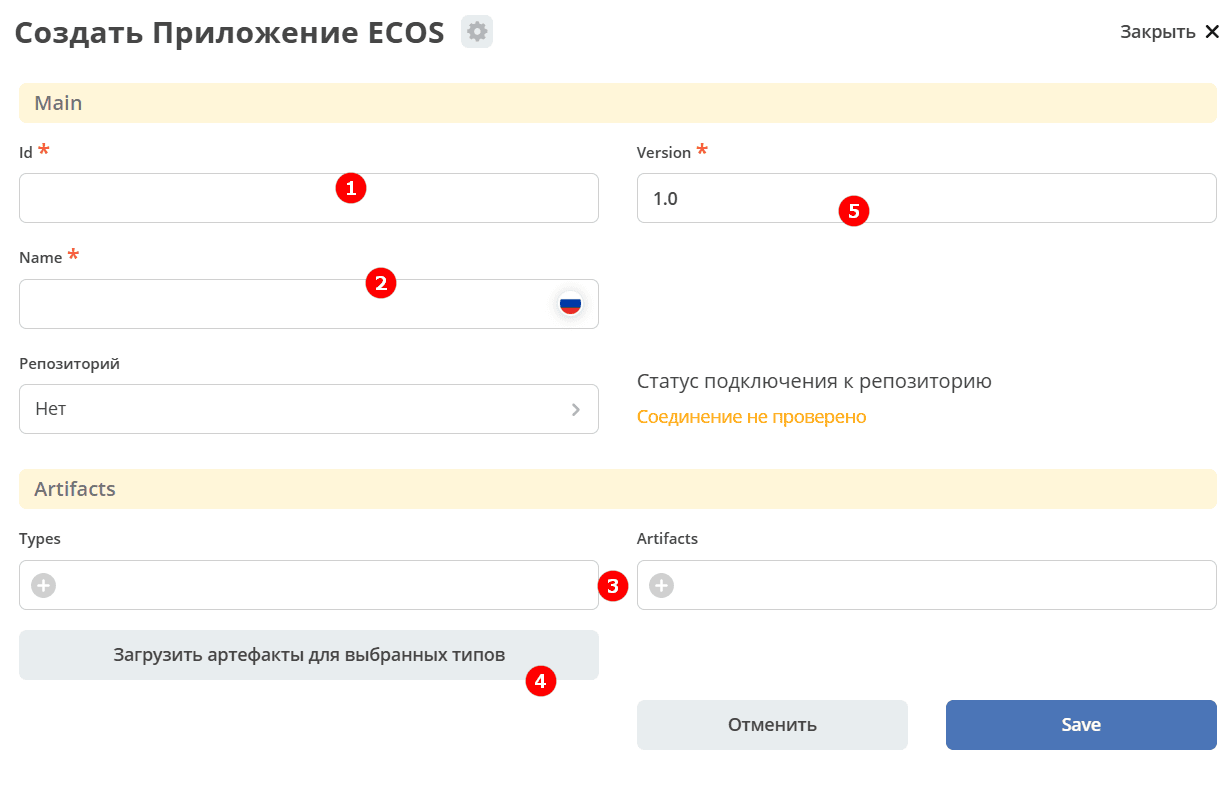
If necessary, add items to the list manually by clicking +.
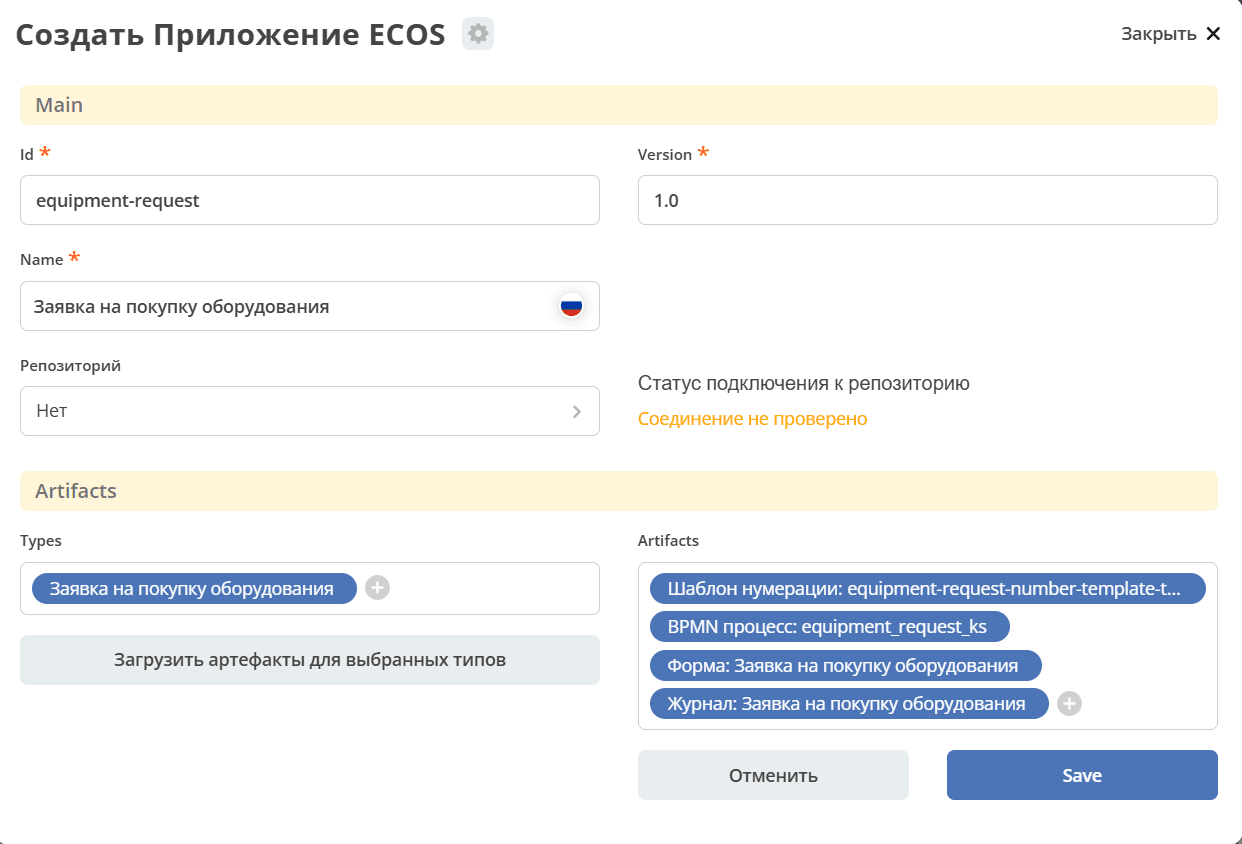
Click Save.
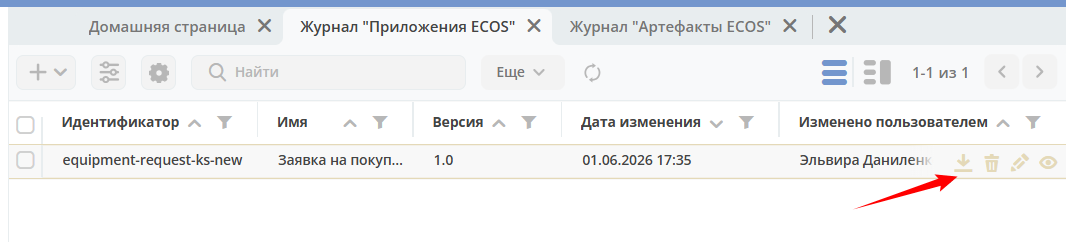
Downloading the Application
To download the application archive, click the download button next to the required application:
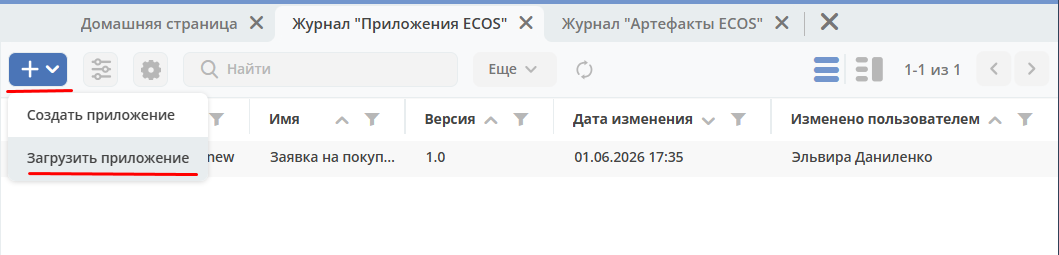
Uploading to Another Environment
To upload the application to another workspace, click + — Upload Application:
See also
For details about applications, see the article.