Extending the Equipment Purchase Request Process: Using a DMN Dynamic Role in a Business Process
Note
This article is a continuation of working with the Equipment Purchase Request business process.
If you are continuing from the article Equipment Purchase Request Process. Adding a Reference Book. Non-default Journal and Form, delete the Script task “Save Comment”.
Use users from the demo dataset or add users as described in the article Creating users for Citeck Community.
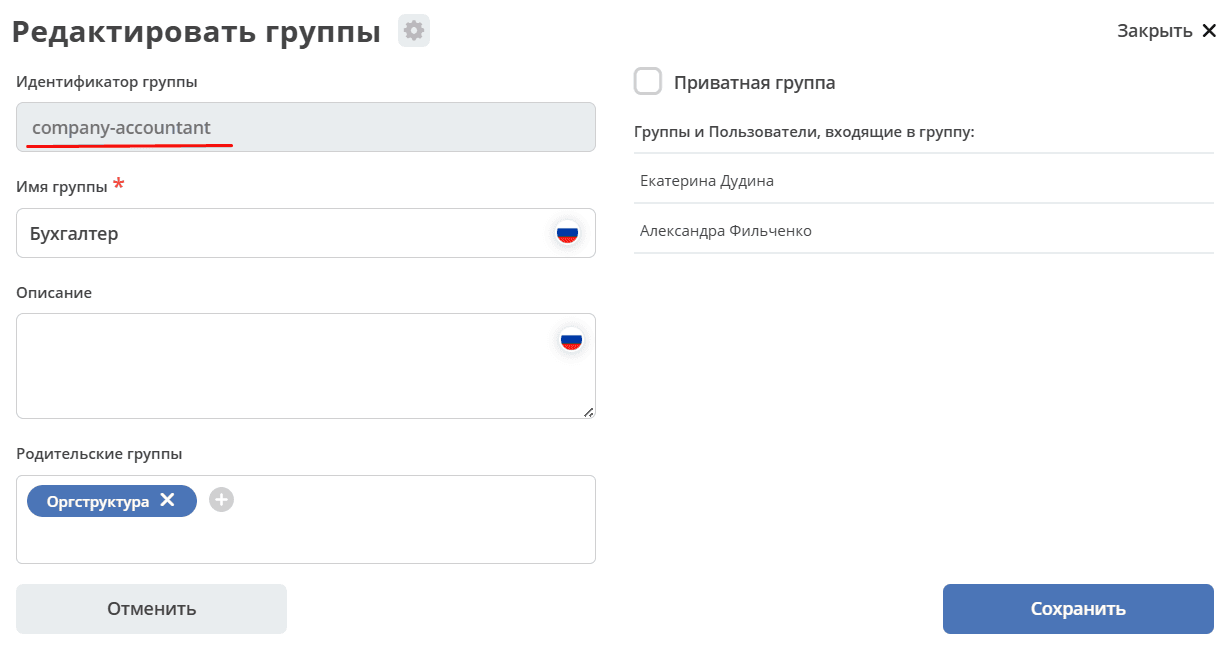
Use groups from the demo dataset or add groups as described in Creating a group.
In this example, we will add a dynamic role using the DMN table for equipment purchase approval. Depending on the conditions specified in the DMN table, the approver role will be calculated automatically.
To do this:
Create a decision table (DMN).
Add a DMN dynamic role for the approver in the data type.
DMN Table
Note
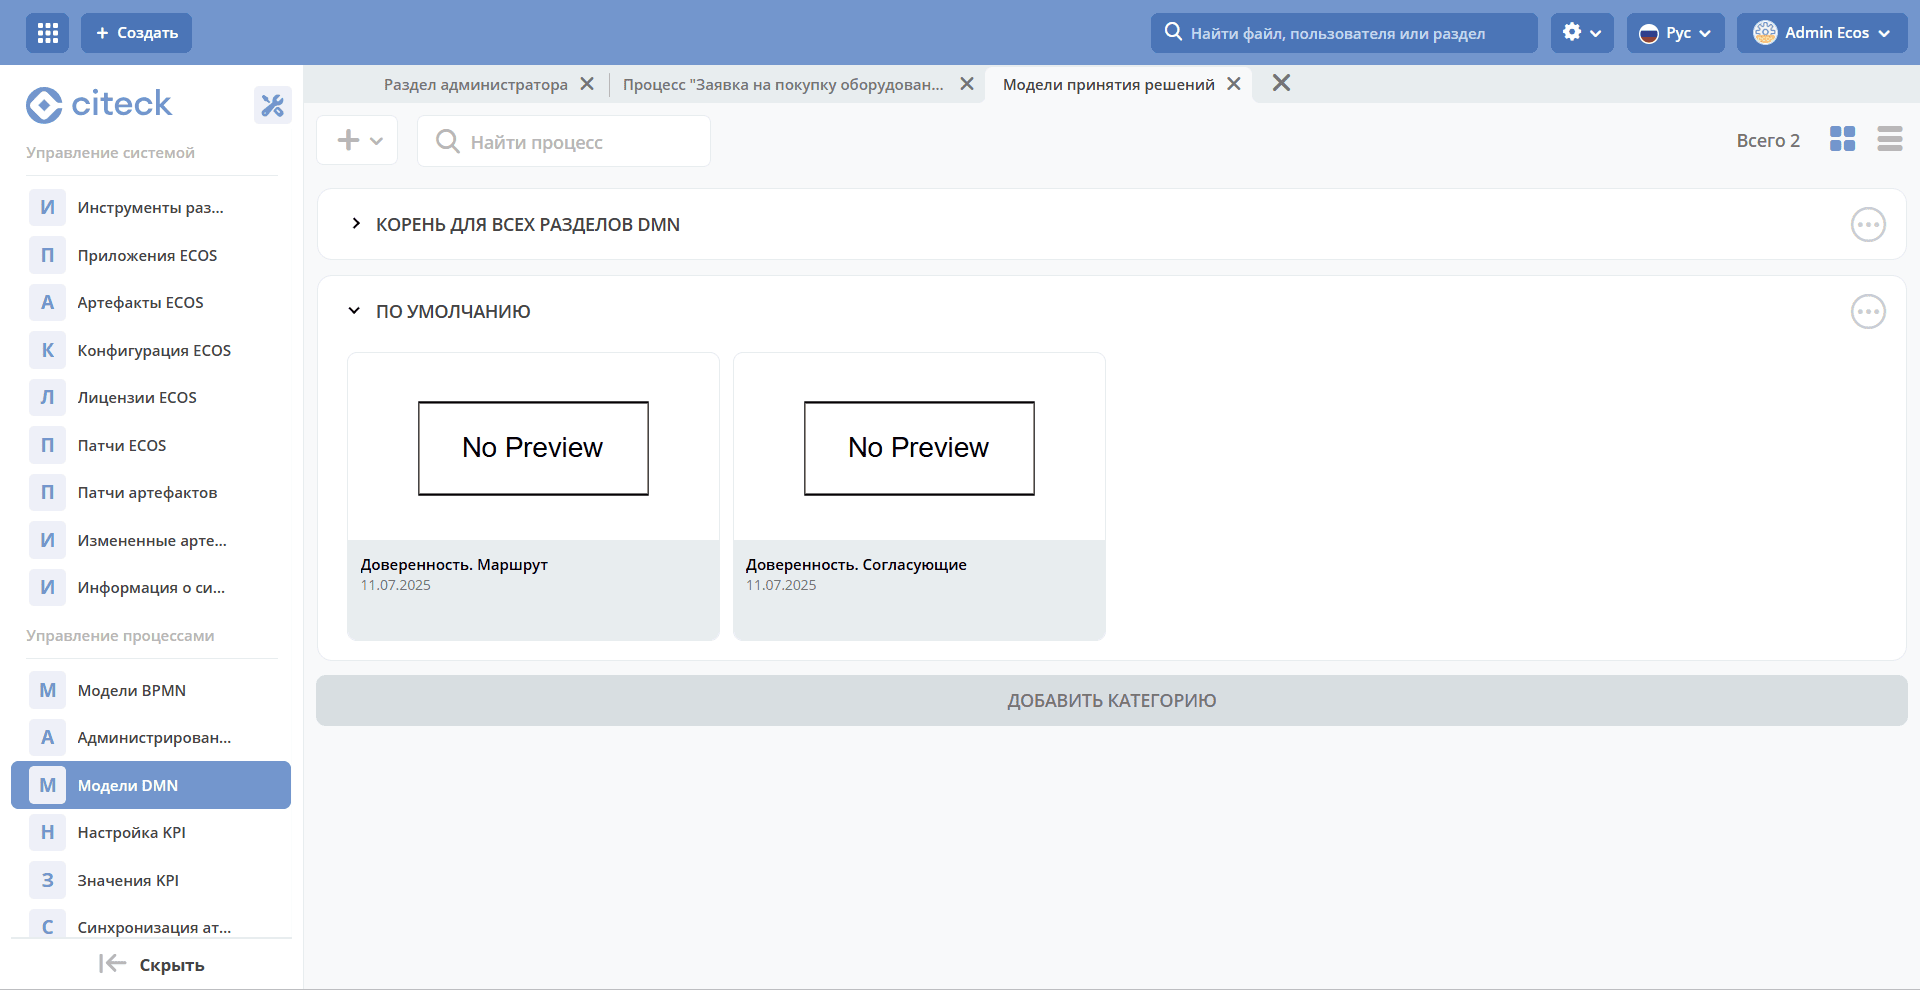
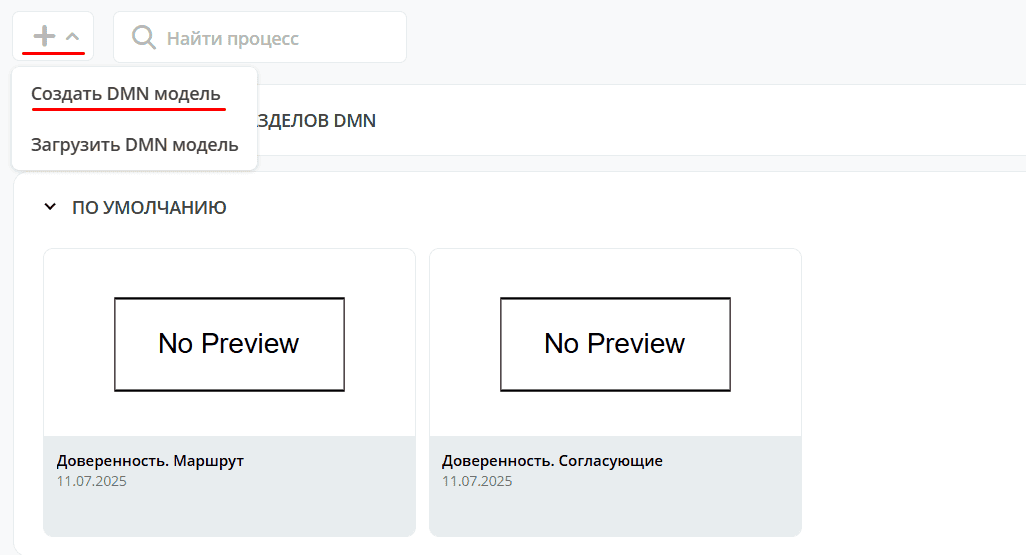
To create a model in the local workspace, go to the Administration → DMN Models section and click + — Create DMN model.
The table requires defining criteria based on which decisions will be made. The main criteria are the equipment name and the approver.
Go to the administrator workspace. In the Process Management section, select DMN Models:
Click “+ — Create DMN model”:
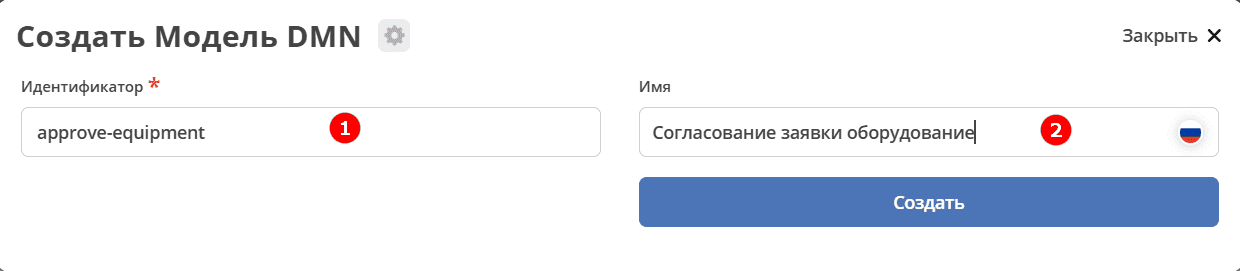
Fill in the fields:
1 |
Identifier |
approve-equipment |
2 |
Name |
Equipment Request Approval |
Click “Save”.
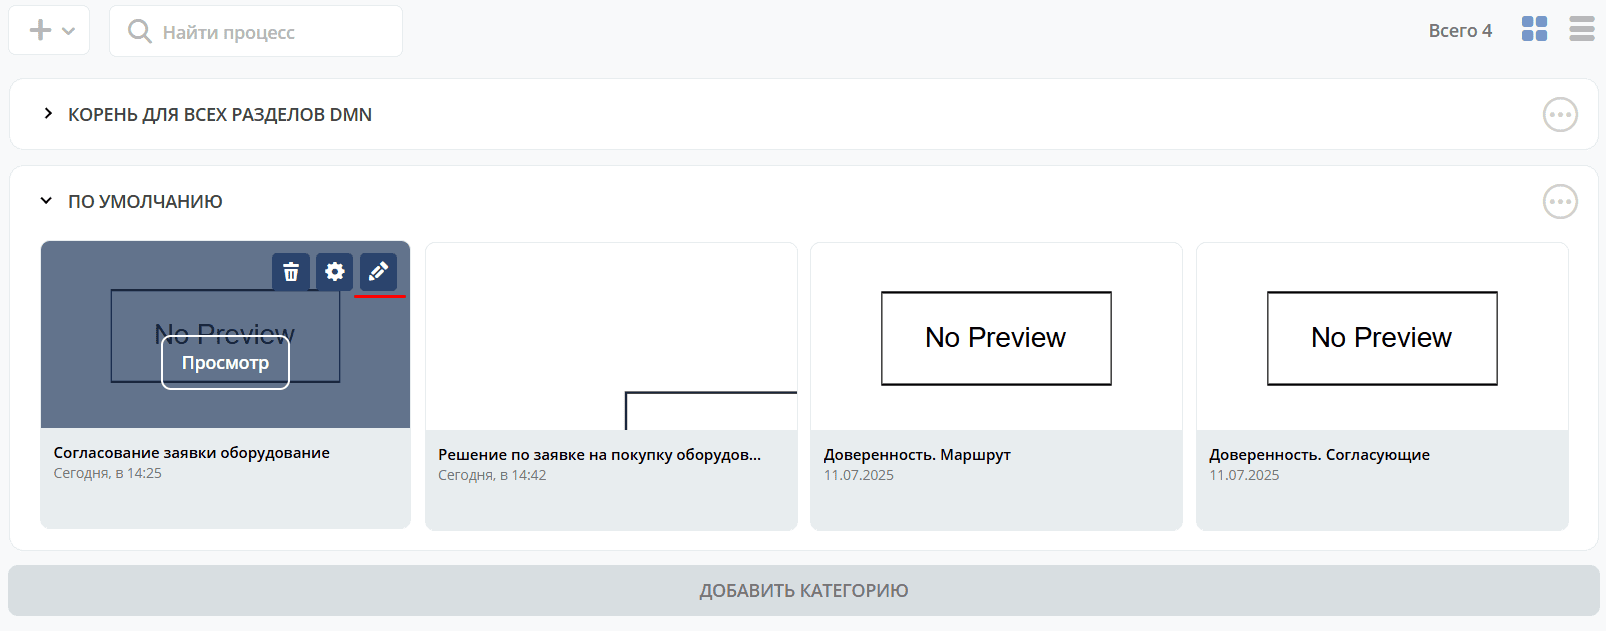
To go to the editor, expand the “Default” section, hover over the created model and click the edit button:
The decision editor will open:
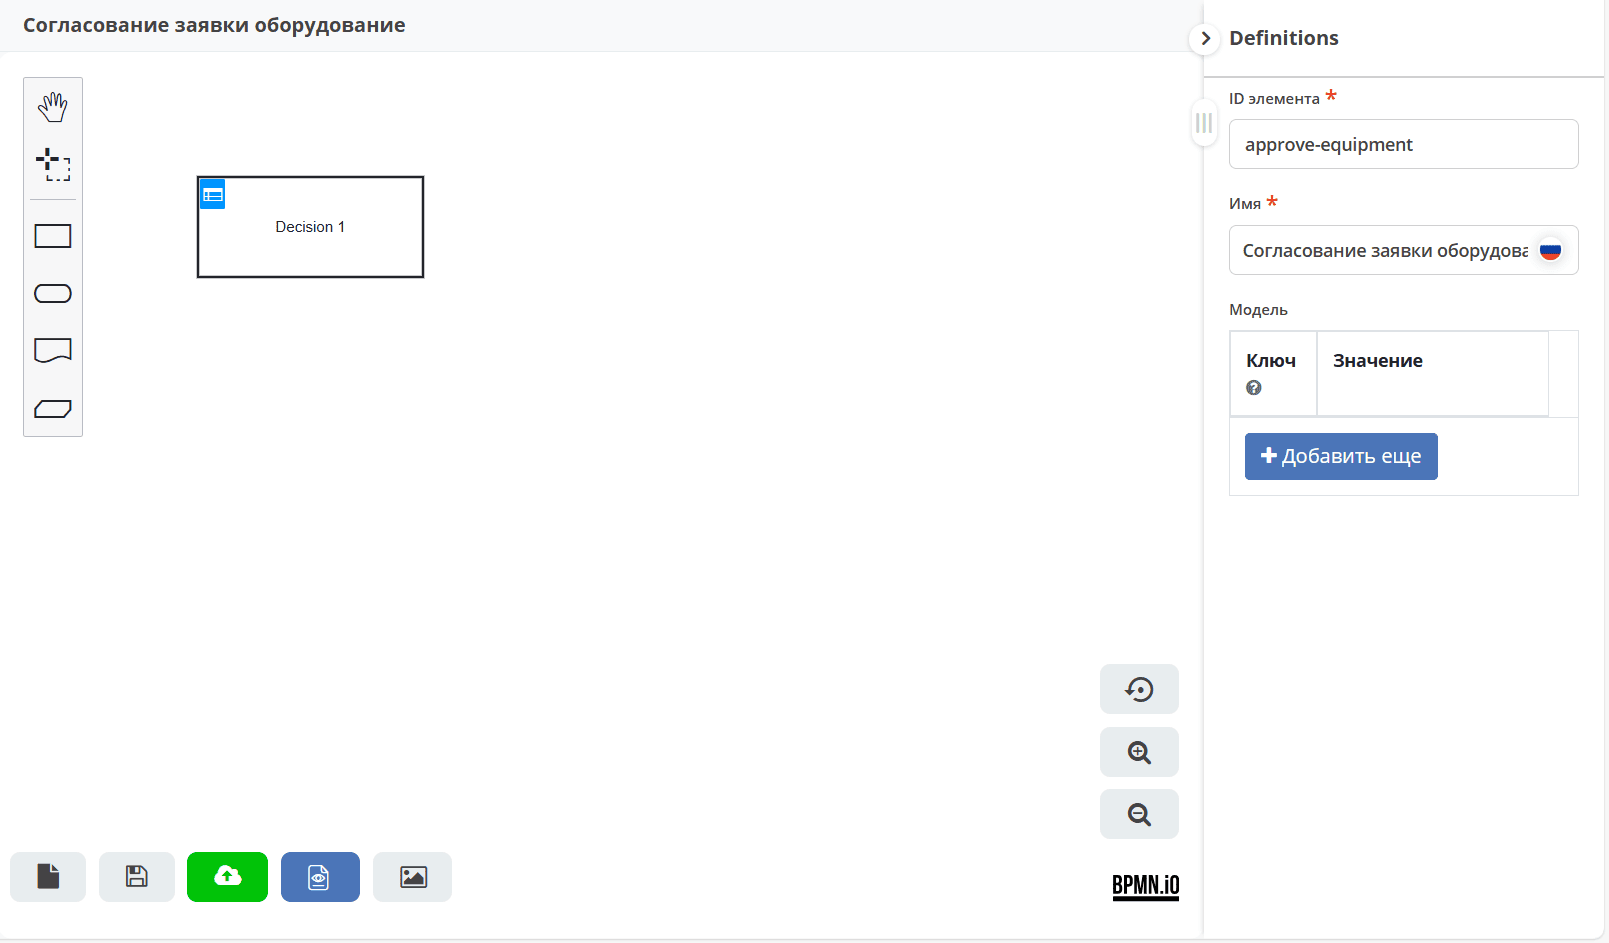
In the right part of the model, define the input data for calculating the role based on DMN. Computed data will be available in the DMN context by the model key.
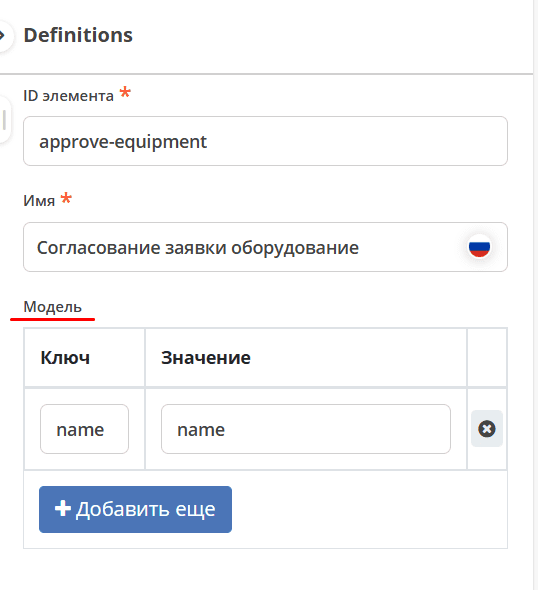
Define the key-value mapping:
Key |
name |
Input element for the decision. Specified further in the Expression field. |
Value |
name |
Data type attribute — the condition by which the role is calculated. |
Note
There can be multiple key-value pairs (conditions). For each condition, the corresponding role will be calculated.
To enter data into the table, click the edit button:

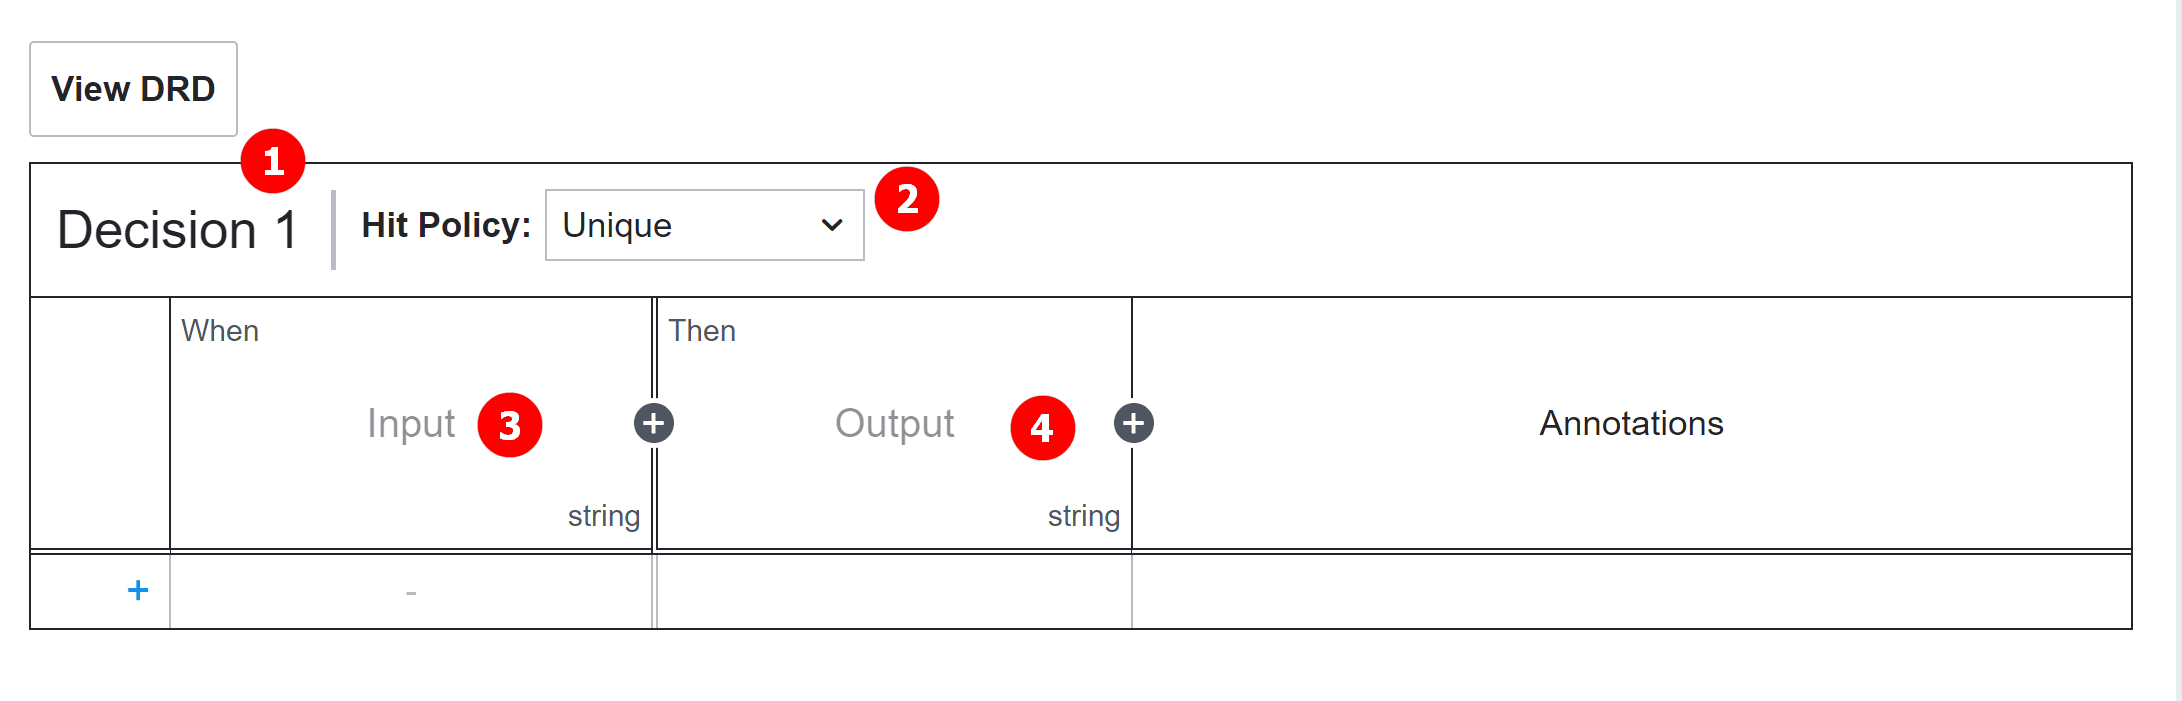
Double-click the decision name (1) to switch to edit mode and set the name to Decision_furniture.
Hit policy (2) — selection policy. Set the value to Unique (default).
(3) — input elements, (4) — output elements. The combination of input and output elements forms the decision.
Input elements
Double-click the field under When and enter the input element name — “Name”:
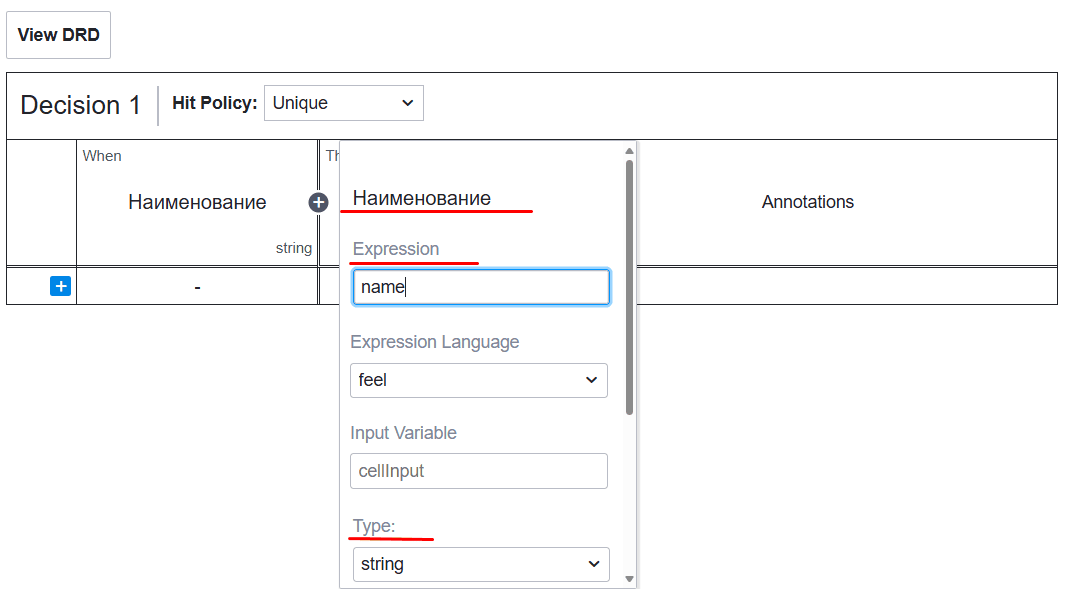
In properties, specify:
Field |
Value |
Explanation |
|---|---|---|
Expression |
name |
Key from model |
Type |
string |
Corresponds to the type of the |
Output element
Double-click the field under Then and enter the output element name — “Approver”:
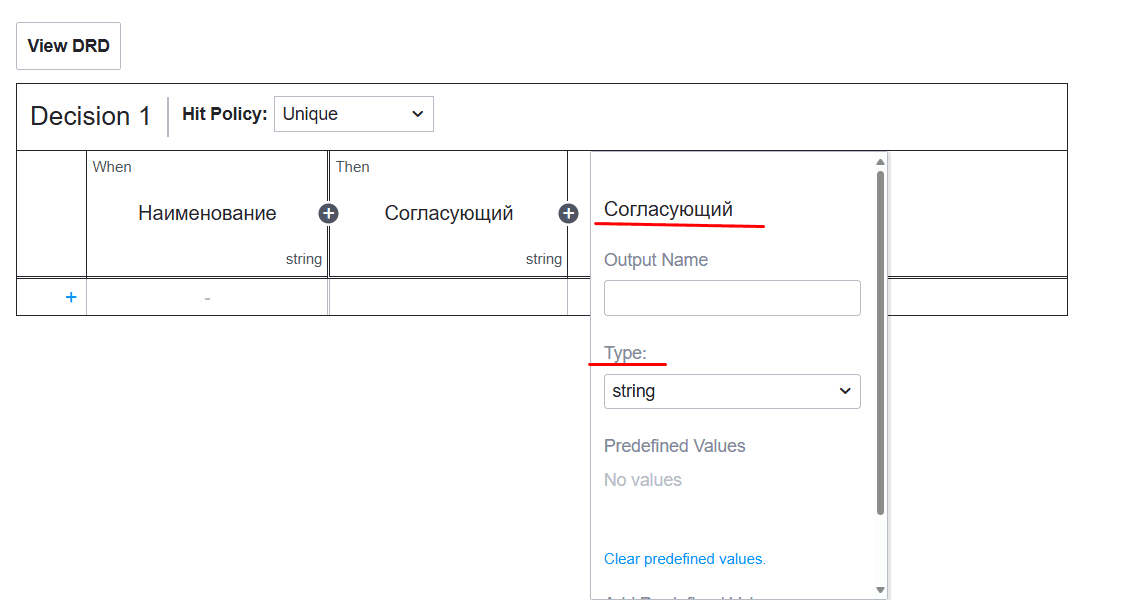
In properties, specify:
Field |
Value |
Explanation |
|---|---|---|
Type |
string |
The DMN decision will return a string (String) with recipient names. |
Rules
Add three rules that map the equipment name to the corresponding approver.
Note
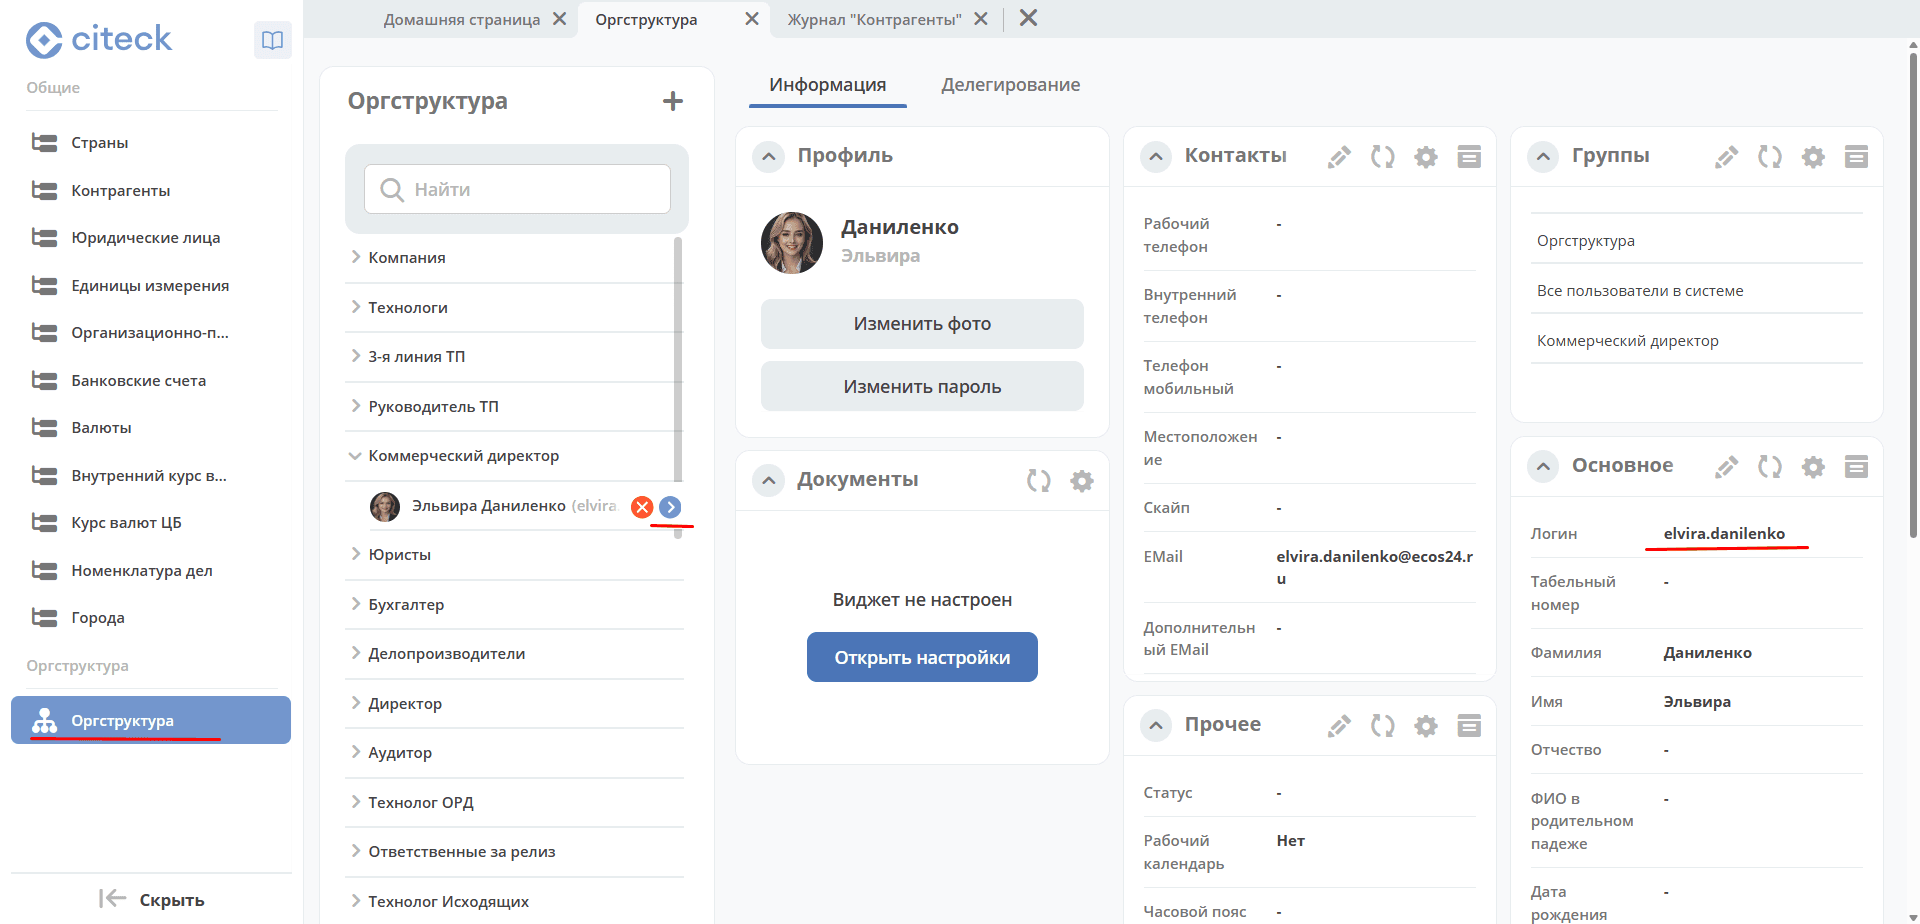
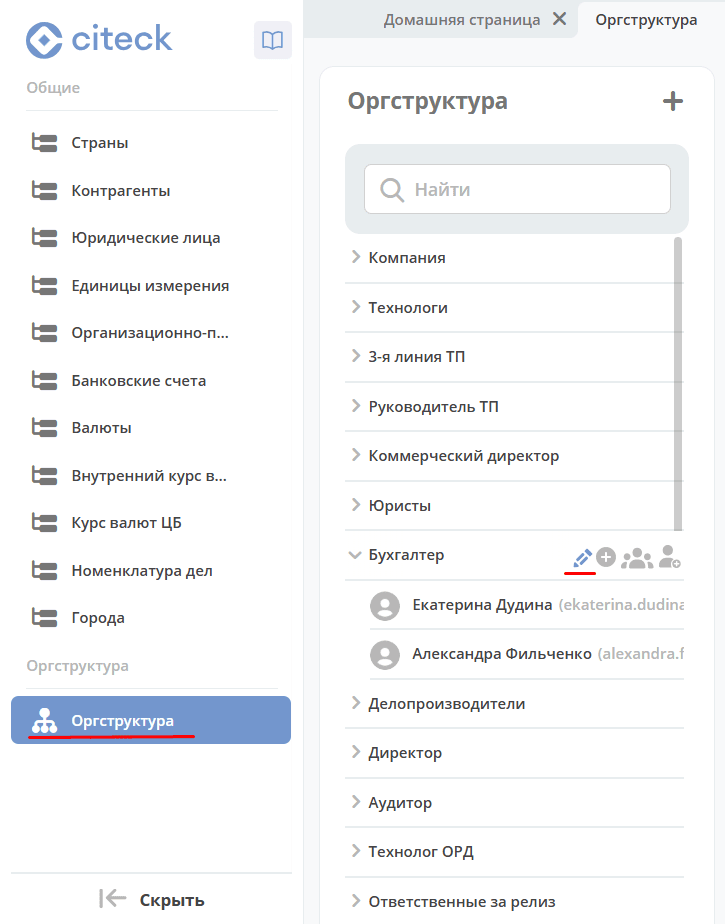
The user’s system name can be found in the Org Structure by opening the user profile:
Groups:
Note
If specifying a group, you must add the
GROUP_prefix before the group name.Values of type string (the Name and Approver fields) must be enclosed in quotes.
Multiple values are specified separated by commas without spaces within the same quotes.
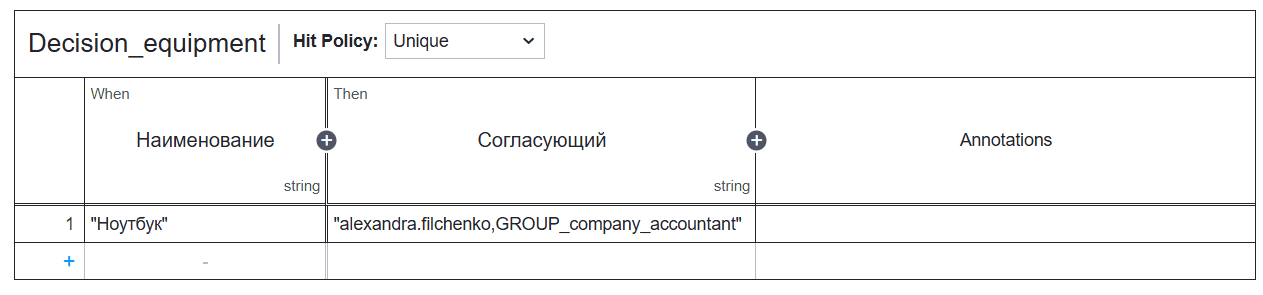
Add the first rule: for the name “Laptop” — approver “alexandra.filchenko” and group “GROUP_company_chief_accountant”:
Click the + button at the bottom of the table to add the next rule.
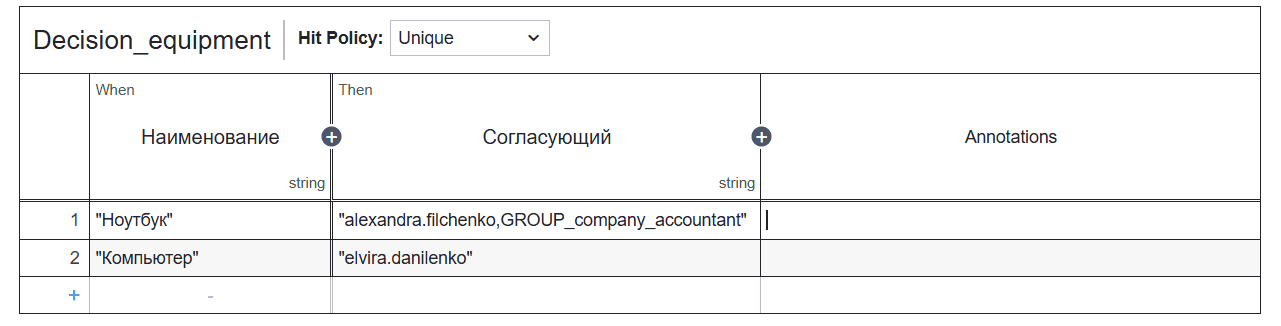
Add the second rule: for the name “Computer” — approver “elvira.danilenko”:
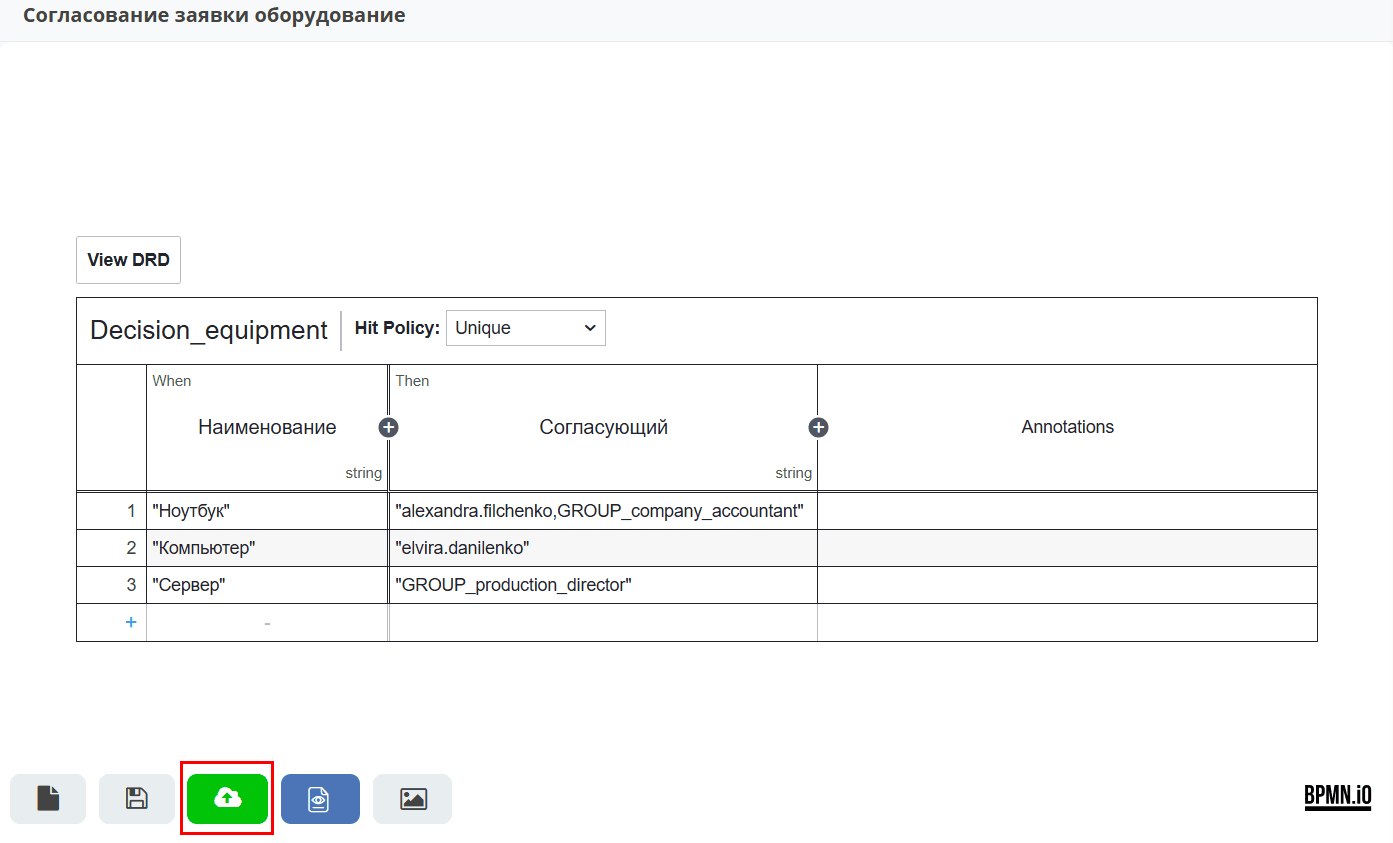
Resulting rules table:
Name |
Approver |
|---|---|
"Ноутбук"
|
"alexandra.filchenko,GROUP_company_accountant"
|
"Компьютер"
|
"elvira.danilenko"
|
"Сервер"
|
"GROUP_production_director"
|
Save and publish the decision table:
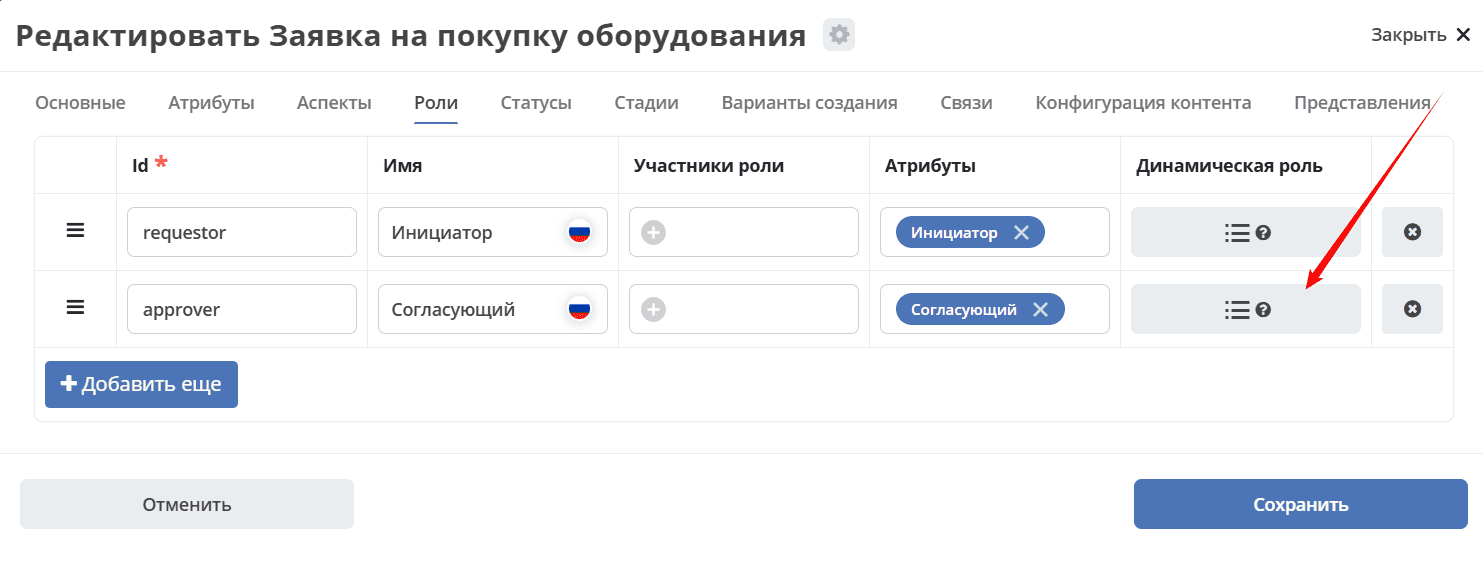
Data type
In the “Roles” tab of the previously created data type, assign a dynamic role to the approver:
In the form, select type DMN and the decision — Decision_furniture:
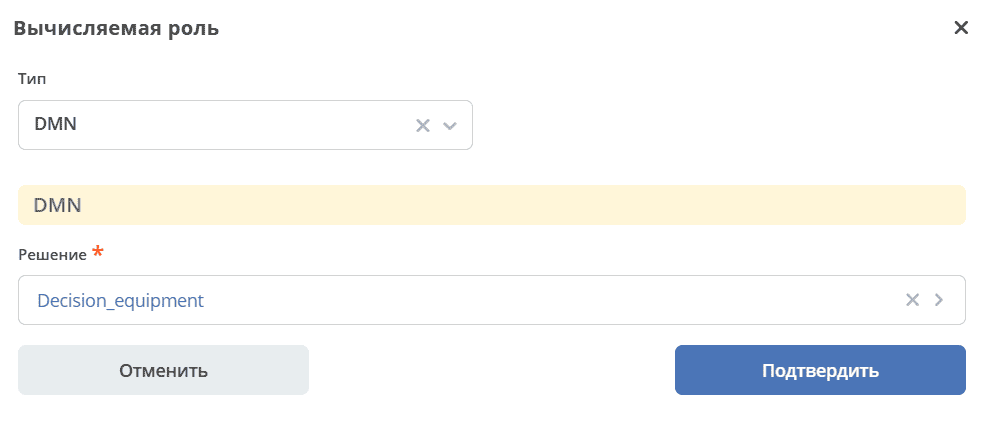
Click “Confirm”.
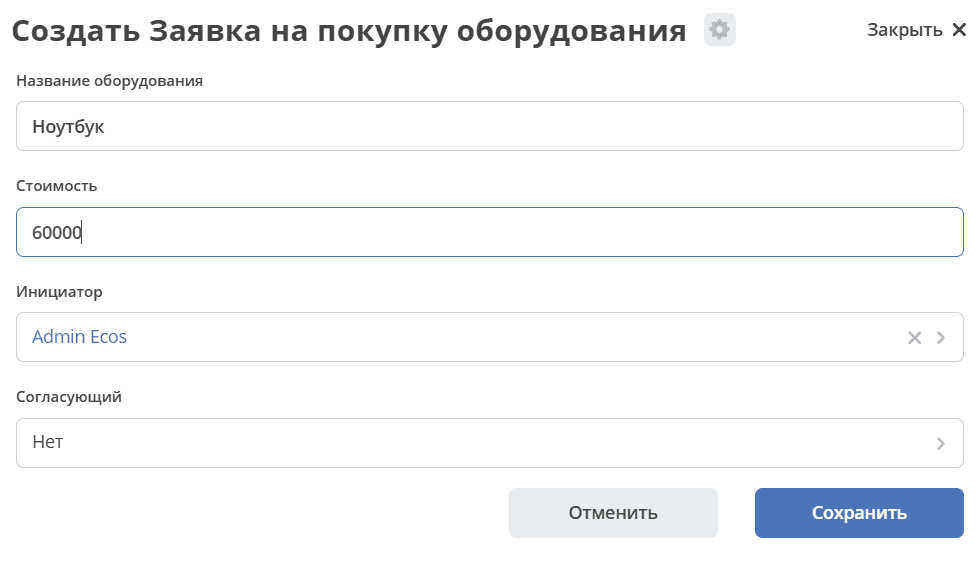
Process testing
Go to the journal, create a new request, fill out the card and click “Save”:
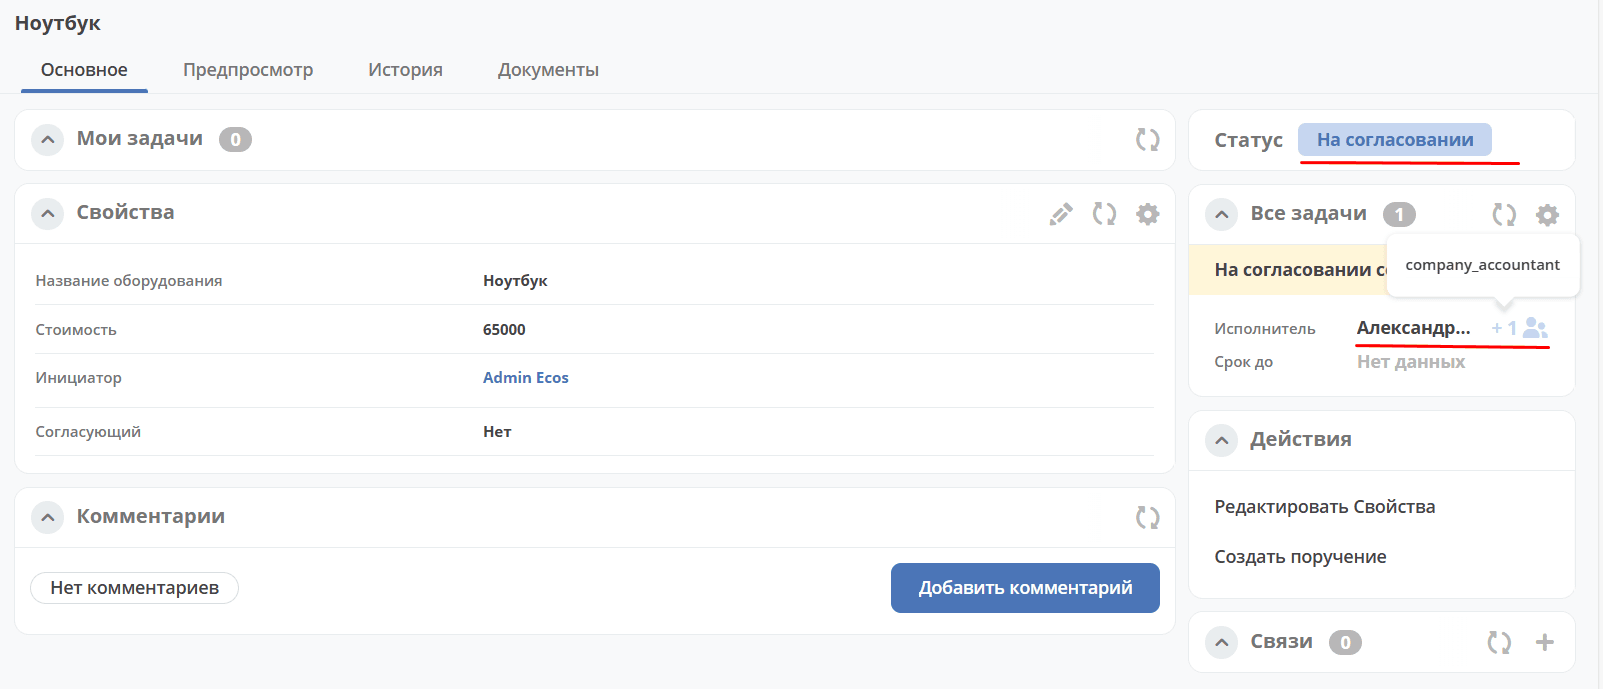
At the “Under Approval” status, the assignees are Alexandra Filchenko (account alexandra.filchenko) and Chief Accountant (group company_accountant):
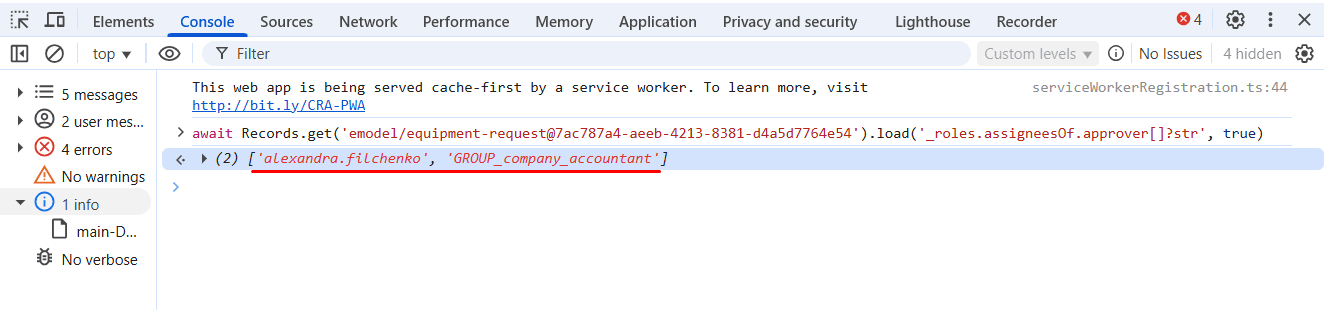
Checking permissions via browser console
The assigned role can be checked via the browser console with the command:
await Records.get('emodel/type-id@local-id').load('_roles.assigneesOf.approver[]?str', true)
where:
approver— role id from the data type;emodel/type-id@local-id— record identifier from the browser address bar:
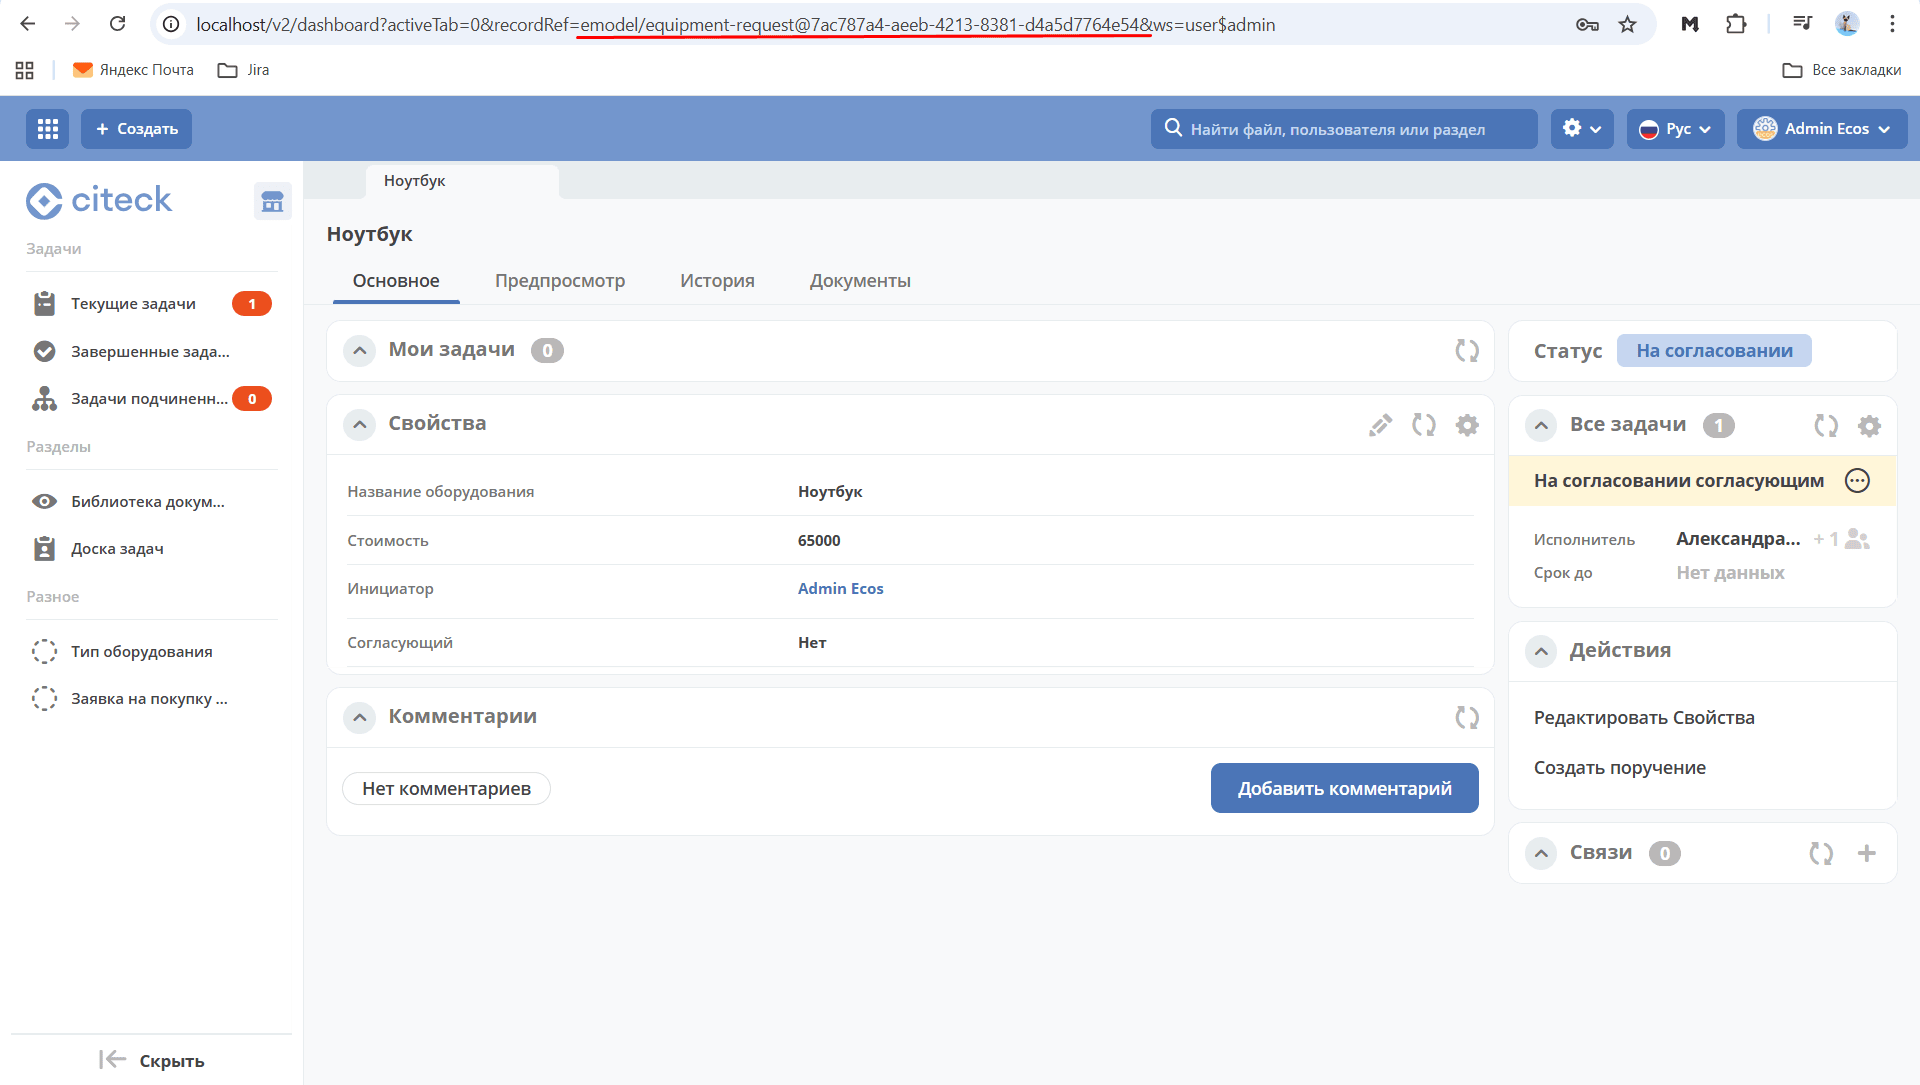
The system will display the list of users assigned to the approval task: