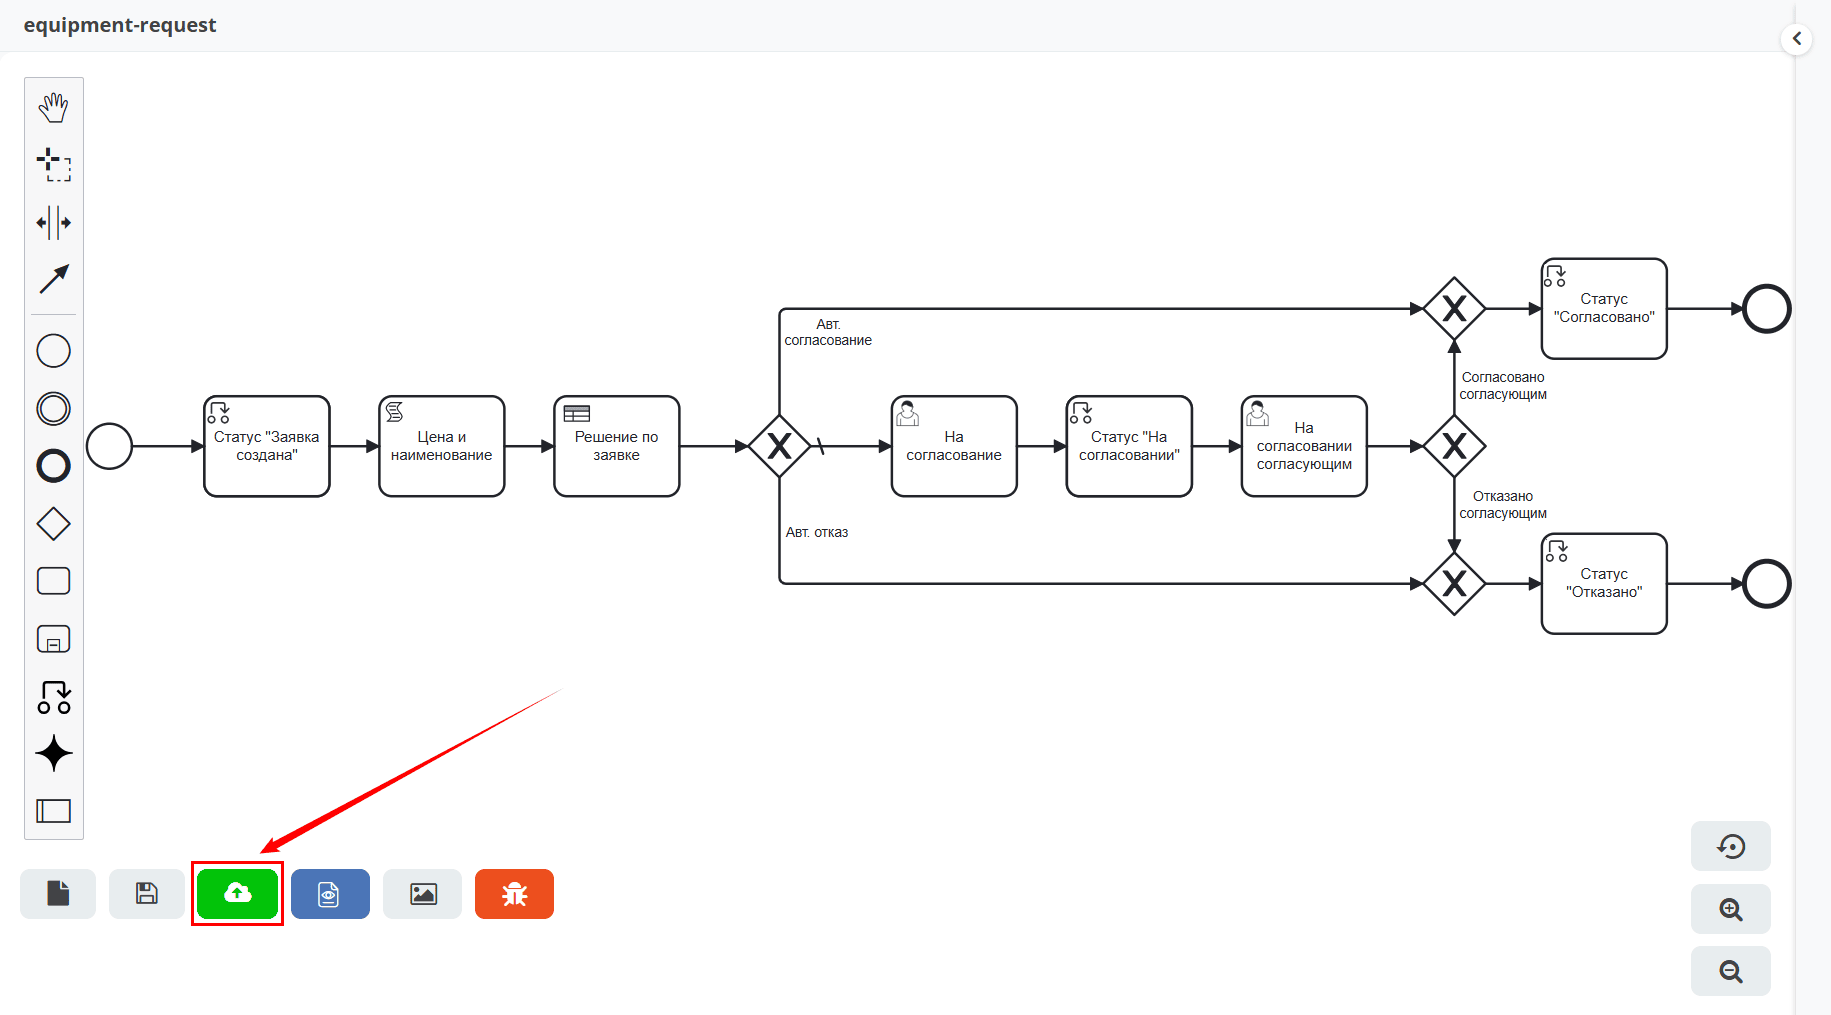
Equipment Purchase Request Process. Integrating DMN into the Process
Note
This article continues working with the previously created business process Equipment Purchase Request.
If you are continuing from the article Equipment Purchase Request Process. Adding a Directory. Non-default Journal and Form, then delete the Script task “Save Comment”.
In the local workspace, go to Administration → DMN Models and click + — Create DMN Model.
Equipment purchases always require approval: if a request does not meet the established criteria, it is rejected. Some of these decisions can be automated using a decision table (DMN).
DMN processes incoming process data and uses it to make final or intermediate business decisions.
Creating a Decision Table
For the table, you need to define the criteria based on which the decision will be made. The main criteria are the equipment name and its cost.
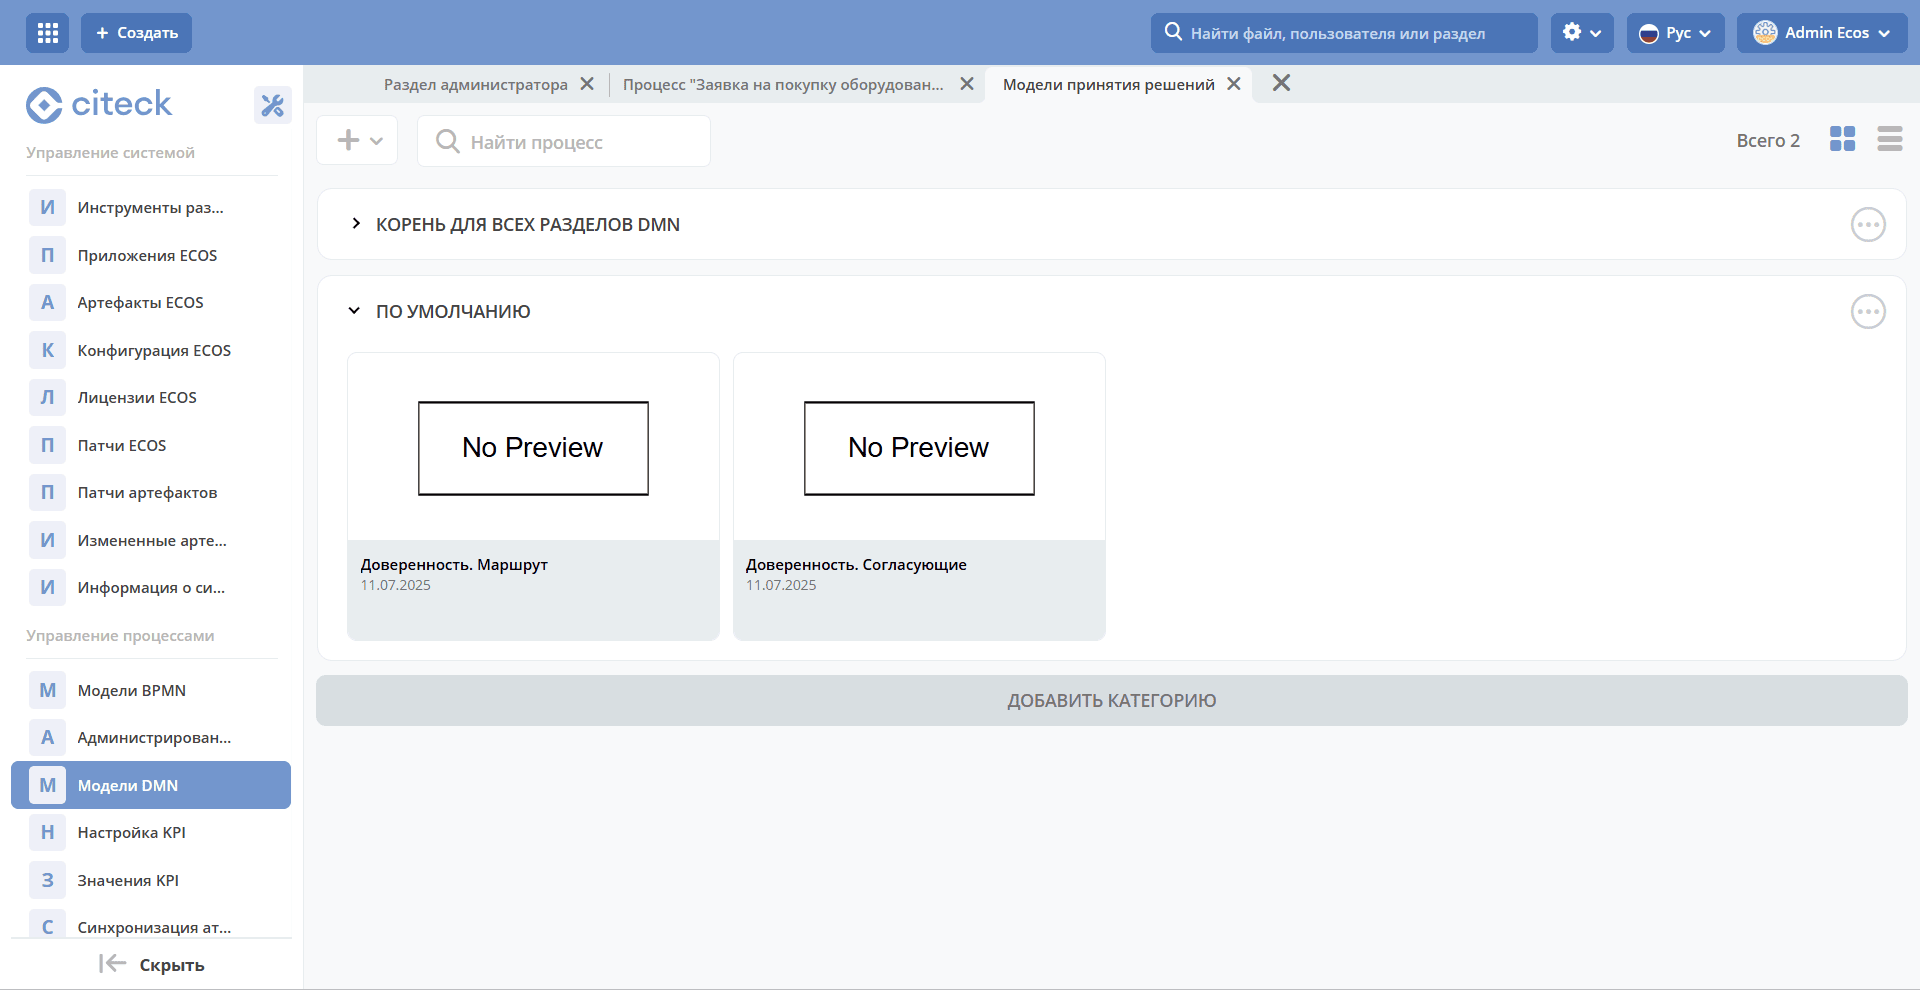
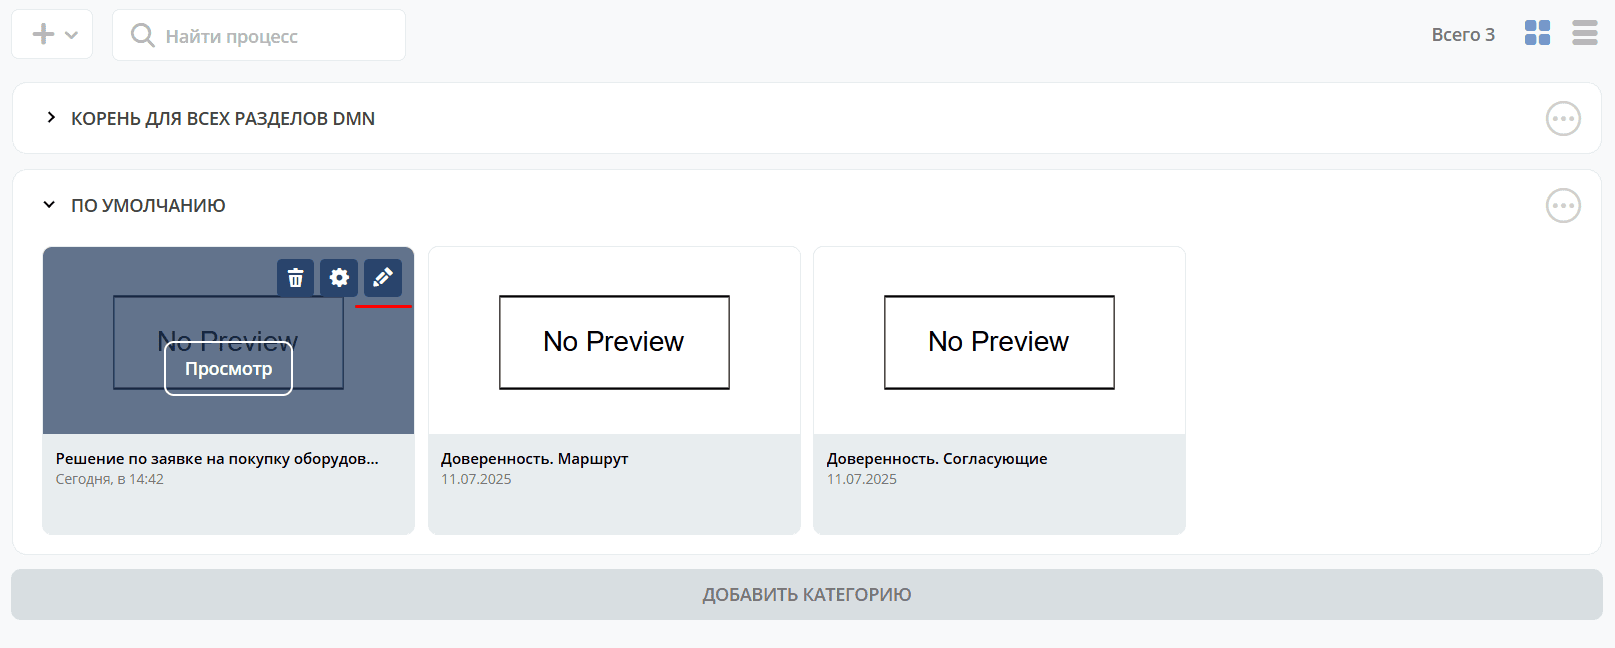
To create a decision table, go to the administrator workspace. In the Process Management section, go to DMN Models:
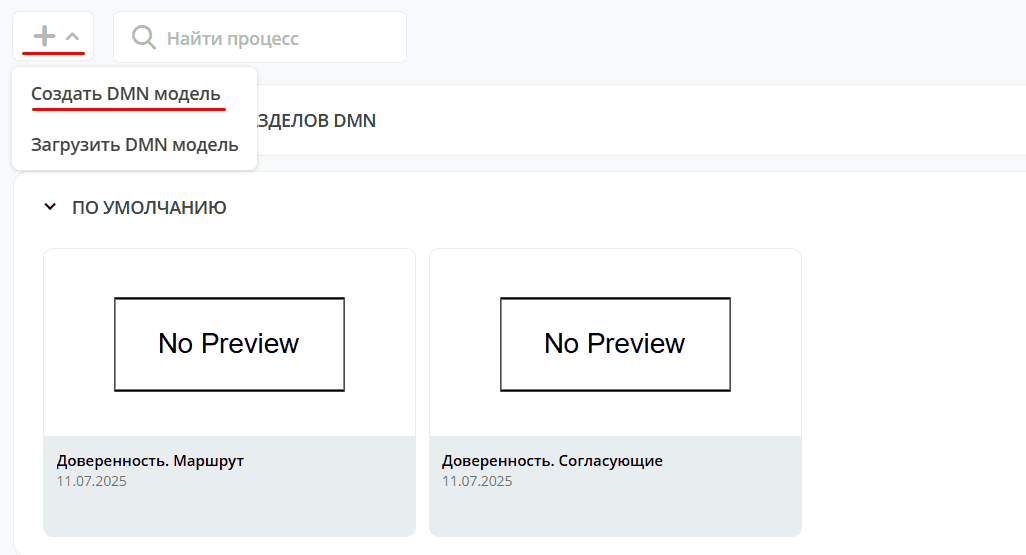
Click «+ - Create DMN Model»:
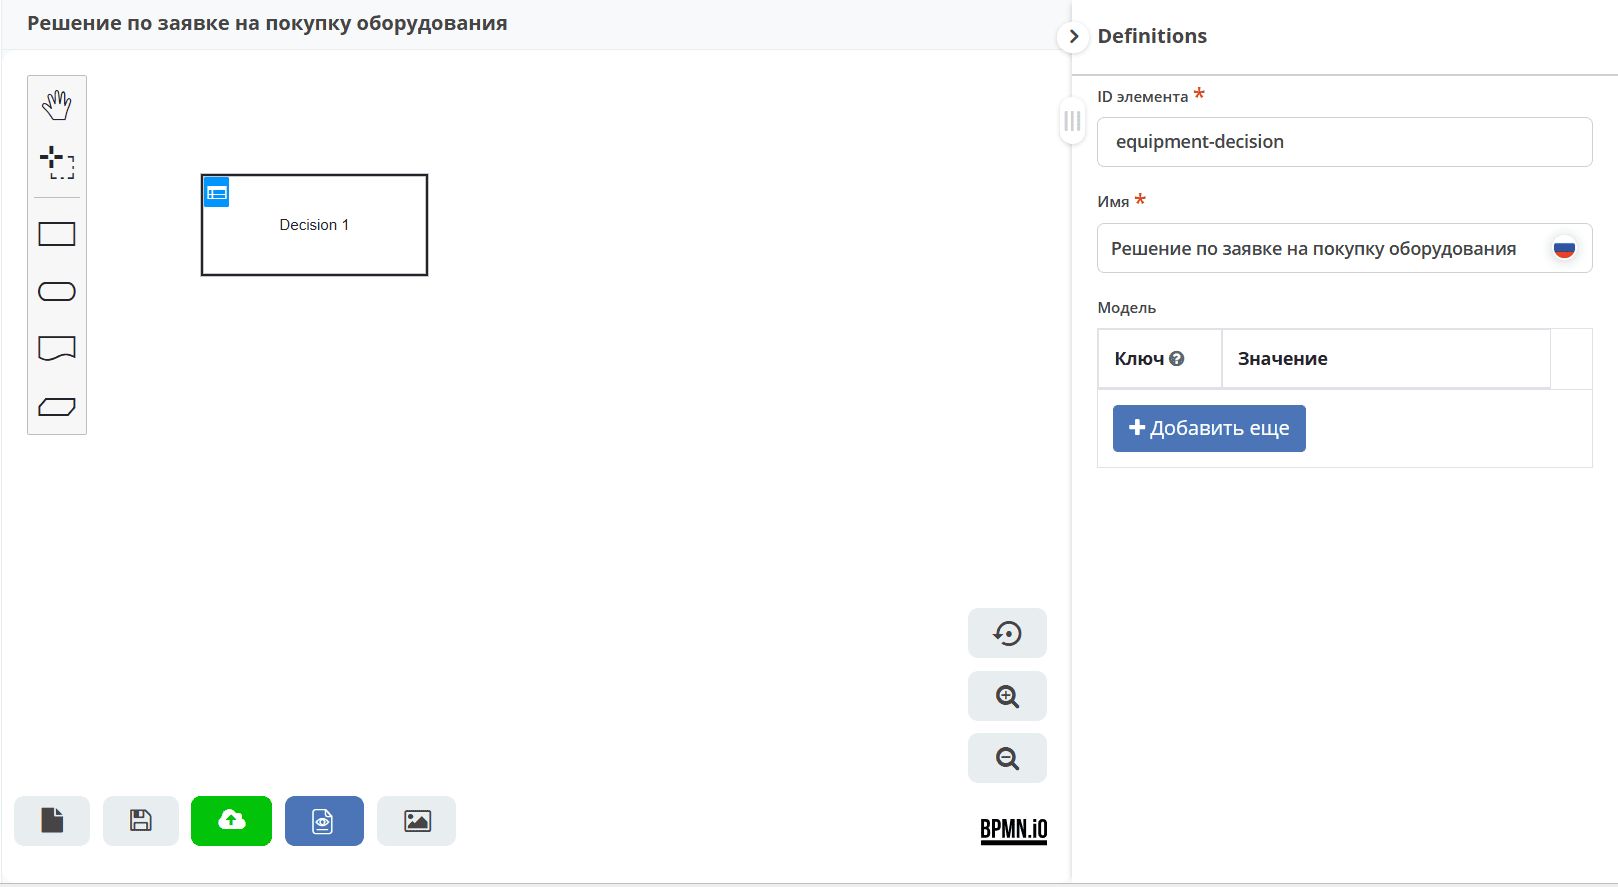
Fill in the fields:
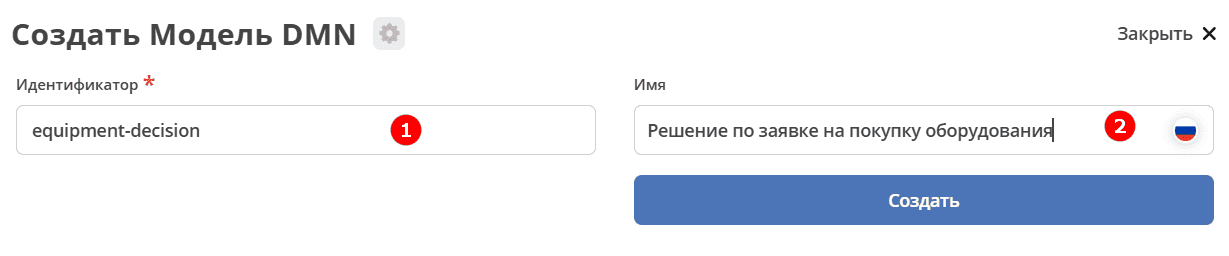
1 |
Identifier |
equipment-decision |
2 |
Name |
Decision on Equipment Purchase Request |
Click «Save».
To go to the editor, expand the «Default» section, hover the cursor over the created model, and click:
The decision will open:
To enter data into the table, click:
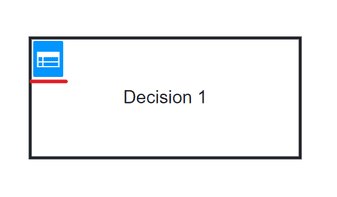
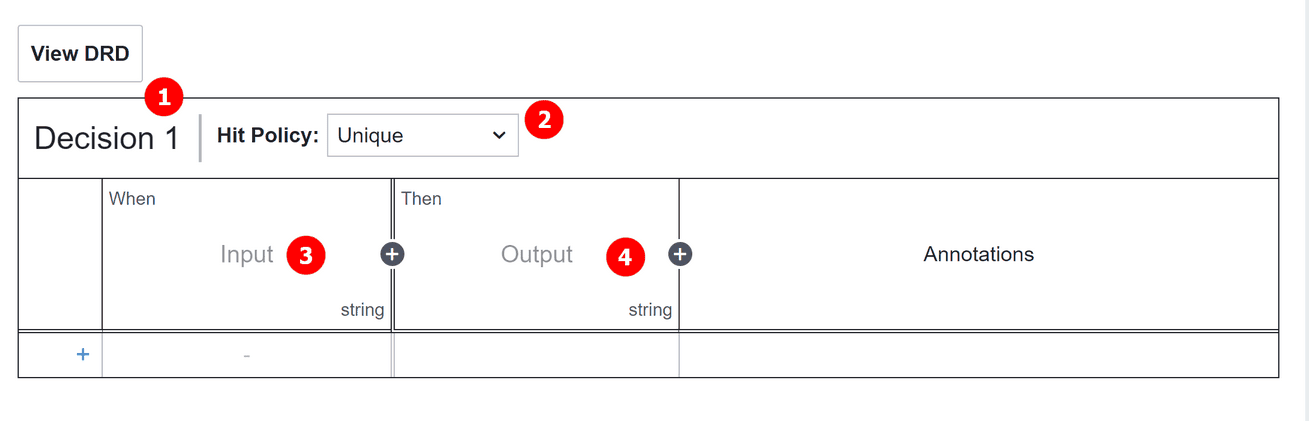
Double-click the decision name (1) to enter edit mode and name the decision Computer Equipment.
Hit policy (2) - selection policy. Let’s define it as Unique (default).
(3) – input elements, (4) – output elements.
Note
The variables for the input and output elements specified below are not chosen randomly. They will be needed to configure the business rule task component in the target business process.
Input Elements
To set the name of the input element, double-click the field under When and enter Name:
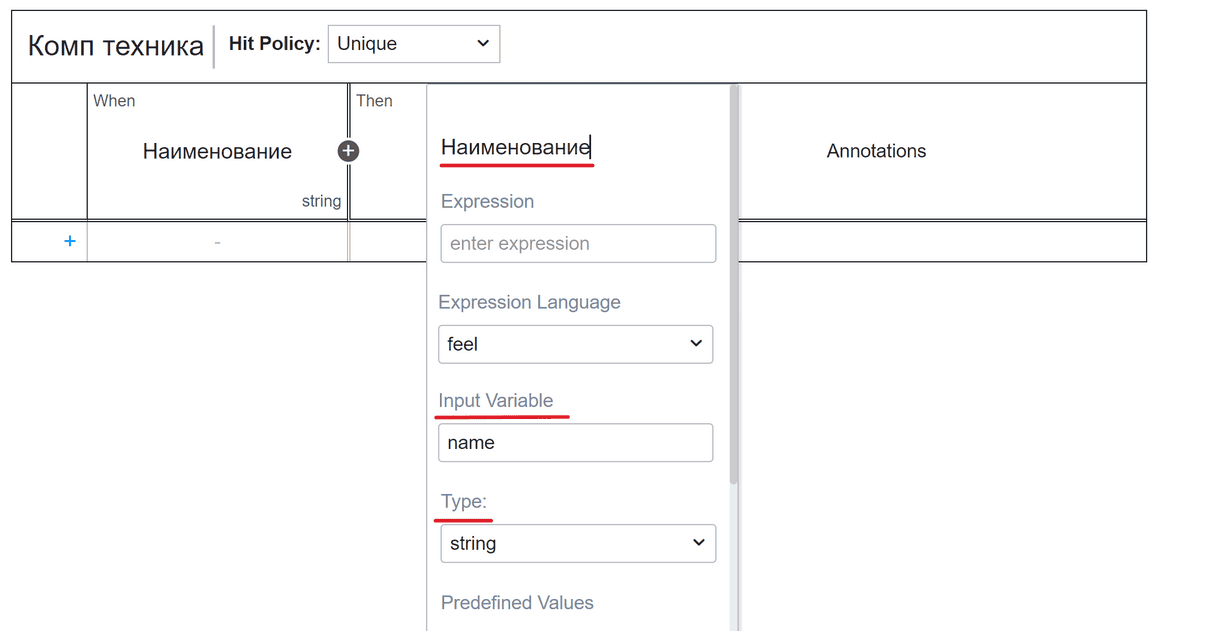
In the properties, specify:
Field |
Value |
Explanation |
|---|---|---|
Input Variable |
name |
Corresponds to the name attribute from the data type. The value will be passed as a variable to the business process. |
Type |
string |
The string type corresponds to text in the data type. |
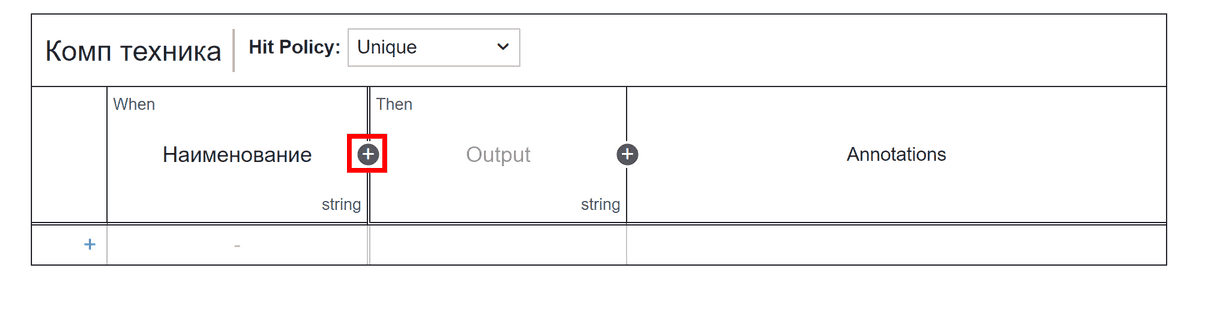
Click + to add a second input element:
To set the name of the input element, double-click the field under When and enter Cost:
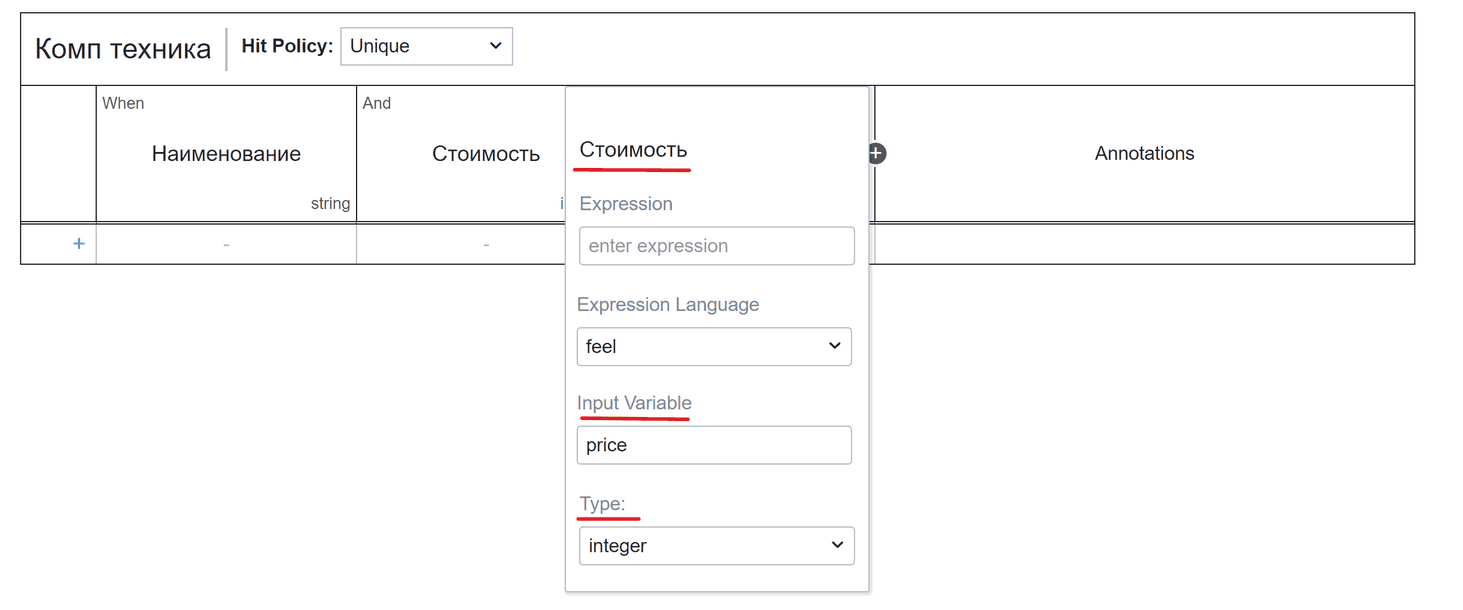
In the properties, specify:
Field |
Value |
Explanation |
|---|---|---|
Input Variable |
price |
Corresponds to the price attribute from the data type. The value will be passed as a variable to the business process. |
Type |
integer |
The integer type corresponds to number in the data type. |
Output Element
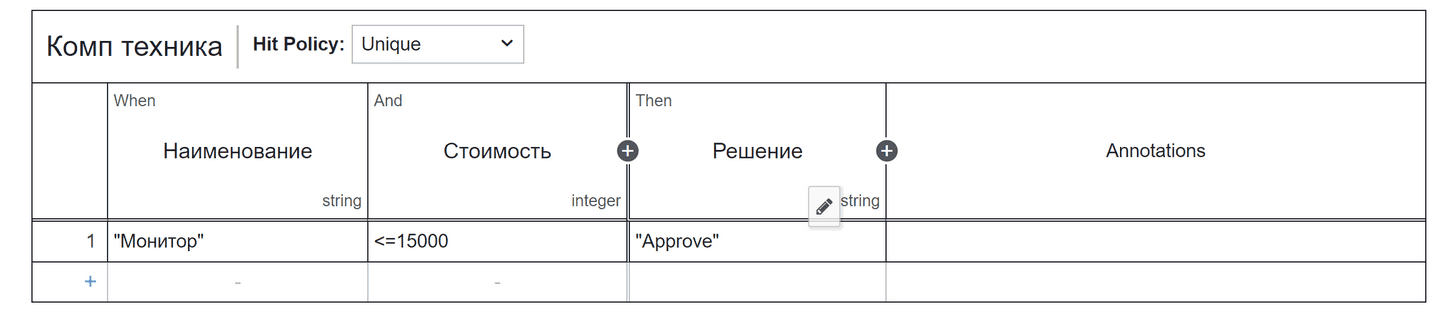
To set the name of the output element, double-click the field under Then and enter Decision:

In the properties, specify:
Field |
Value |
Explanation |
|---|---|---|
Output Name |
decision |
The value will be passed to the business process as a result variable. |
Type |
string |
Rules
Automatic approval, rejection, or assigning an approver depends on the equipment name and its cost.
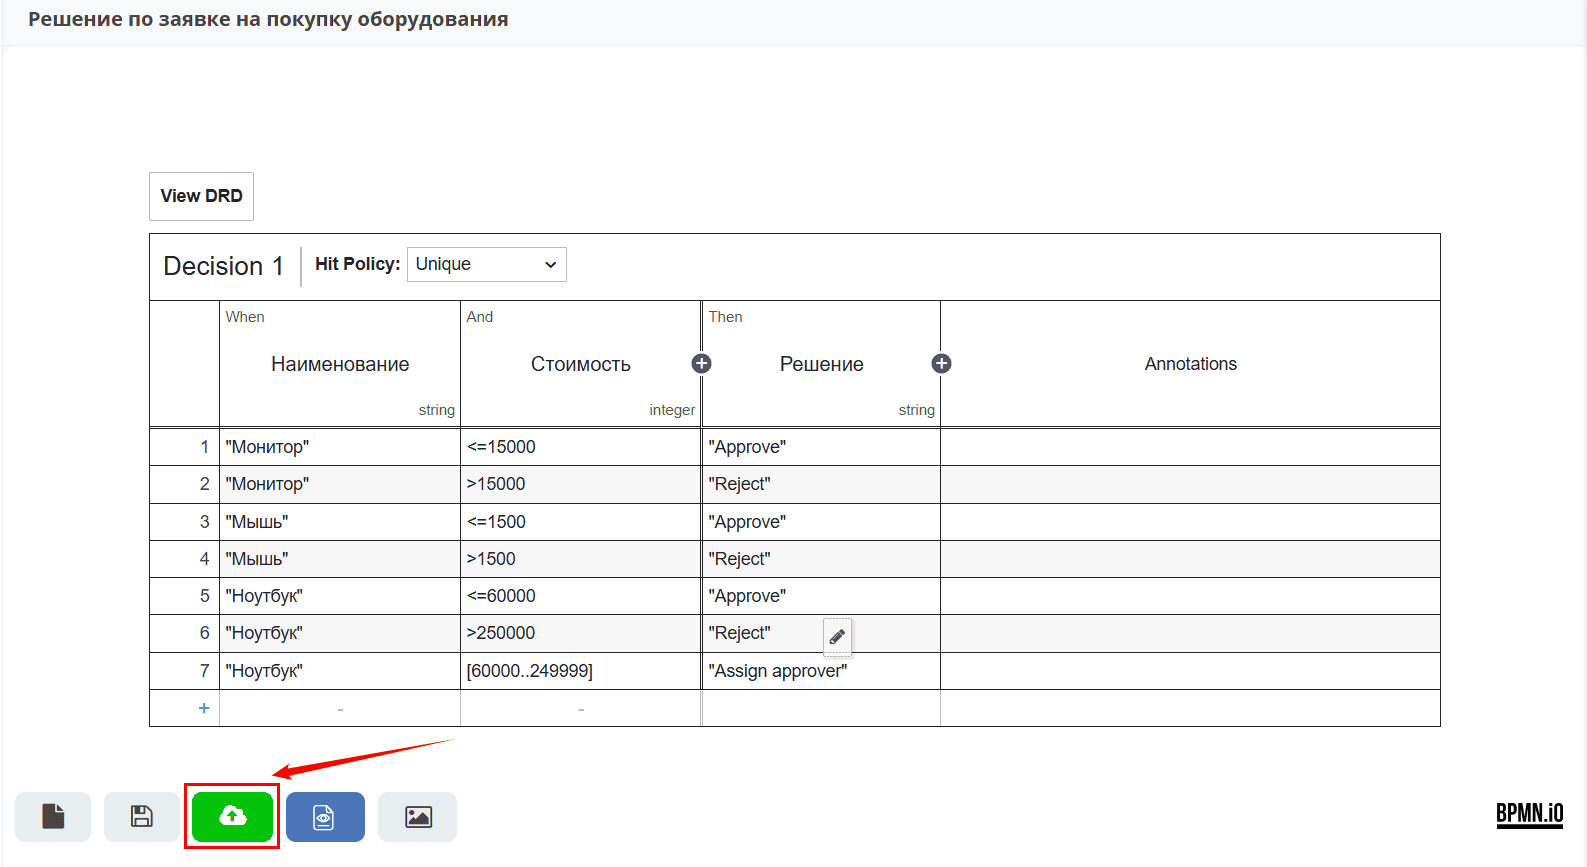
For example, let’s choose 3 items: Monitor, Mouse, Laptop. For each item, we will specify a cost limit/range and the corresponding possible decision:
|
Automatically Approved |
|
Automatically Rejected |
|
Assigning an Approver |
Depending on the decision, the process follows the corresponding control flow.
Add the first rule, indicating that for a Monitor costing 15,000 or less — the decision is Approve.
Note
Name and Decision are of type string, so the elements must be specified in quotes.
Click the «+» button at the bottom of the table or simply click anywhere in the last row.
Add a second rule, indicating that for a Monitor costing more than 15,000 - the decision is Reject.
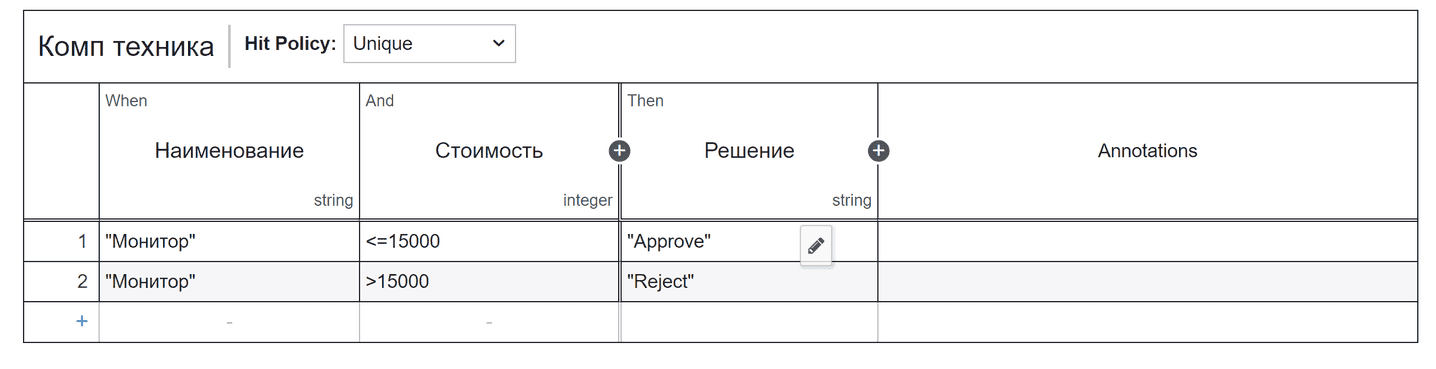
Final rules table:
Name |
Price |
Decision |
|---|---|---|
|
|
|
|
|
|
|
|
|
|
|
|
|
|
|
|
|
|
|
|
|
Save and publish the decision table:
Adding the Decision Model to the Business Process
Next, we will add the model to the existing business process. For this, it is necessary to:
Configure process variables (1) so that the model and the business process can interact with each other;
Add a Business rule task (2) component – to embed the model into the process;
Configure the gateway and control flows (3) – to explain to the system which direction to take
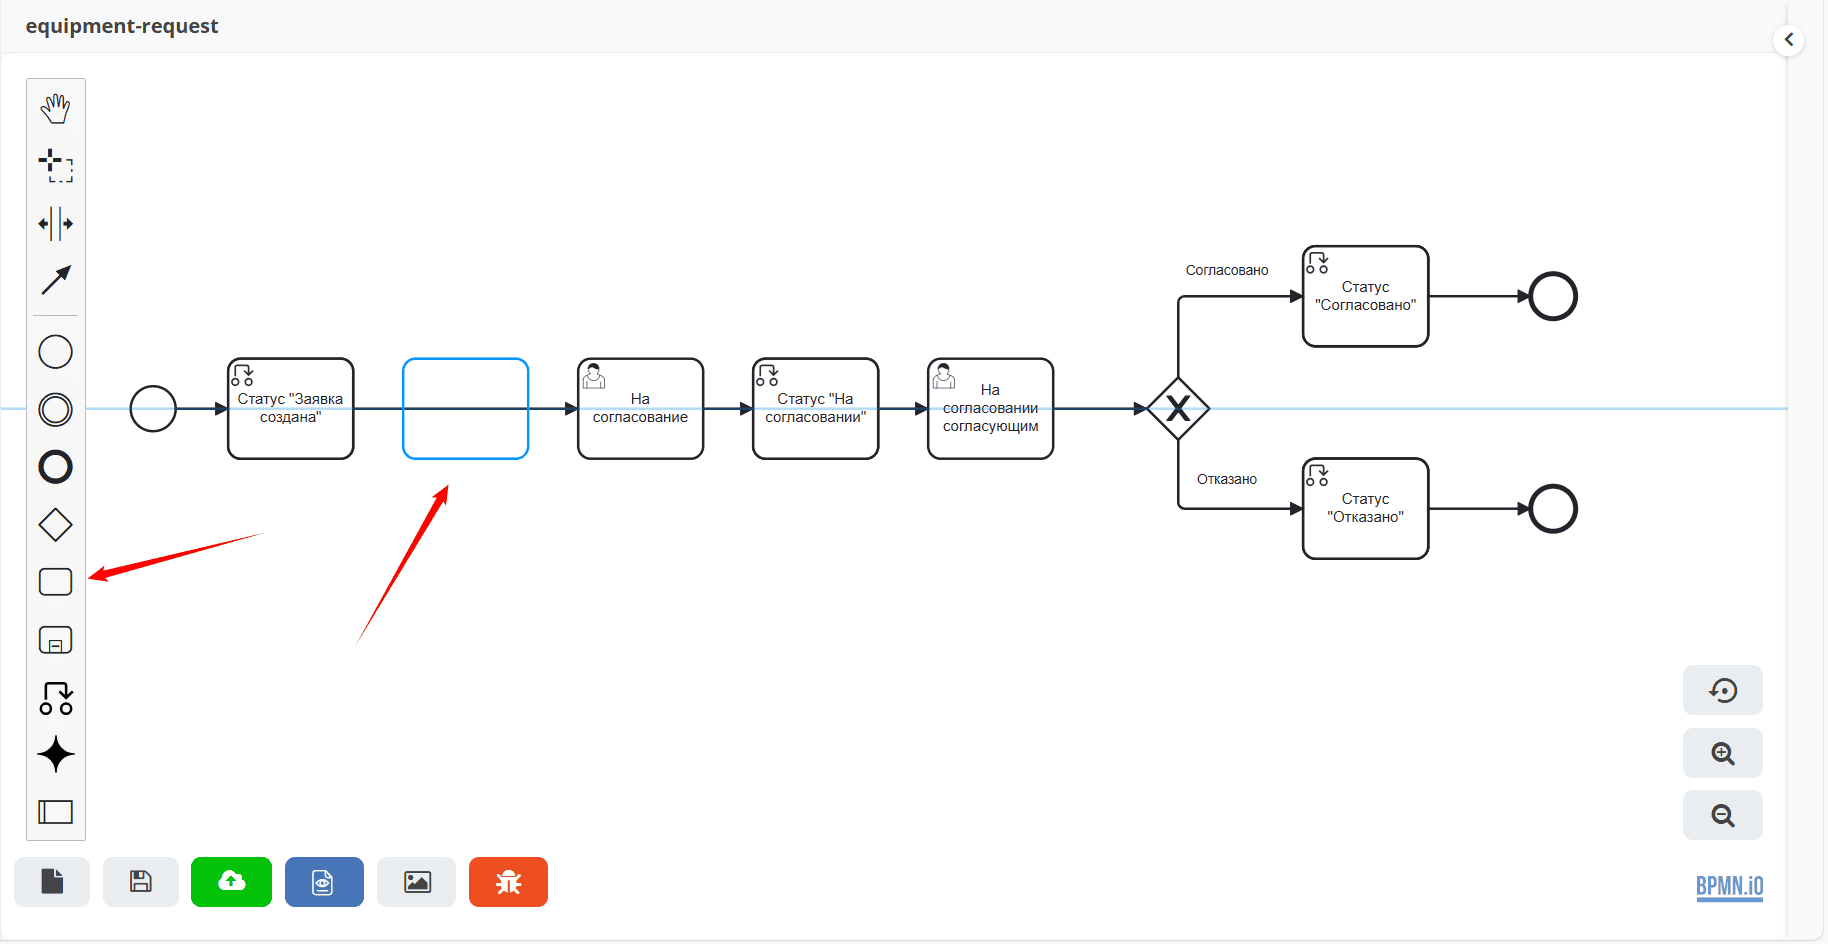
Adding a Variable to the Process (1)
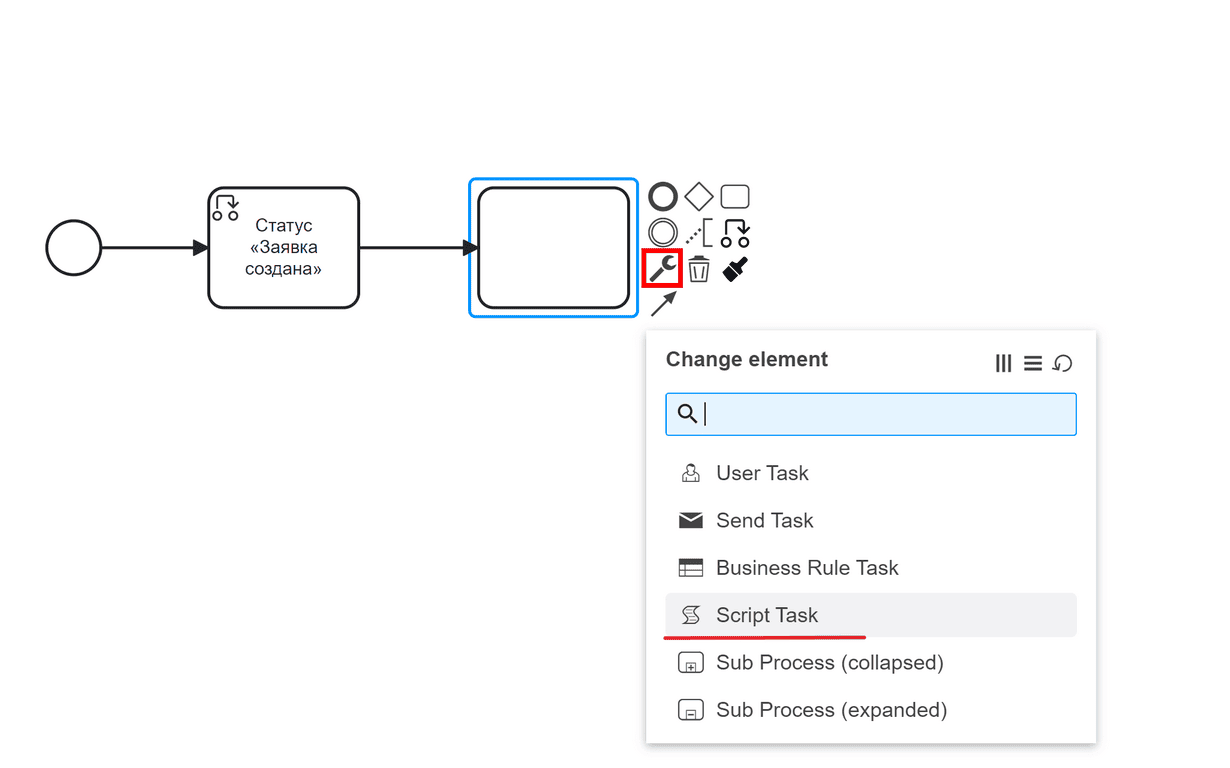
Between the Status “Request Created” and the user task “For Approval” components, you need to add a script task.
Using free selection (1), select and move the elements to the left:
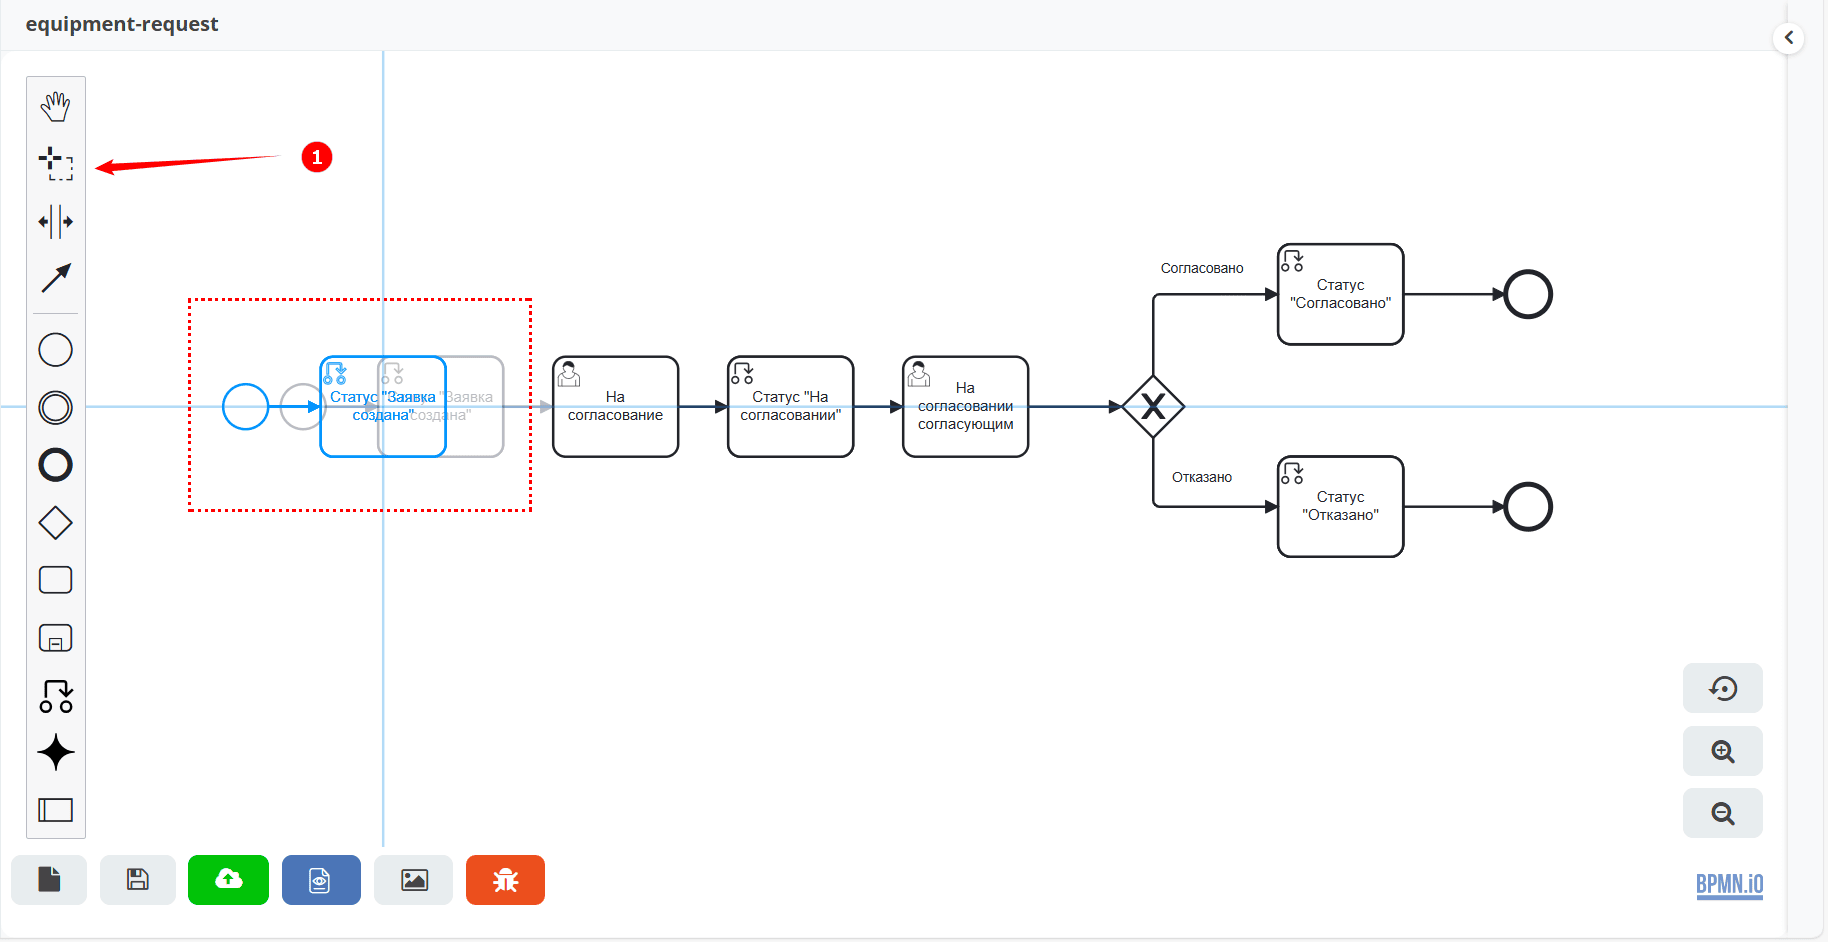
In the menu, select the «Task» element and drag it after the «Request Created» status:
Change its type to Script task:
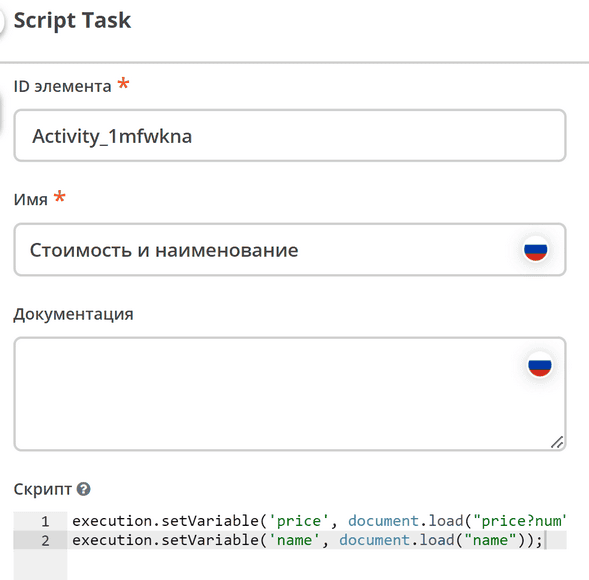
For the input element data of the decision to become available in the business process, they must be entered as variables.
Fill in the fields:
Name —
Cost and NameScript:
execution.setVariable('price', document.load("price?num"));
execution.setVariable('name', document.load("name"));
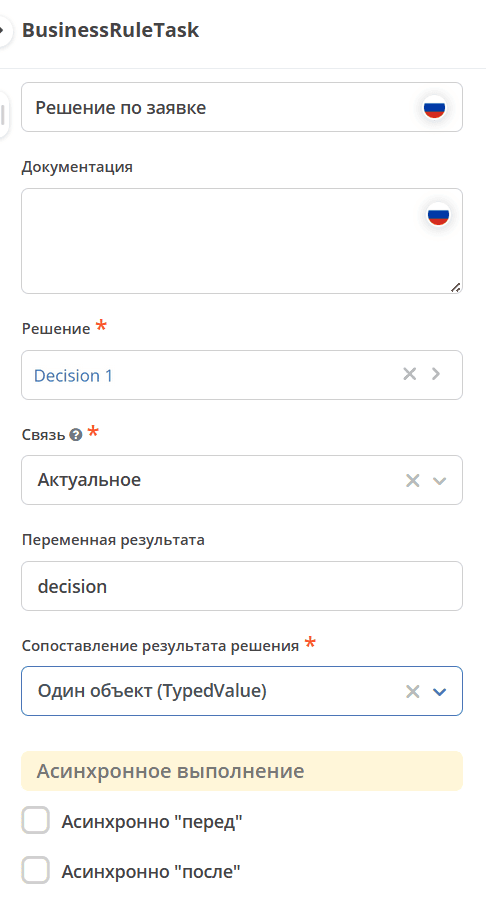
Adding a Business Rule Task Component (2)
Add a Business rule task as the next element after the script task.
Using free selection (1), select and move the elements to the left. In the menu, select «Task» and drag it after the created script task.
Change its type to Business Rule Task:
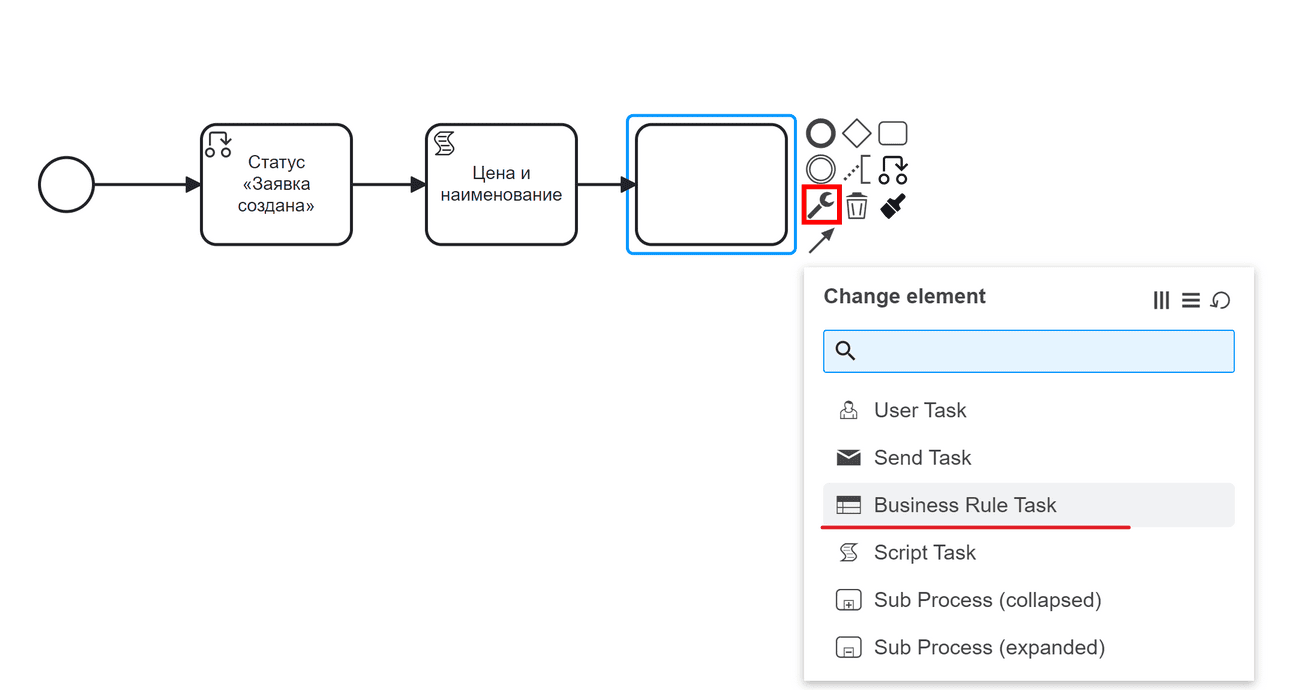
Fill in the fields:
Name —
Request DecisionDecision — select the previously created decision from the journal.
Relation —
Latest(always the latest version of the decision).Result variable —
decision(set when creating the Output element).Decision result mapping —
Single Object (TypedValue)– since we have a single output value.
Updating Gateways and Control Flows (3) and (4)
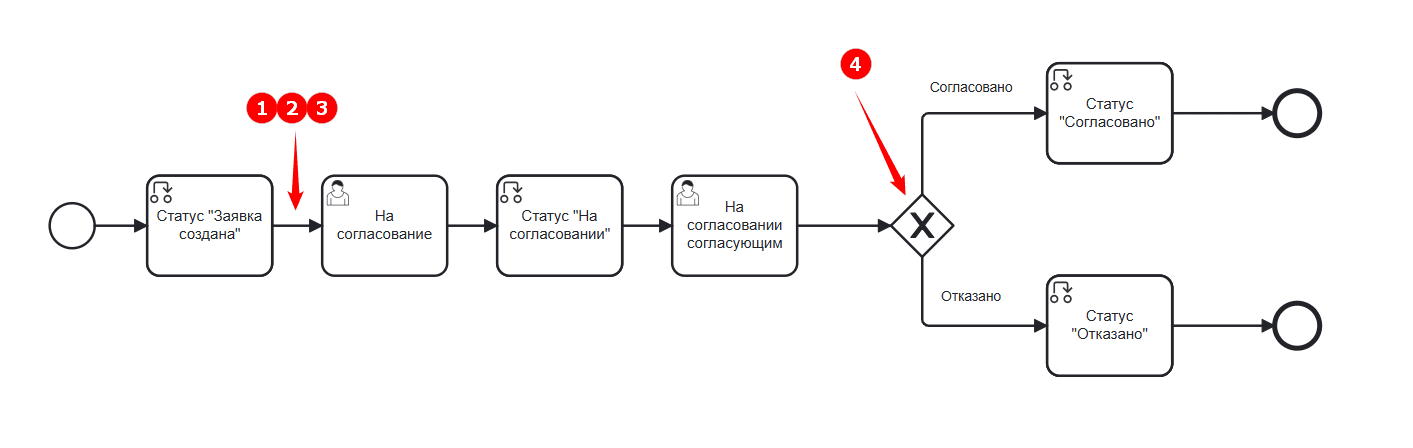
After the Request Decision element, add a gateway with three outputs according to the rules, as well as two additional gateways to the one originally created in the base process:
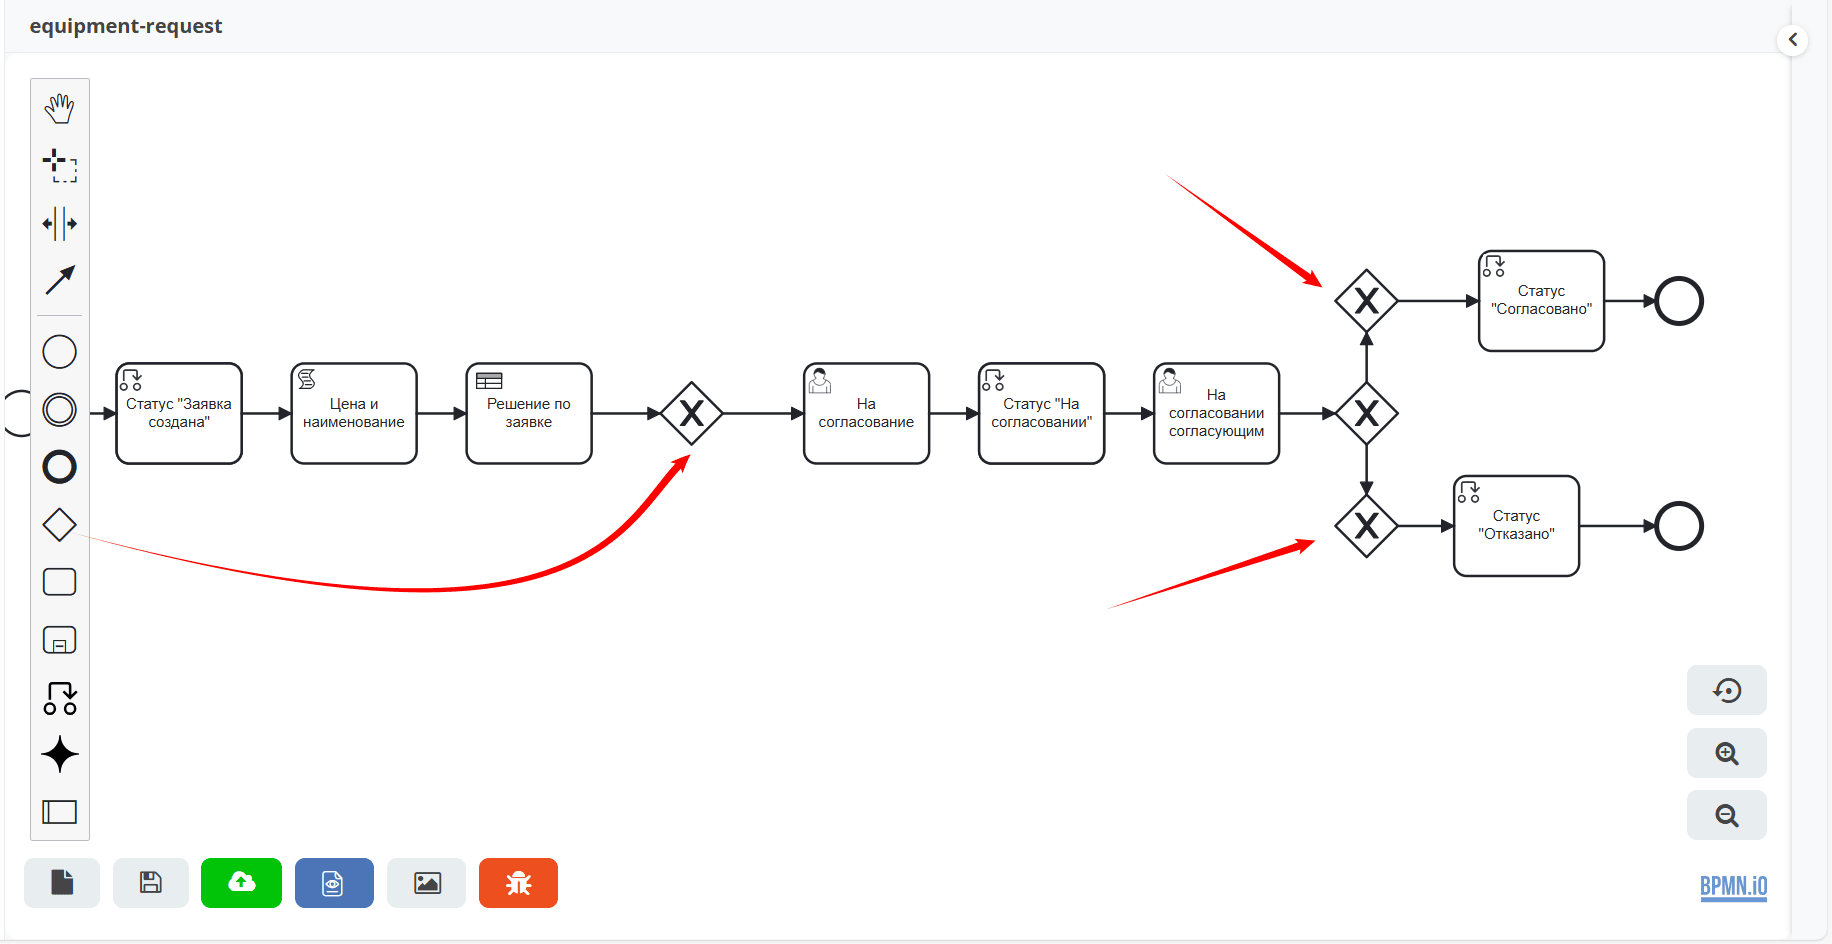
Connect the elements:

where:
1 — «Assign approver» (approval by assigned employee)
2 — «Approve» (automatic approval)
3 — «Reject» (automatic rejection)
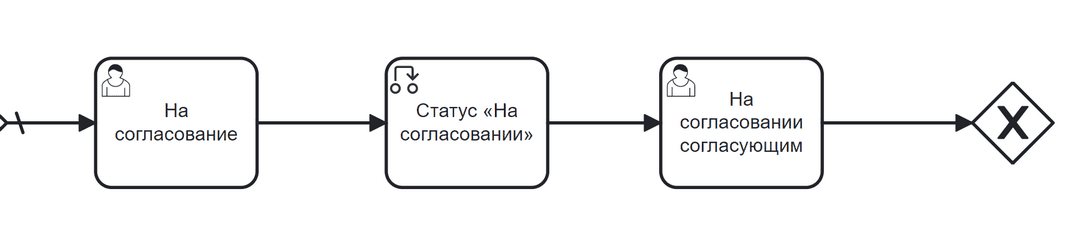
1 — Approval by Employee |
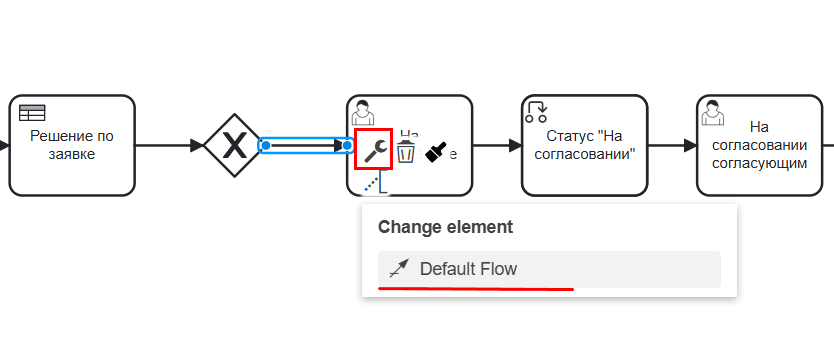
Flow (1) is the default flow. To configure it:
And then the components of the base process follow the default flow:
|
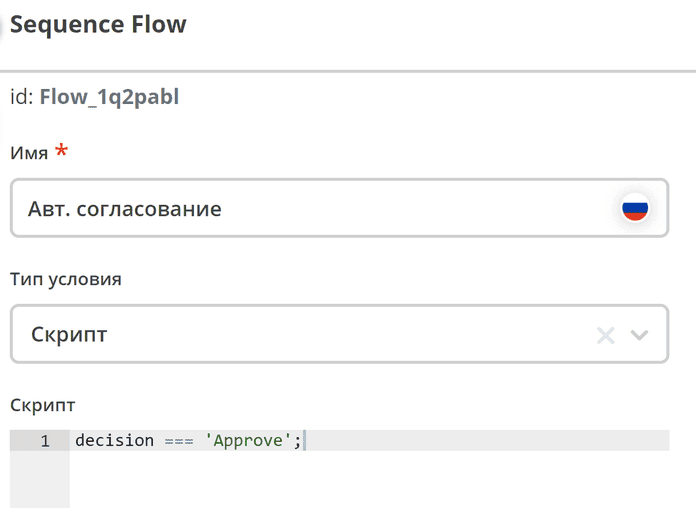
2 — Auto. Approval |
Automatic approval flow:
|
3 — Auto. Rejection |
Automatic rejection flow:
|

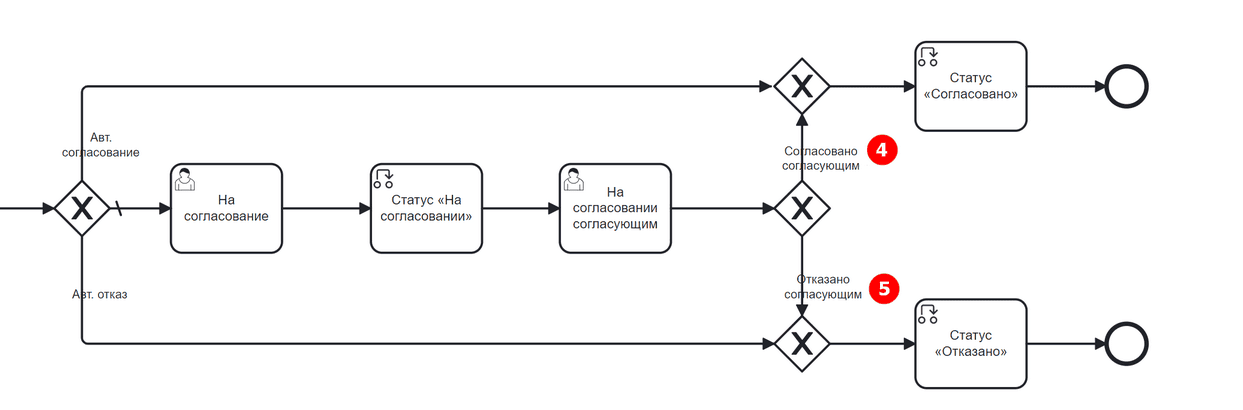
Note the flows (4) and (5). They were configured in the base process:
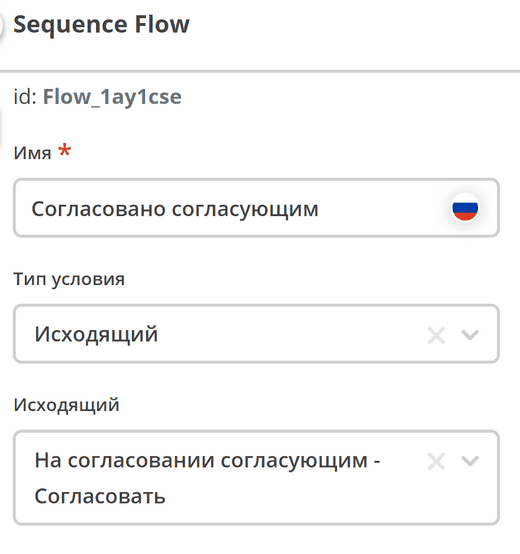
4 — Approved by Approver |
|
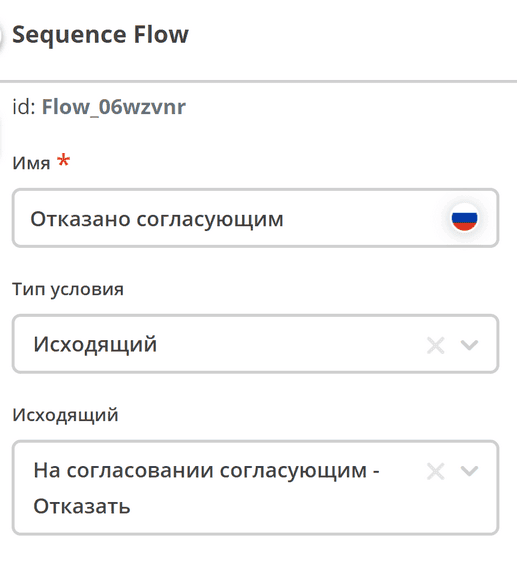
5 — Rejected by Approver |
|
Save and publish the process:
Process Testing
Let’s test how the decision table works.
Note
For the decision to be made automatically, the equipment name in the request form must exactly match (including case) the name in the decision table. Be careful when using Unicode characters.
Automatic Approval
Create a request in the journal:
Equipment Name —
MouseCost —
500Initiator — current user
Approver — select the current user or another from the organizational structure
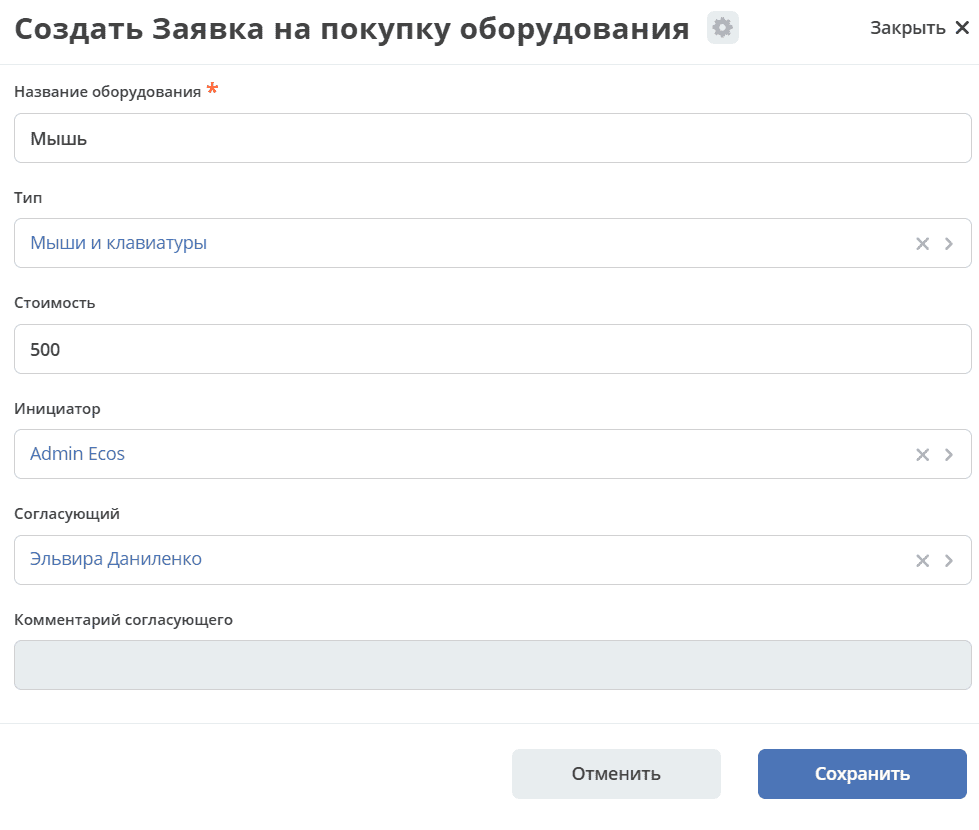
And click «Save». The request is created successfully and its status automatically becomes «Approved»:

Automatic Rejection
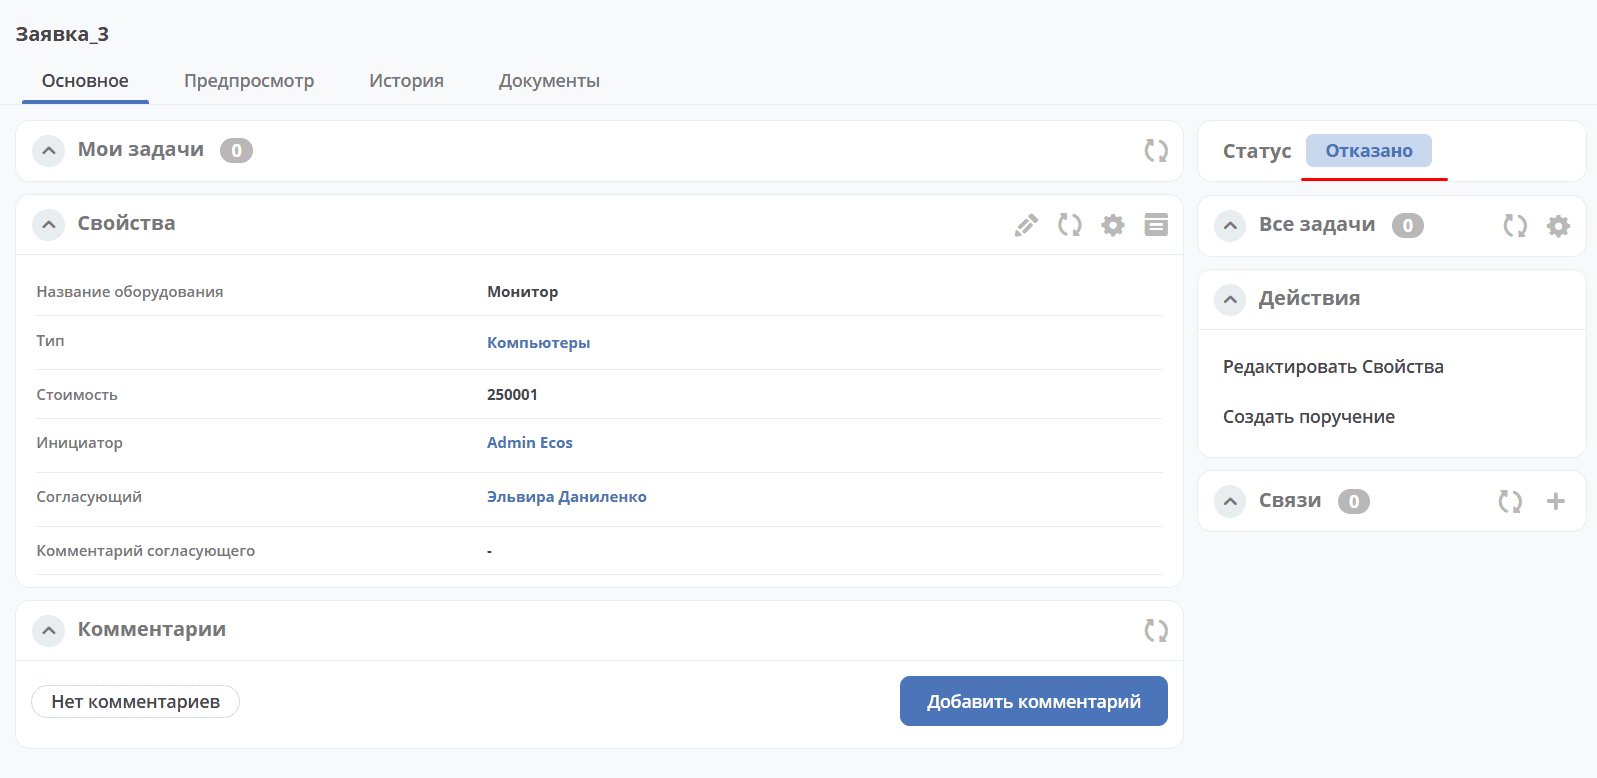
Create a request in the journal:
Equipment Name —
MonitorCost —
250001Initiator — current user
Approver — select the current user or another from the organizational structure
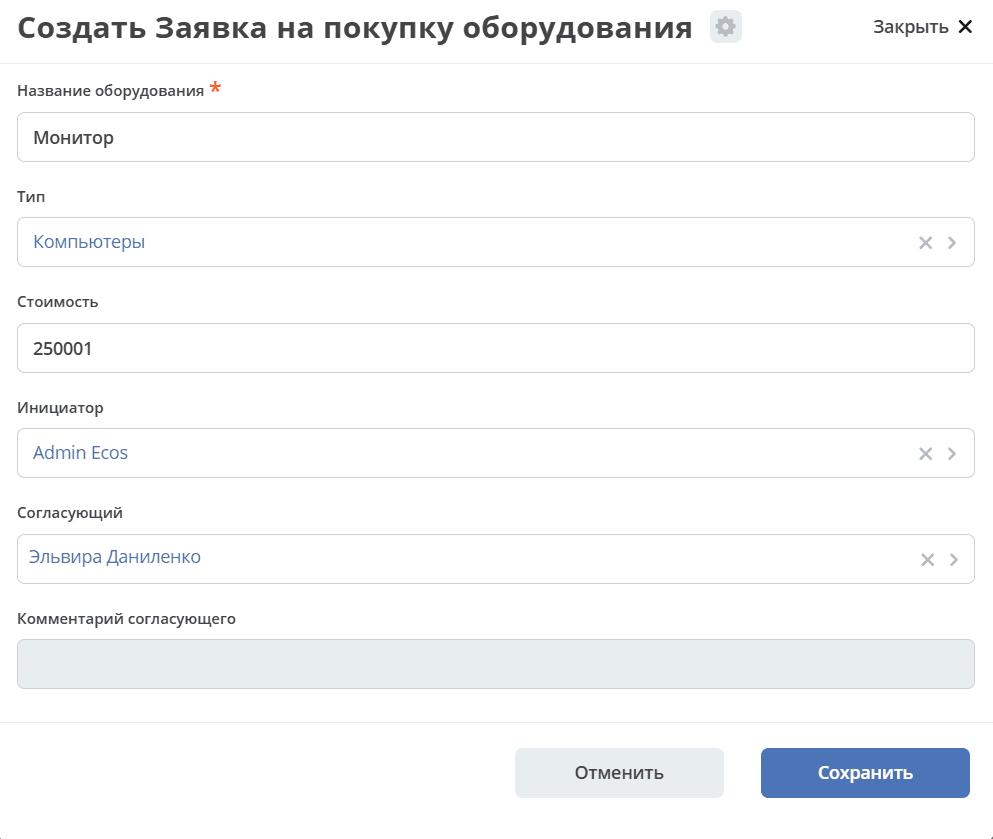
And click «Save». The request is created successfully and its status automatically becomes «Rejected»:
Approval by Employee (Default Flow)
If you specify any other equipment name not listed in the table, or specify:
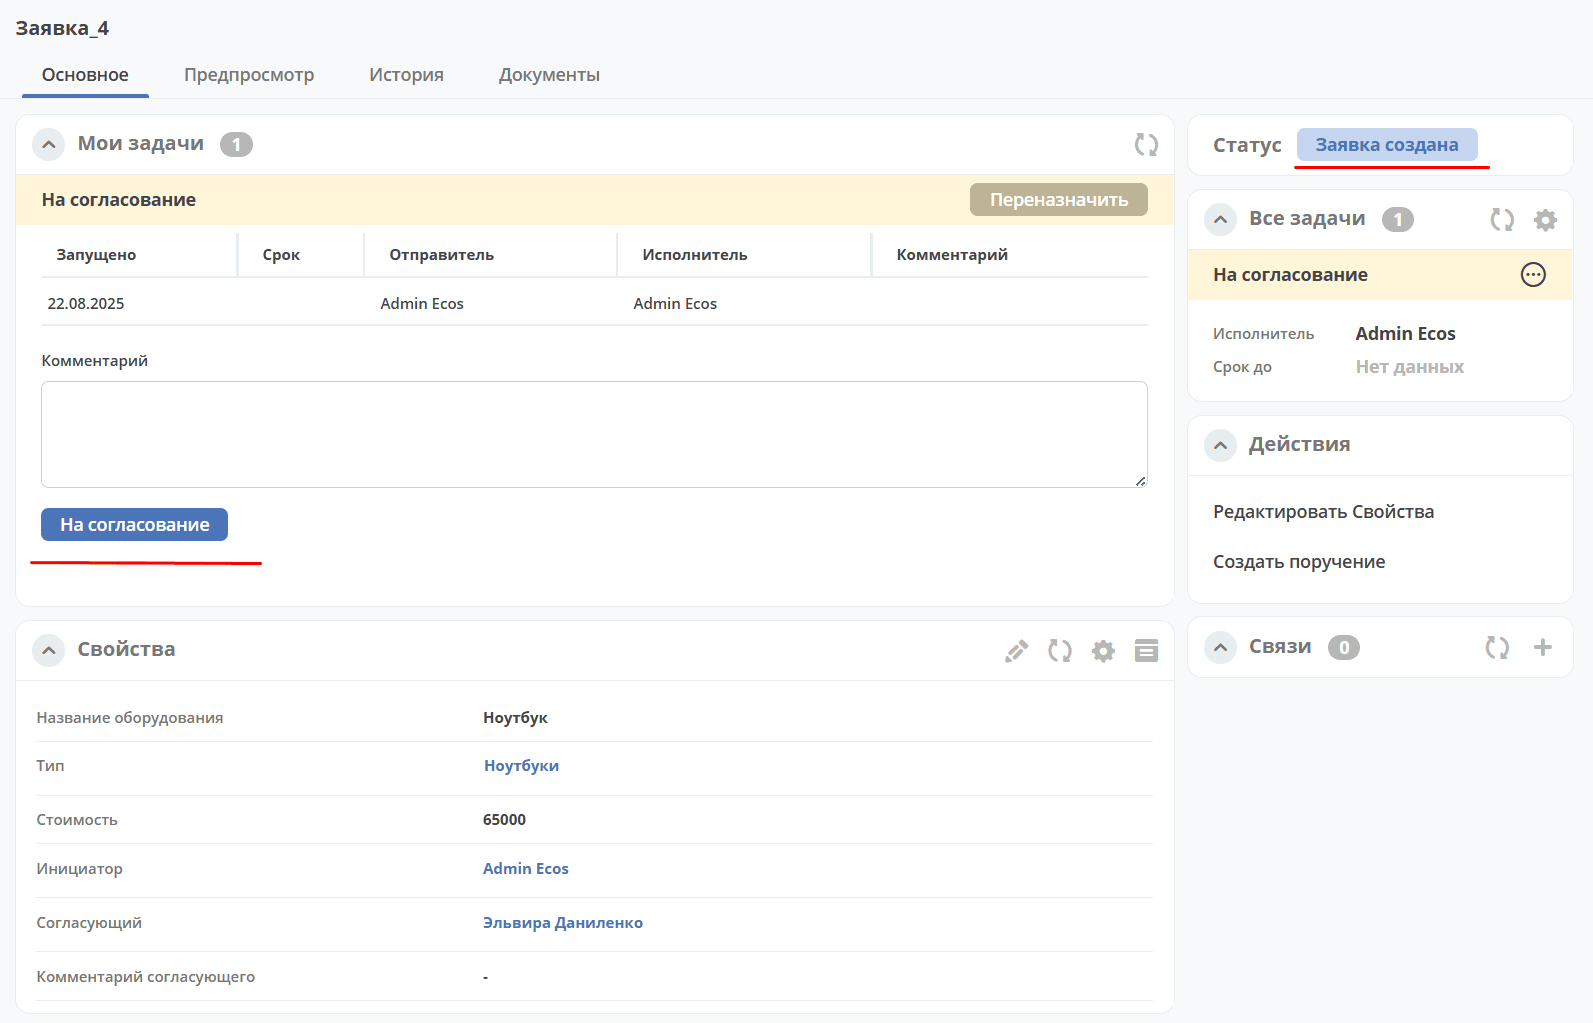
Equipment Name —
LaptopCost —
65000Initiator — current user
Approver — select the current user or another from the organizational structure
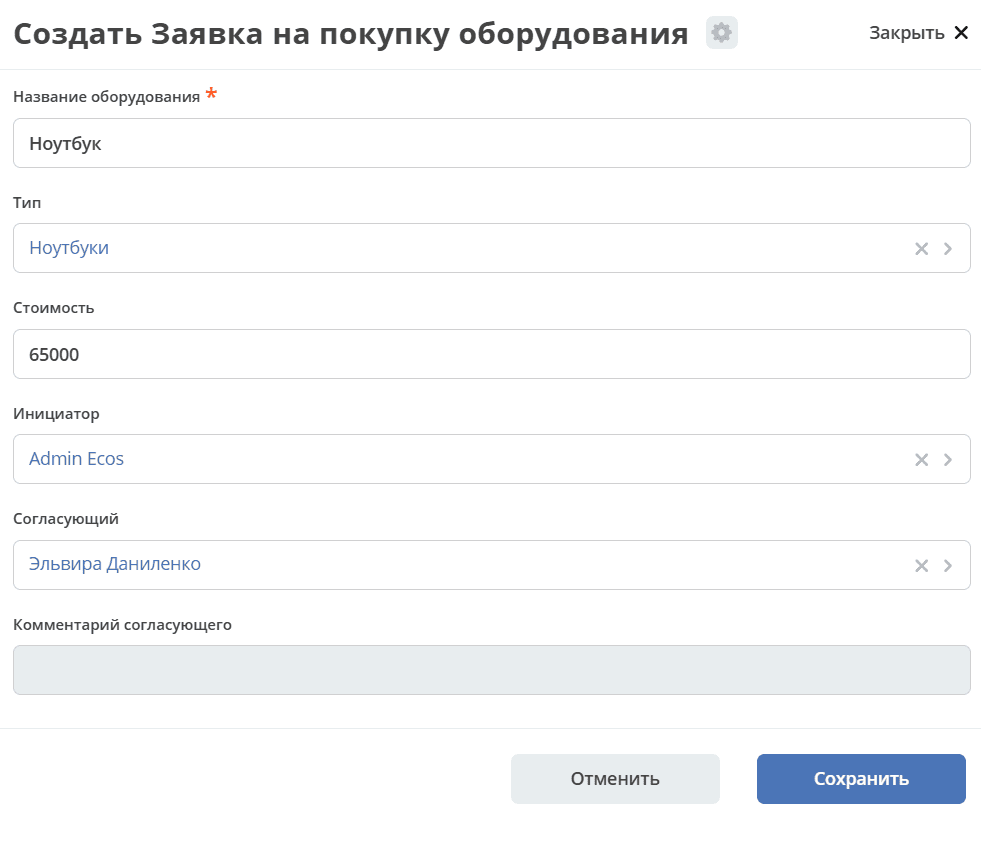
then the process will proceed in the standard way, as in the original Equipment Purchase Request: