Best practice
This page contains recommendations for designing and formatting forms in the Citeck platform. Following the listed rules ensures interface consistency and improves the user experience when working with references, requests, and tasks.
Reference forms, child elements (table-form)
All form elements are placed inside a container. The form header and buttons are static, and only the fields on the form can be scrolled. Using the counterparties reference as an example:
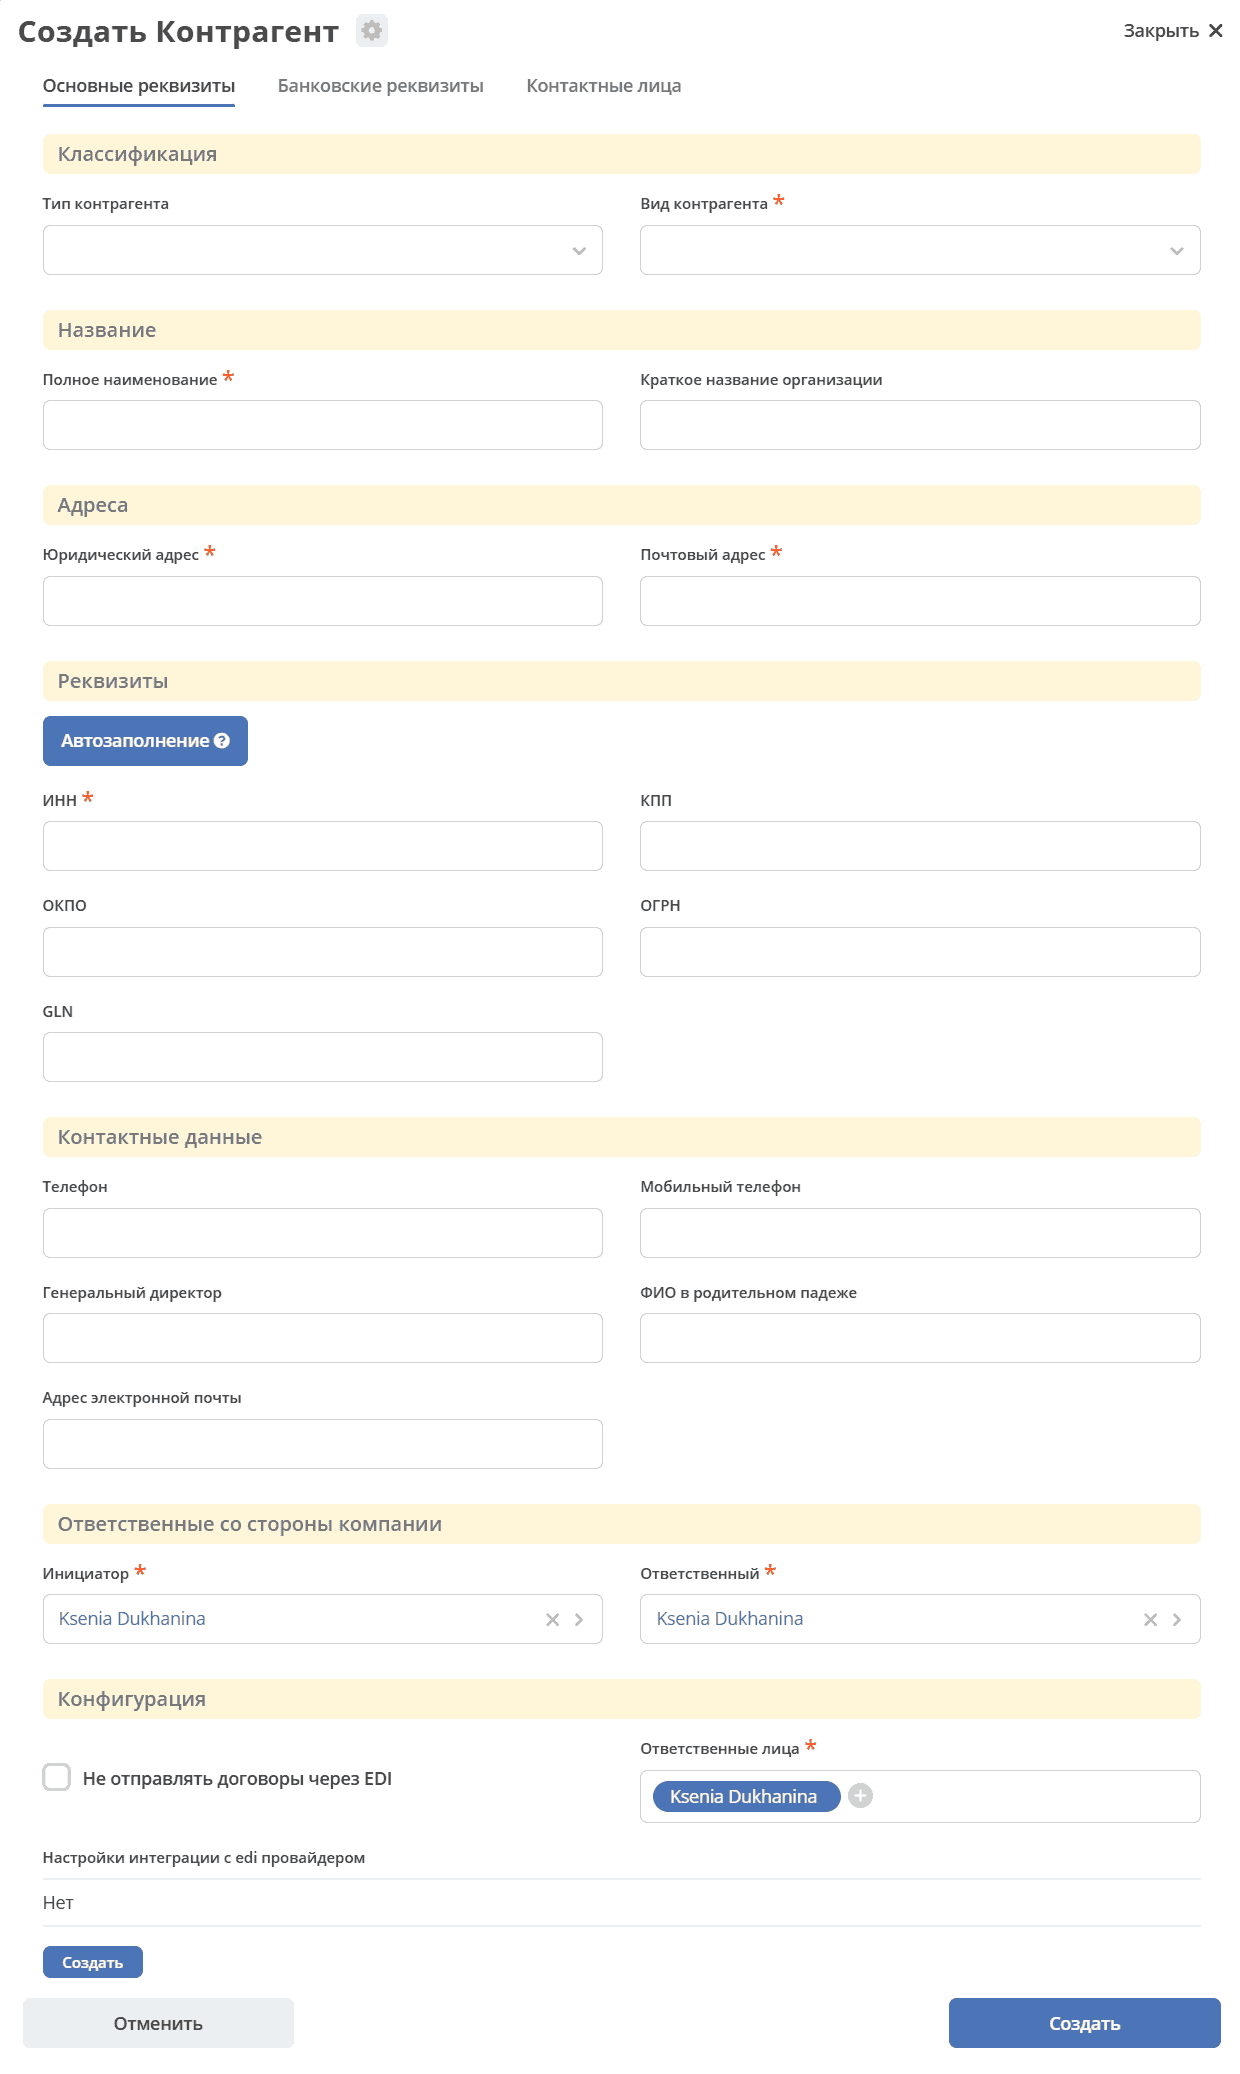
Columns:
If there are 1 to 3 fields on the form, they are laid out in a single column.
If there are 4 or more fields on the form, all fields must be arranged in 2 columns.
If functional division of columns is required, panels with headers are used. Column division can be placed inside a panel, or a panel can be placed inside a column.

Buttons
are located at the bottom of the form,
on the left, occupying 1/4 of the form’s width, is the gray “Cancel” button,
on the right, occupying 1/4 of the form’s width, is the blue “Save” button.
it is necessary to remove the large padding below the buttons at the bottom of the form.
Example of ideal button placement and appearance:

Request creation forms
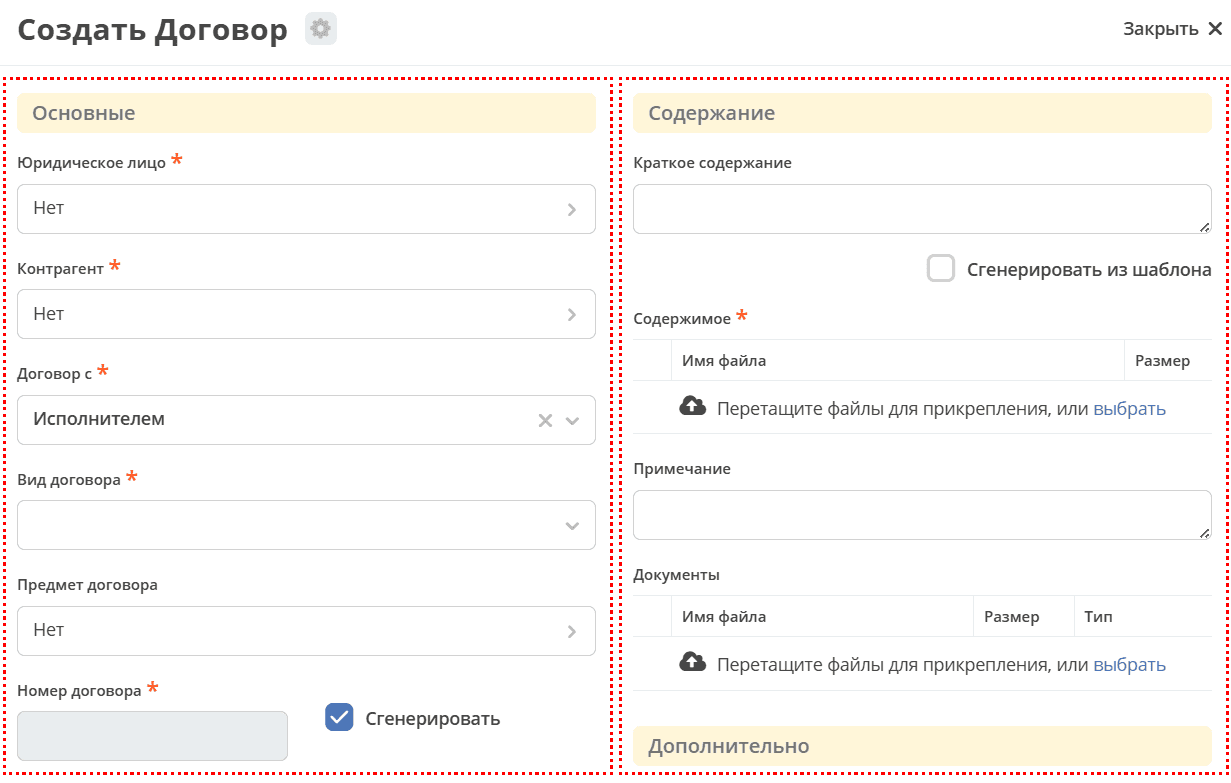
All form elements must be placed inside a container. The form header and buttons must be static, and only the fields on the form can be scrolled. Using the contract form as an example:
All fields on the form must be arranged in 2 columns. If functional division of columns is required, panels with headers are used. Panels are also placed inside columns.
Criteria for panels:
Fields in panels are grouped by meaning
A panel must have a title
It is necessary to optimize the placement of panels to minimize empty space, but all fields should be formatted in width and height, i.e., arranged in a tabular manner.
Buttons
buttons are located at the bottom of the form,
on the left, occupying 1/4 of the form’s width, is the gray “Cancel” button,
on the right, occupying 1/4 of the form’s width, is the blue “Create” button.
to the left of the “Create” button, occupying 1/4 of the form’s width, is the gray “Save” button.
it is necessary to remove the large padding below the buttons at the bottom of the form.
Example of button placement and appearance:

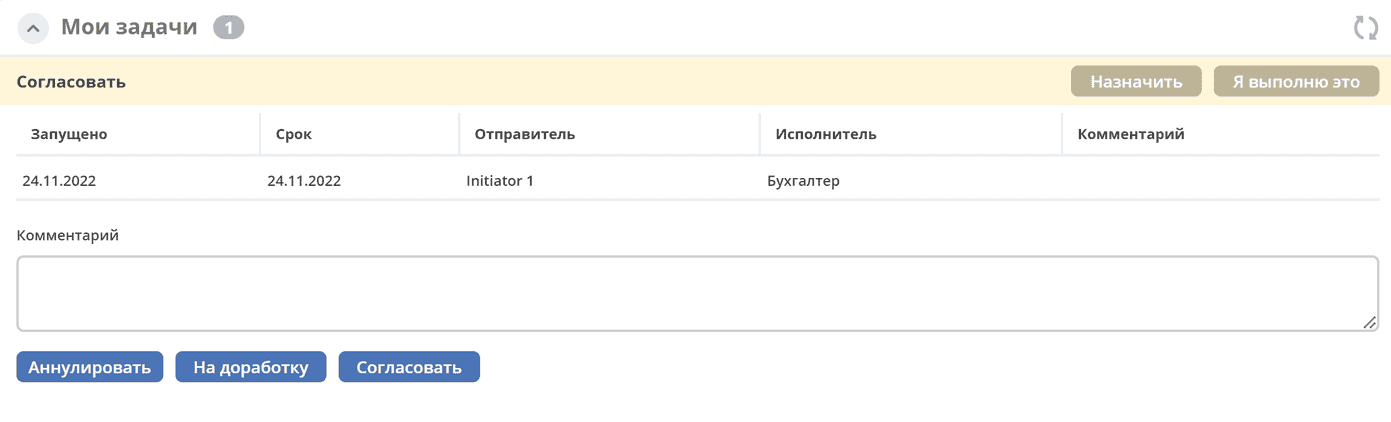
Usually, the task form contains a “Comment” field and approval buttons. Depending on the process requirements, the content may vary.
Task forms
Button requirements:
All buttons are aligned to the left edge of the form.
Buttons with a negative resolution (gray color) are placed first.
Buttons with a positive resolution (blue color) are placed on the right edge.
If required, buttons with a neutral resolution (gray color) are placed between the negative and positive resolution buttons.
Example of a task form:
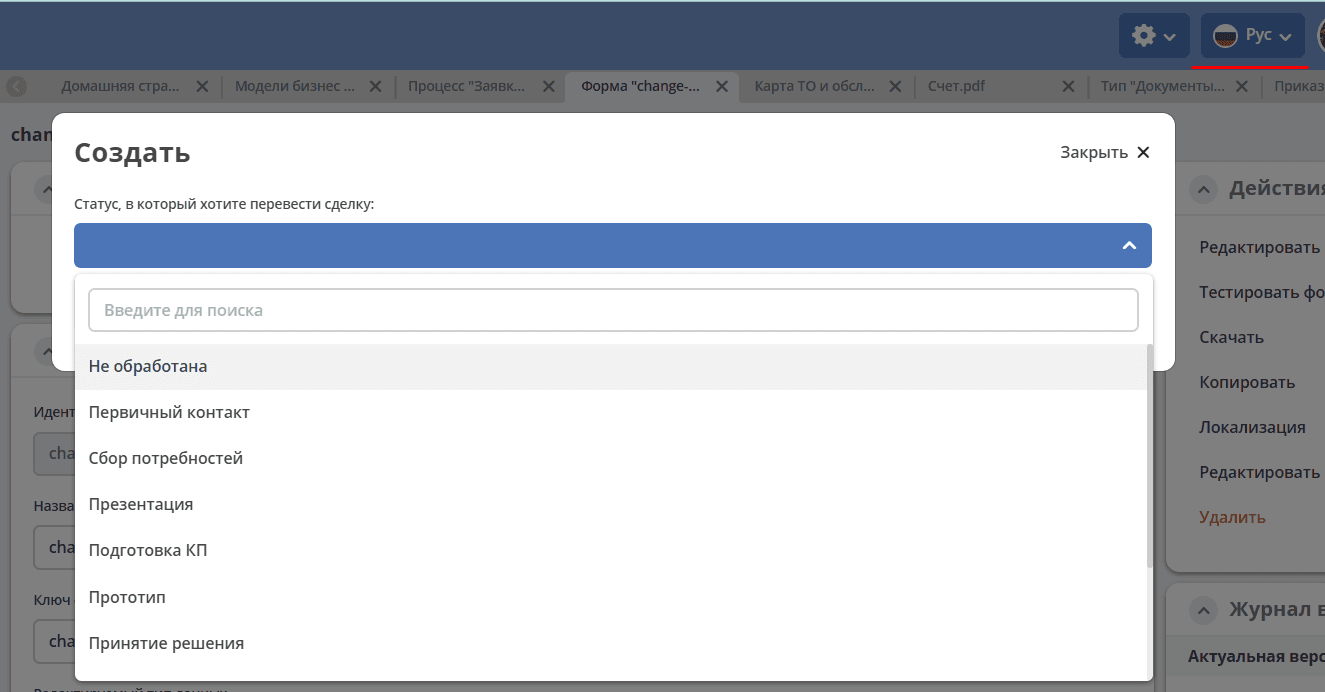
Using the Citeck.helpers.getMLValue(nameObj) function
The Citeck.helpers.getMLValue(nameObj) function accepts a parameter - an object with keys that match the keys of existing localizations and values - the names in those localizations.
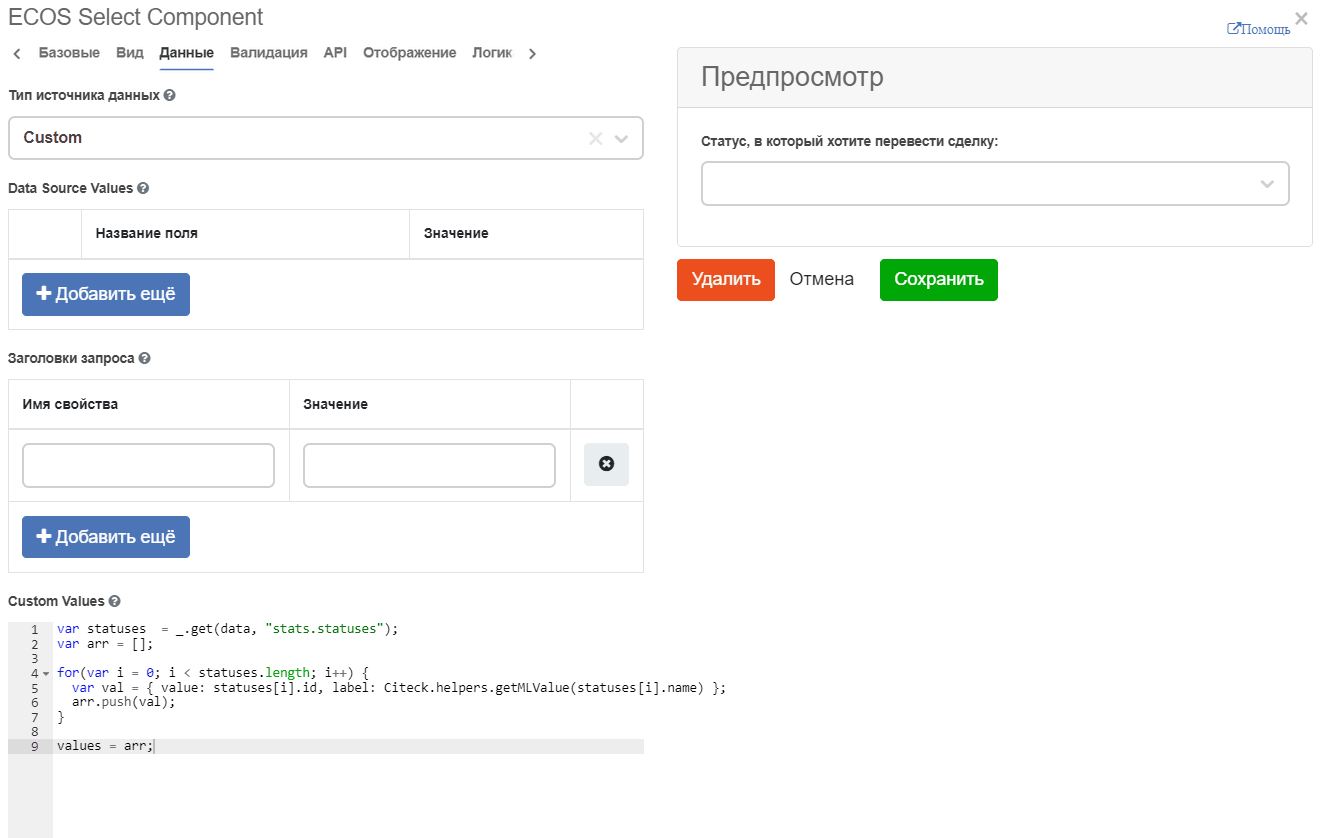
var statuses  = _.get(data, “stats.statuses”);
var arr = [];

for(var i = 0; i < statuses.length; i++) {
var val = { value: statuses[i].id, label: Citeck.helpers.getMLValue(statuses[i].name) };
arr.push(val);
}

values = arr;
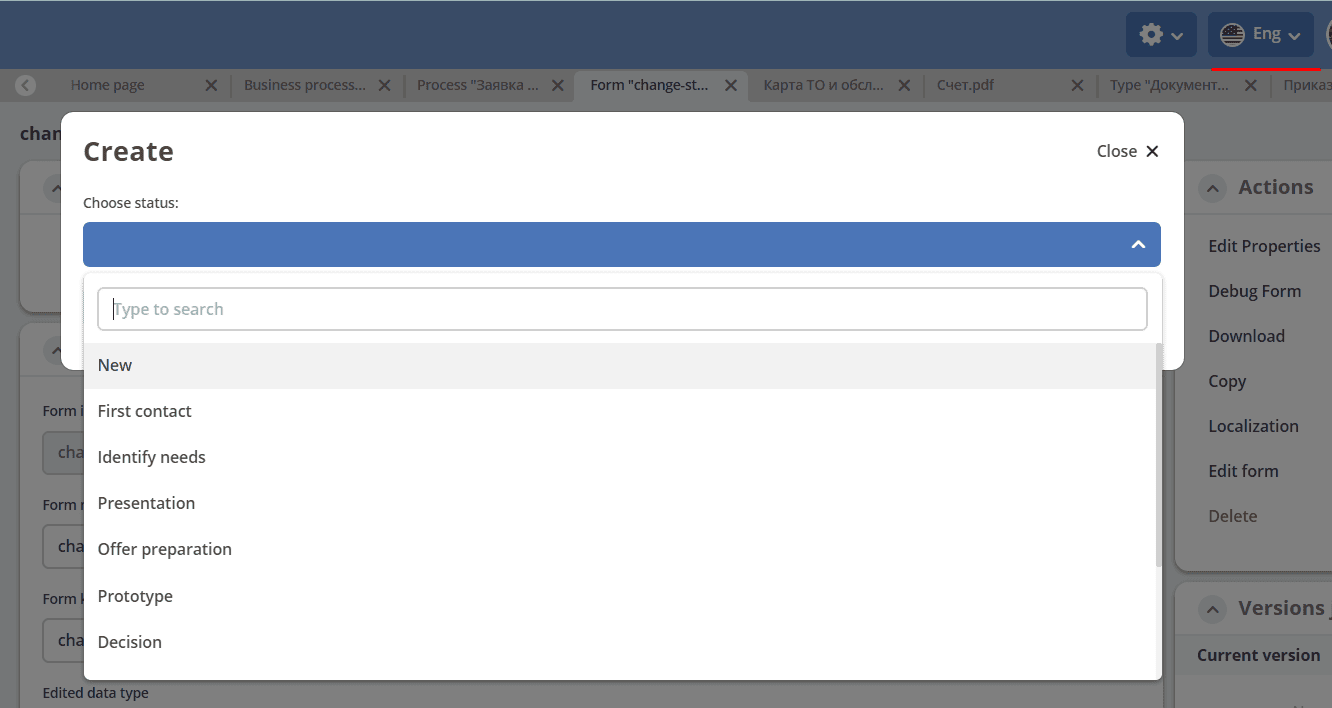
Implementation example:
When Russian language is selected in the system – statuses are displayed in Russian:
When English language is selected in the system – statuses are displayed in English:
Using the main form submission function
In any component, it is possible to trigger the submission of the main (parent) form immediately after some action in the child form by handling the instance.on('change') event.
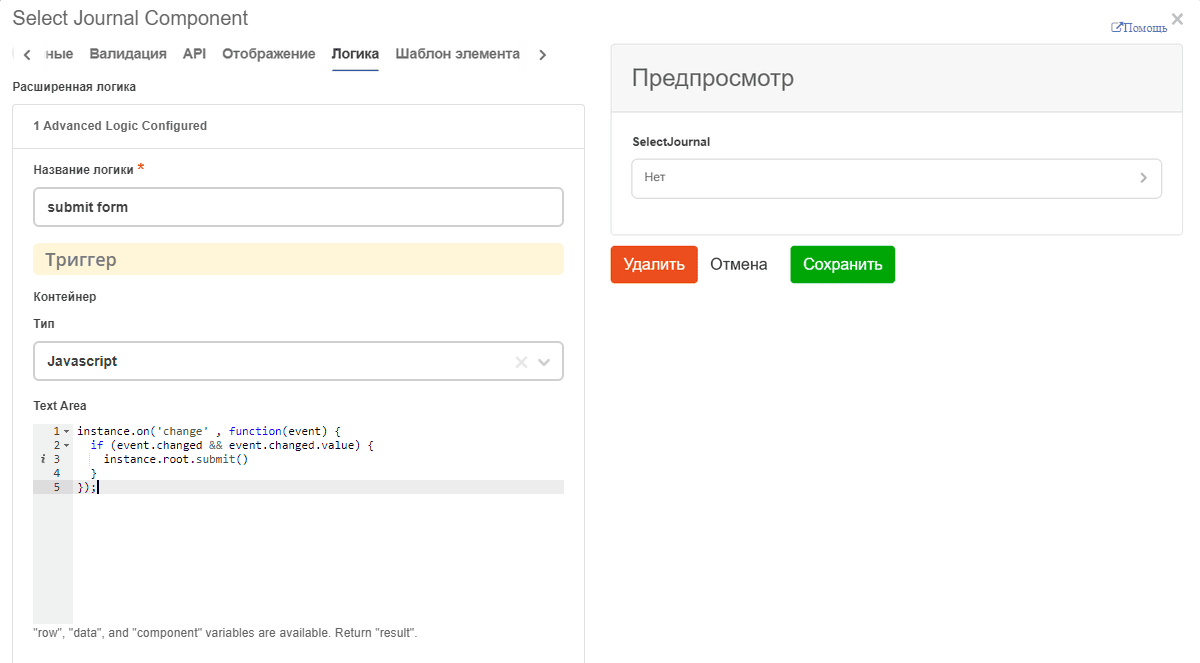
instance.on('change' , function(event) {
if (event.changed && event.changed.value) {
instance.root.submit()
}
});
When using instance.root.submit(), it is possible to specify two optional parameters:
If you need to perform validation or prepare data before submission, you can define a callback function as the first argument, which will perform the necessary actions.
As the second argument, you can also pass options if they are needed for the callback function. Options are passed as an object.