Offers Module
The module provides a comprehensive solution for managing the candidate selection process and storing information for each candidate.
Work in the module consists of two business processes:
A department creates and approves a recruitment request with information about the position and candidate experience.
Based on the received request, the HR department selects candidates, schedules interviews, and closes the request upon candidate selection.
Available Workspace
Модуль доступен в рабочем пространстве Рекрутинг.
Recruitment Request
Process Directories
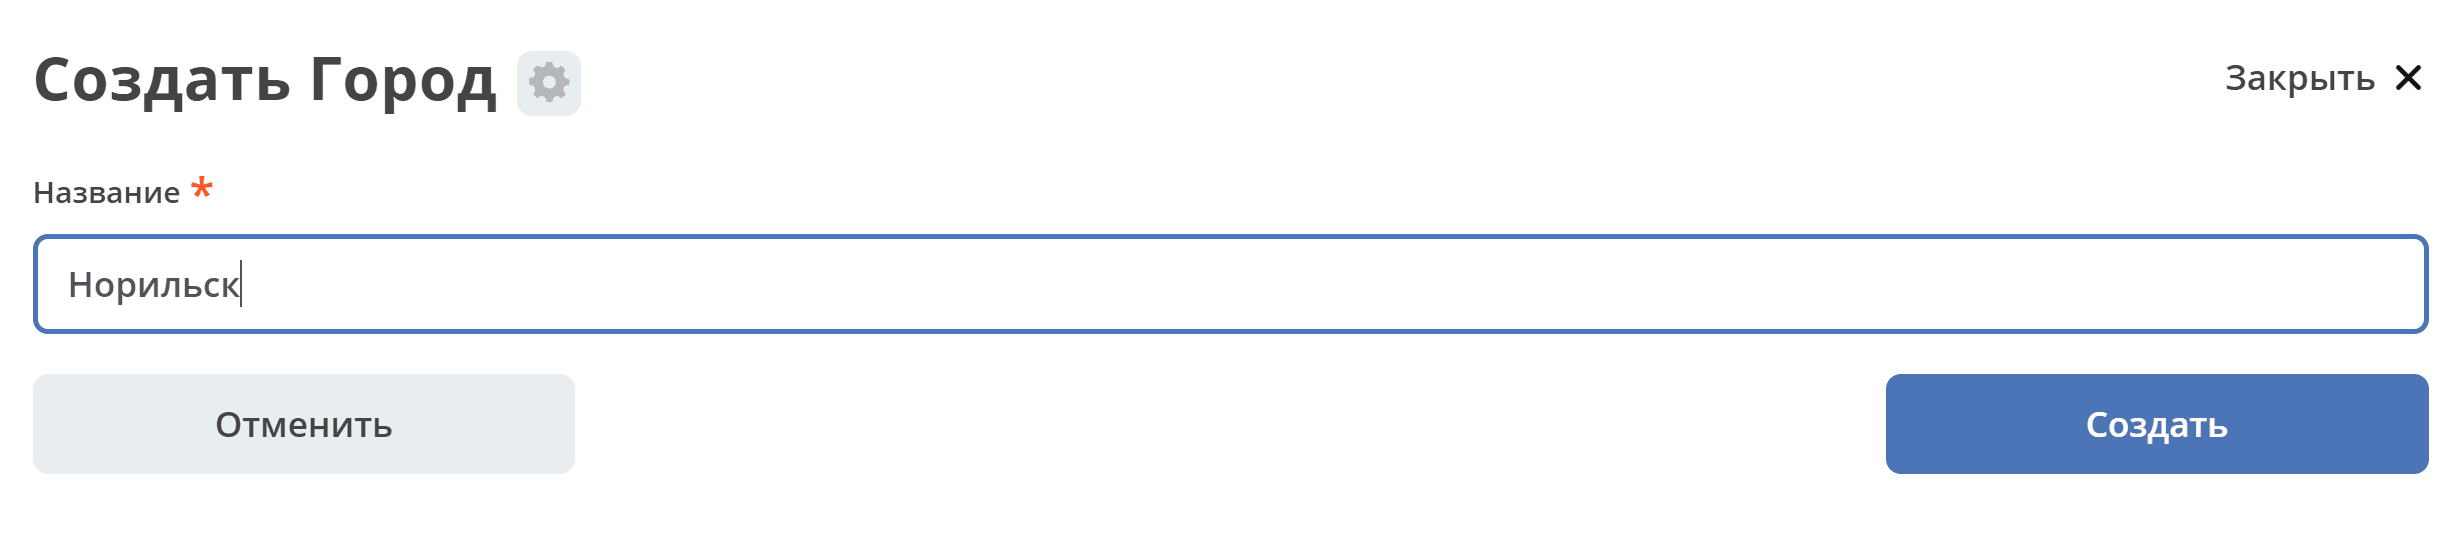
City:
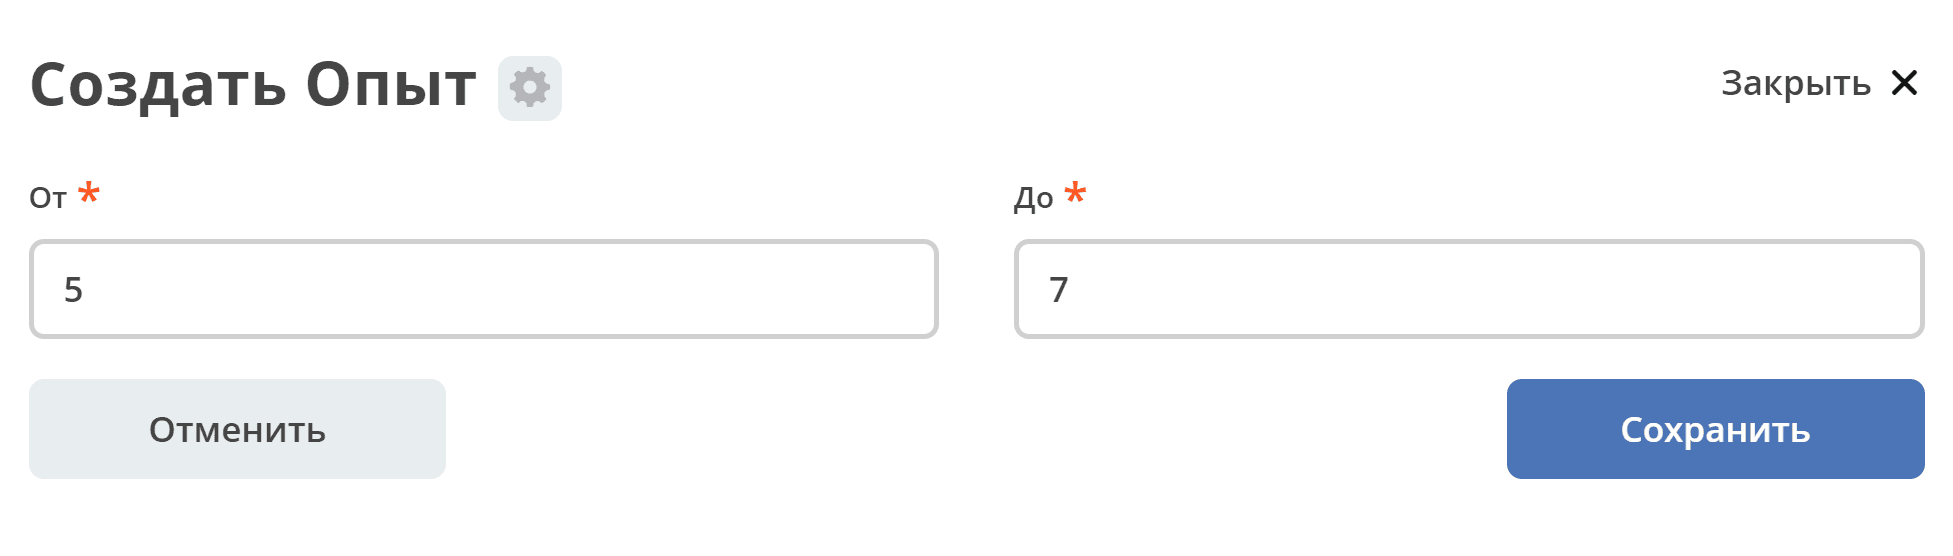
Experience:
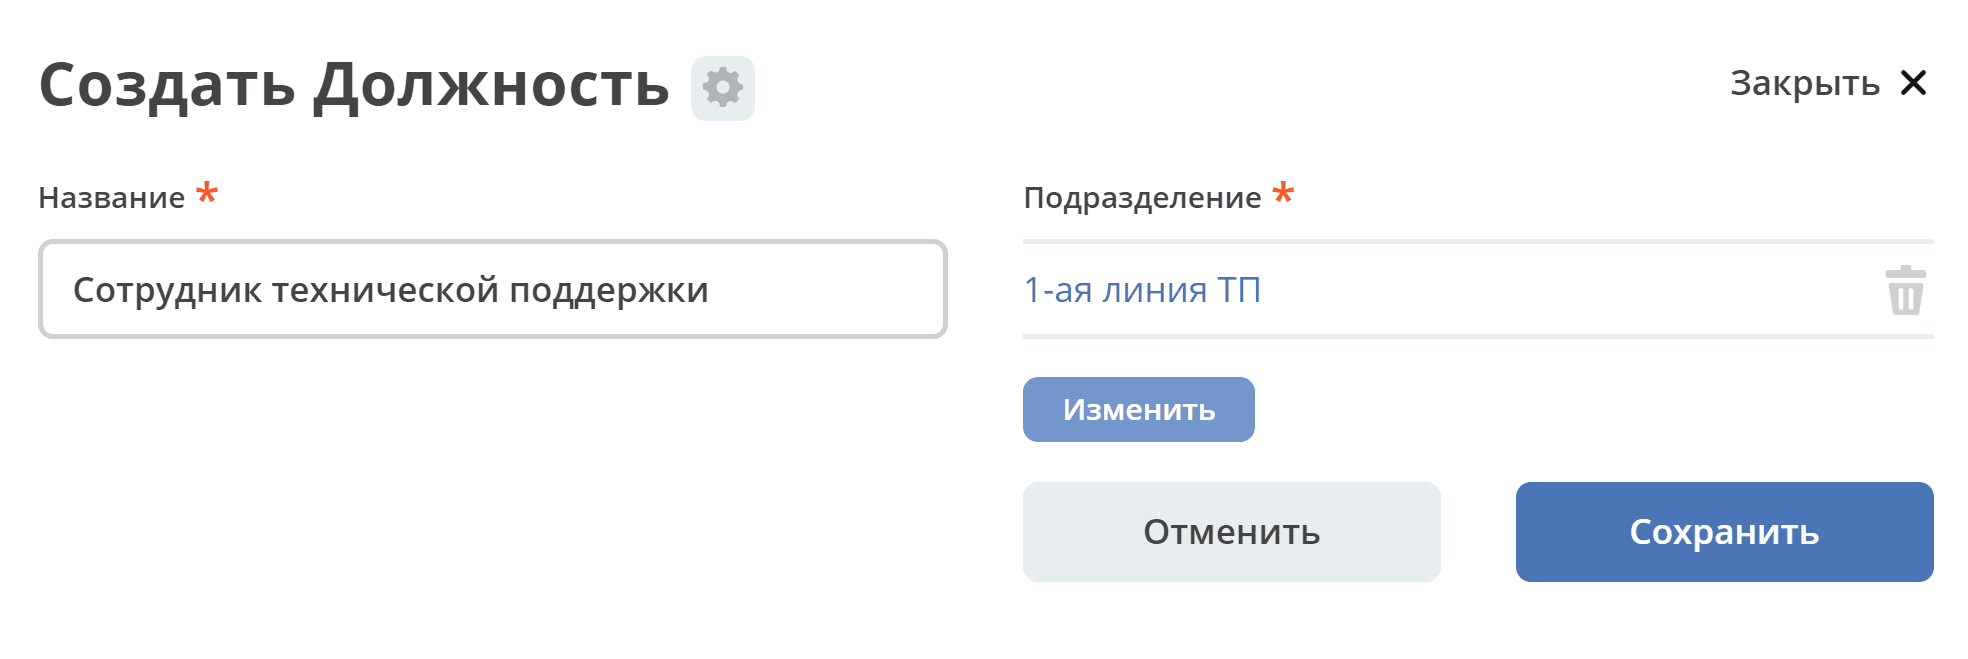
Position
Project

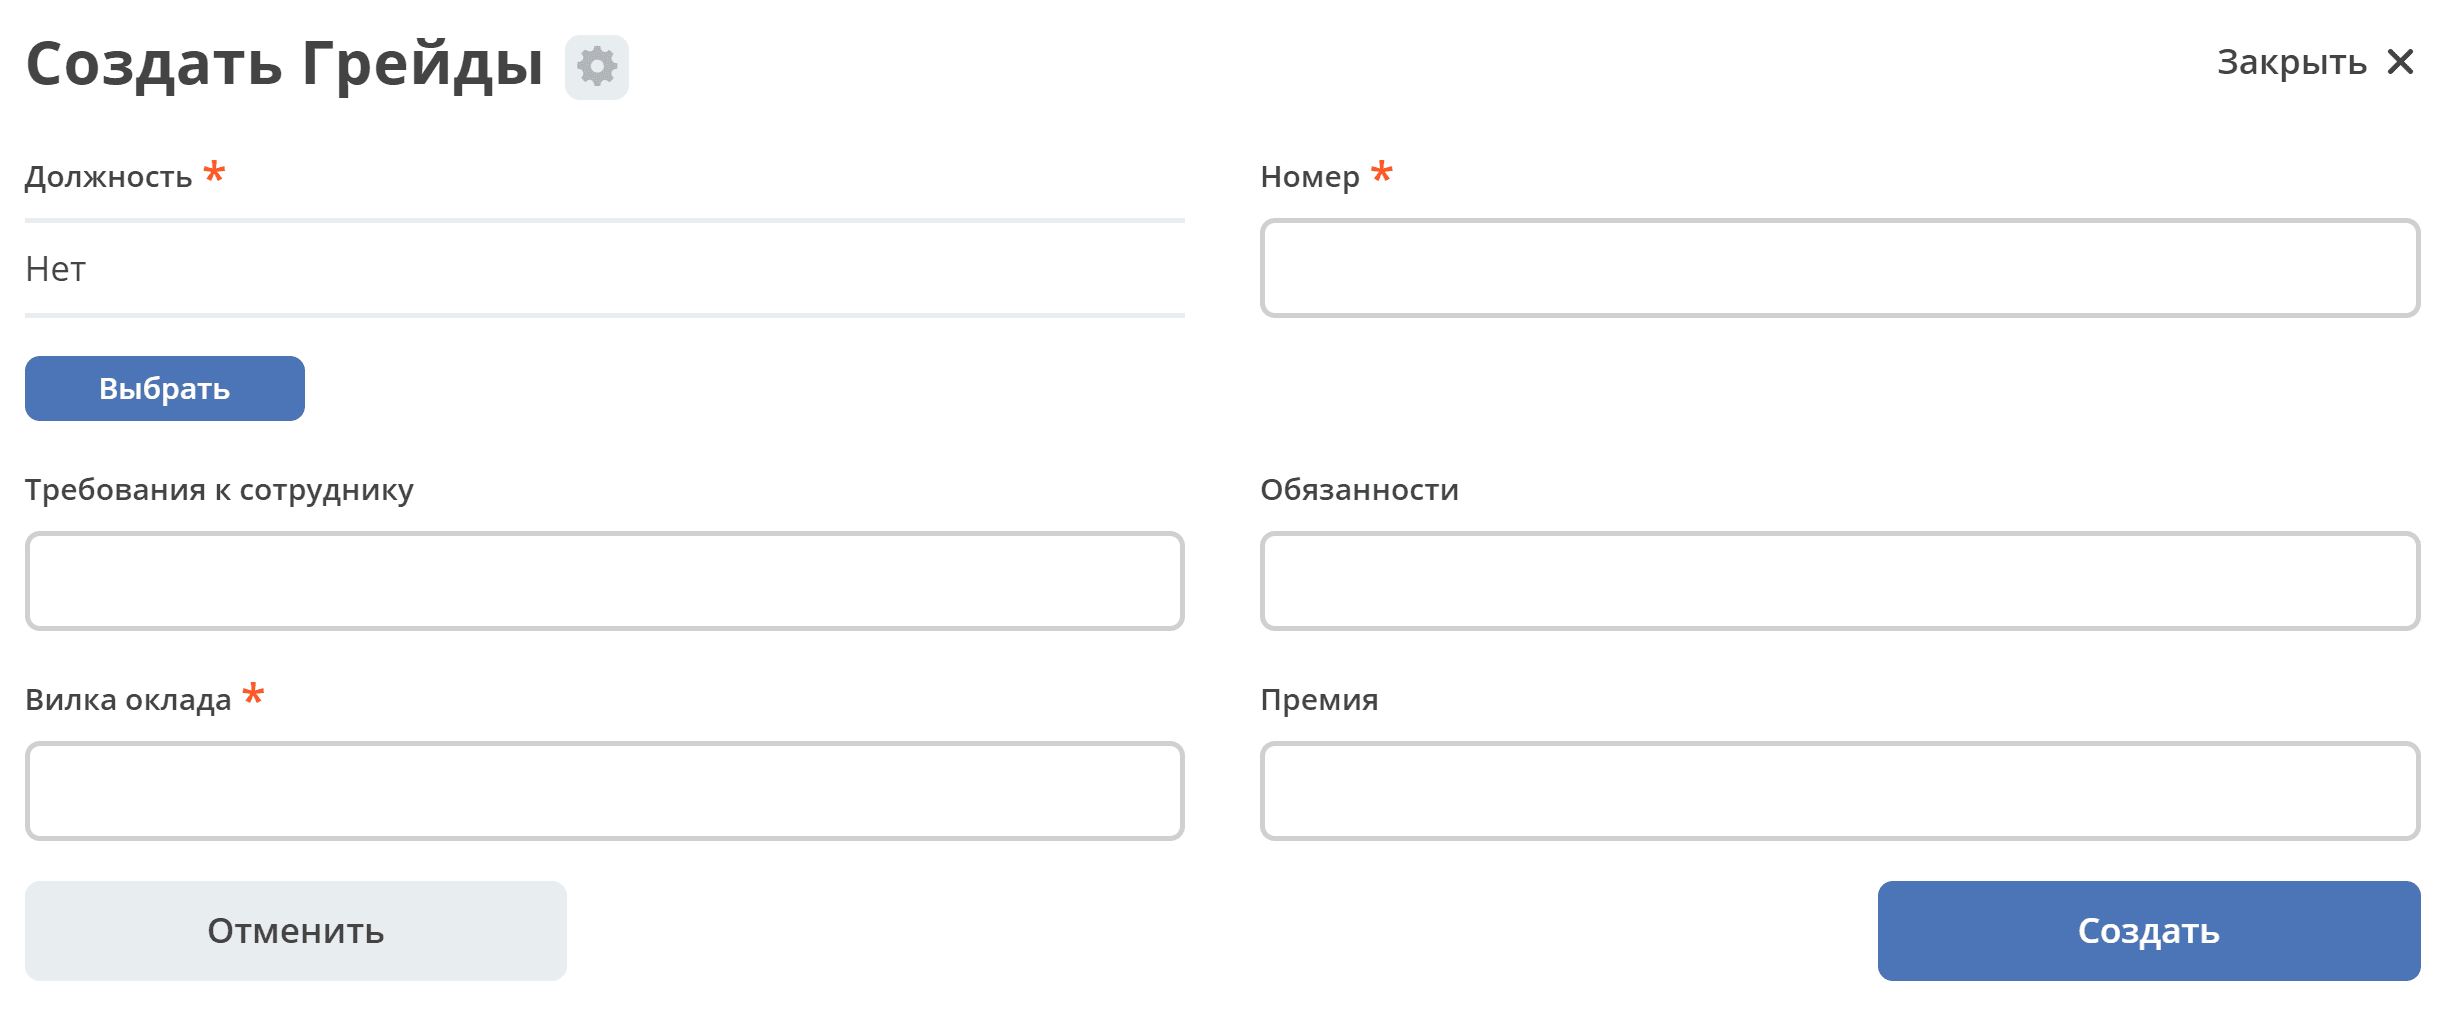
Grades
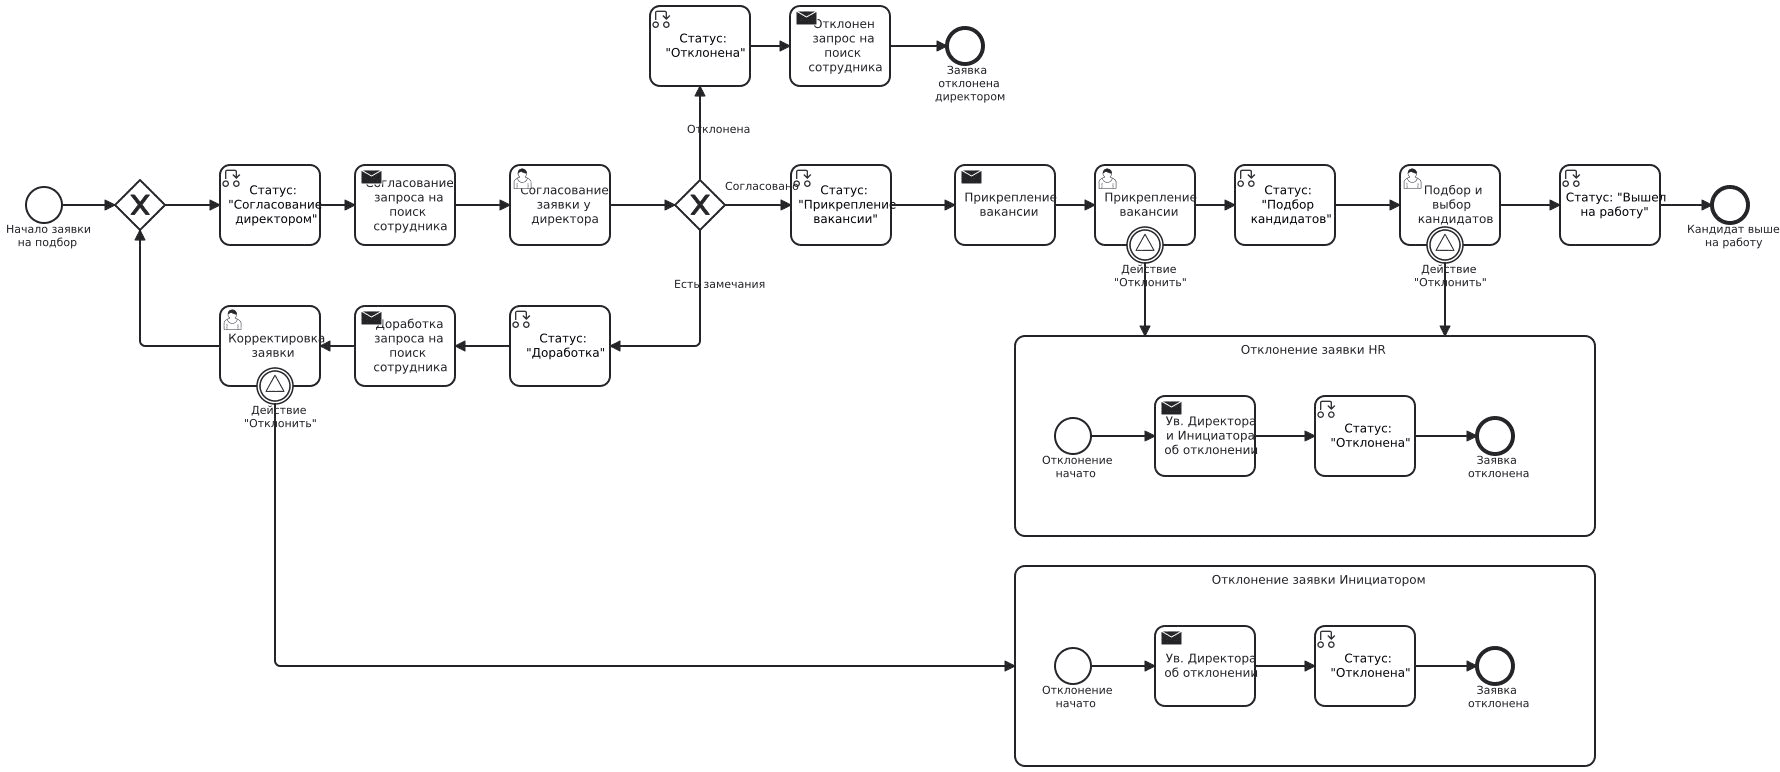
Business Process Diagram
Roles
Initiator |
Company employee submitting a recruitment request |
General Director |
Company General Director approving the recruitment request |
HR |
Employees of the HR department group who post vacancies, select candidates, and schedule interviews. |
Organizational structure groups where users must be added
General Director
Chief Accountant
Accounting Department
HR Department
Production Director
Statuses
Draft |
Recruitment request created |
Director Approval |
Recruitment request sent for director approval |
Revision |
Recruitment request sent for revision to the Initiator |
Rejected |
Recruitment request rejected by the director, initiator, or HR department employee. |
Vacancy Attachment |
Recruitment request received by the HR department, employee publishes vacancy information and places it in the request card |
Candidate Selection |
Request received by the HR department for candidate selection based on the published vacancy |
Started Work |
HR employee set ‘Started Work’ in the candidate card. Recruitment request closed. |
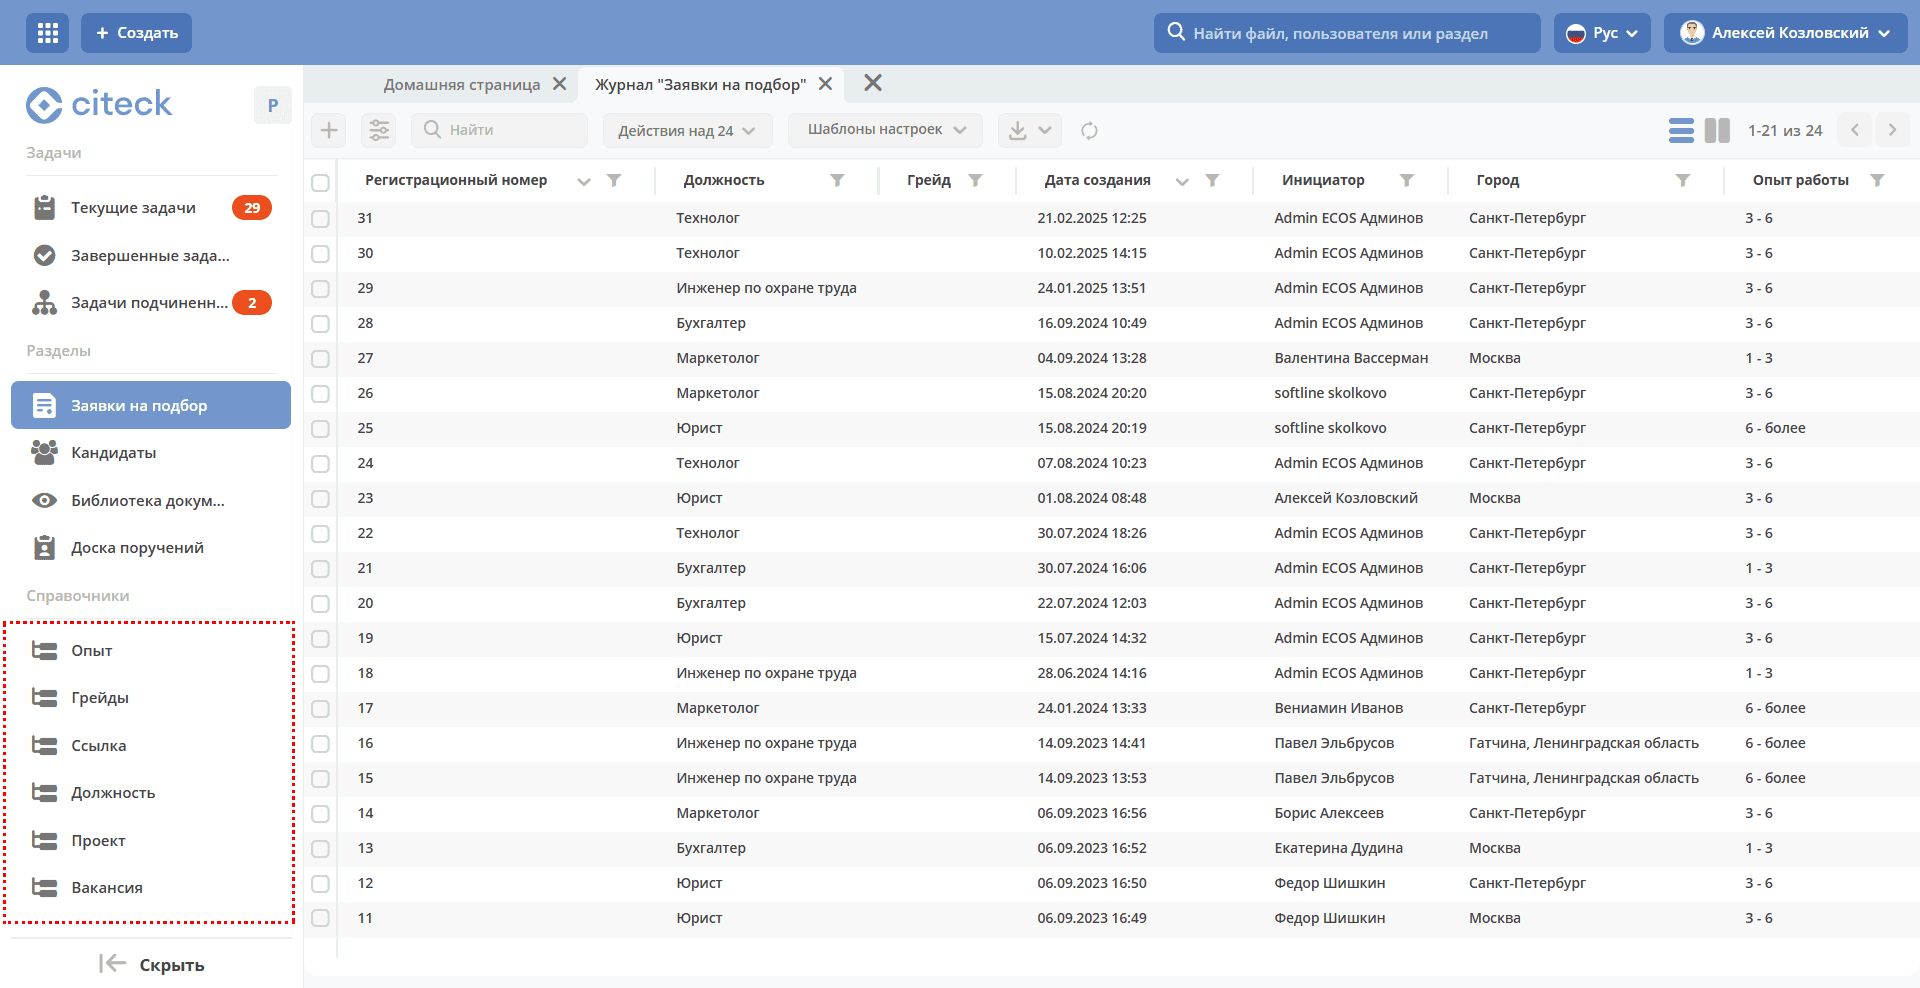
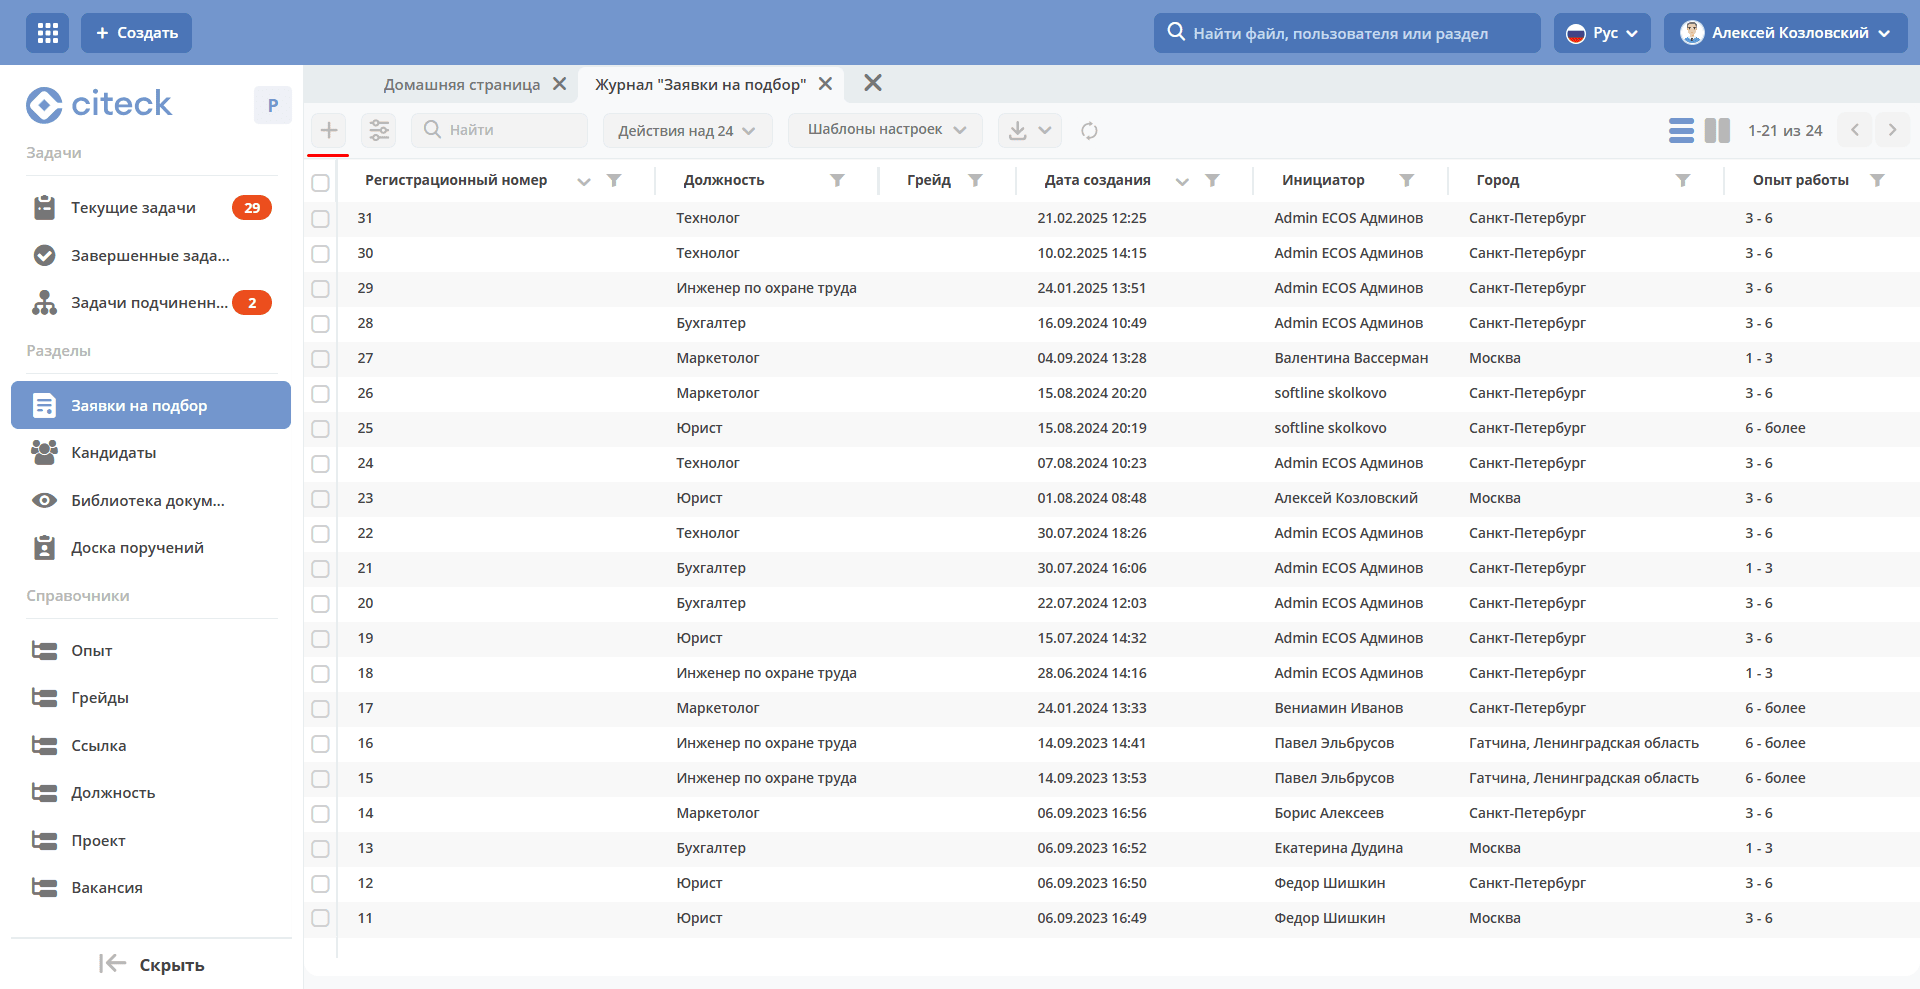
Journal

Request Processing Workflow
Step 1. Creating a Request
Creation is possible using the quick create button:

or from the «Recruitment Requests» journal:
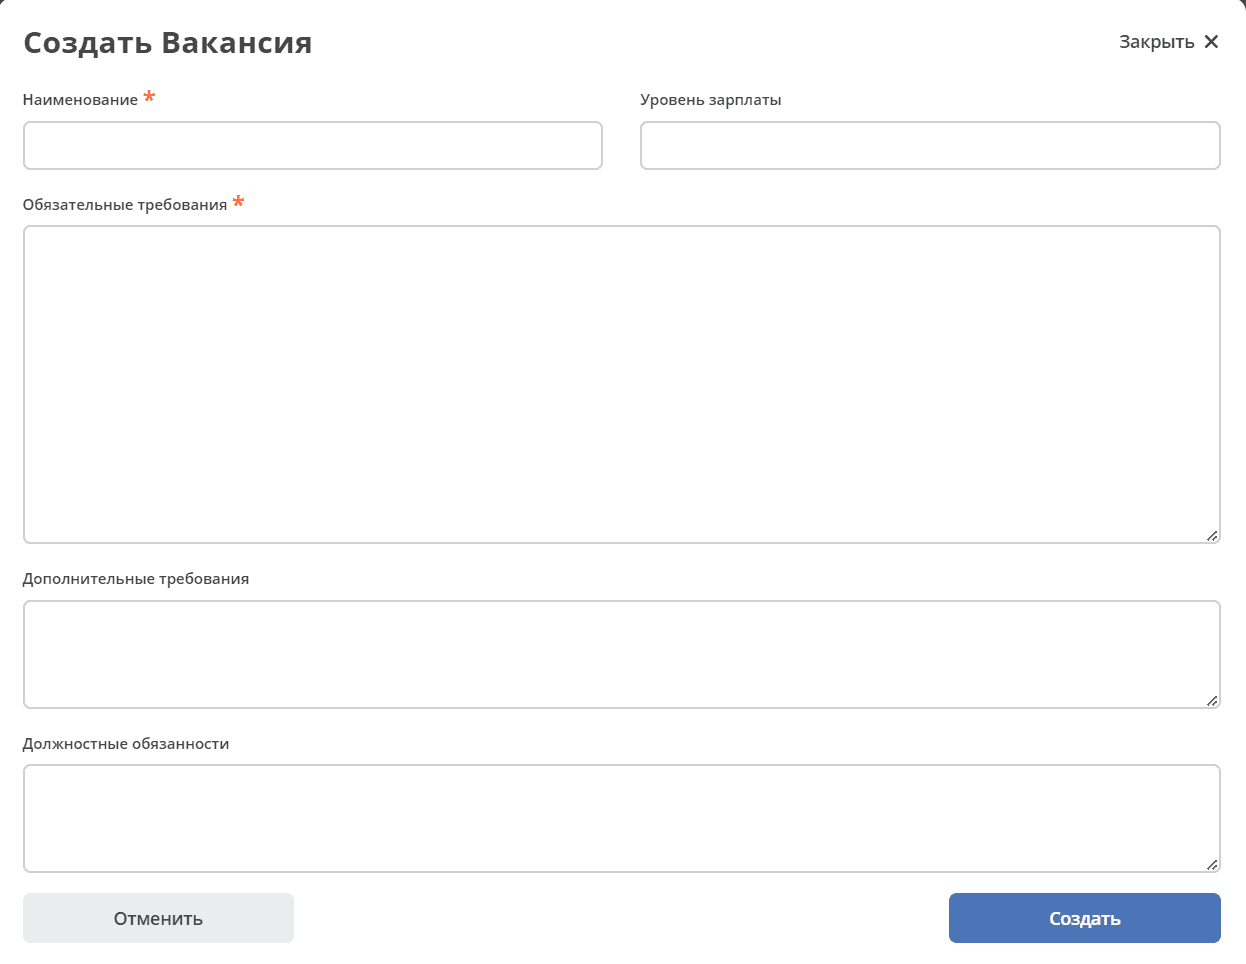
The Request creation form becomes available on the screen:
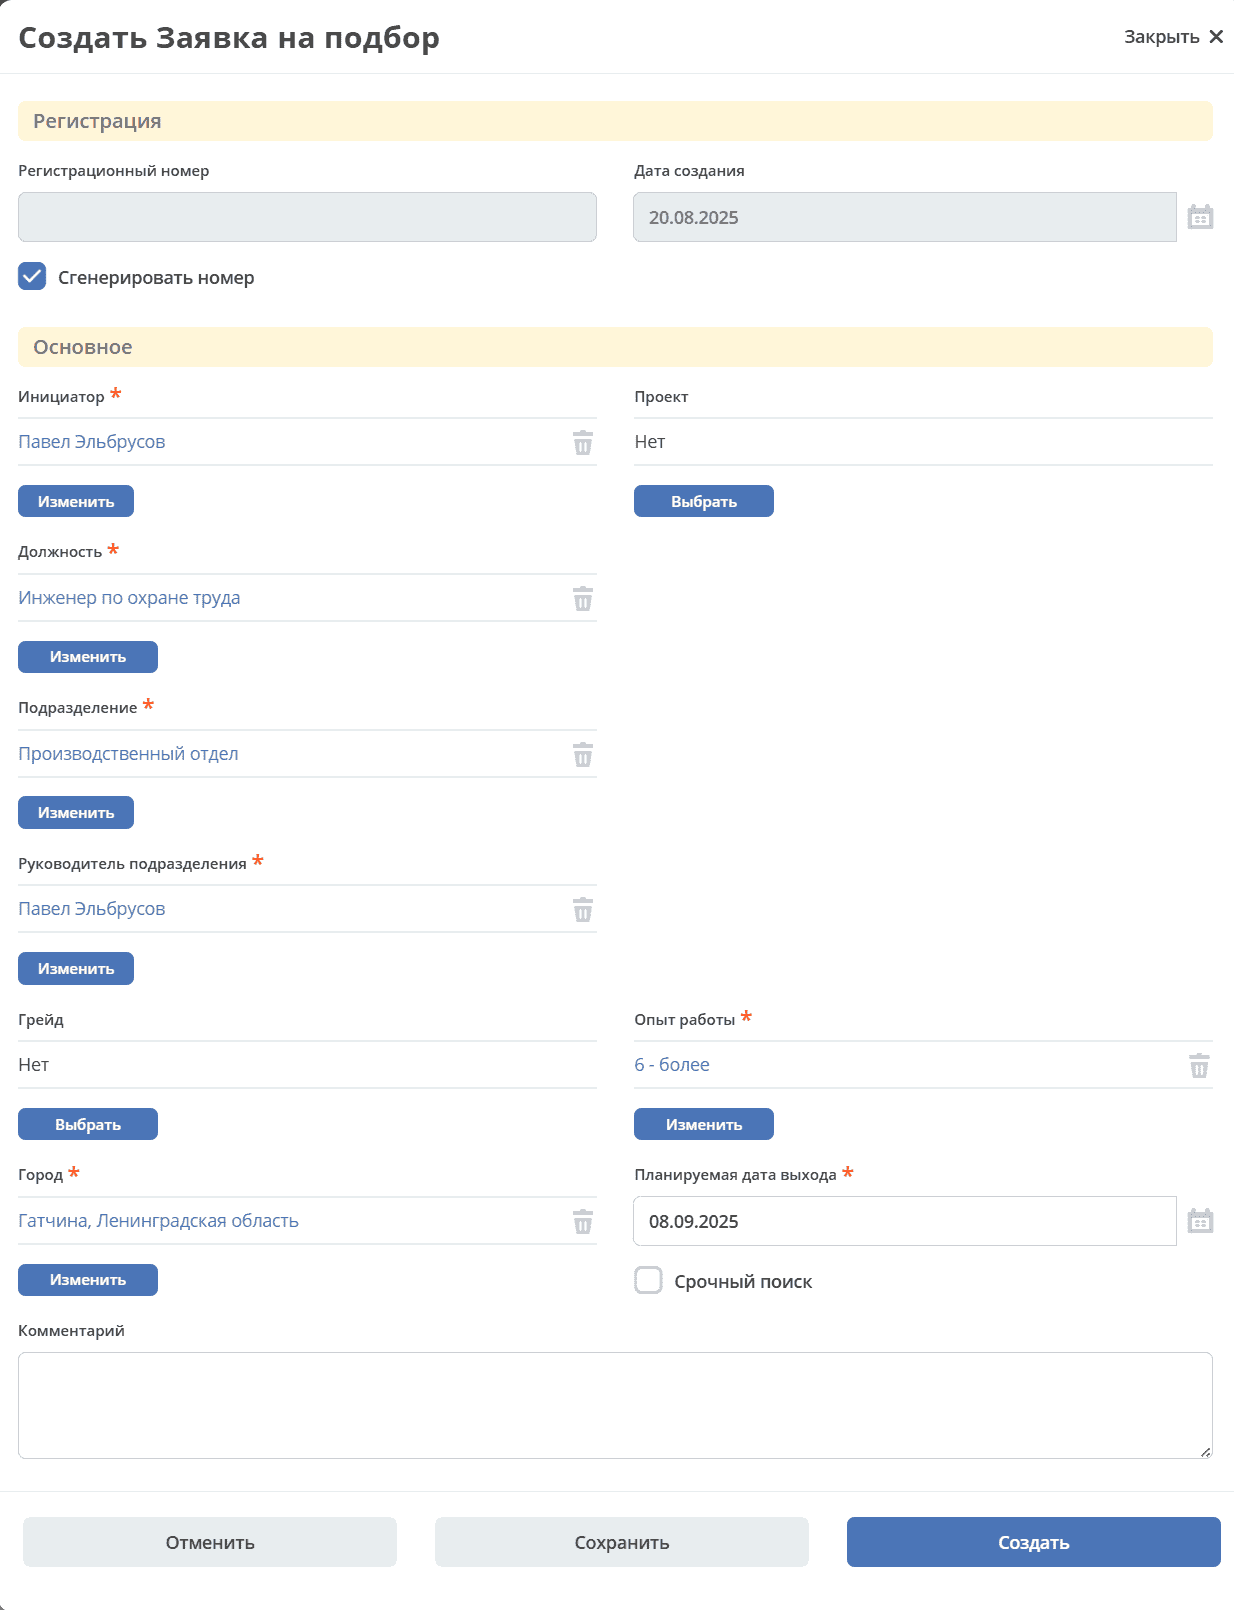
Required card fields:
Initiator;
Position;
Department;
Department Head;
City;
Work Experience;
Planned Start Date.
Fill in the mandatory fields marked with * and additional ones if necessary, click «Save» to save the draft, or «Create» to send for approval. After creating the request, the status becomes «Director Approval».
You can navigate to the request in any of the following ways:
by opening the task in the «Current Tasks» Journal;
by opening the document in the «Recruitment Requests» Journal;
by following the link from the received notification.
Подробно о задачах.
Step 2. Director Approval of the Request
The system creates a task «Director Approval», which is assigned to the General Director.
The Request card opens in a separate tab:
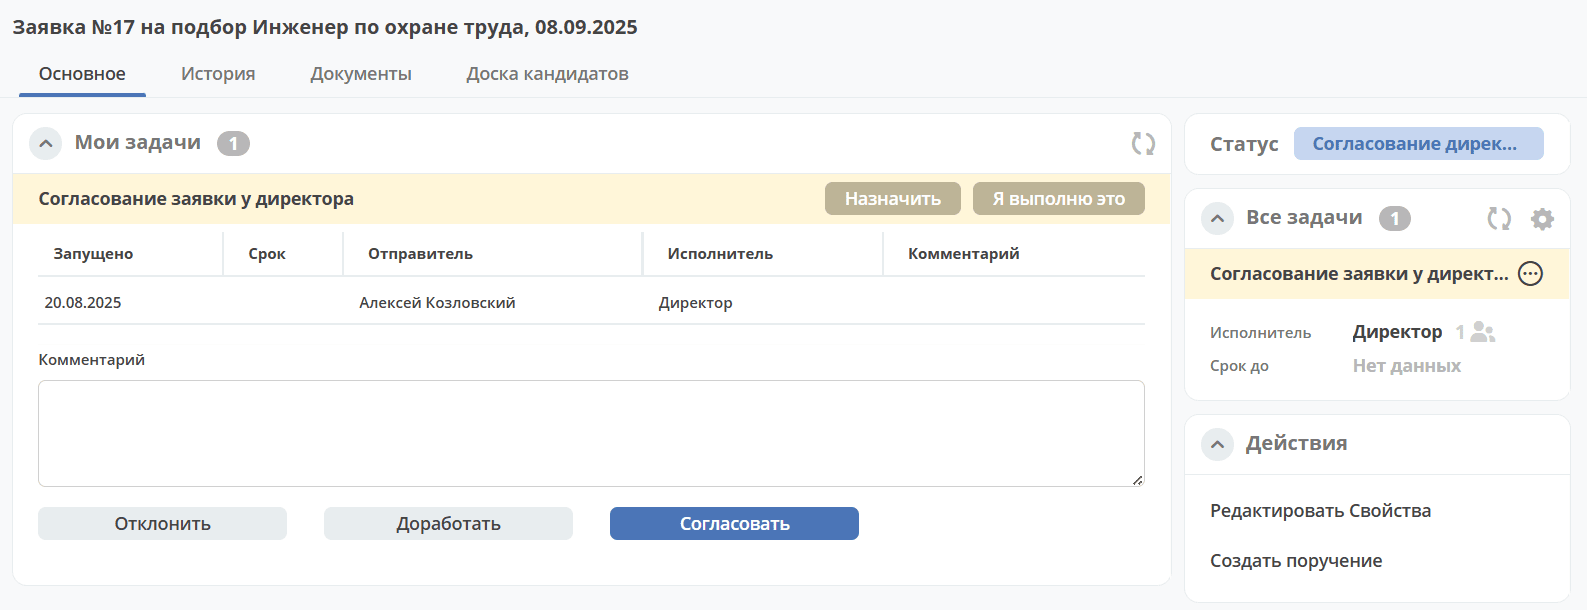
The following decisions can be made on the request:
Approve by clicking «Approve», the status will change to «Vacancy Attachment». The HR department will receive a notification.
Send to the Initiator by clicking «Revise», the status will change to «Revision». The executor will receive a notification.
Reject by clicking «Reject», the status will change to «Rejected». The Initiator will receive a notification.
A comment can also be added in the «Comment» field.
Step 3. Attaching a Vacancy
The system creates a task «Vacancy Attachment», which is assigned to the HR department.
The Request card opens in a separate tab:
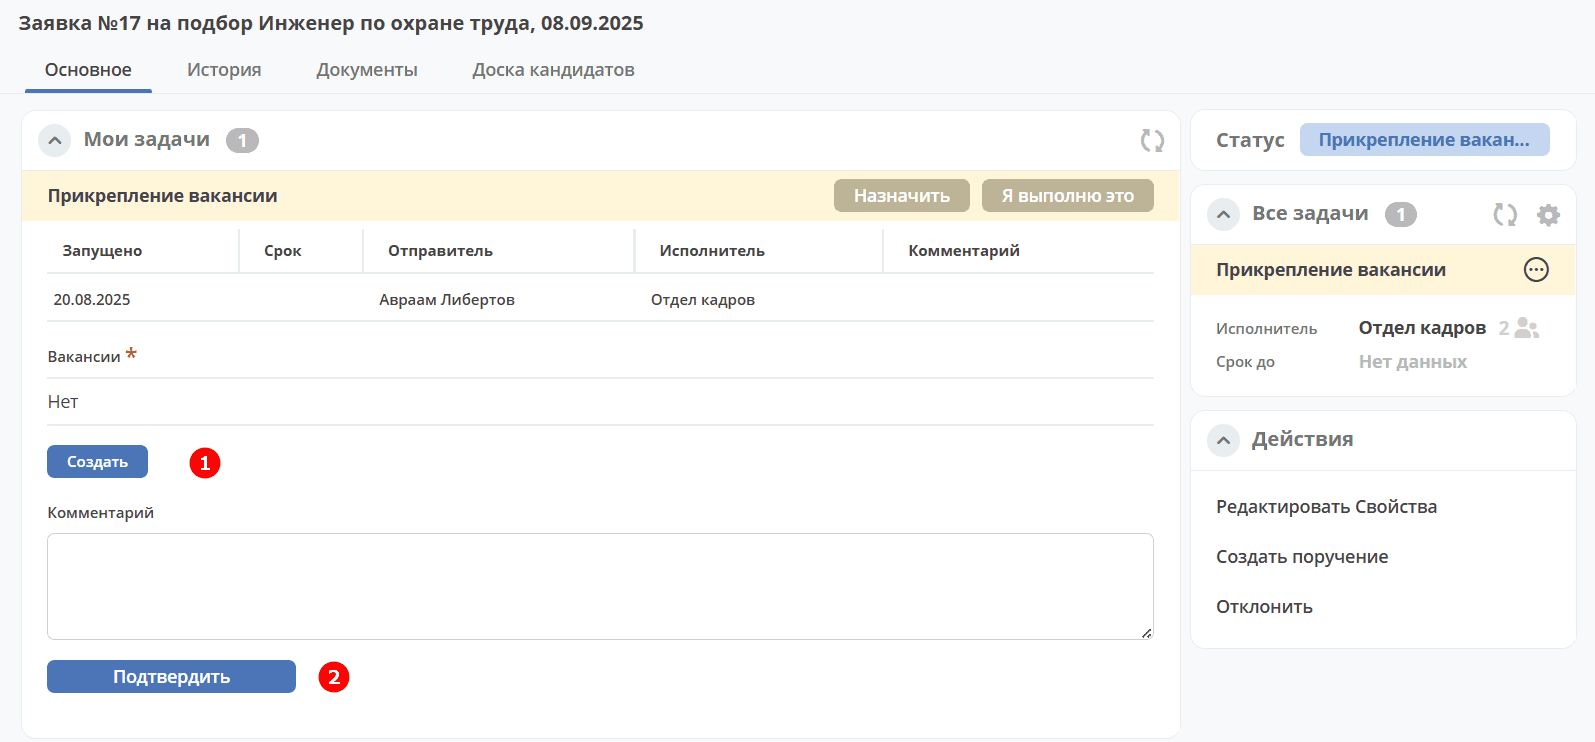
Adding Vacancy Information
To add information about the created vacancy, click «Create» (1):
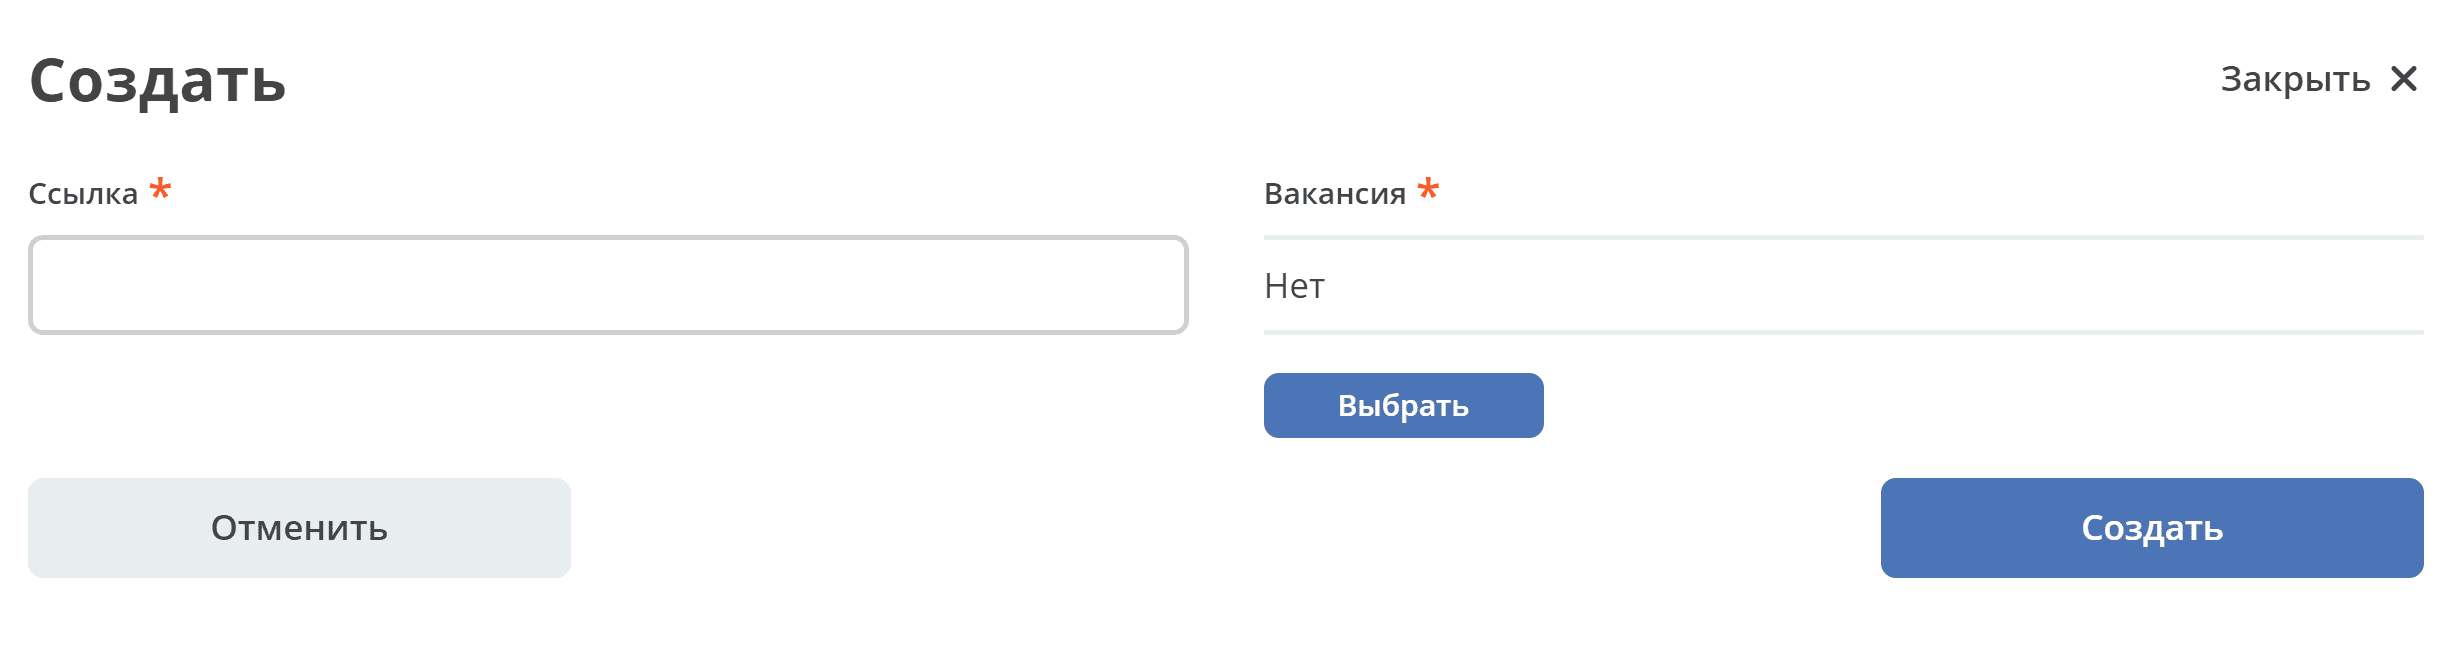
Specify the link to the posted vacancy and select the vacancy from the directory, click OK:
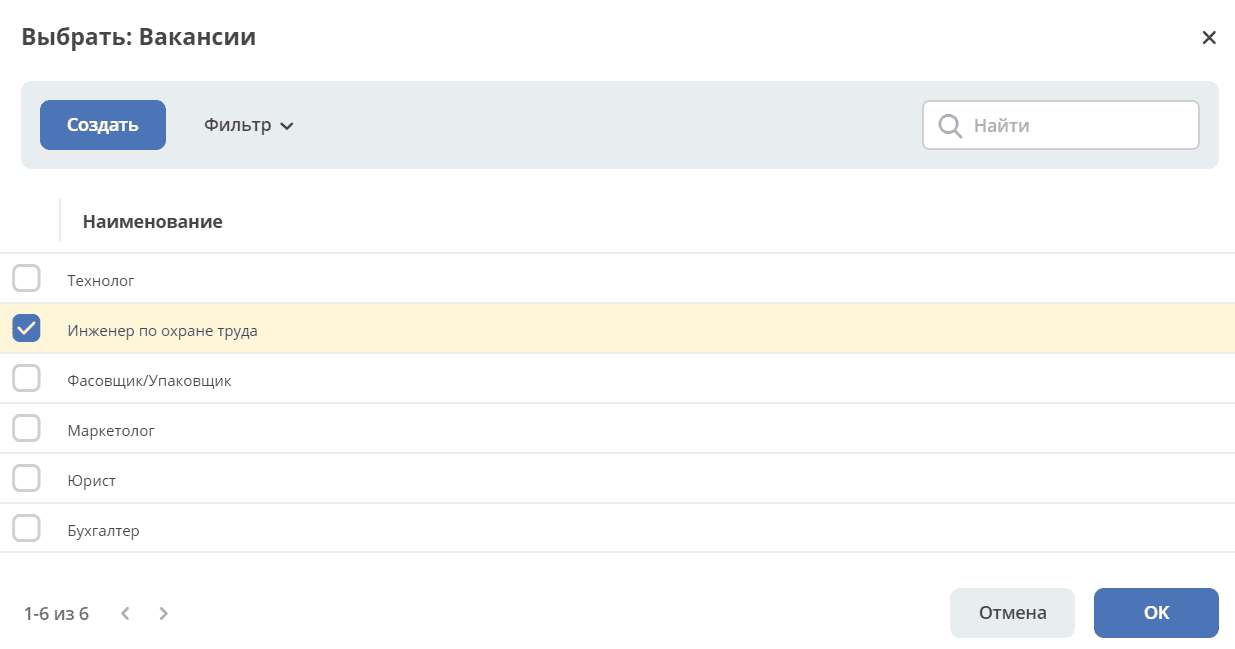
If the vacancy is not in the directory, it can be added using the Create button:
Added information about the created vacancy:

Task Execution
Vacancy information will be reflected in the task:
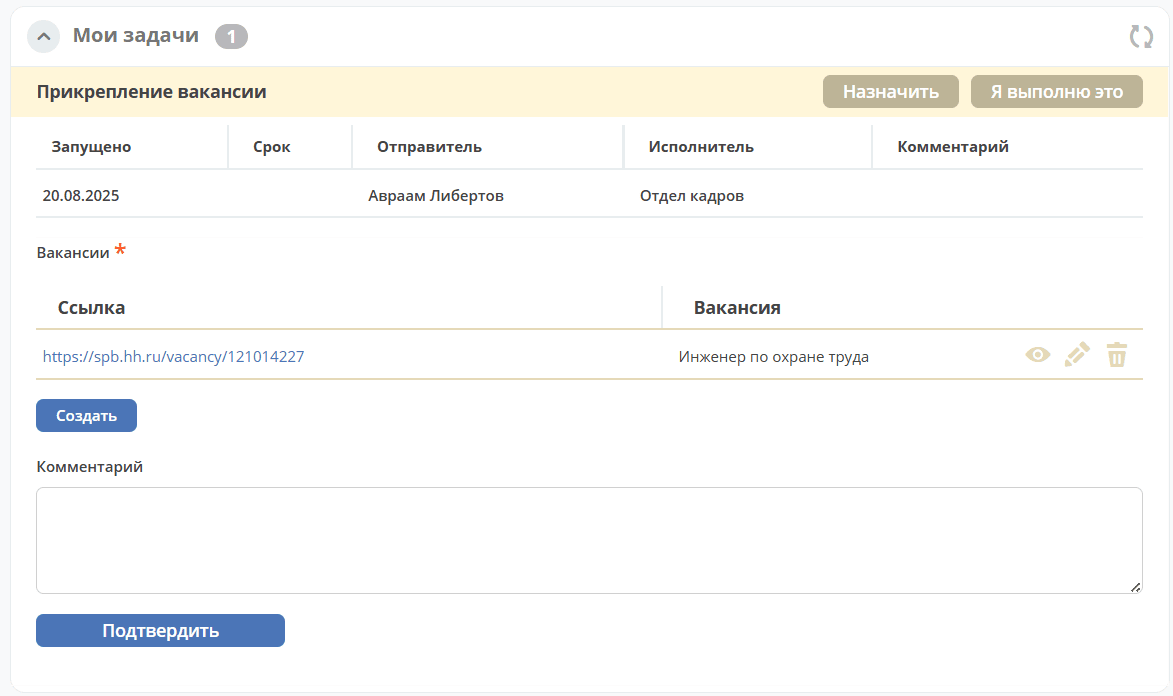
To execute the task, click «Confirm» in the «My Tasks» widget.
The request status becomes «Candidate Selection and Choice».
Step 4. Candidate Selection and Choice
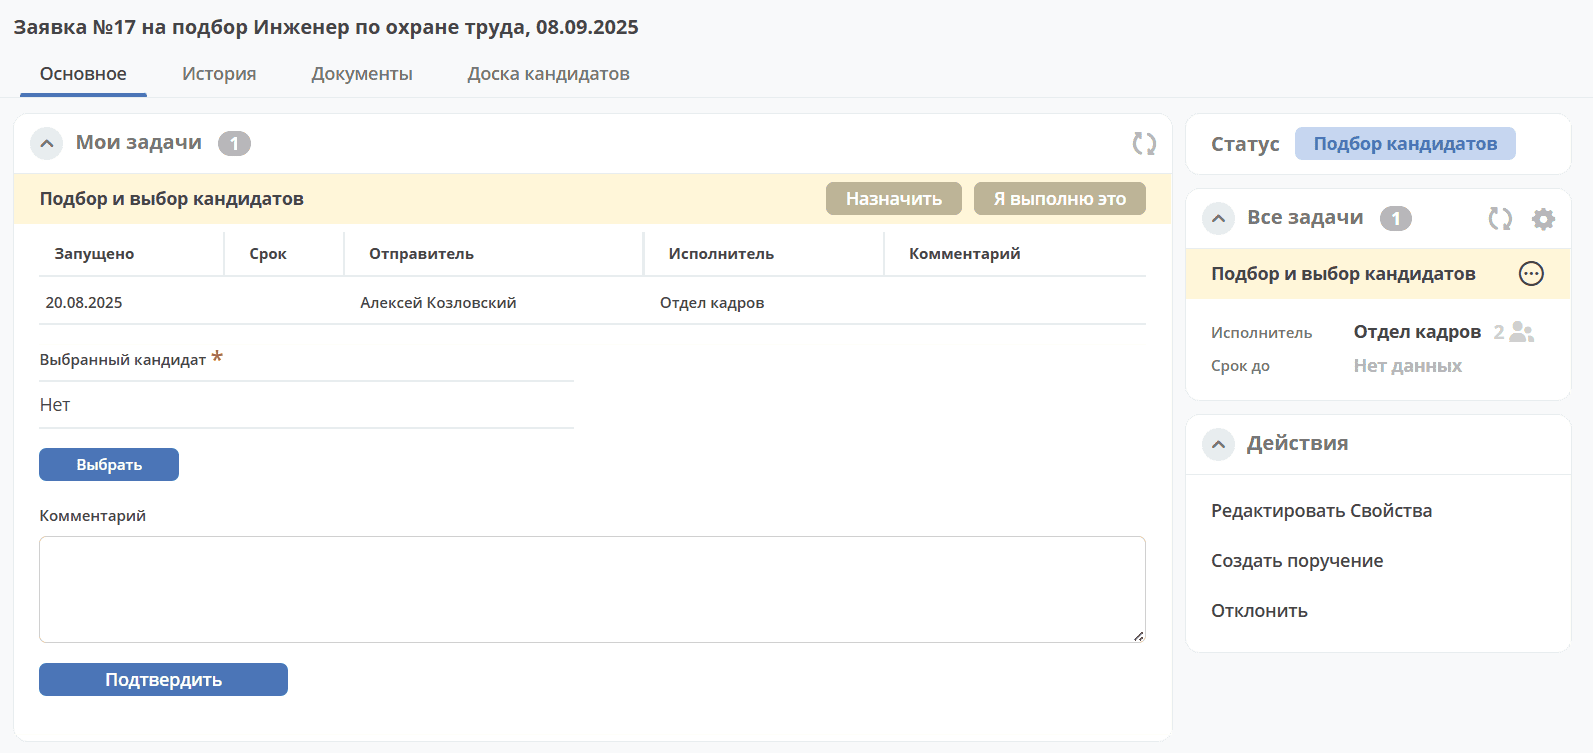
Система создает задачу «Подбор и выбор кандидатов», которая назначается на отдел кадров. На данном шаге сотрудник отдела кадров работает с процессом Кандидаты
The Request card opens in a separate tab:
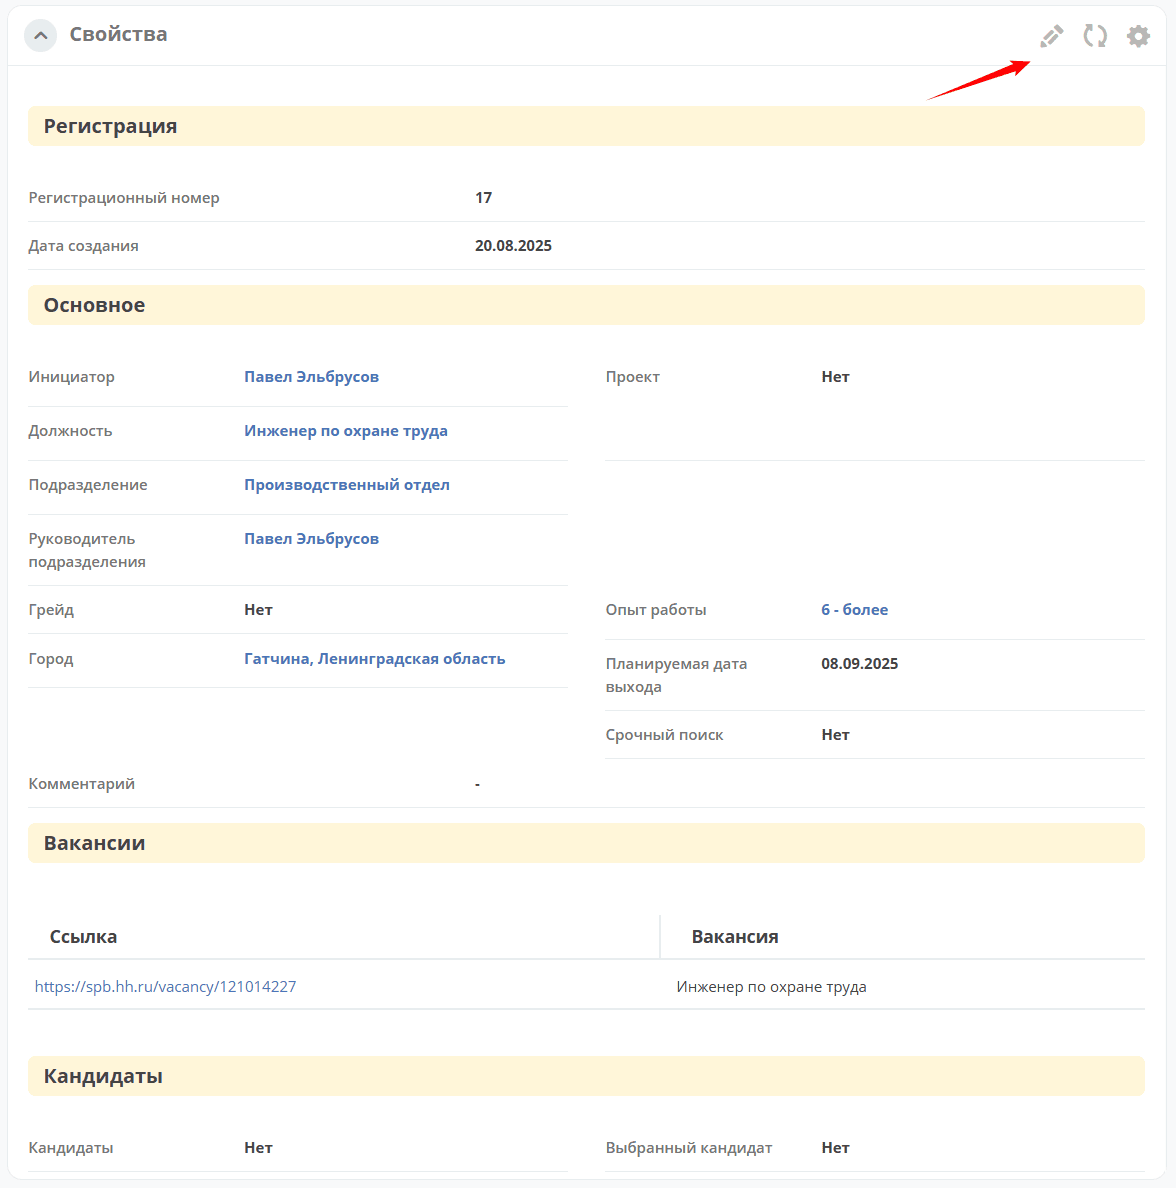
Adding Information about Considered Candidates
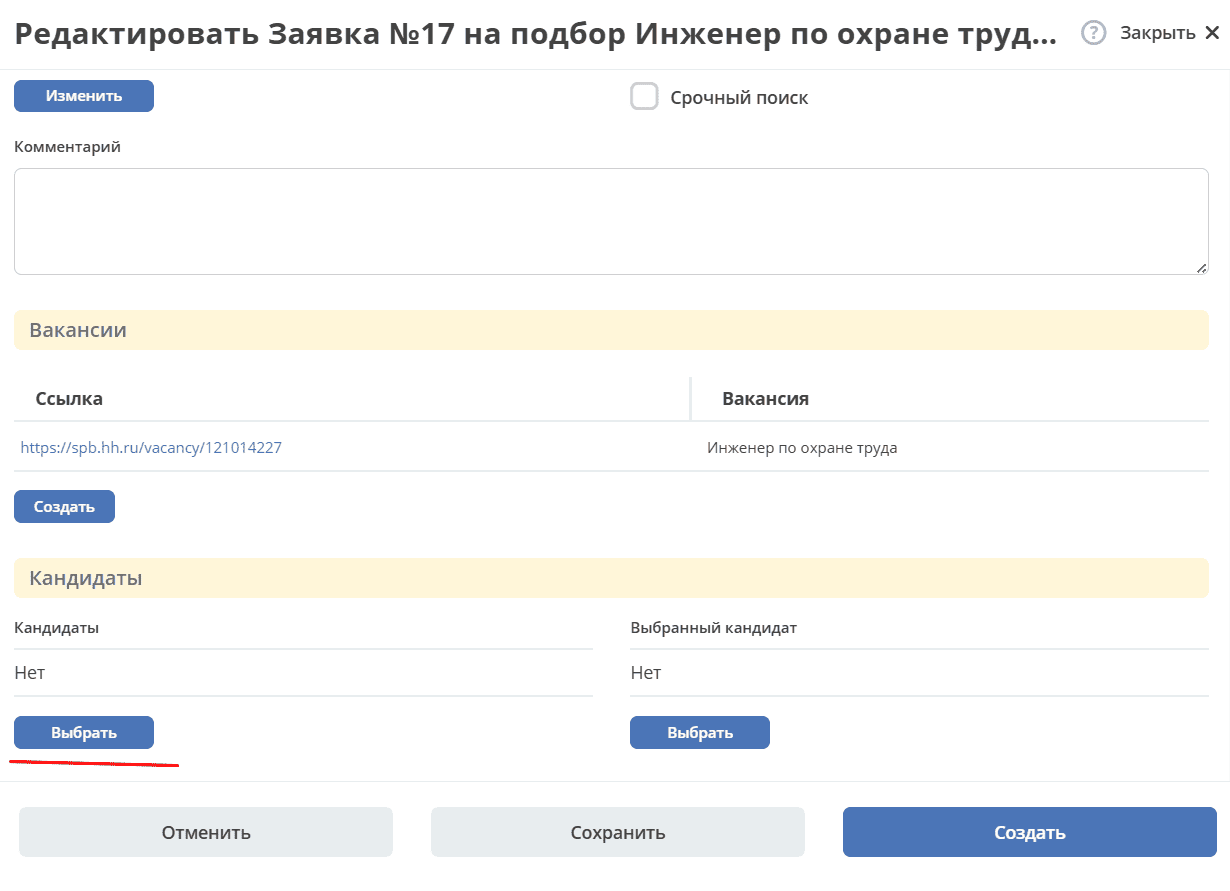
Add the candidates being considered at the selection stage to the recruitment request card. To do this, switch to edit mode in the «Properties» widget:
In the «Candidates» section, click «Select»:
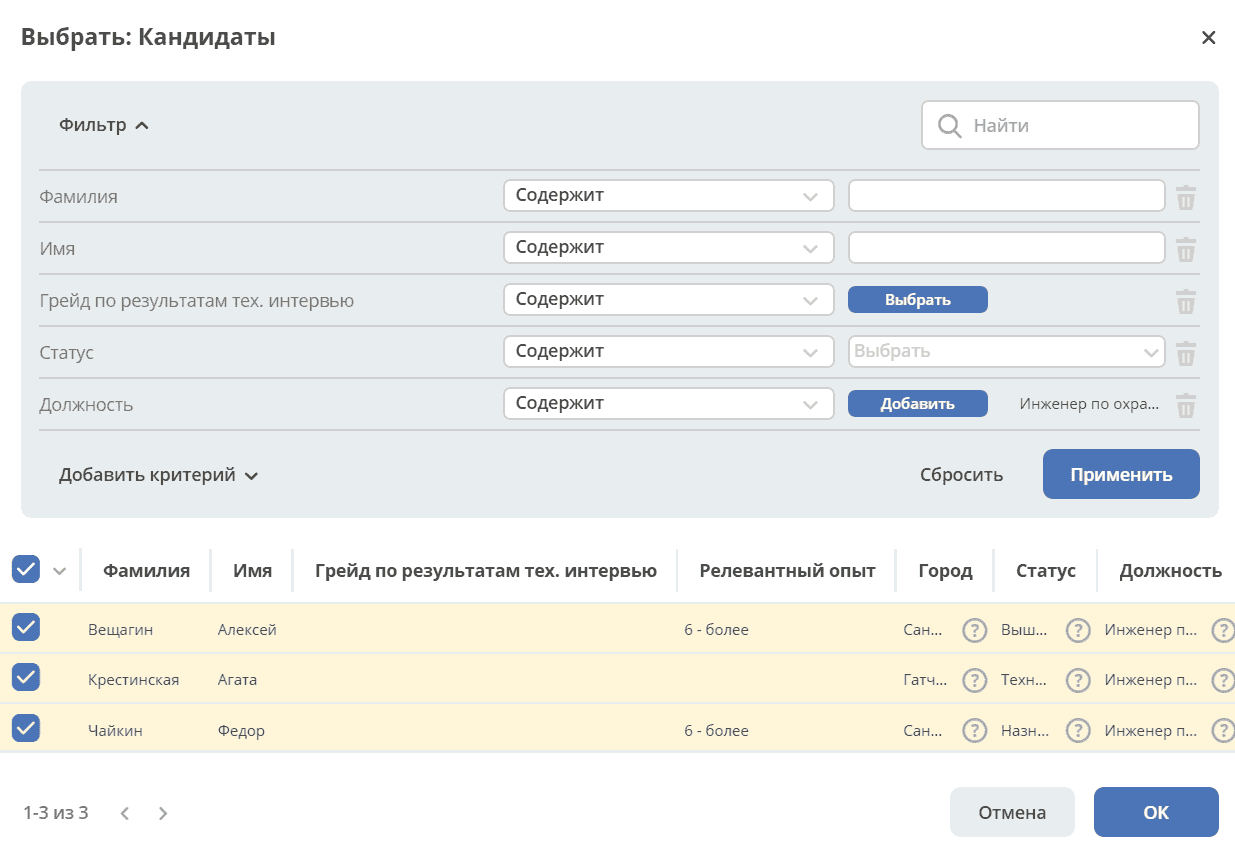
The «Candidates» journal will open with a filter configured based on the specific request data.

If you need to select candidates with different experience, city, etc., remove the criteria and click «Apply»:
Select the candidates and click «OK». The selected candidates will be reflected in the request:
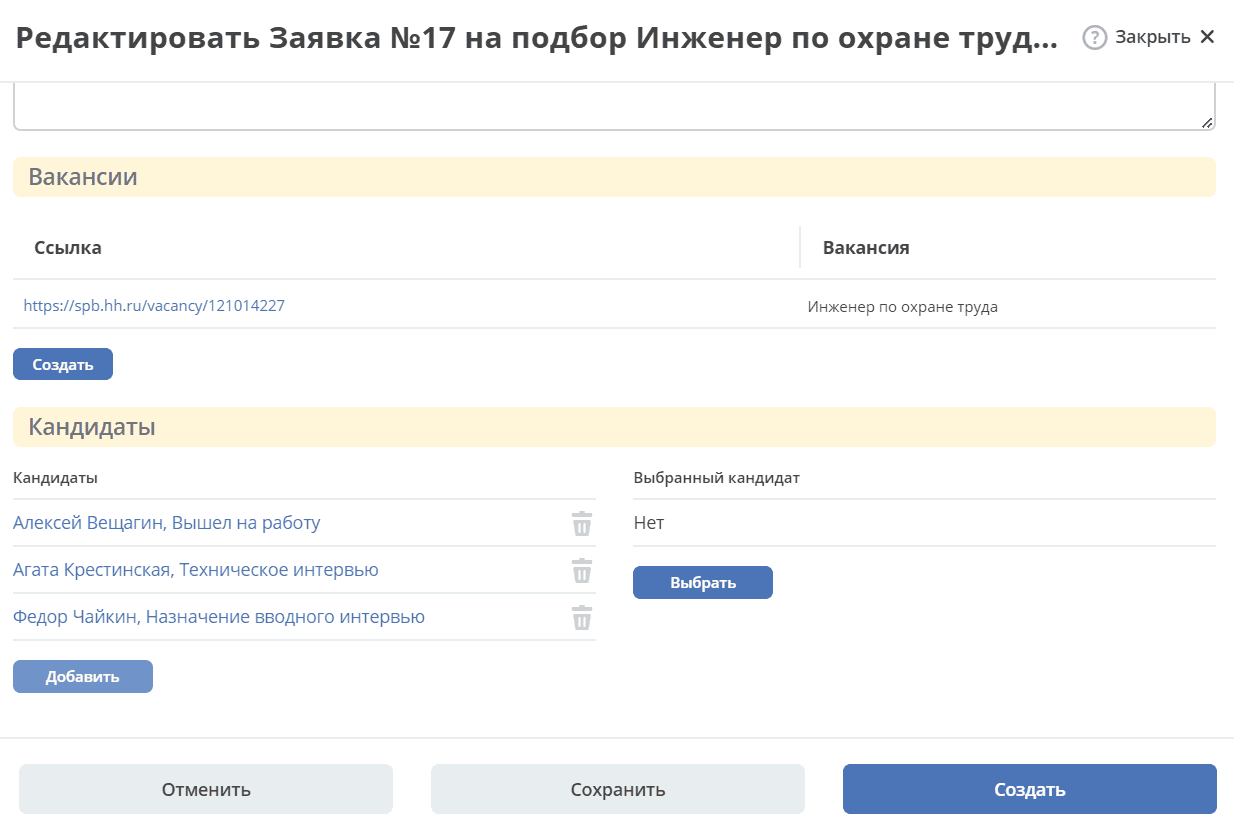
Save the request.
These employees will be reflected on the kanban board
Task Execution

After the candidate for the vacancy is selected and their card is marked as started work, this candidate must be selected in the request using the «Select (1)» button. Only candidates with the status «Started Work» are available for selection.
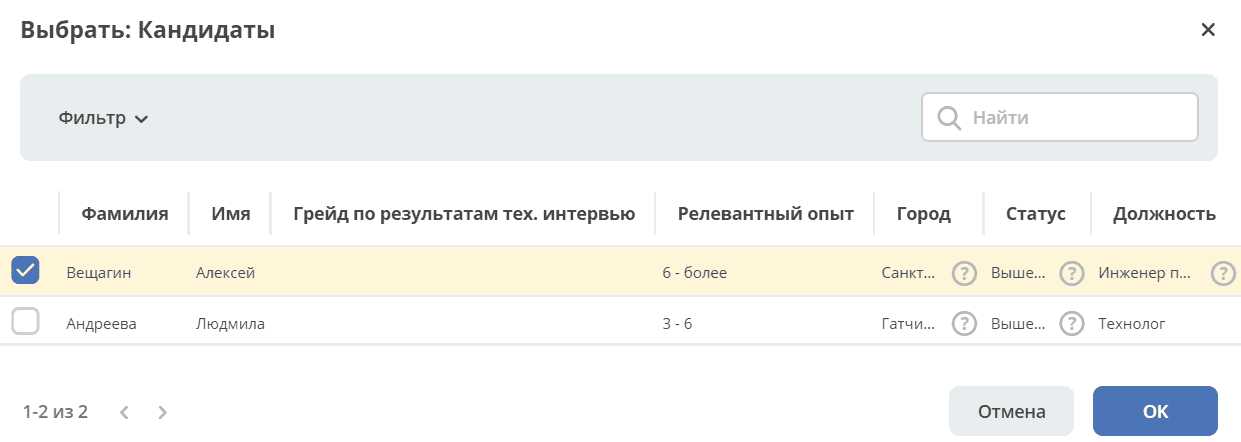
To execute the task, click «Confirm» (2).
The request status becomes «Started Work».
Kanban Board for Tracking the Candidate Selection Process
In the request card for which candidate selection is already in progress, the Kanban Board tab is available, displaying candidates for this request in various statuses:
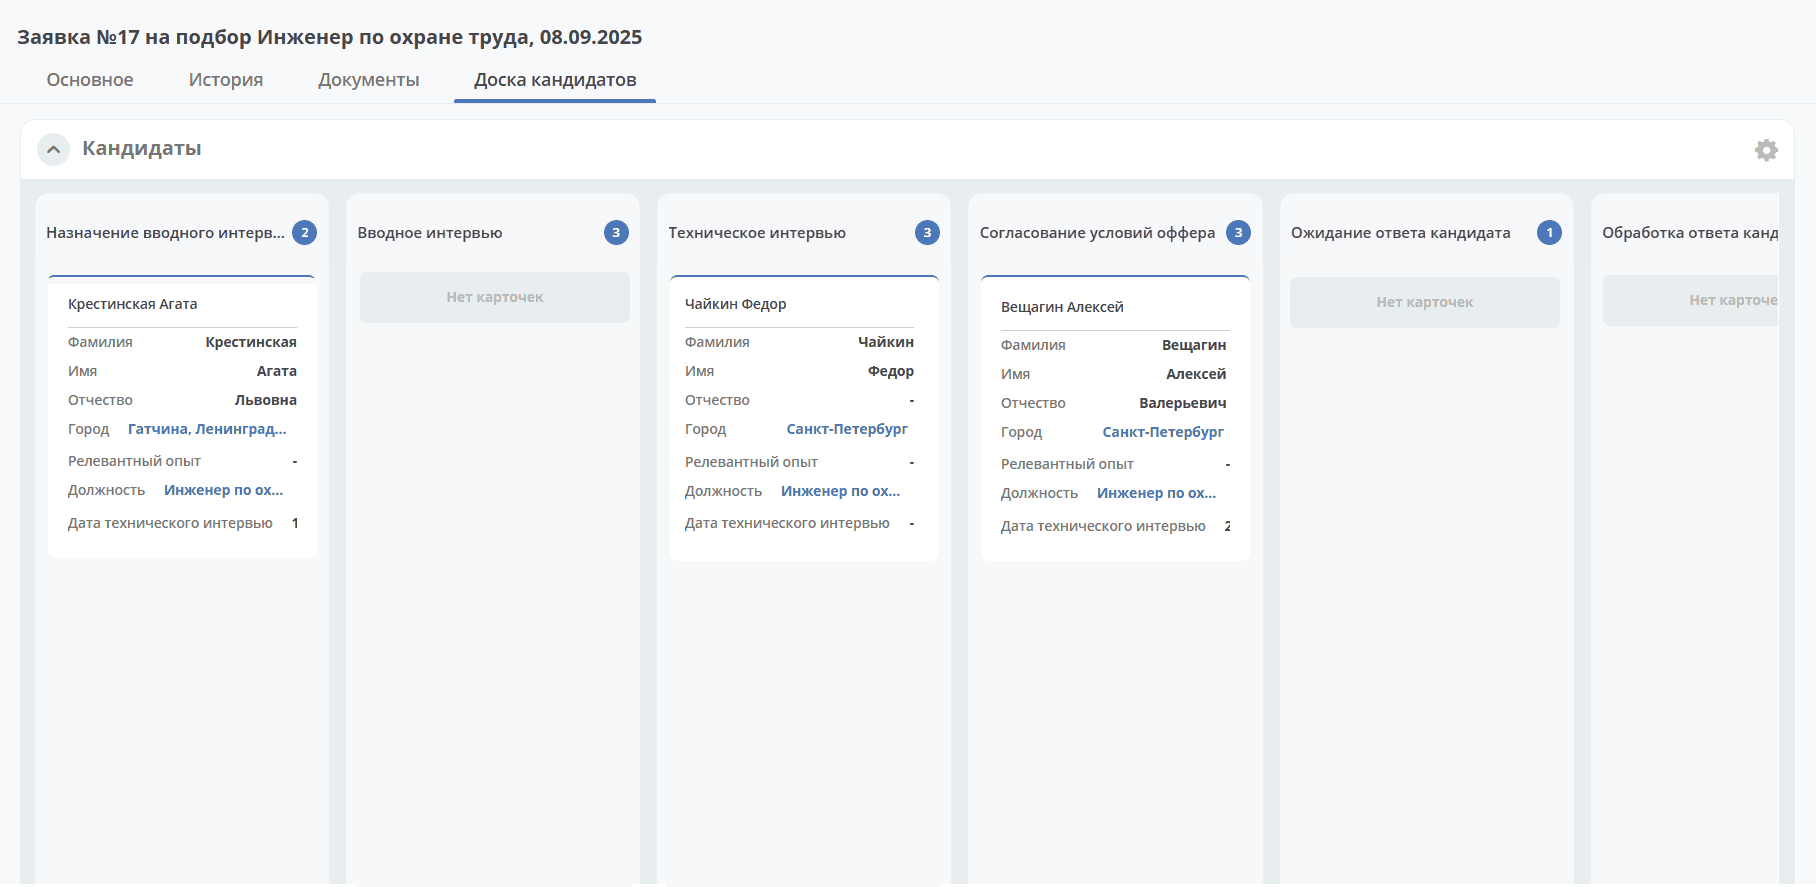
Clicking on the Full Name allows you to go to the candidate’s card.
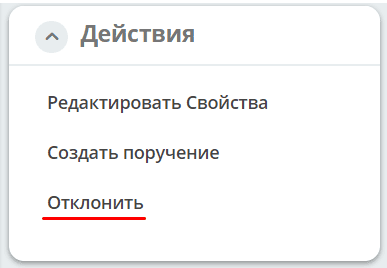
Actions
Rejecting a Request
The Initiator can reject the request at the «Revision» status, the HR employee can reject at the «Vacancy Attachment», «Candidate Selection» statuses using the «Reject» action:
And by specifying a reason:
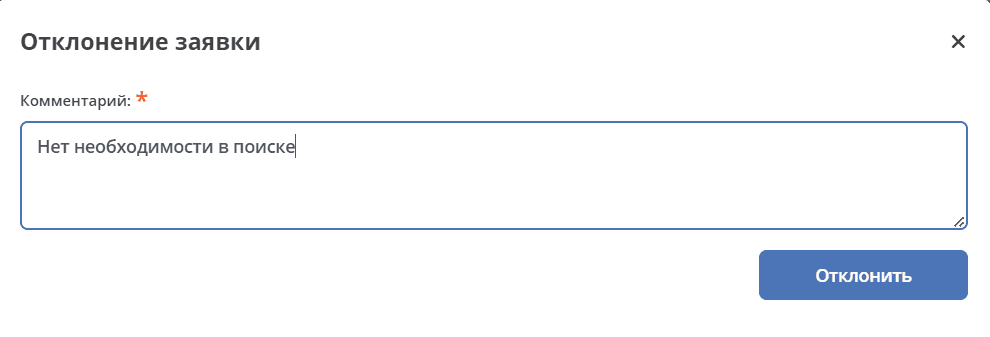
The request status becomes «Rejected».
When revising the request at the «Revision» status, an email with a comment is sent to the director.
At the «Vacancy Attachment», «Candidate Selection» statuses, an email with a comment is sent to the director and the initiator.
Create Assignment
An assignment can be created from the document card by selecting the action «Create Assignment». See details Creating an assignment from a card
Candidates
Business Process Diagram

Roles
HR |
HR department group responsible for candidate selection. |
Technical Interview Interviewers |
Company employees selected as technical interview interviewers |
Chief Accountant |
Chief Accountant approving the offer |
Production Director |
Production Director approving the offer |
General Director |
Company General Director approving the offer |
Statuses
Draft |
Candidate created |
Rejected |
Candidate rejection at various stages |
Scheduling Introductory Interview |
Scheduling the date for the introductory interview |
Declined by Candidate |
Candidate refusal after the introductory interview, refusal to accept the offer. |
Introductory Interview |
Conducting the introductory interview and making a decision based on its results. |
Candidate Rejected |
Negative decision based on the results of the introductory/technical interview |
Technical Interview |
Introductory interview conducted successfully. Scheduling, conducting the technical interview, and making a decision based on its results |
Offer Terms Approval |
Candidate selected. Approval of offer terms by the accountant, production director, general director.
If revision is needed based on the approval results, the status does not change - the task is returned to the HR employee.
|
Awaiting Candidate Response |
Sending the offer to the candidate and awaiting their decision |
Processing Candidate Response |
Entering the candidate’s decision |
Offer Accepted |
Candidate accepted the offer. |
Started Work |
Candidate started work |
Did Not Start Work |
Candidate did not start work |
Journal
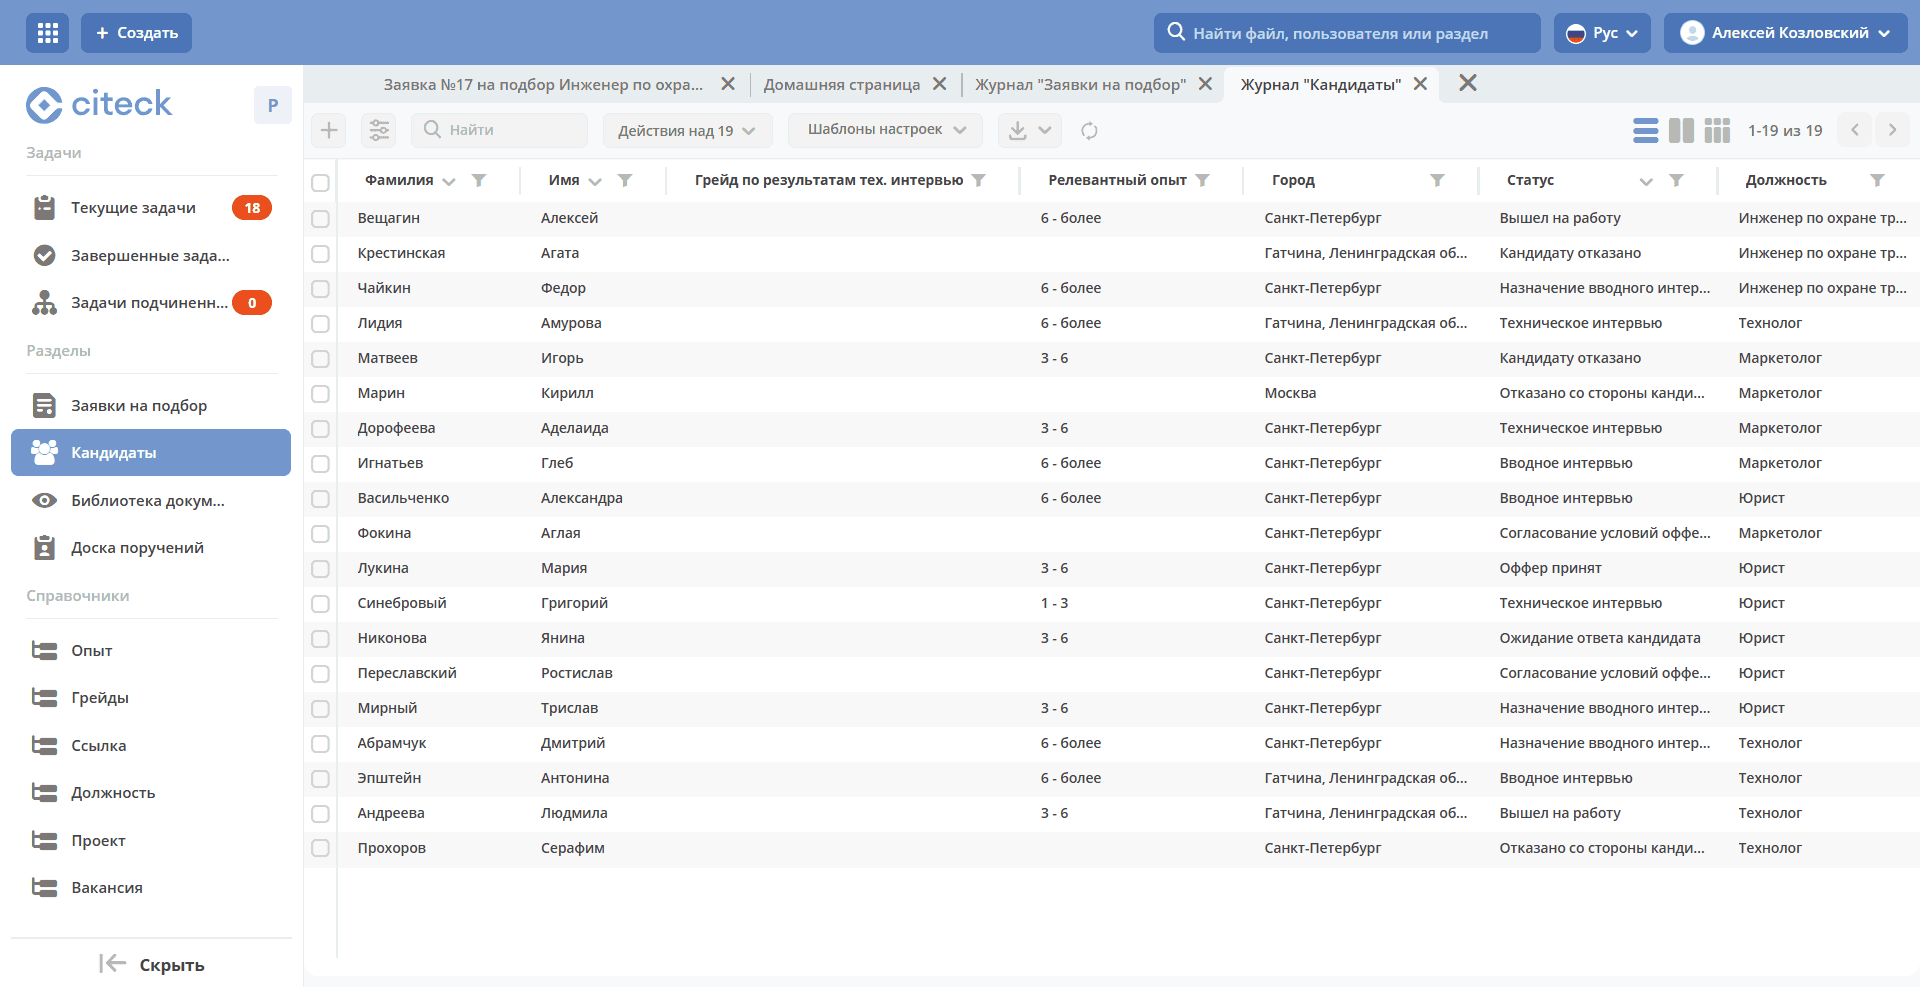
Journal Kanban View
The mode is available by clicking:
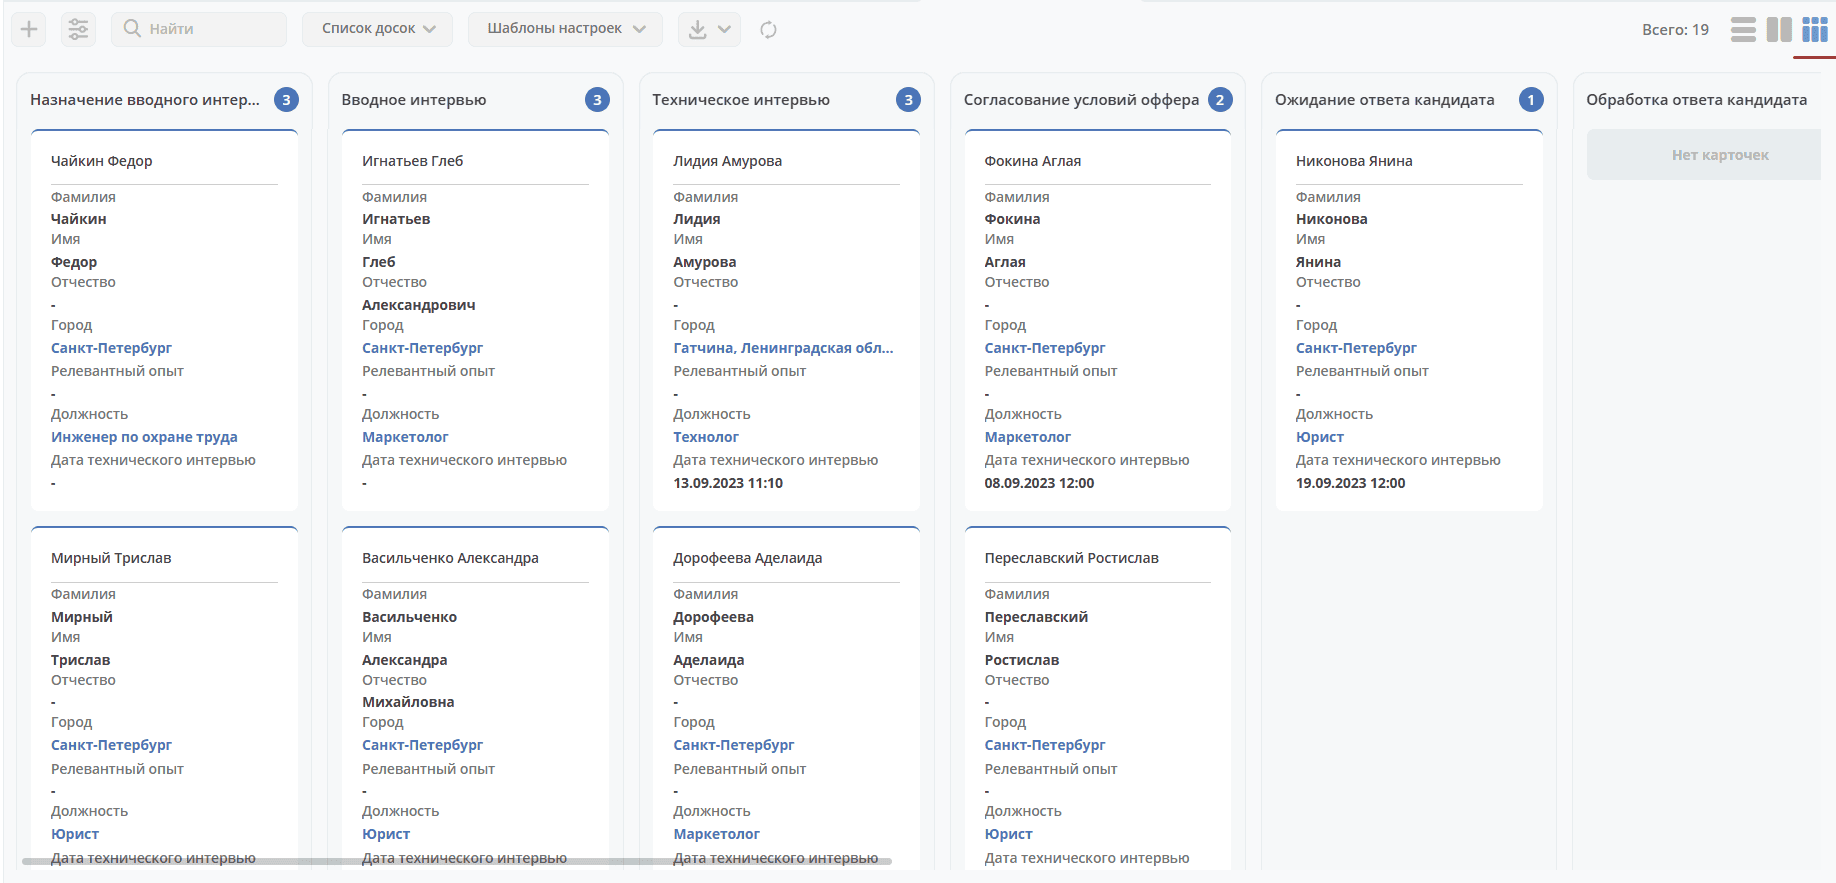
The board columns display candidate statuses; on the board itself, candidates are distributed by status. Clicking on the Full Name allows you to go to the candidate’s card.
Candidate Processing Workflow
Step 1. Creating a Candidate Card
Creation is possible using the quick create button:
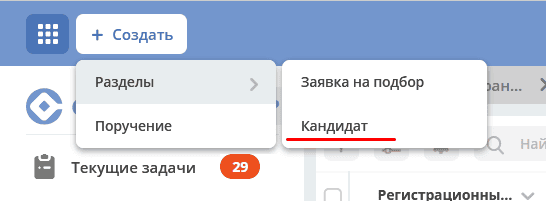
or from the «Candidates» journal:

The Candidate creation form becomes available on the screen:
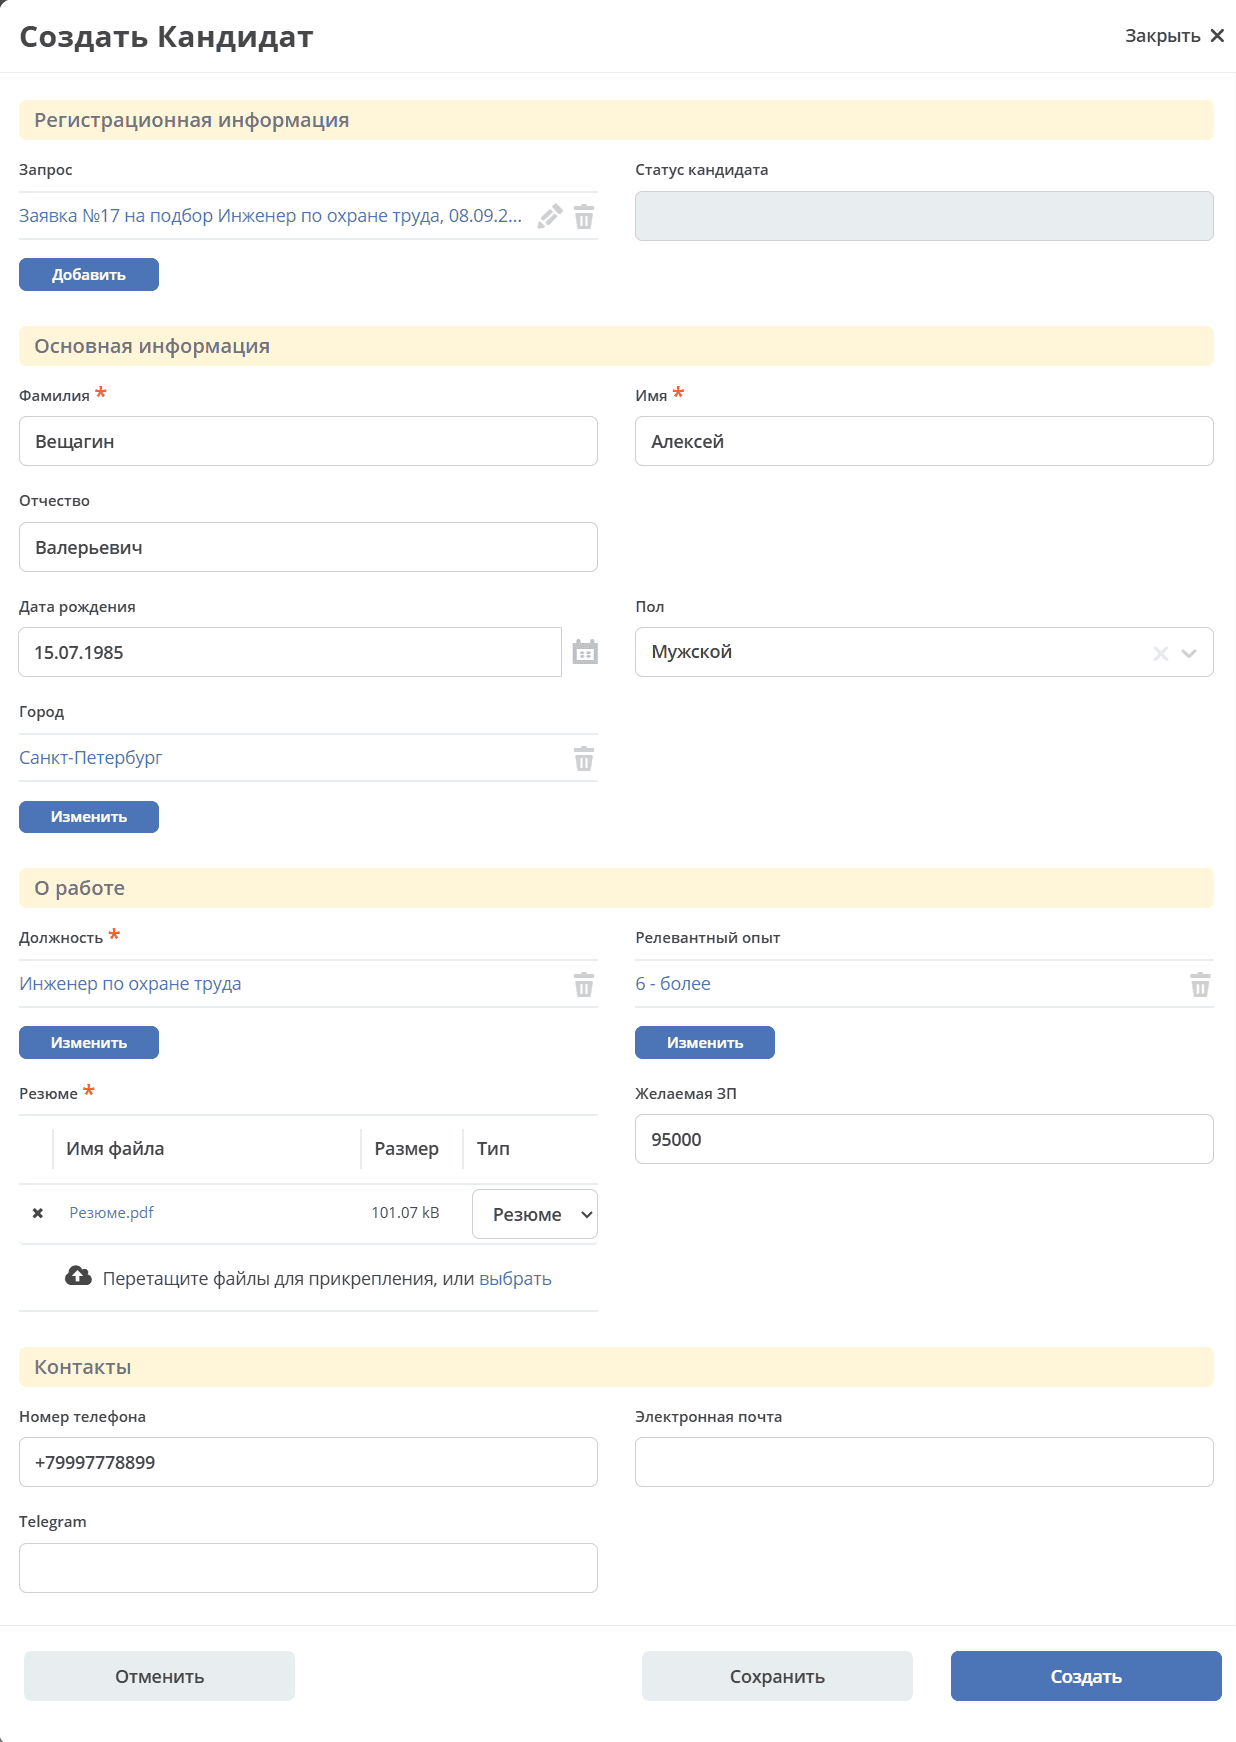
Select the request for which the candidate search is needed, fill in the mandatory fields marked with * and additional ones if necessary, attach the resume file, click «Save» to save the draft, or «Create» to send further through the process.
Upon creation, the status becomes «Scheduling Introductory Interview».
You can navigate to the candidate in any of the following ways:
from the received email;
by opening the task in the «Current Tasks» Journal;
by opening the document in the «Candidates» Journal;
Step 2. Scheduling the Introductory Interview
The system creates a task «Scheduling Introductory Interview», which is assigned to the HR department employee.
The Candidate card opens in a separate tab:

Specify the introductory interview date and click «Confirm» to complete the task.
The candidate status becomes «Introductory Interview».
Step 3. Conducting the Introductory Interview and Making a Decision
The introductory interview is conducted by an HR employee who then makes a decision on it:
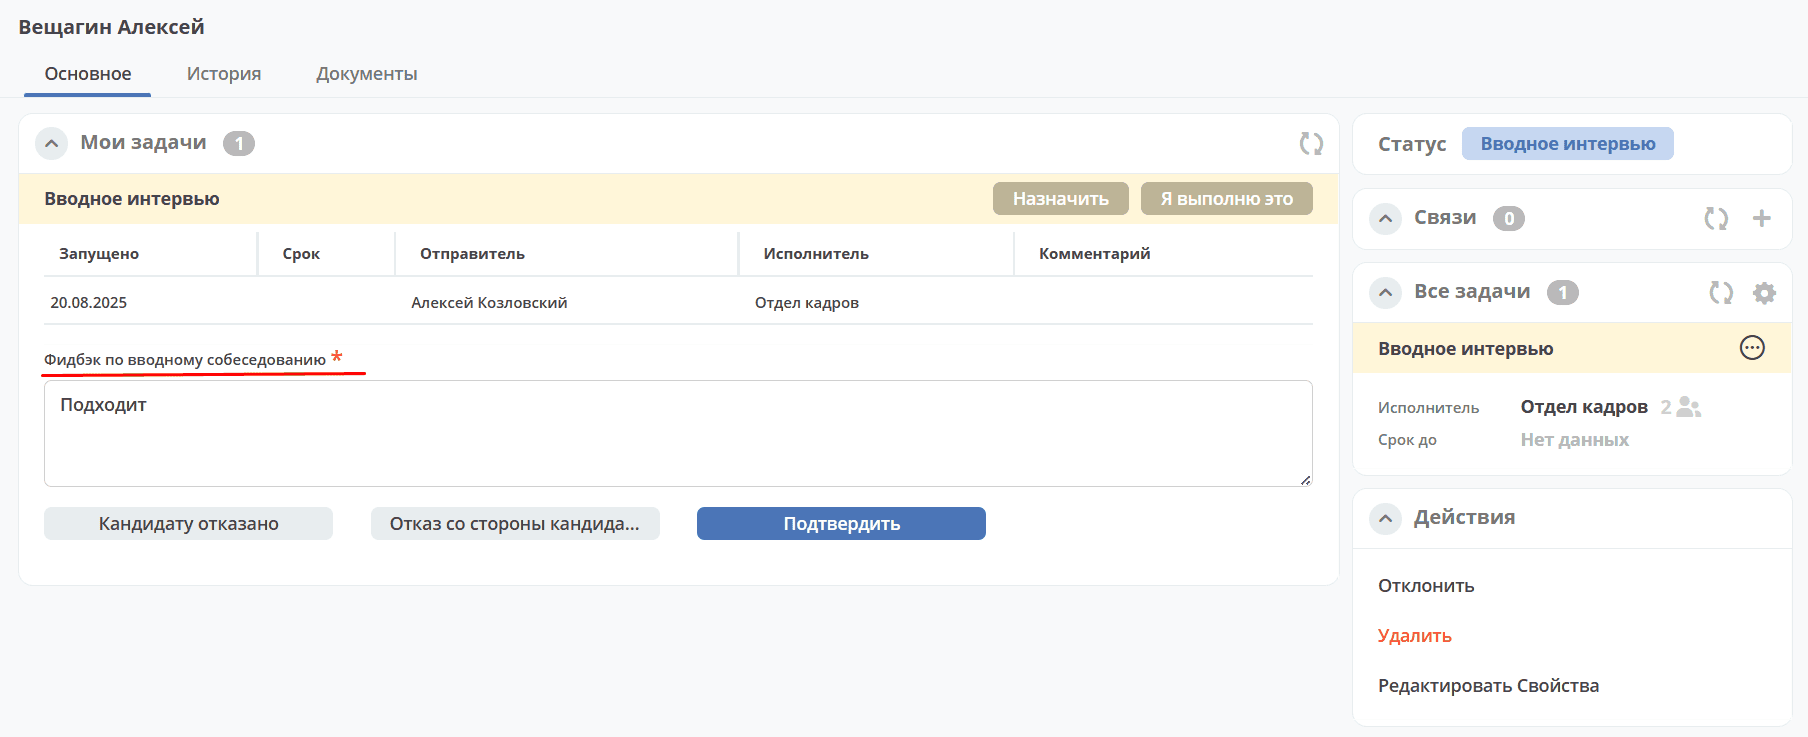
To complete the task «Introductory Interview», enter feedback on the introductory interview and select the appropriate decision:
«Reject» – the candidate status becomes «Candidate Rejected».
«Declined by Candidate» – the candidate status becomes «Declined by Candidate».
«Confirm» — the candidate status will change to «Technical Interview». The system creates a task «Scheduling Technical Interview».
Step 4. Scheduling the Technical Interview
Return to the Candidate:
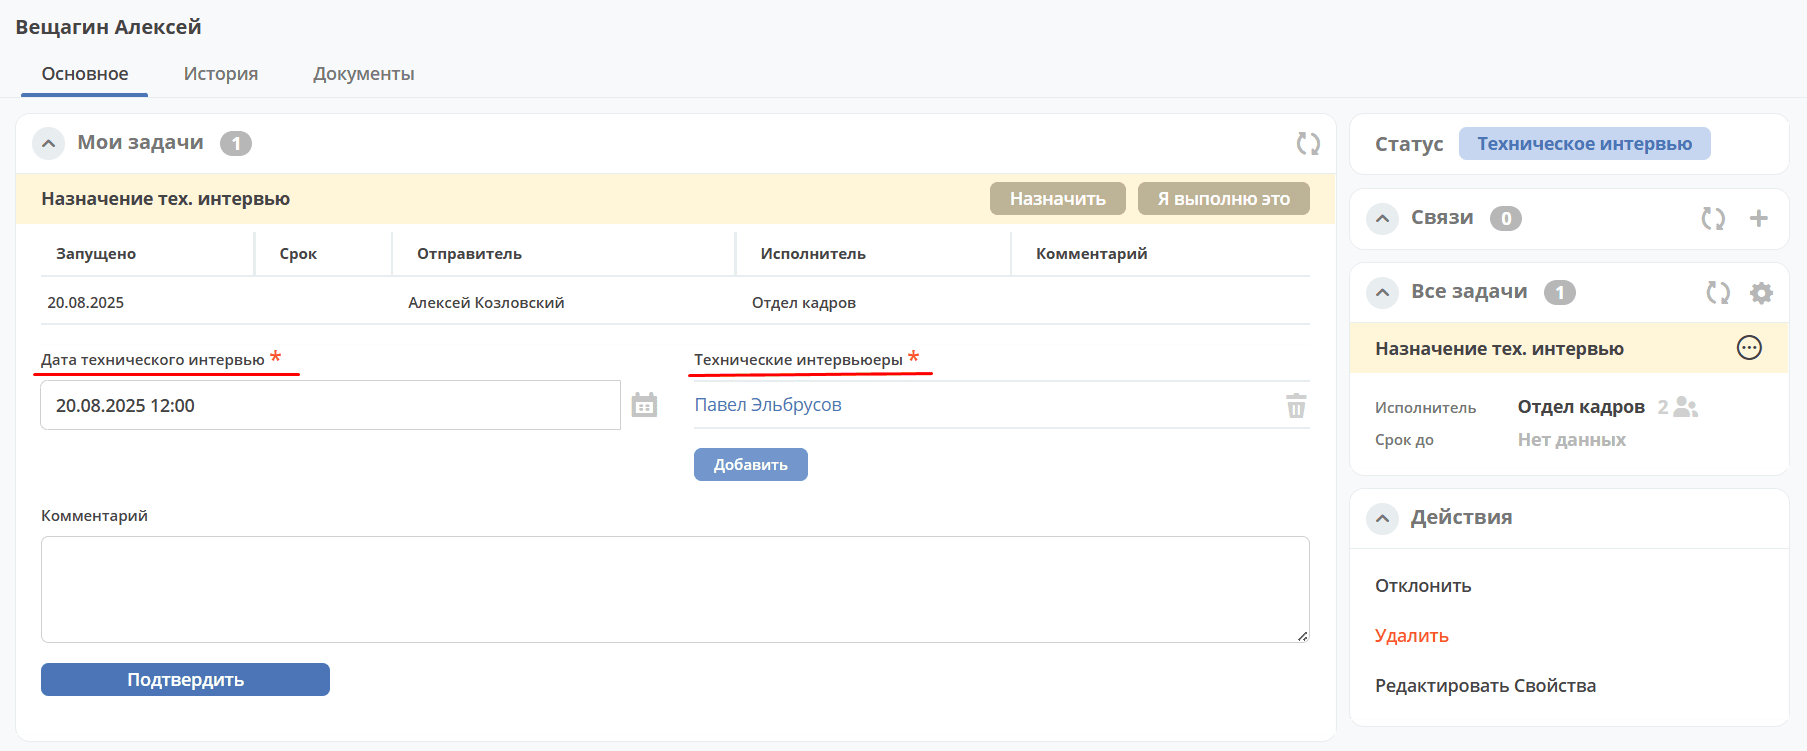
To complete the task «Scheduling Technical Interview», specify the technical interview date, select technical interviewers, and click «Confirm».
The candidate status becomes «Technical Interview».
Step 5. Conducting the Technical Interview and Making a Decision
The system creates a task «Technical Interview», which is assigned to the selected interviewers.
The Candidate card opens in a separate tab:
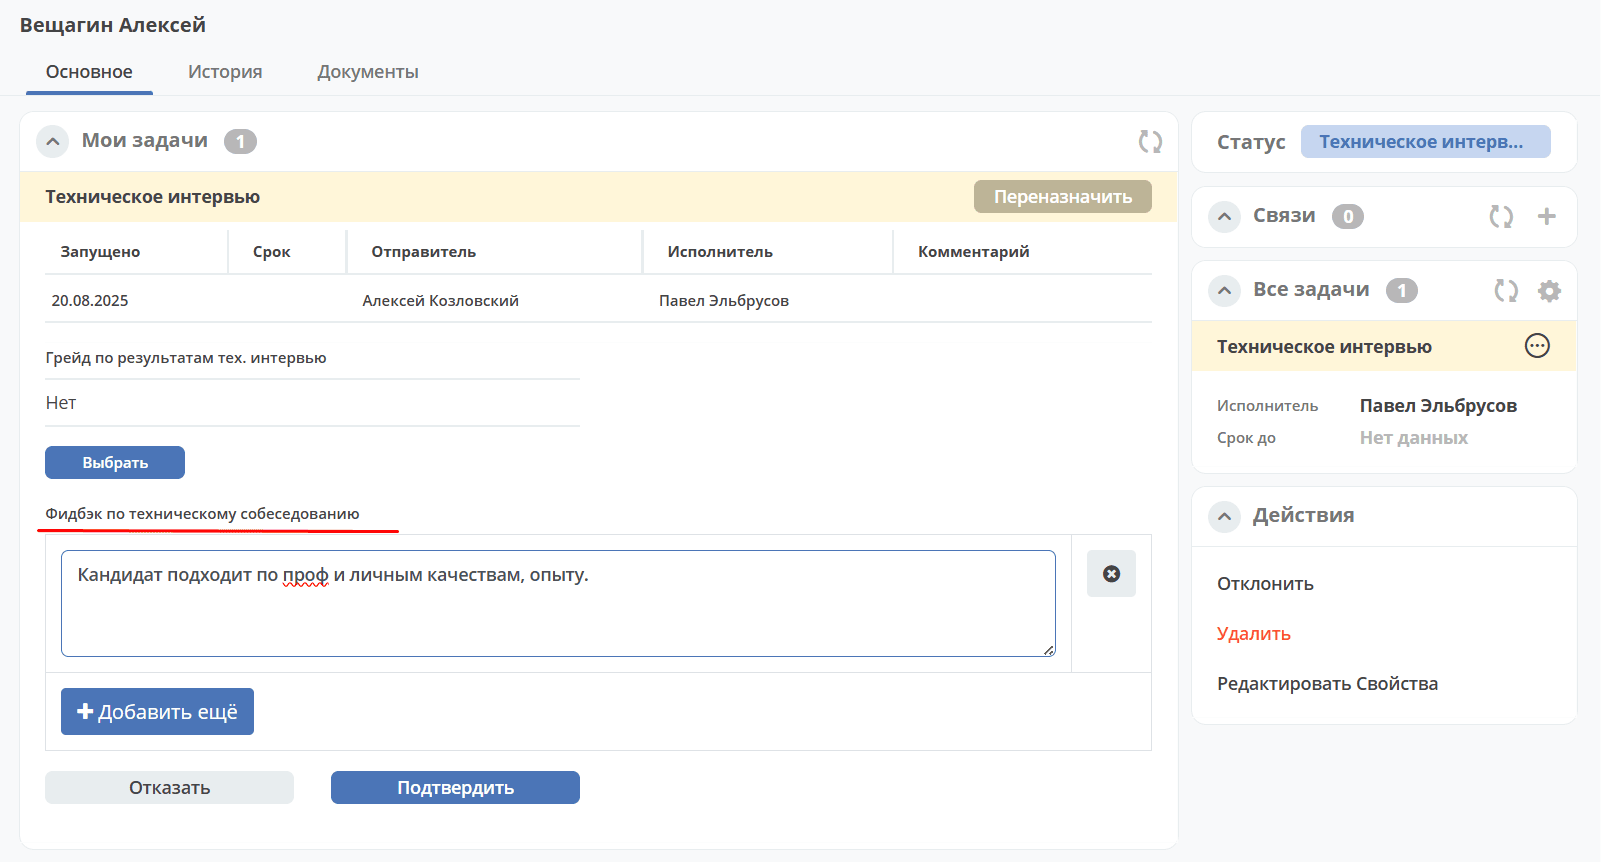
Enter feedback on the technical interview and select the appropriate decision:
«Reject» – the candidate status becomes «Candidate Rejected».
«Confirm» — the candidate status will change to «Offer Terms Approval». The system creates a task «Offer Approval».
Step 6. Creating an Offer and Starting Its Approval
The system creates a task «Offer Terms Approval», which is assigned to the HR department employee.
The Candidate card opens in a separate tab:
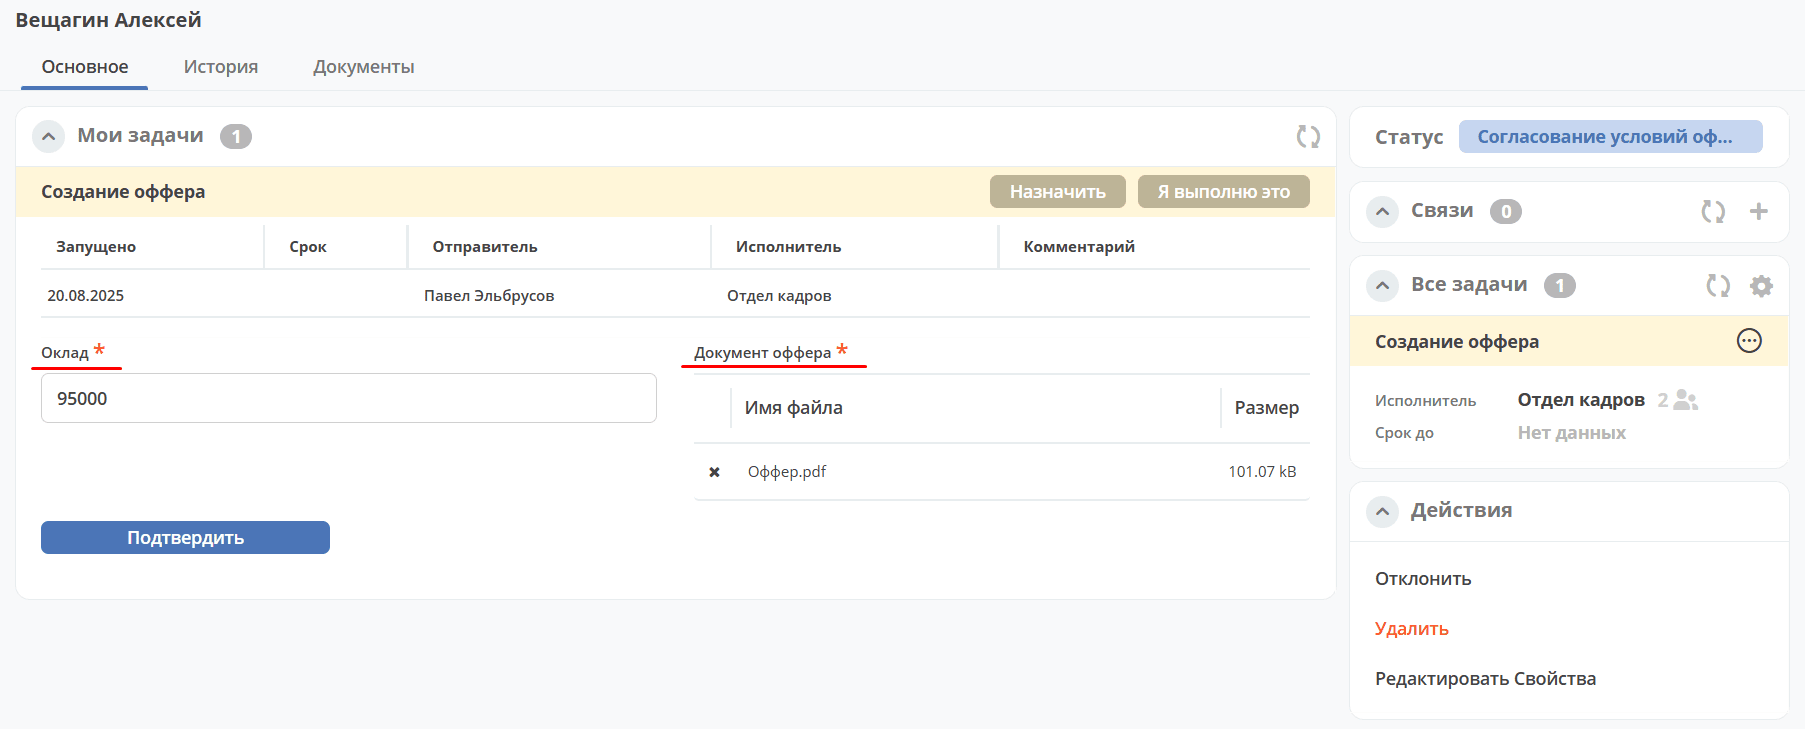
Specify the salary, attach the offer file, and click «Confirm» to complete the task.
The candidate status becomes «Offer Terms Approval».
Step 7. Offer Approval by the Chief Accountant, Production Director, and General Director
The system creates tasks «Offer Terms Approval» for the Chief Accountant, Production Director, and General Director.
The Candidate card opens in a separate tab:
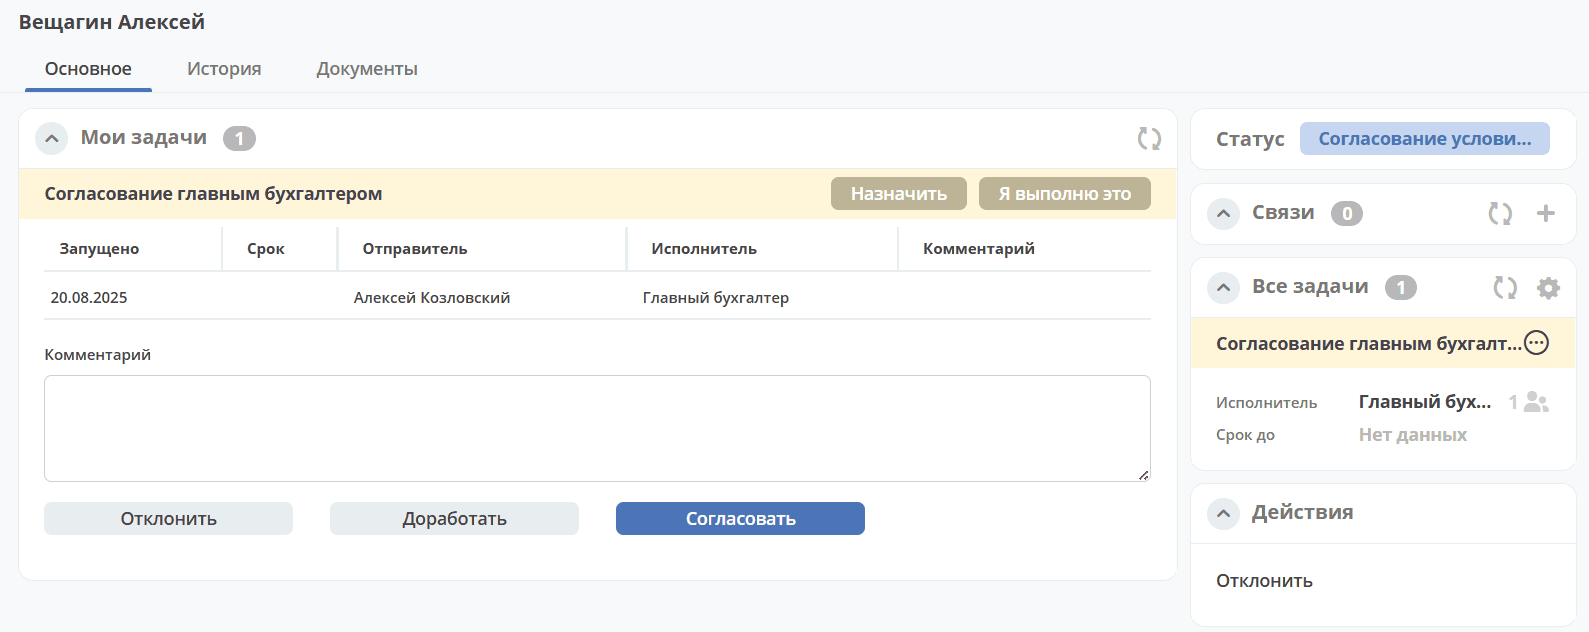
The following decisions can be made on the offer:
Approve by clicking «Approve», the status will remain «Offer Terms Approval». The task will be assigned to the next approver.
send to the Executor for changing the terms, click “Revise” — the status will change to “Revision”. The Executor will receive a notification and a task “Offer Approval”. See Step 6. Creating an offer and launching its approval
Reject by clicking «Reject», the status will change to «Candidate Rejected». The candidate process is complete. The Executor will receive a notification.
A comment can also be added in the «Comment» field.
After successful approval by the General Director, the HR employee will receive a notification and the task «Sending Offer to Candidate».
Step 8. Sending the Offer to the Candidate
The system creates a task «Sending Offer to Candidate», which is assigned to the HR department.
The Candidate card opens in a separate tab:
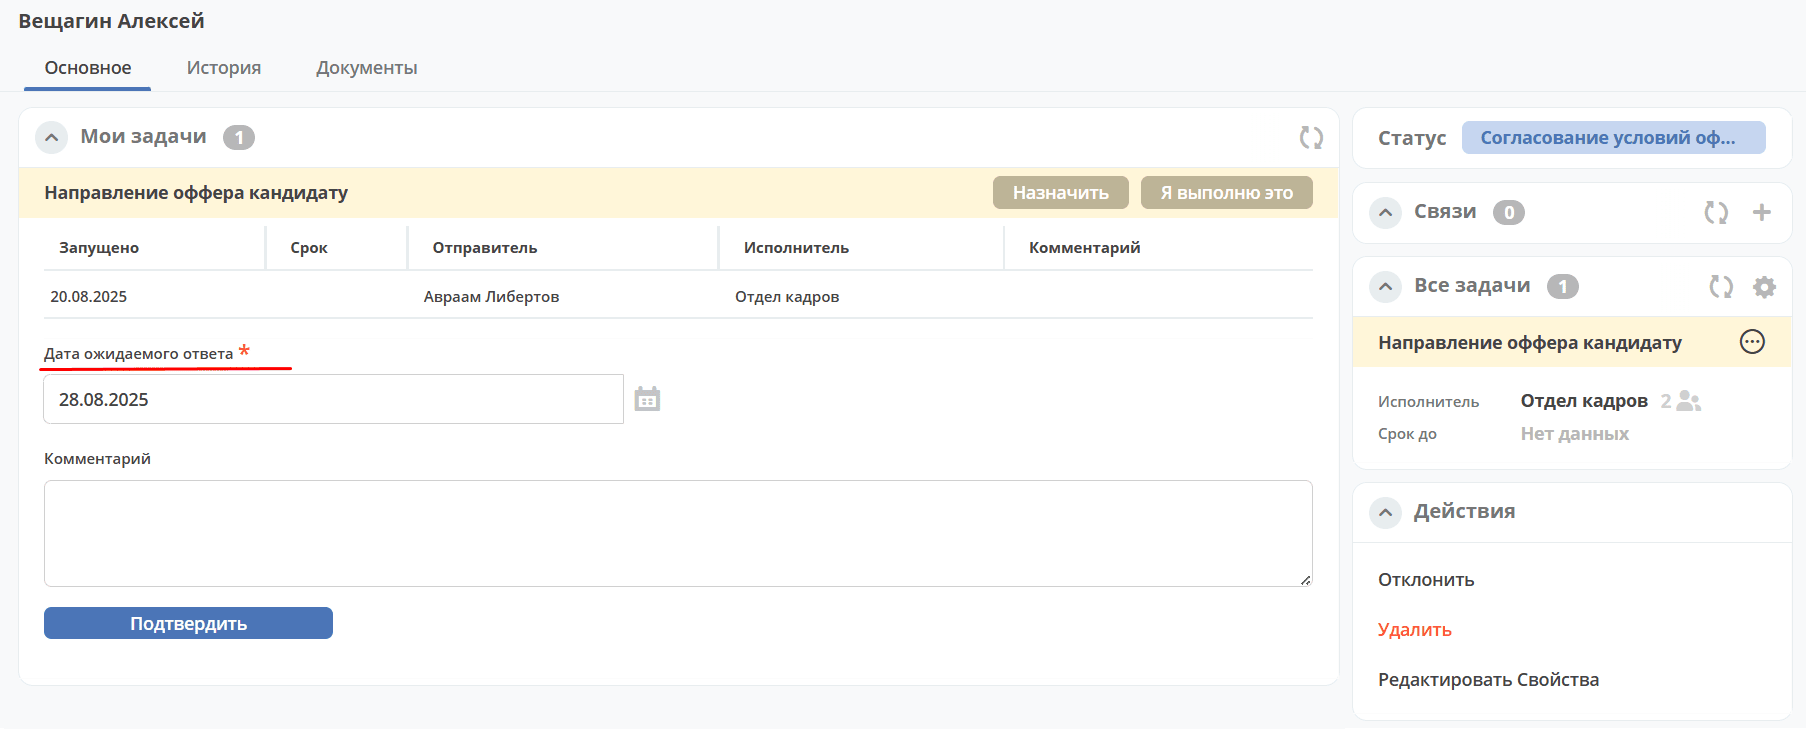
Specify the expected candidate response date and click «Confirm» to complete the task.
The candidate status becomes «Awaiting Candidate Response».
Step 9. Processing the Candidate’s Offer Response
The HR employee receives the candidate’s response to the offer and enters their decision into the task «Processing Candidate Offer Response»:

In the task «Processing Candidate Offer Response», select the appropriate decision:
If the candidate declined the offer, the status becomes «Declined by Candidate».
«Revise», if the offer terms need to be changed;
«Confirm» — enter the start date, the candidate status will change to «Offer Accepted».
Step 10. Starting Work
The HR employee records the candidate’s start/no-start status in the «Starting Work» task:

If started work, the status will change to «Started Work». The HR employee then proceeds to the request at Step 4. Candidate “Selection and Choice
If the candidate did not start work, the status will change to «Did Not Start Work».
Actions
Reject
At each step, the candidate can be rejected — specify the reason and add a comment if necessary:
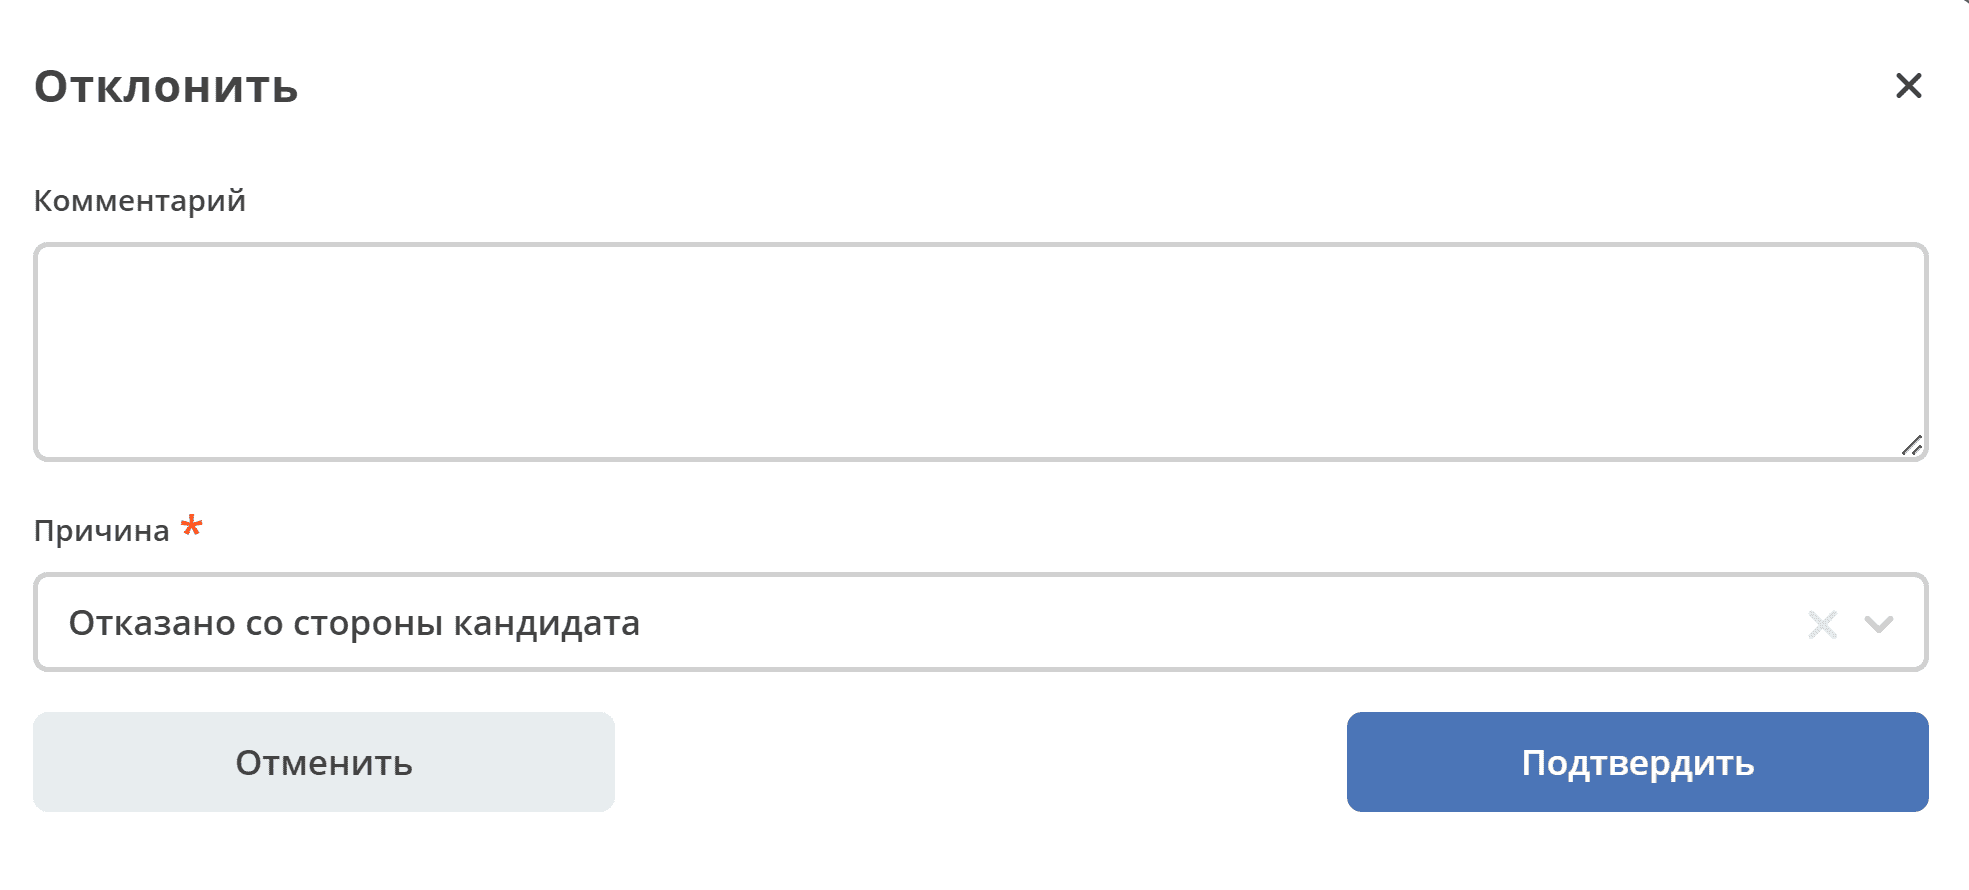
The candidate status will change depending on the selected reason to:
Declined by Candidate;
Candidate Rejected.