CRM Module
The module supports the company’s marketing, sales, and customer service processes, specifically helping to:
organize and store customer data;
ensure their practical application;
track customers at every stage of sales.
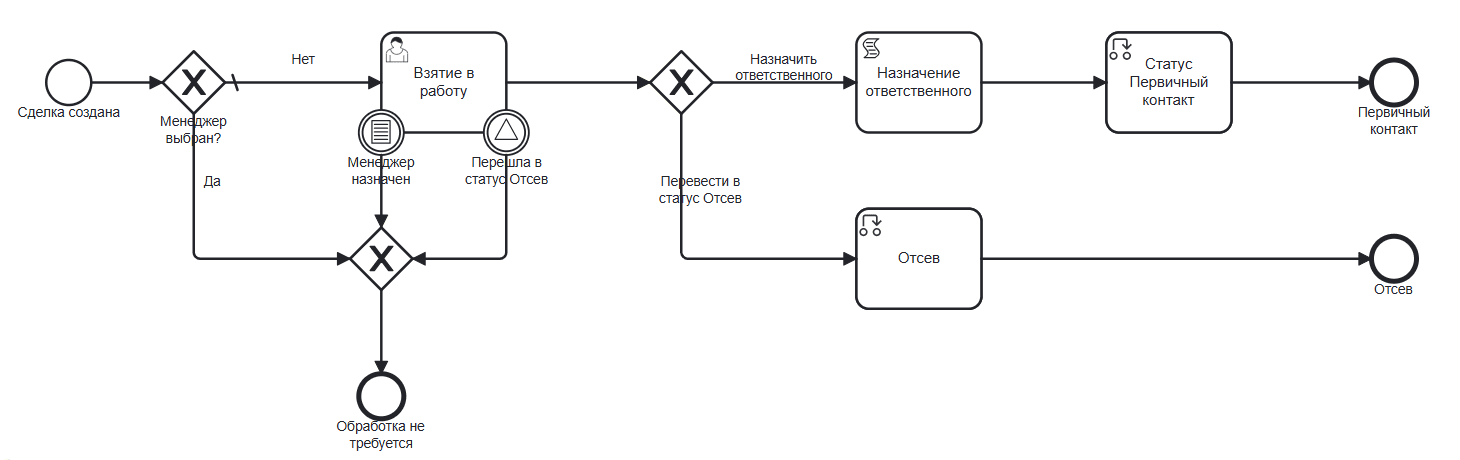
Business Process Scheme
Lead

Deal
Roles
Sales Manager |
The user who initiated the deal. Can only see their own deals. |
Commercial Director |
The user who makes decisions on deals. Can see all deals. |
All CRM Managers |
Users who are members of this role have the right to view all deals. The crm-manager group is added to it by default. If a user is not in the crm-manager group, the role does not apply to them. |
Observers |
Users who are granted additional read access to a particular deal. |
Organizational structure groups where users must be added
CRM Manager (crm-cco)
Commercial Director (crm-manager)
Available Workspace
The module is available in the workspace CRM:
The workspace contains:
Tasks
Current Tasks - all tasks that can be performed by the user, either as the sole executor or as part of groups.
Completed Tasks - tasks completed by the user
Subordinates’ Tasks - tasks of users for whom the current user is specified as their Line Manager in their profiles.
Sections
Journals for the main area of the workspace - Leads, Deals, Orders, Payments, Contracts, Additional Agreements
Document Library - a hierarchical interface for working with folders and documents. See details about the document library.
Assignment Board - a visual representation of the tasks of workspace participants in the form of a virtual board. See details about the kanban board.
Directories
Directories that are used in this workspace. The directories must be filled with data.
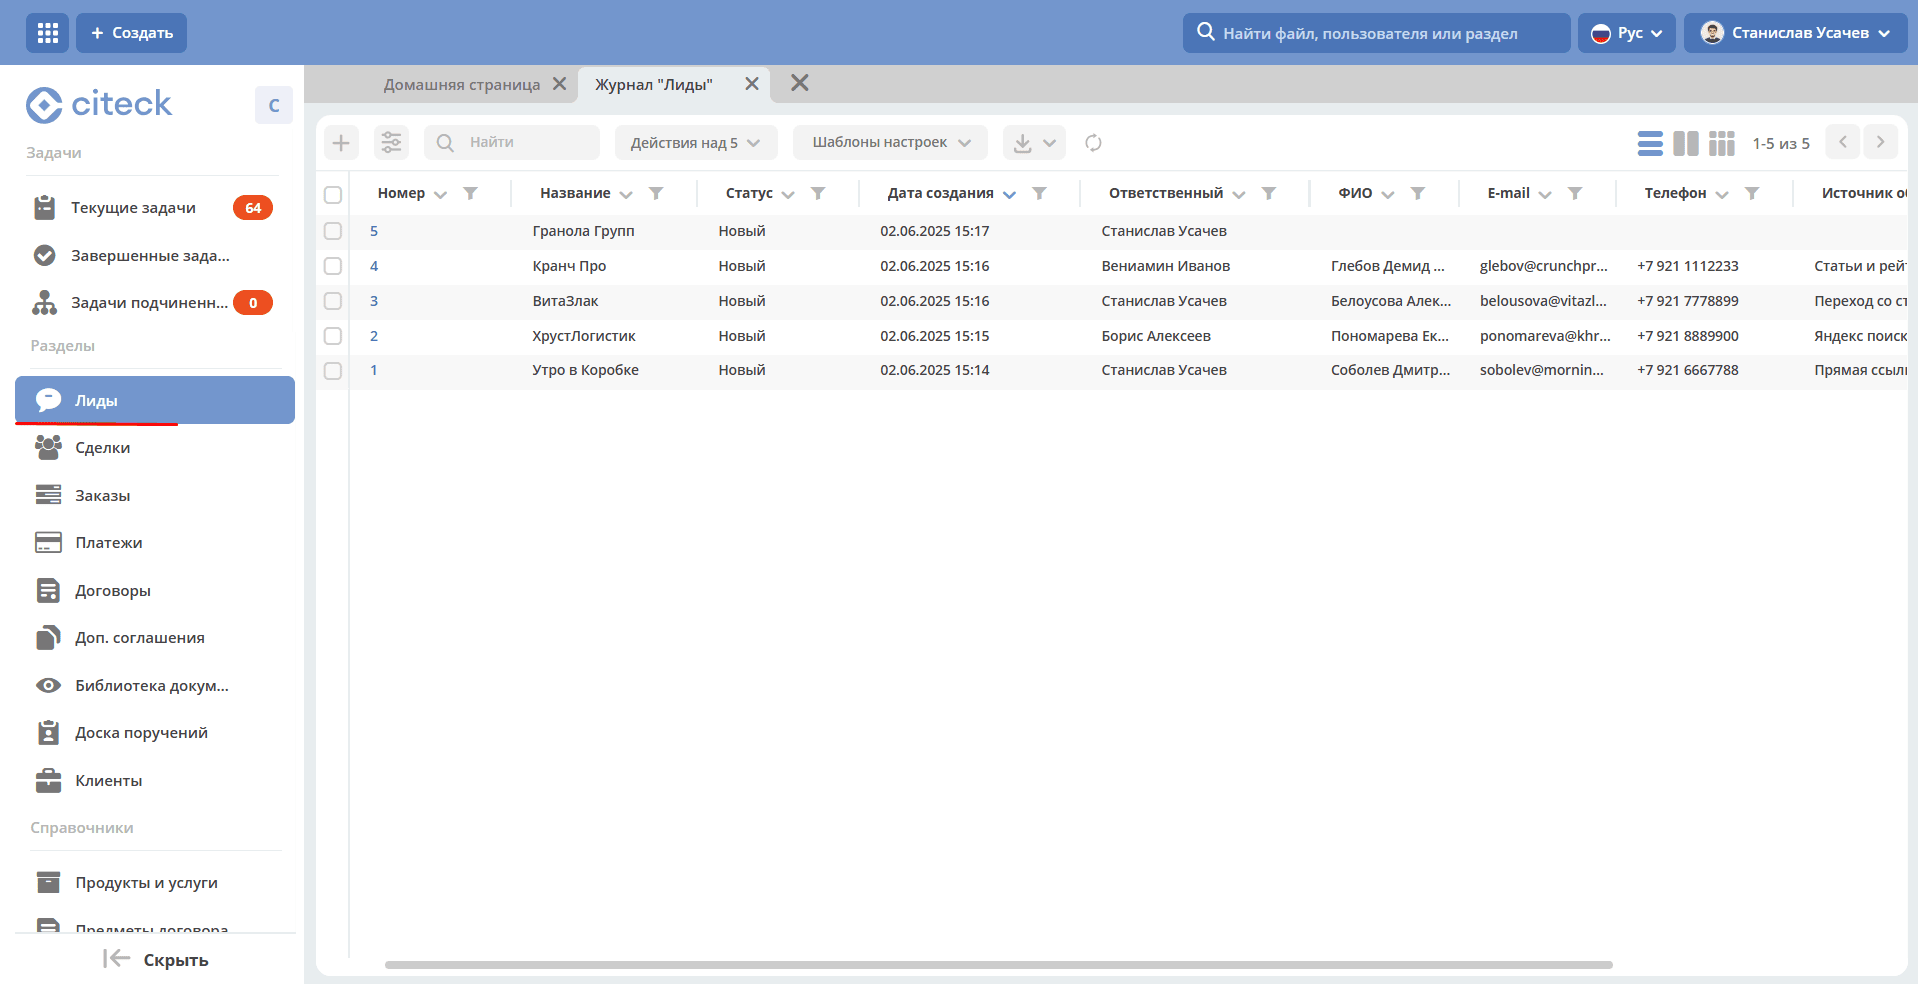
Leads
Leads – potential customers who have shown interest in the product.
Possible lead stages:
Not Processed
Interest Expressed
Paused
Disqualified
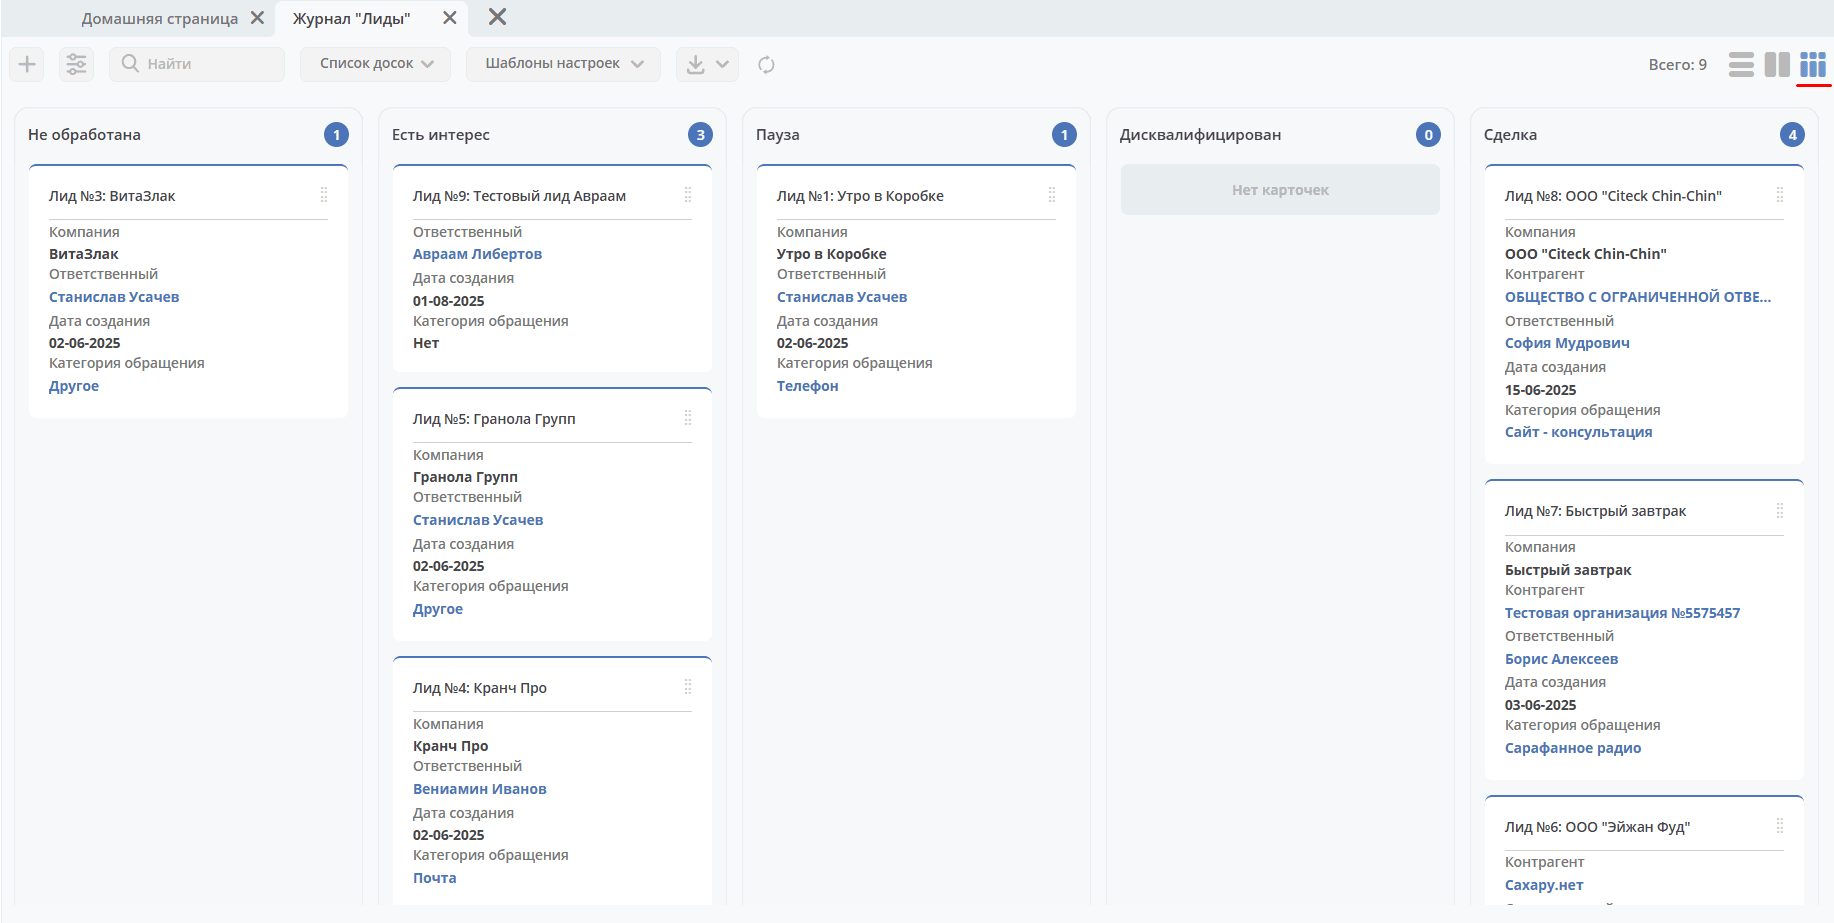
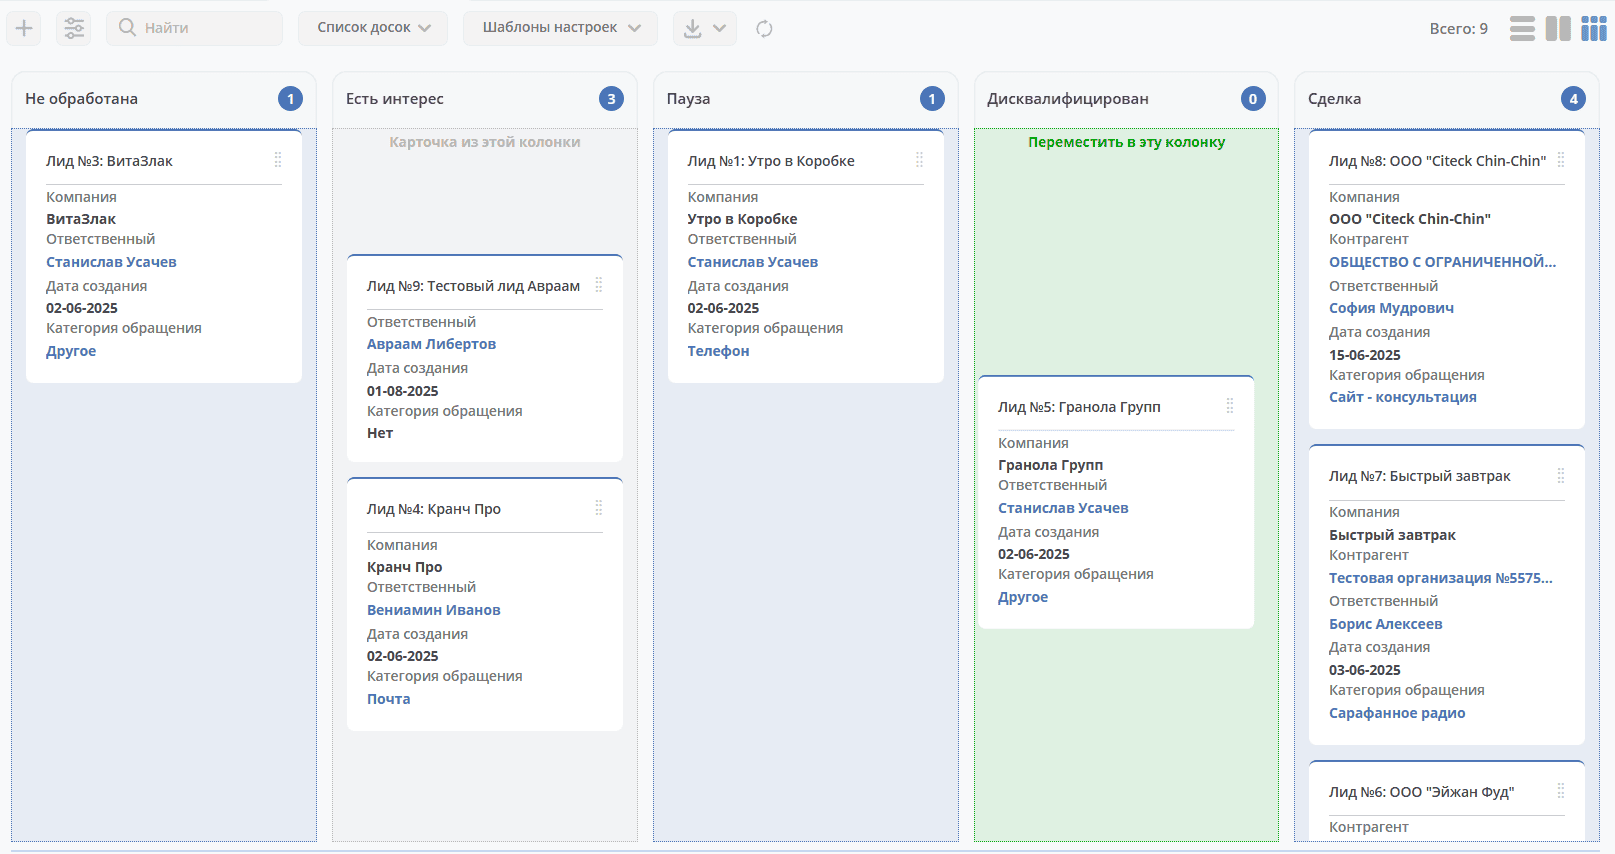
Deal
A Kanban board is available for visual representation of lead statuses:
Creating a Card
A lead can be created using the quick create button:
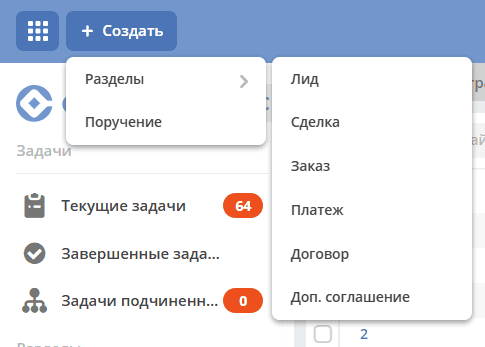
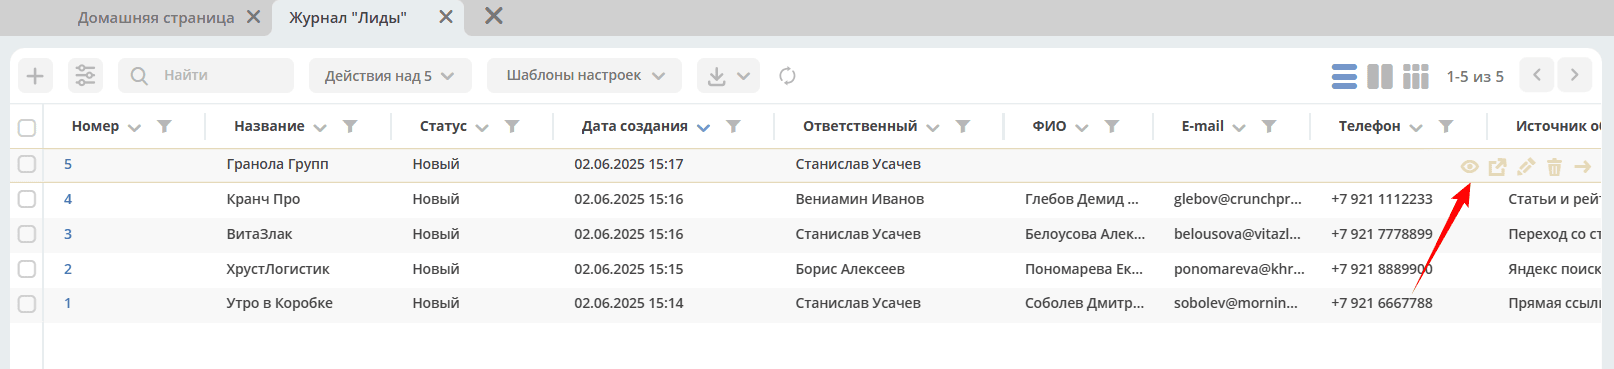
or from the «Leads» journal using the + button.
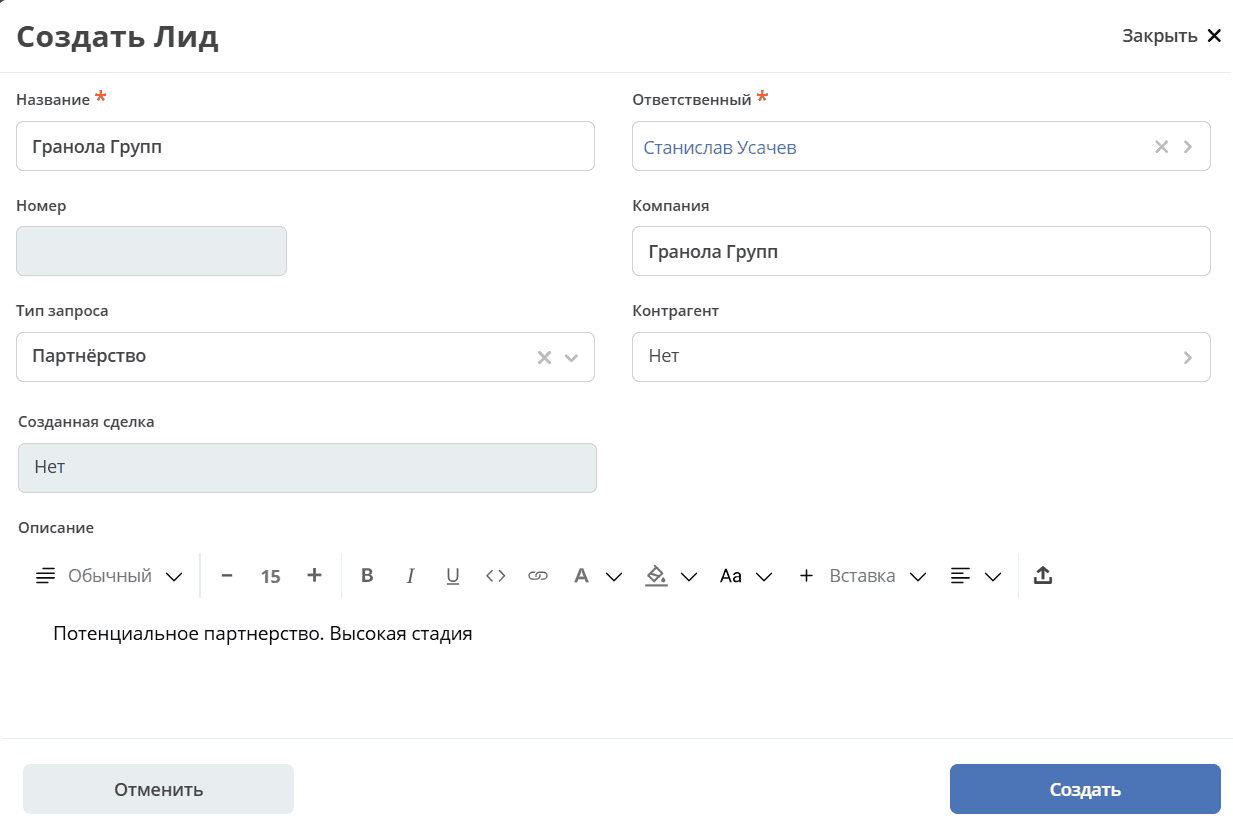
In the card, fill in the necessary and mandatory fields and click «Create».
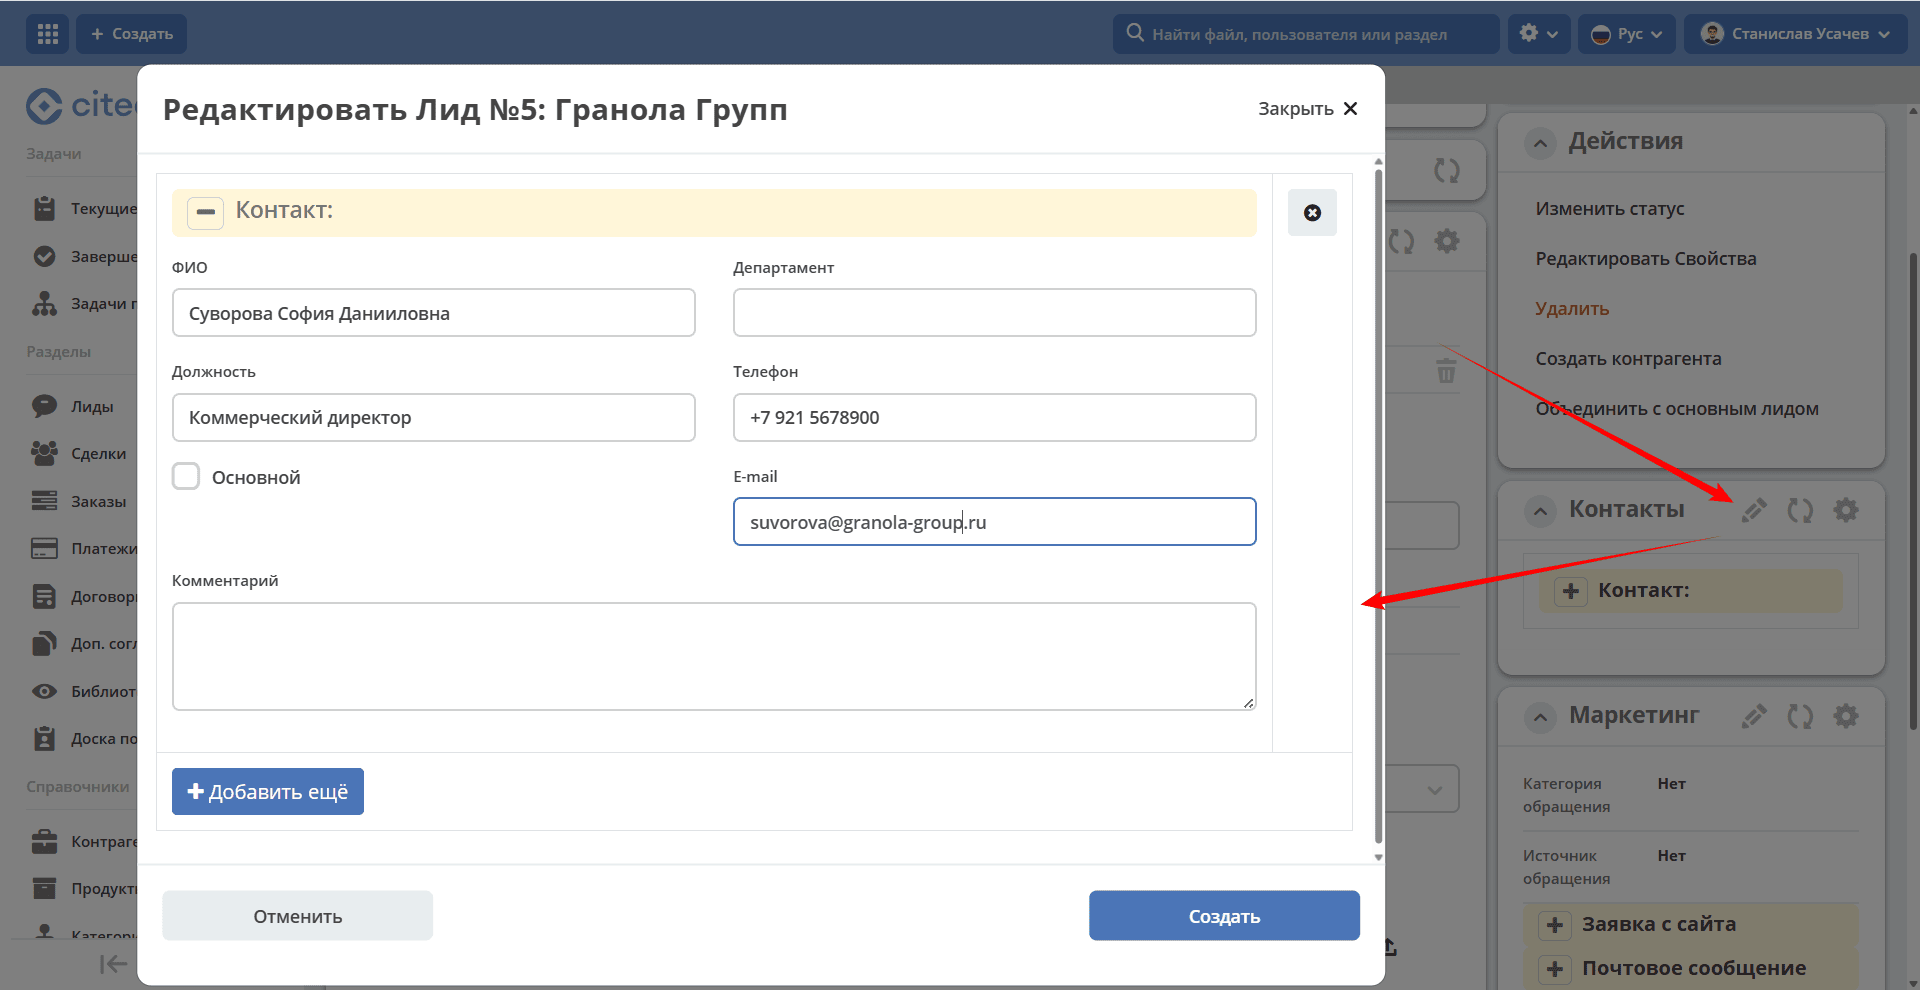
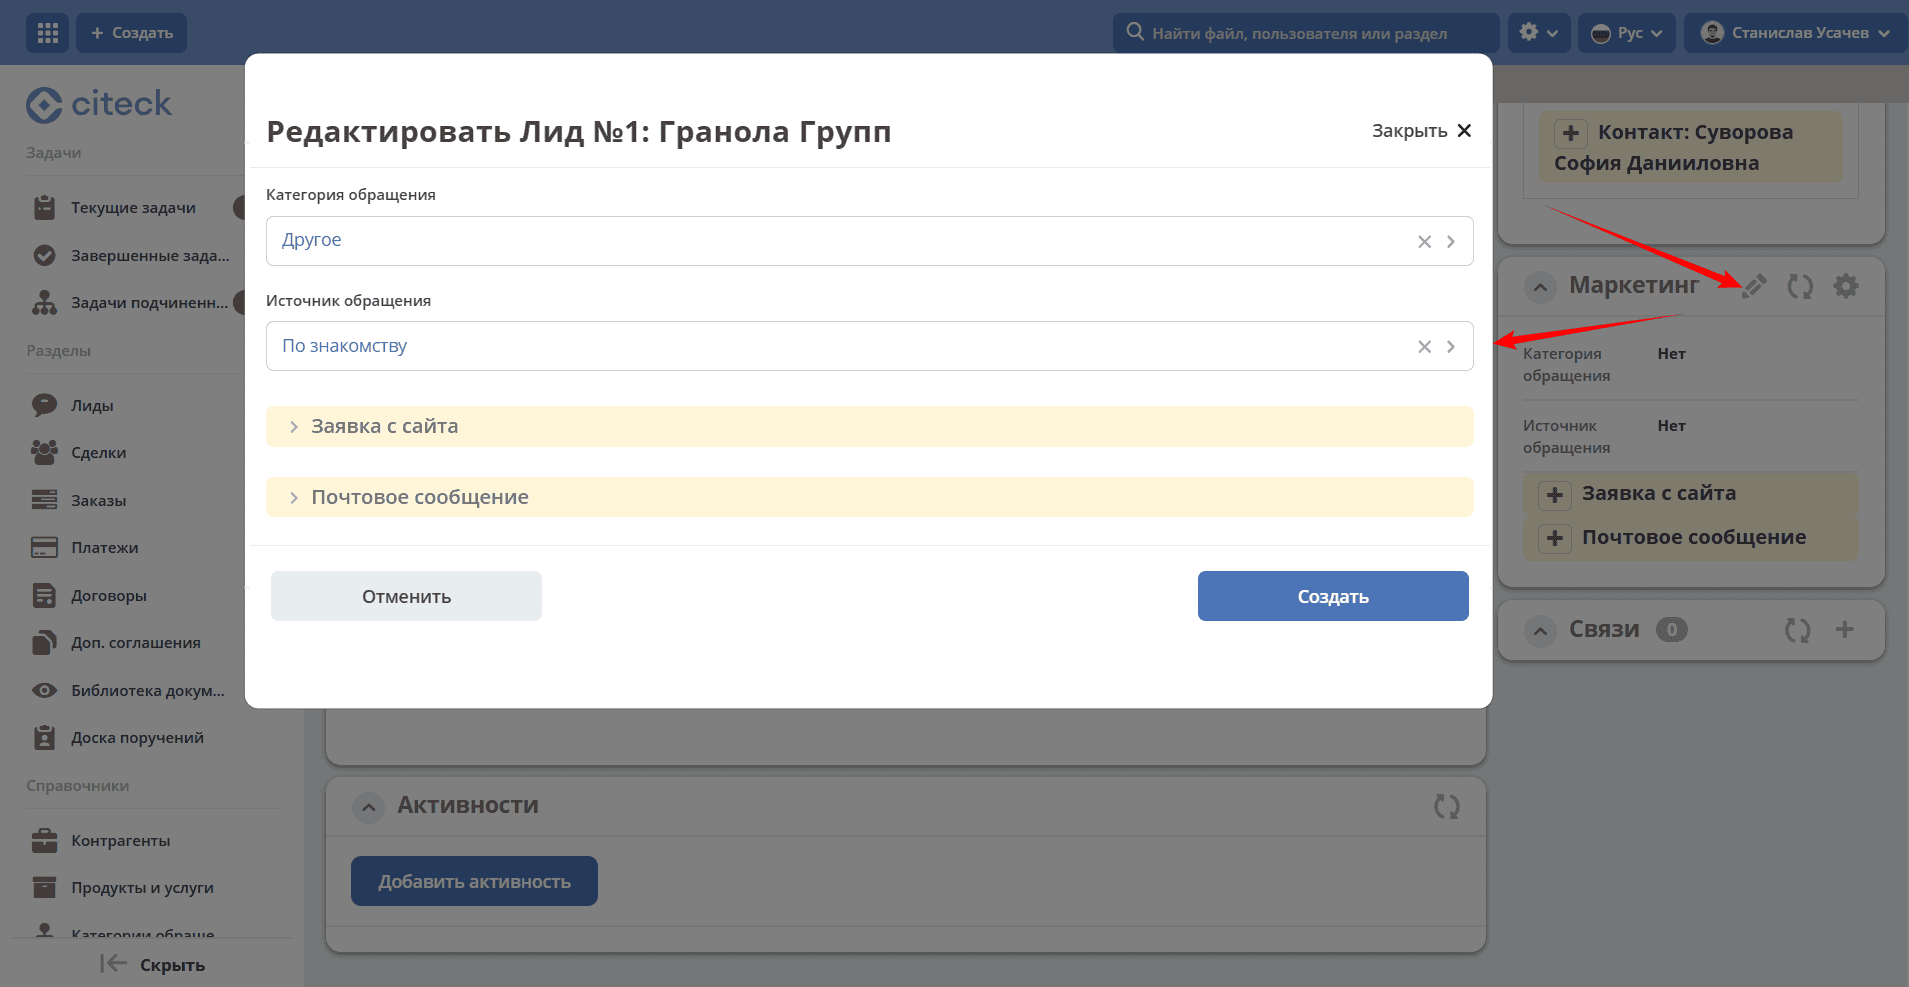
To enter data about the lead’s contacts and additional information, go to the card by clicking:
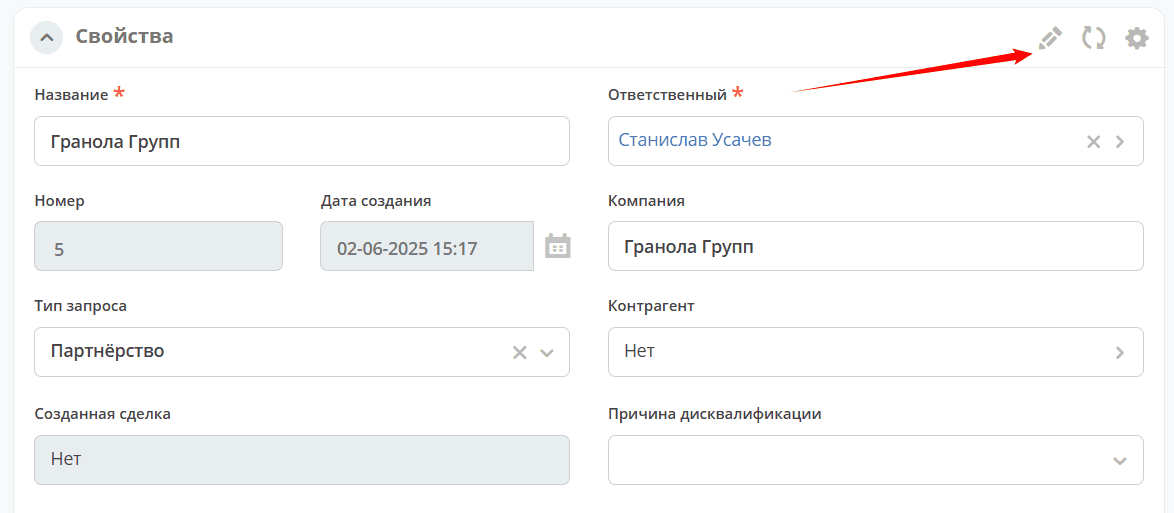
The lead card consists of widgets
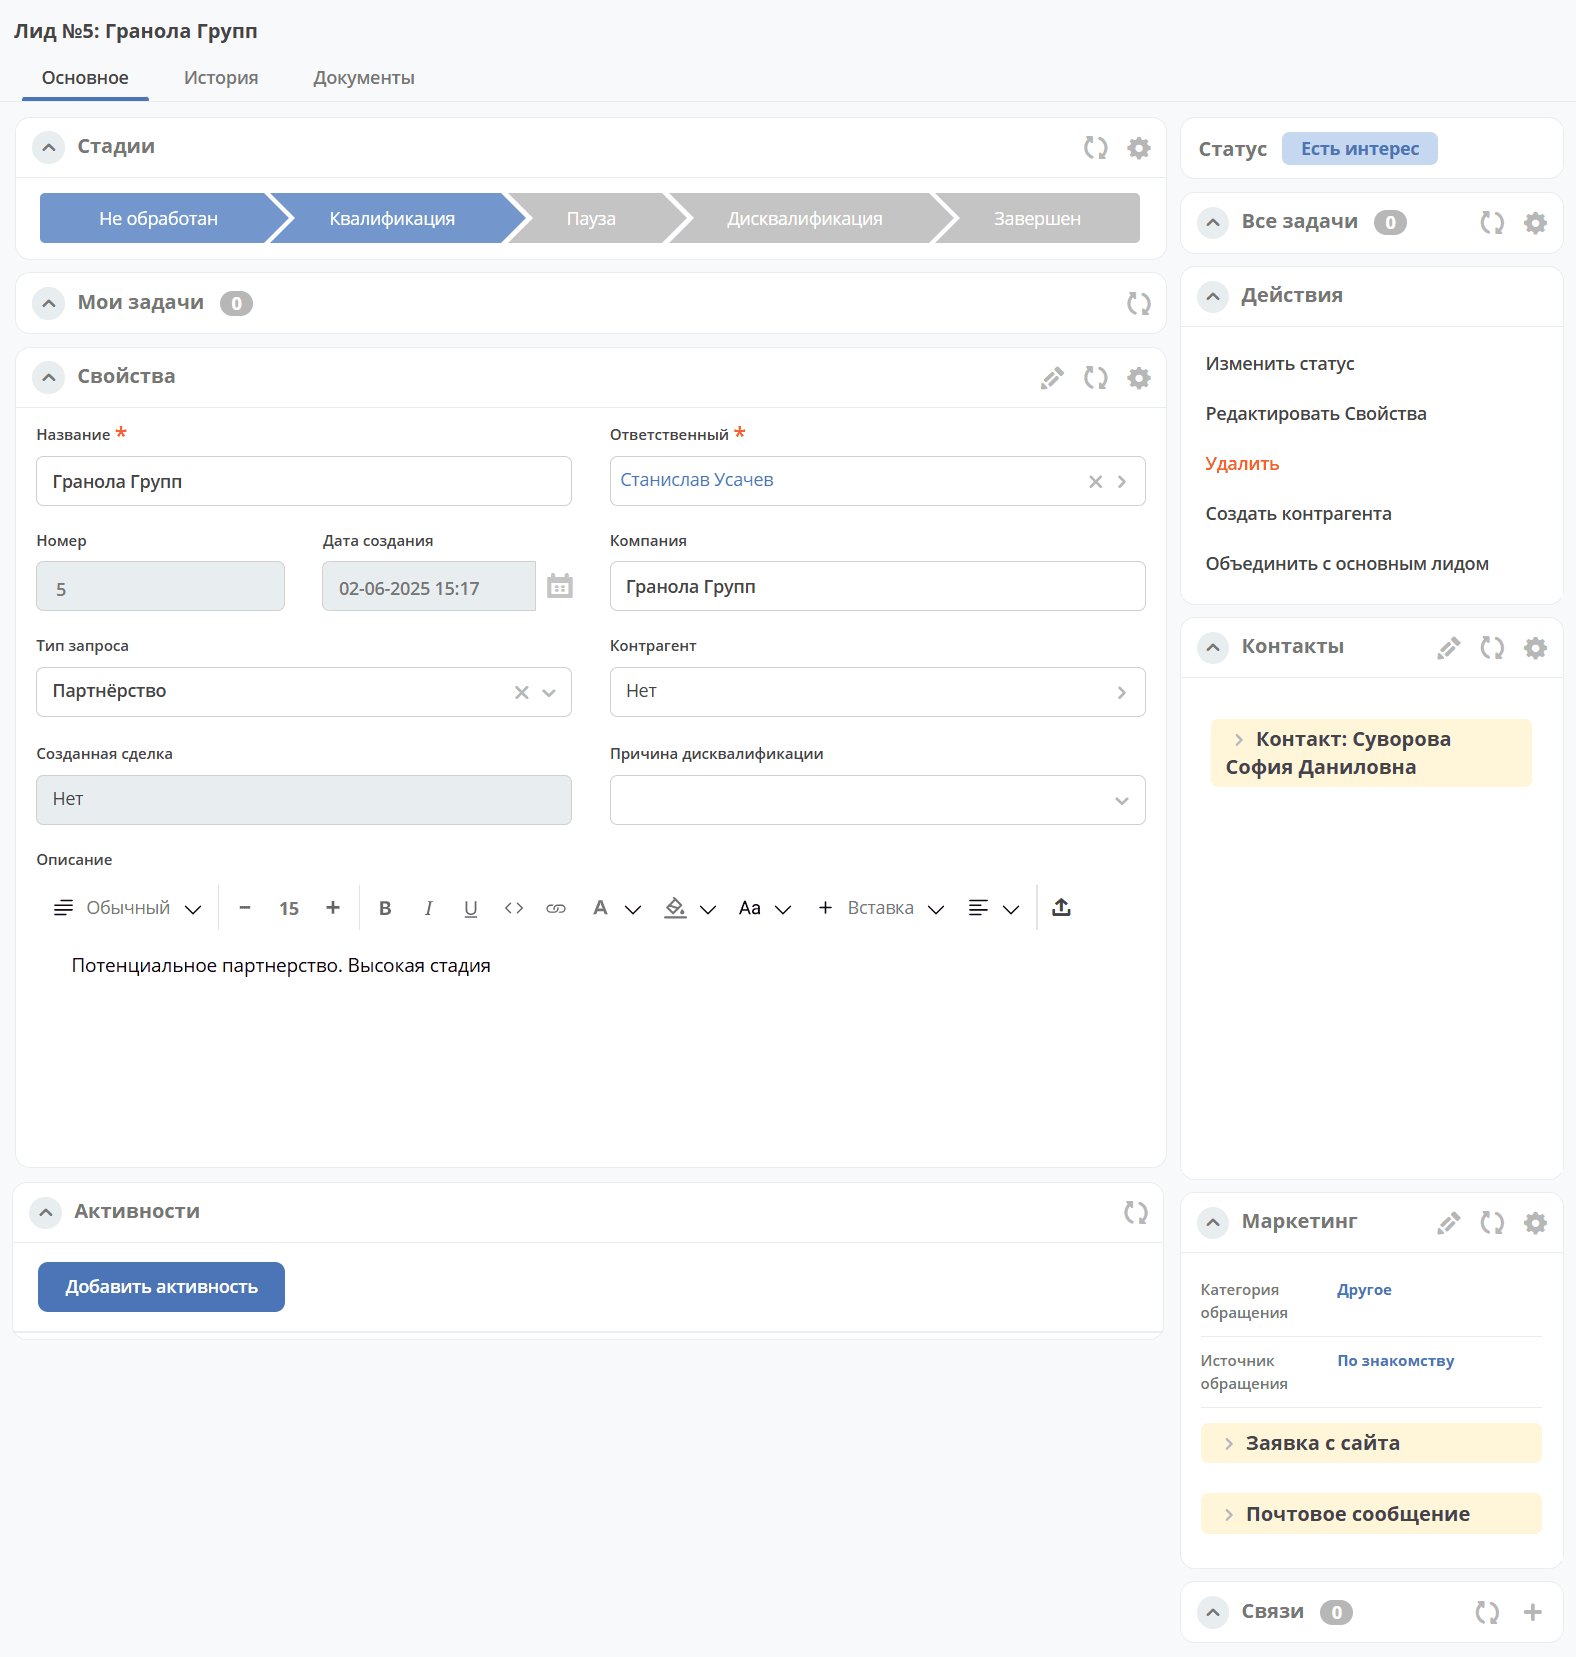
Click the edit icon, fill in the data, and save:
Editing the Card
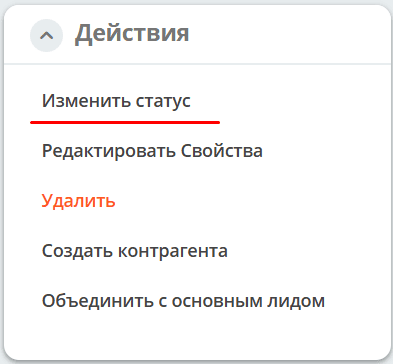
Changing Status
The status can be changed via the corresponding action in the card:
or by moving the card on the Kanban board:
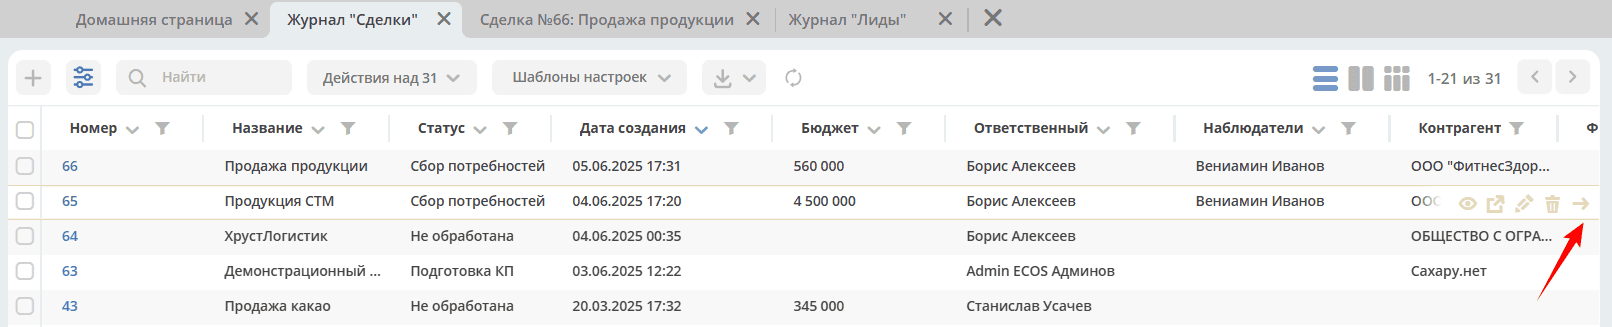
or via an action in the journal:

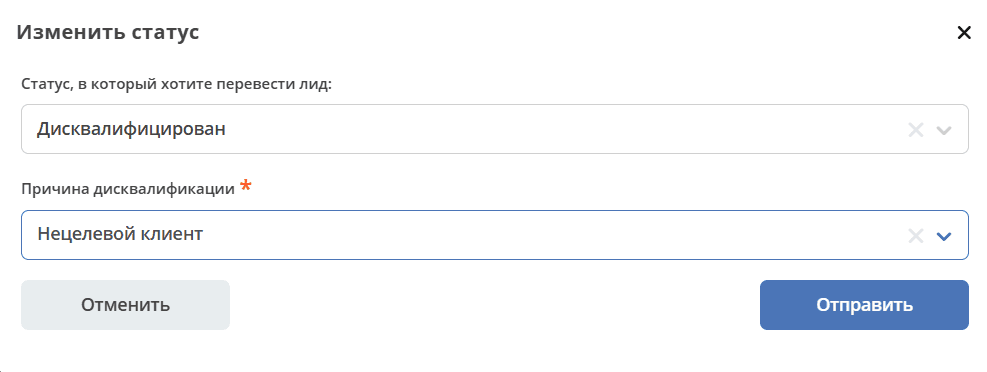
Disqualification
Disqualification – the process of filtering out unsuitable potential customers.
Change the status of the lead to «Disqualified» and select the reason for disqualification, then save:
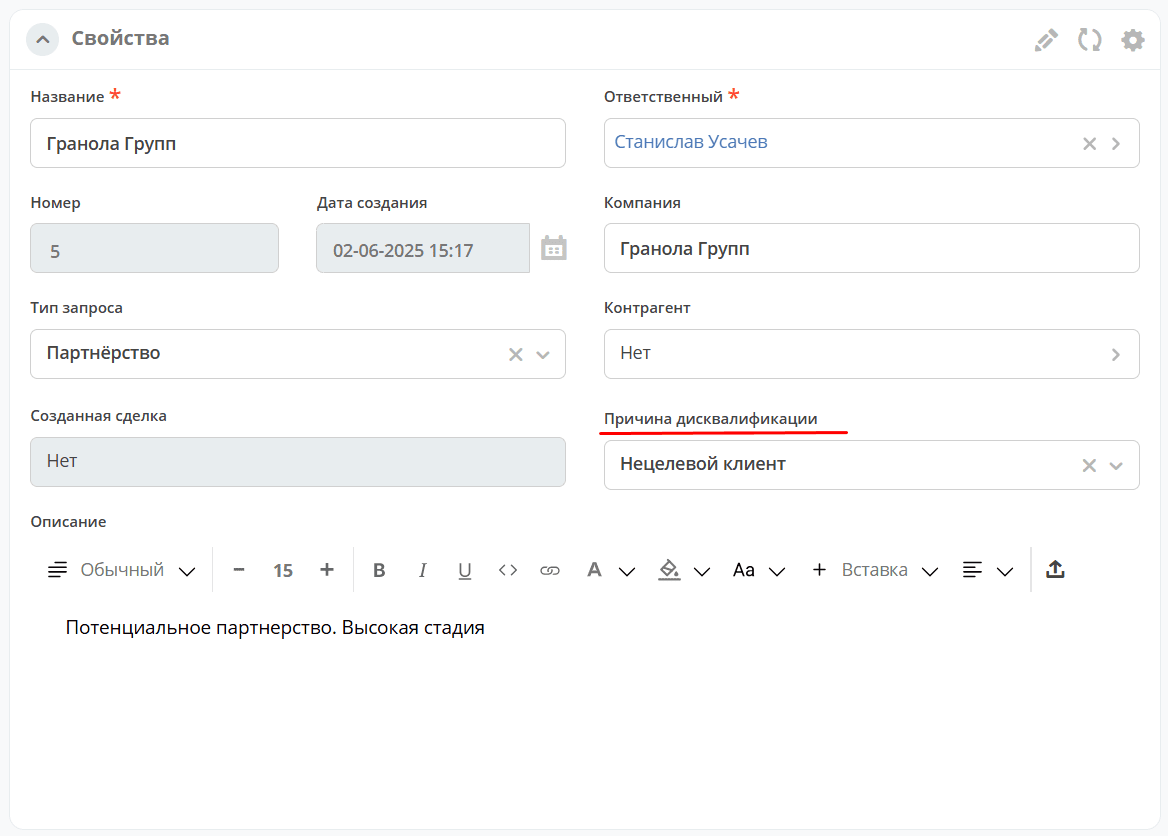
The reason will be indicated in the card:
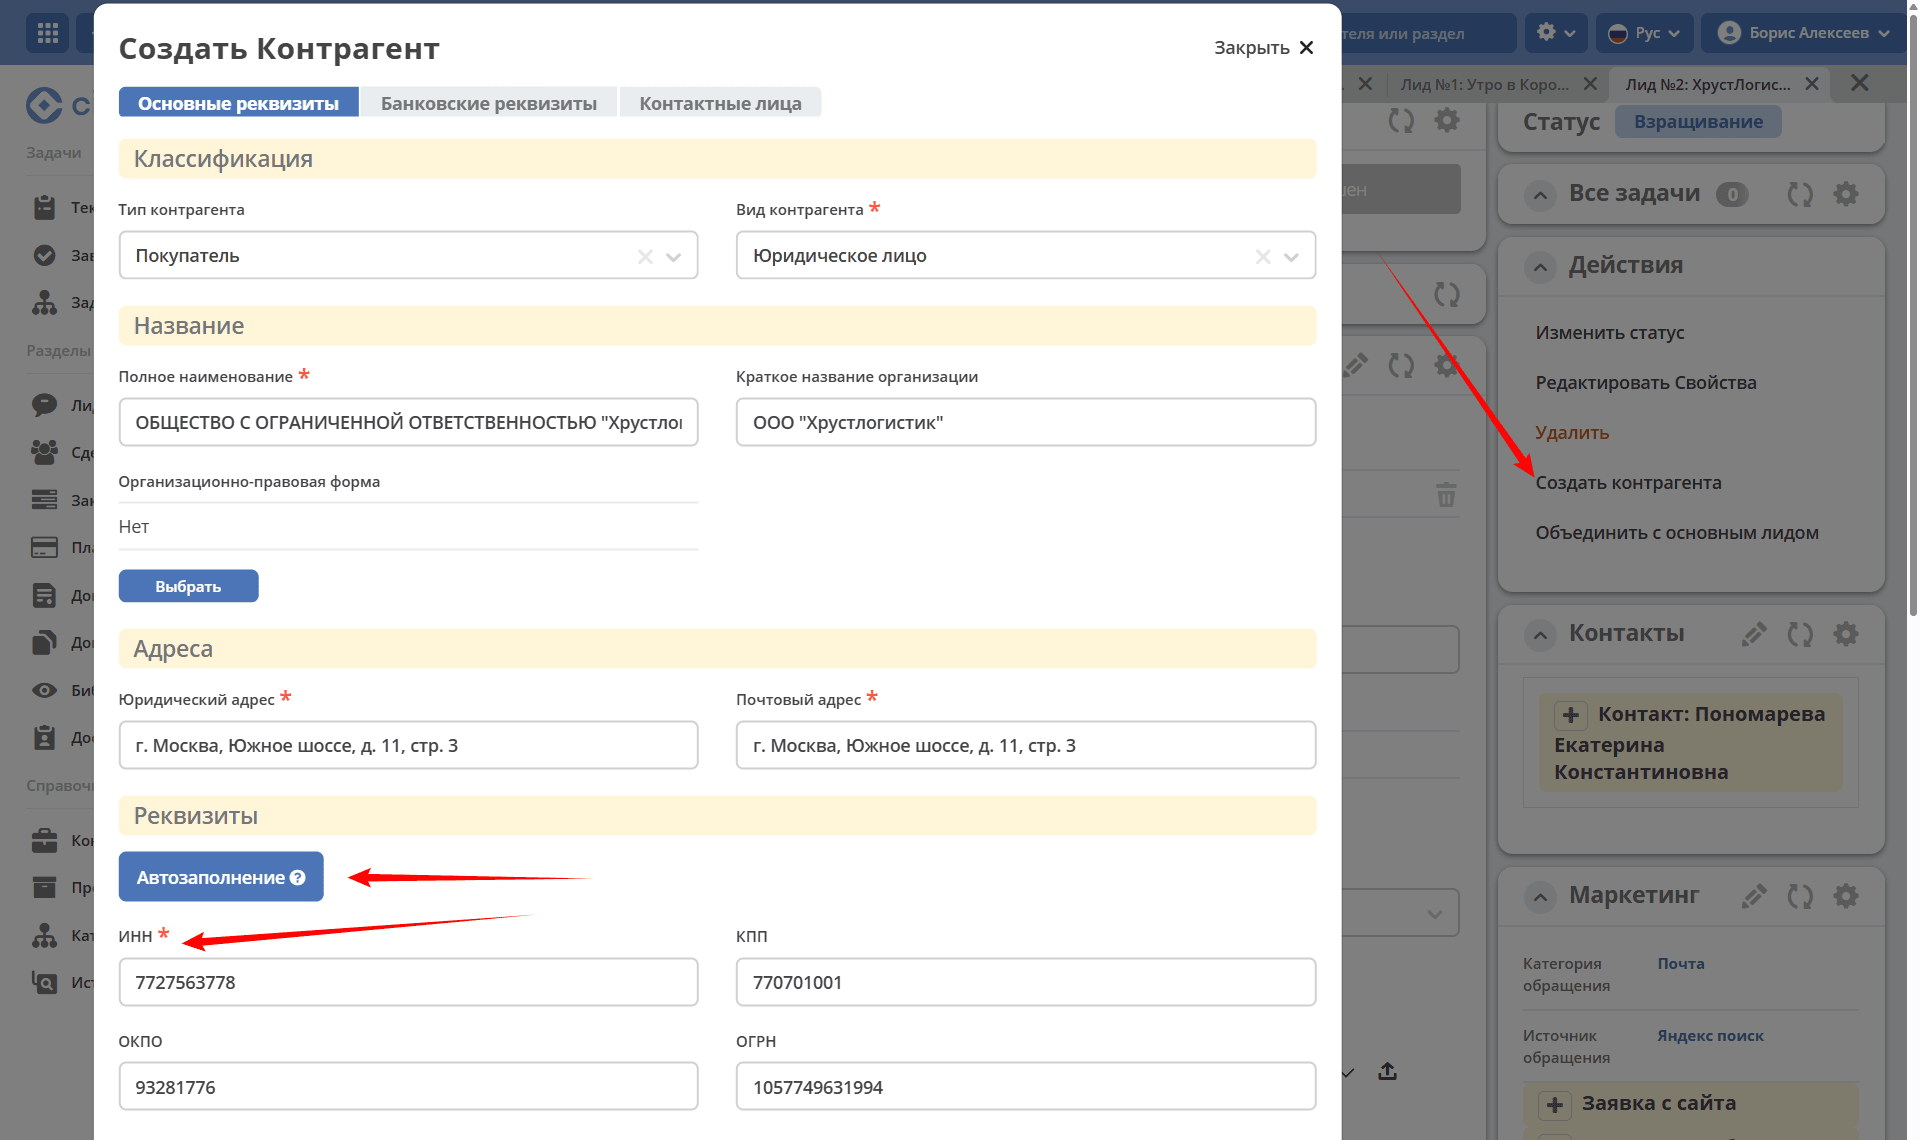
Creating a Counterparty
Before creating a deal in the future, it is necessary to create a counterparty from the lead or select it from the directory if it was created in advance.
To do this, select the action «Create Counterparty», fill in the mandatory fields in all tabs of the card. To automatically fill in the details fields, fill in the Tax ID (INN) and then click «Auto-fill»:
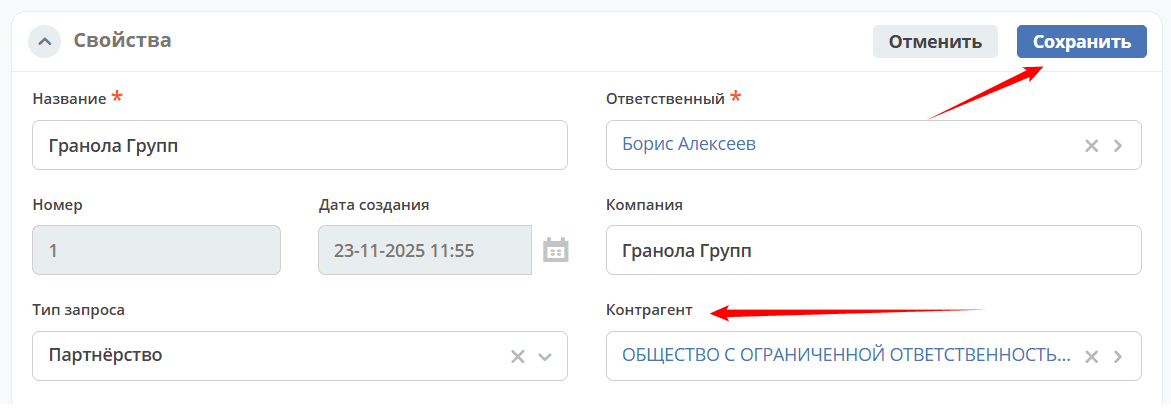
Next, select the created counterparty in the lead card and save:
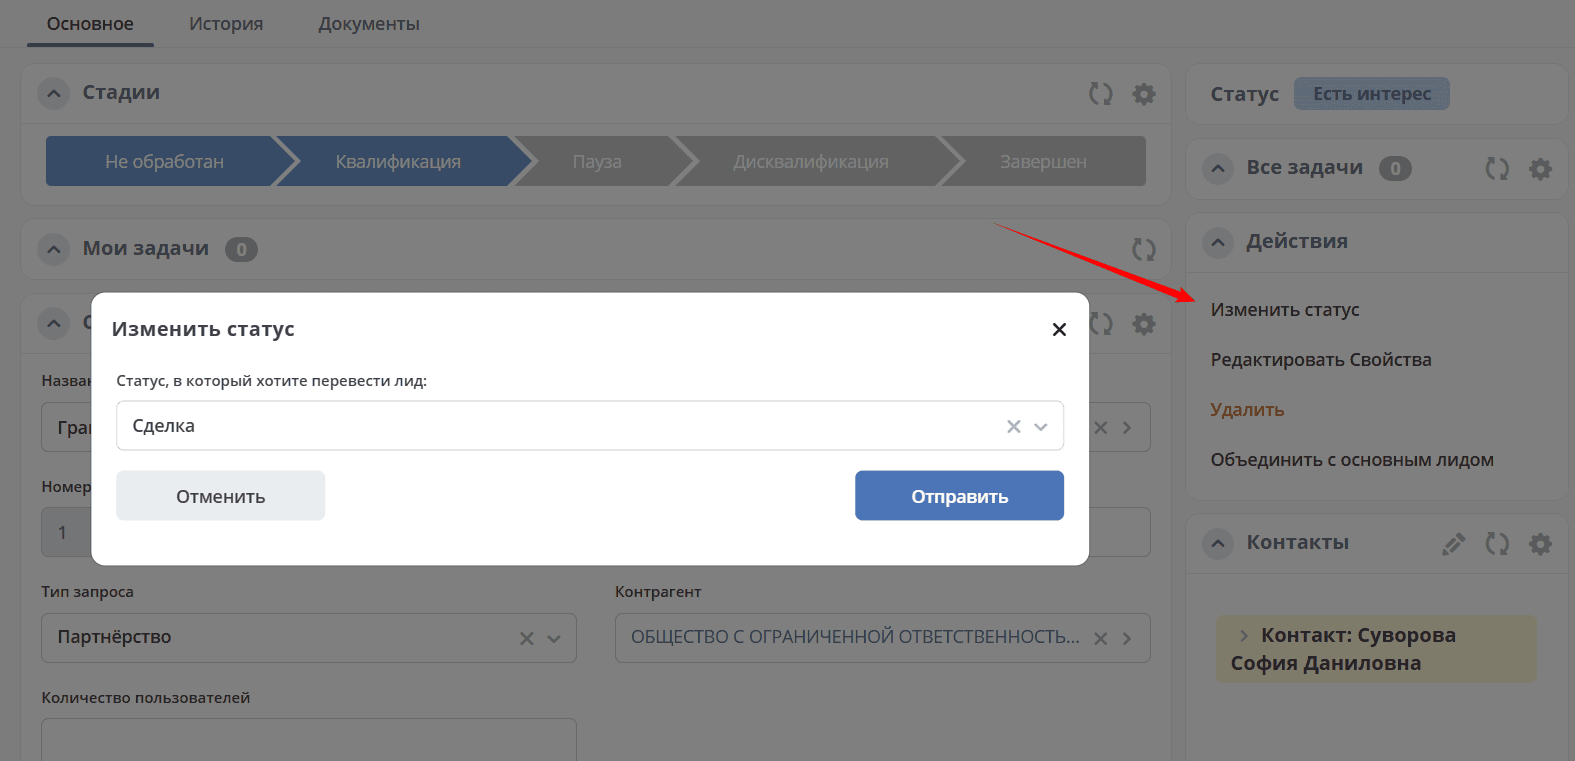
Creating a Deal
Note
The «Counterparty» field must be filled in.
Change the lead’s status to «Deal»:
The lead’s status changes to «Deal» - a deal is created with the status «Not Processed» with data from the lead card:
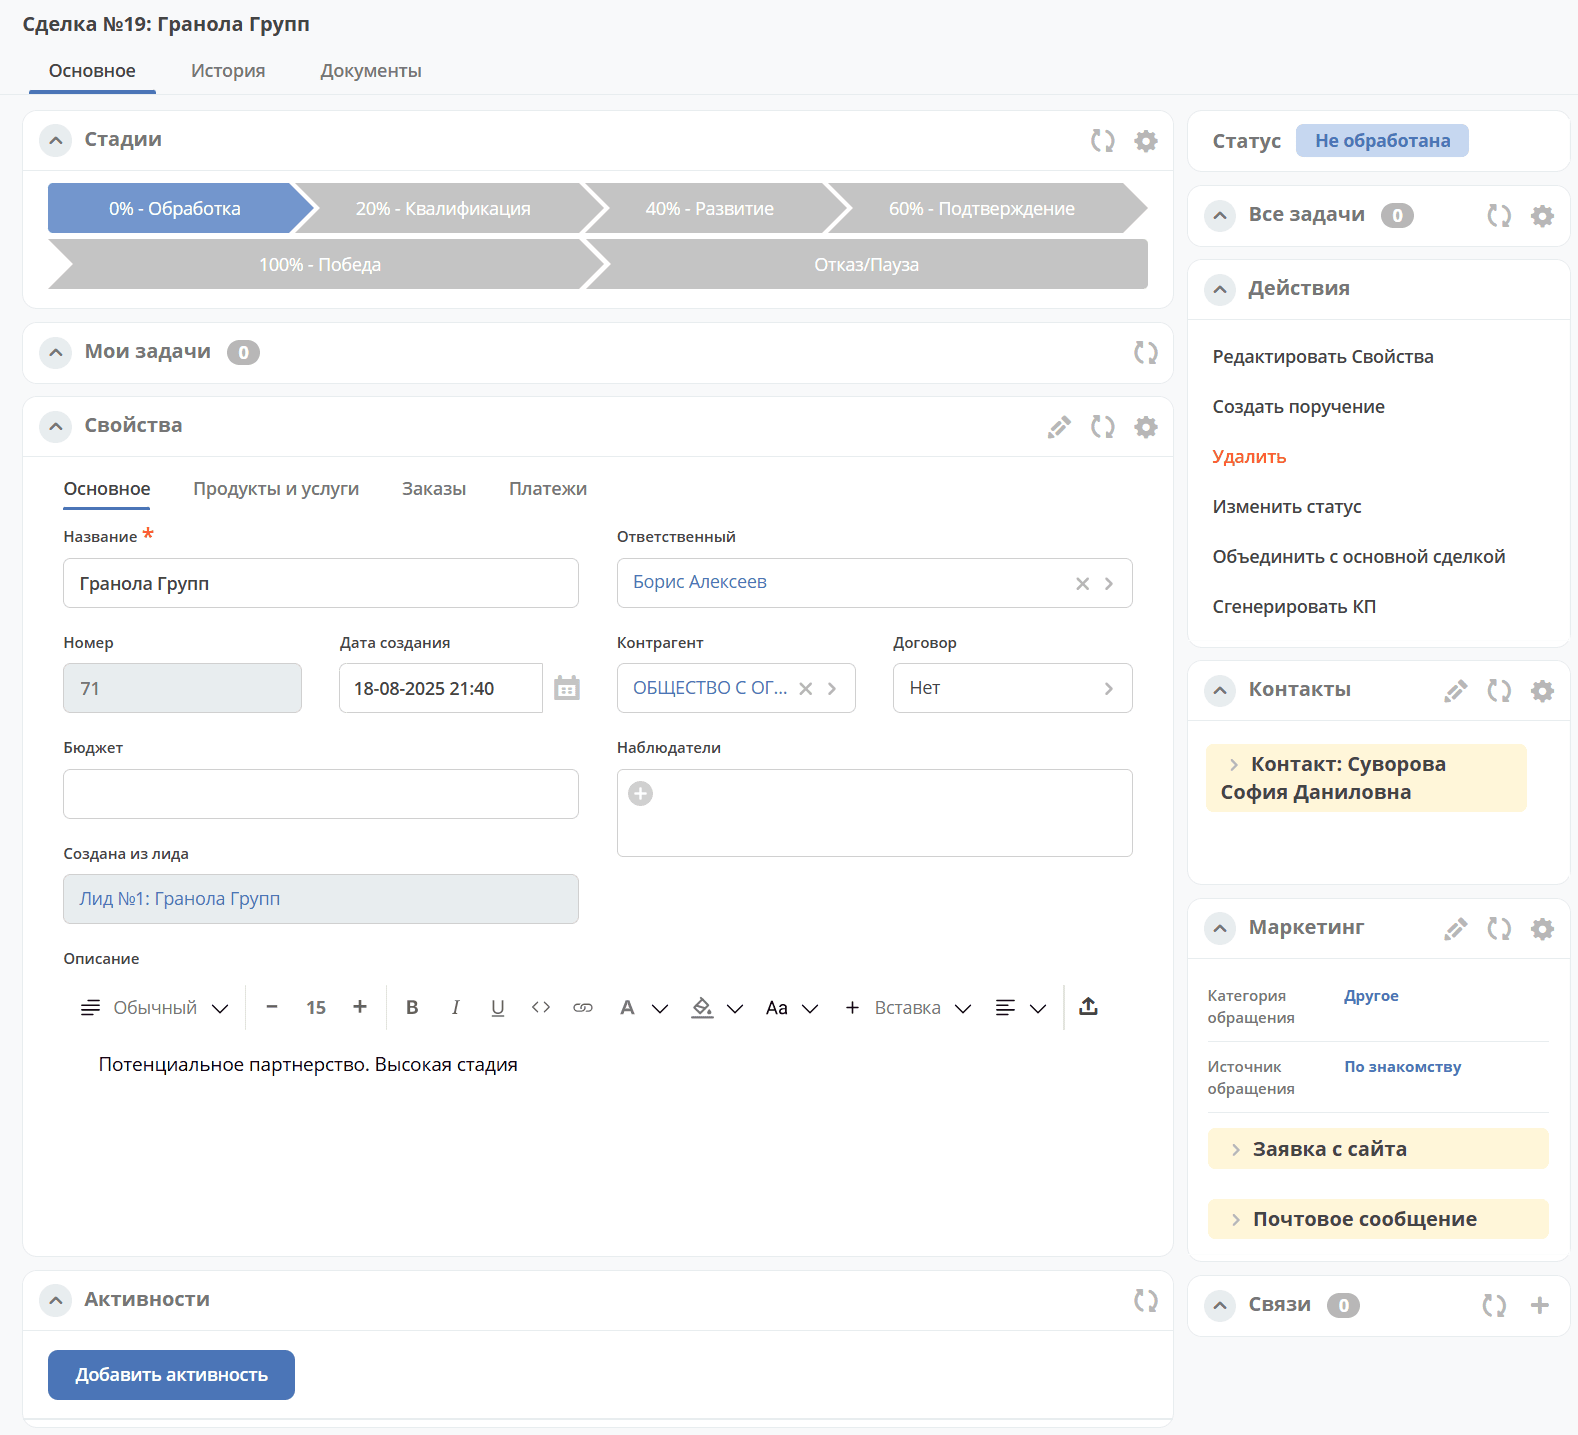
The created deal is automatically indicated in the lead card.
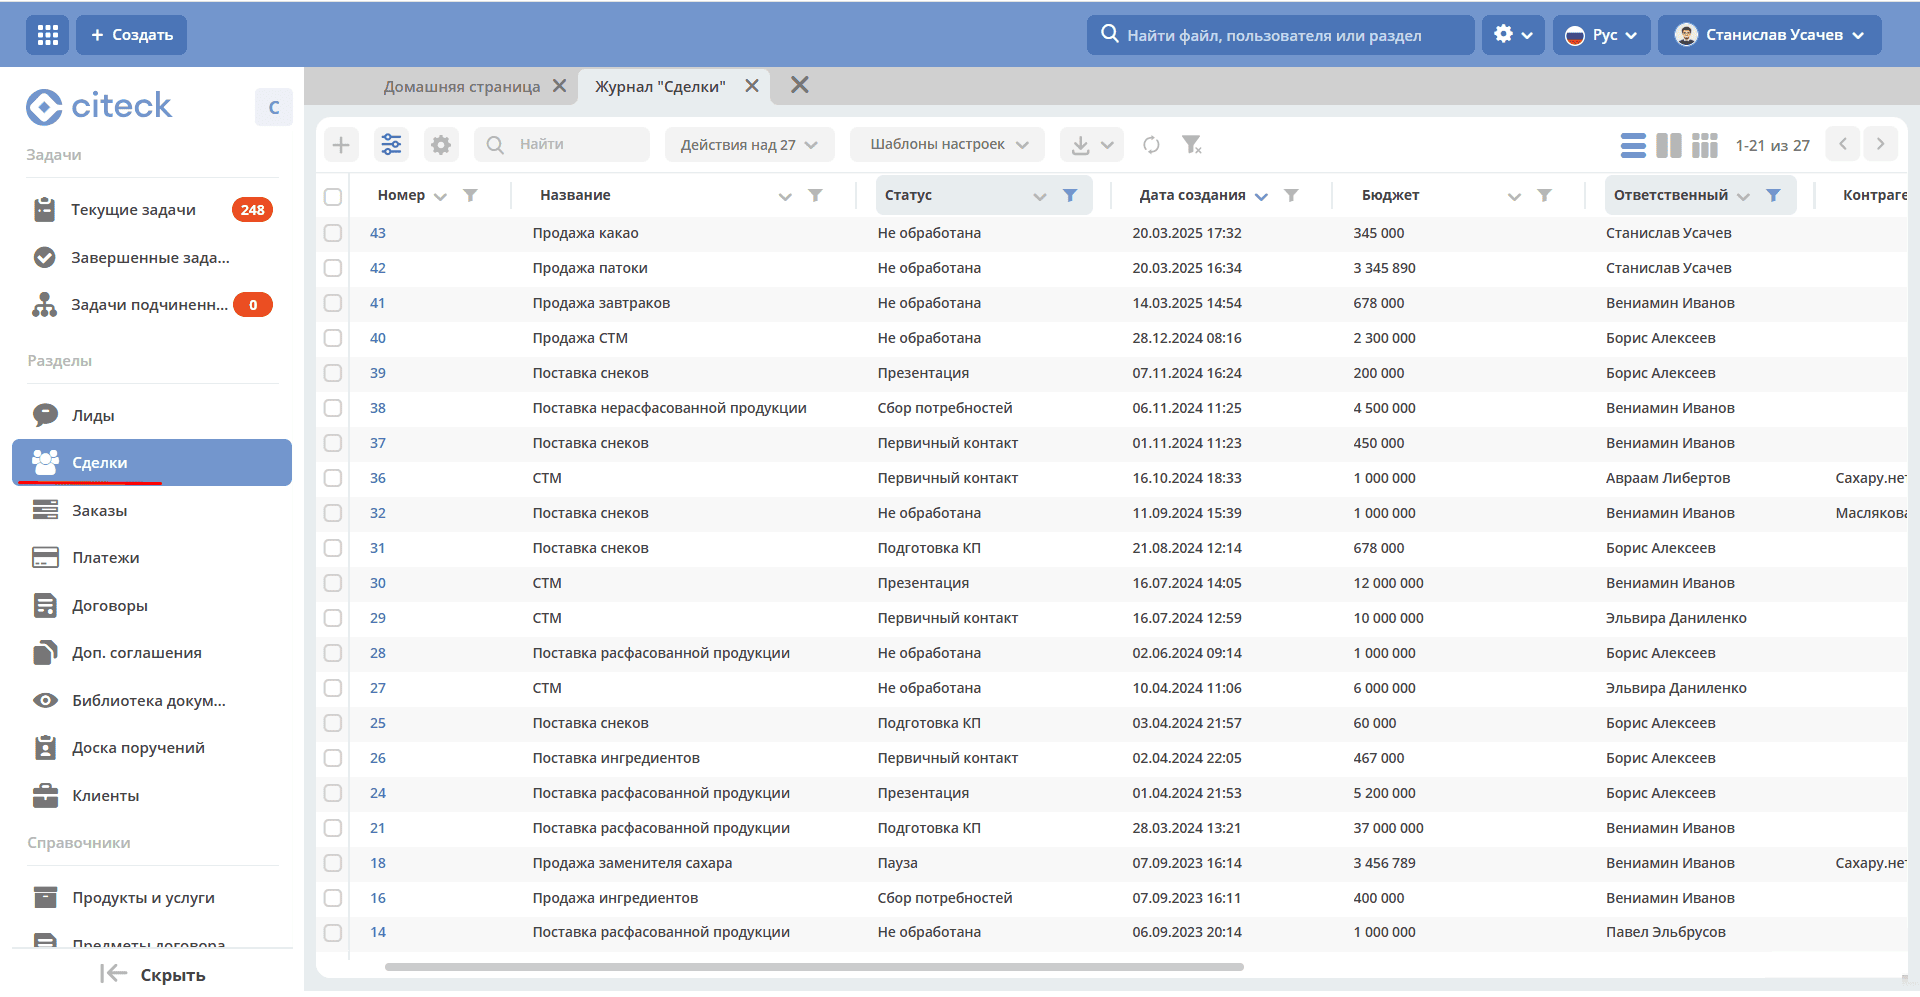
Deal
Possible deal stages:
Not Processed
Initial Contact
Needs Assessment
Presentation
Proposal Preparation
Prototype
Decision Making
Completed
Paused
Rejected
Dropped Out
Historical Applications - outdated applications
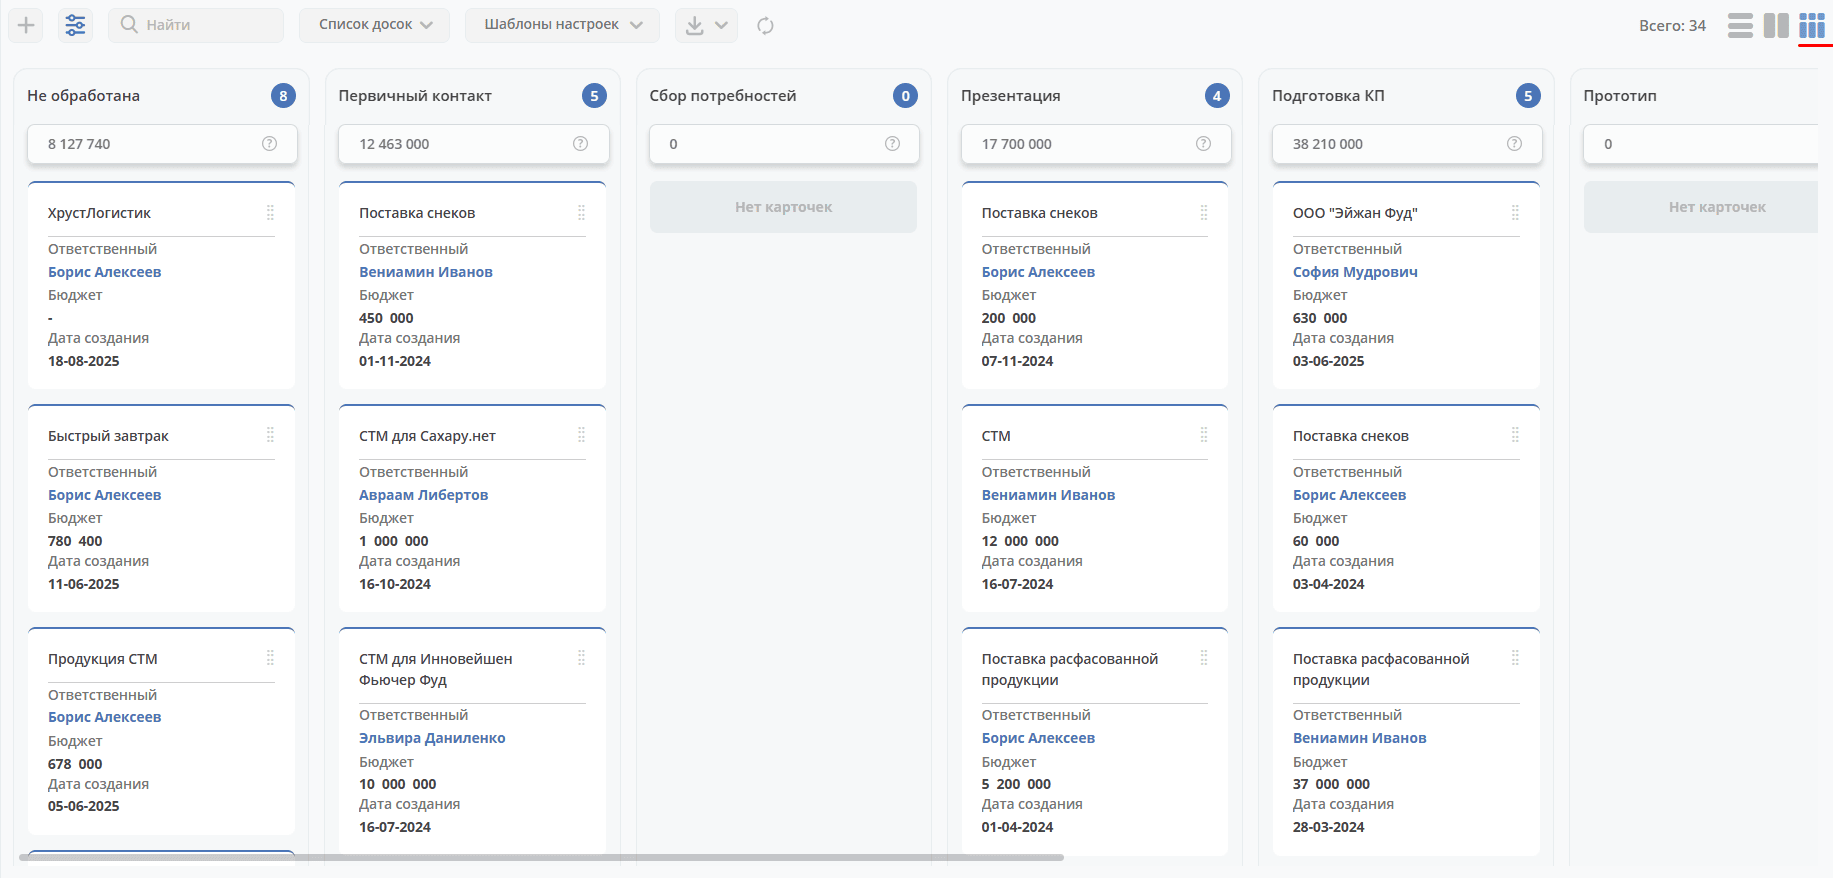
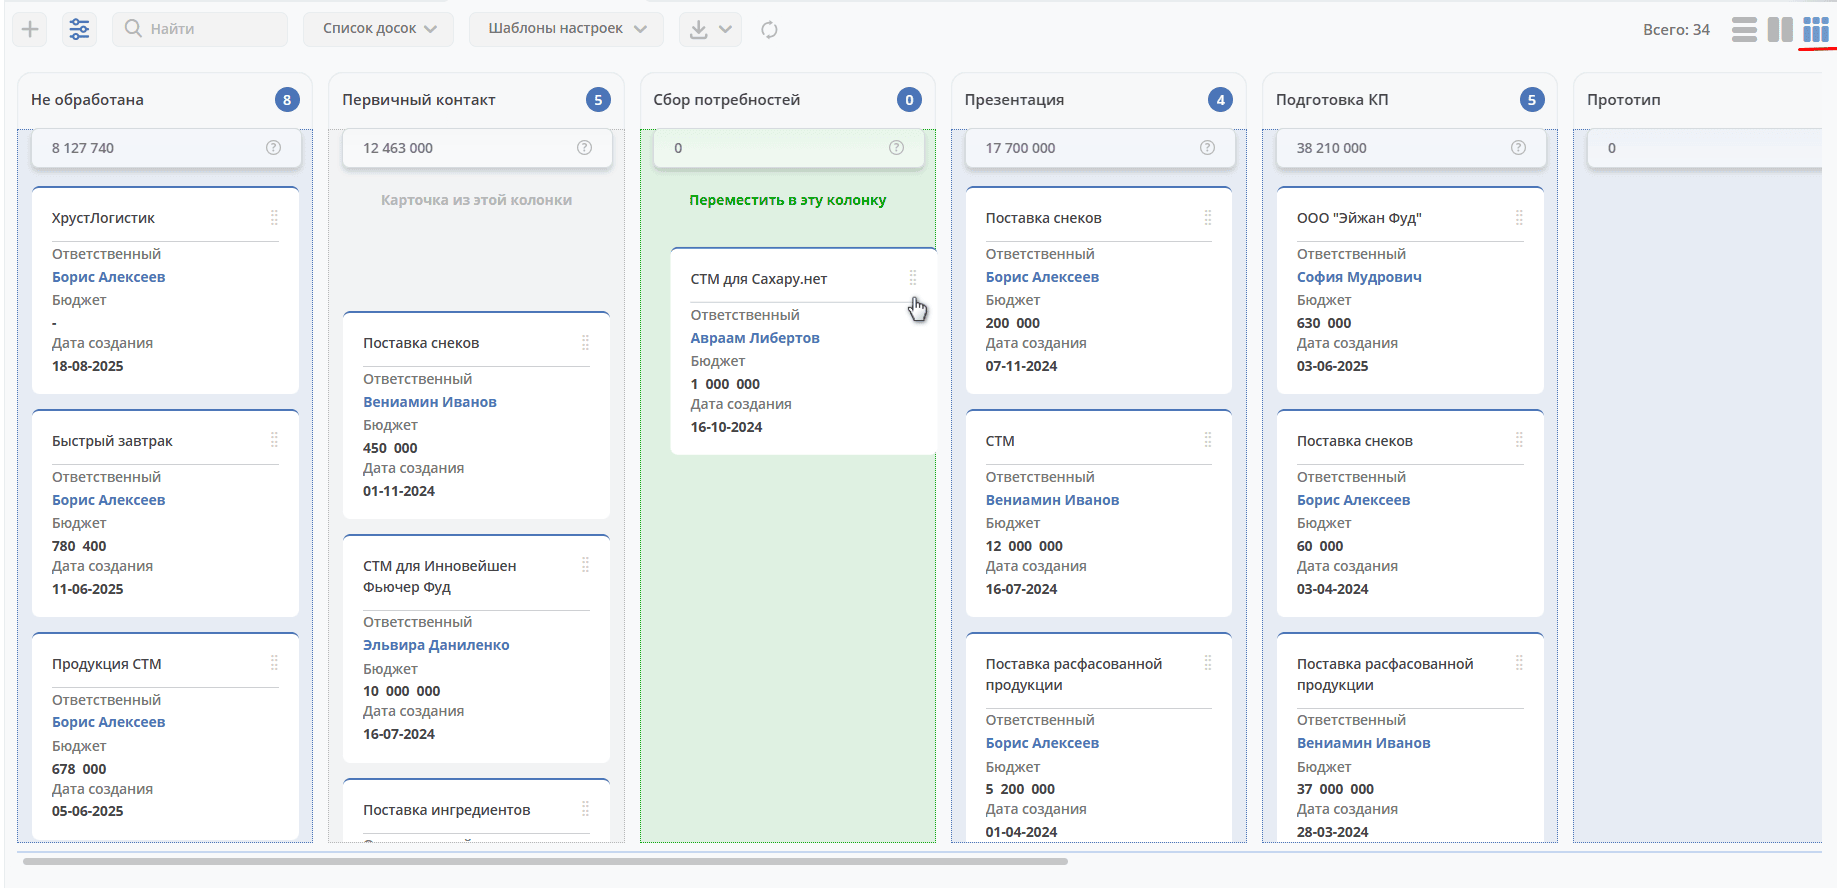
A Kanban board is available for visual representation of deal statuses:
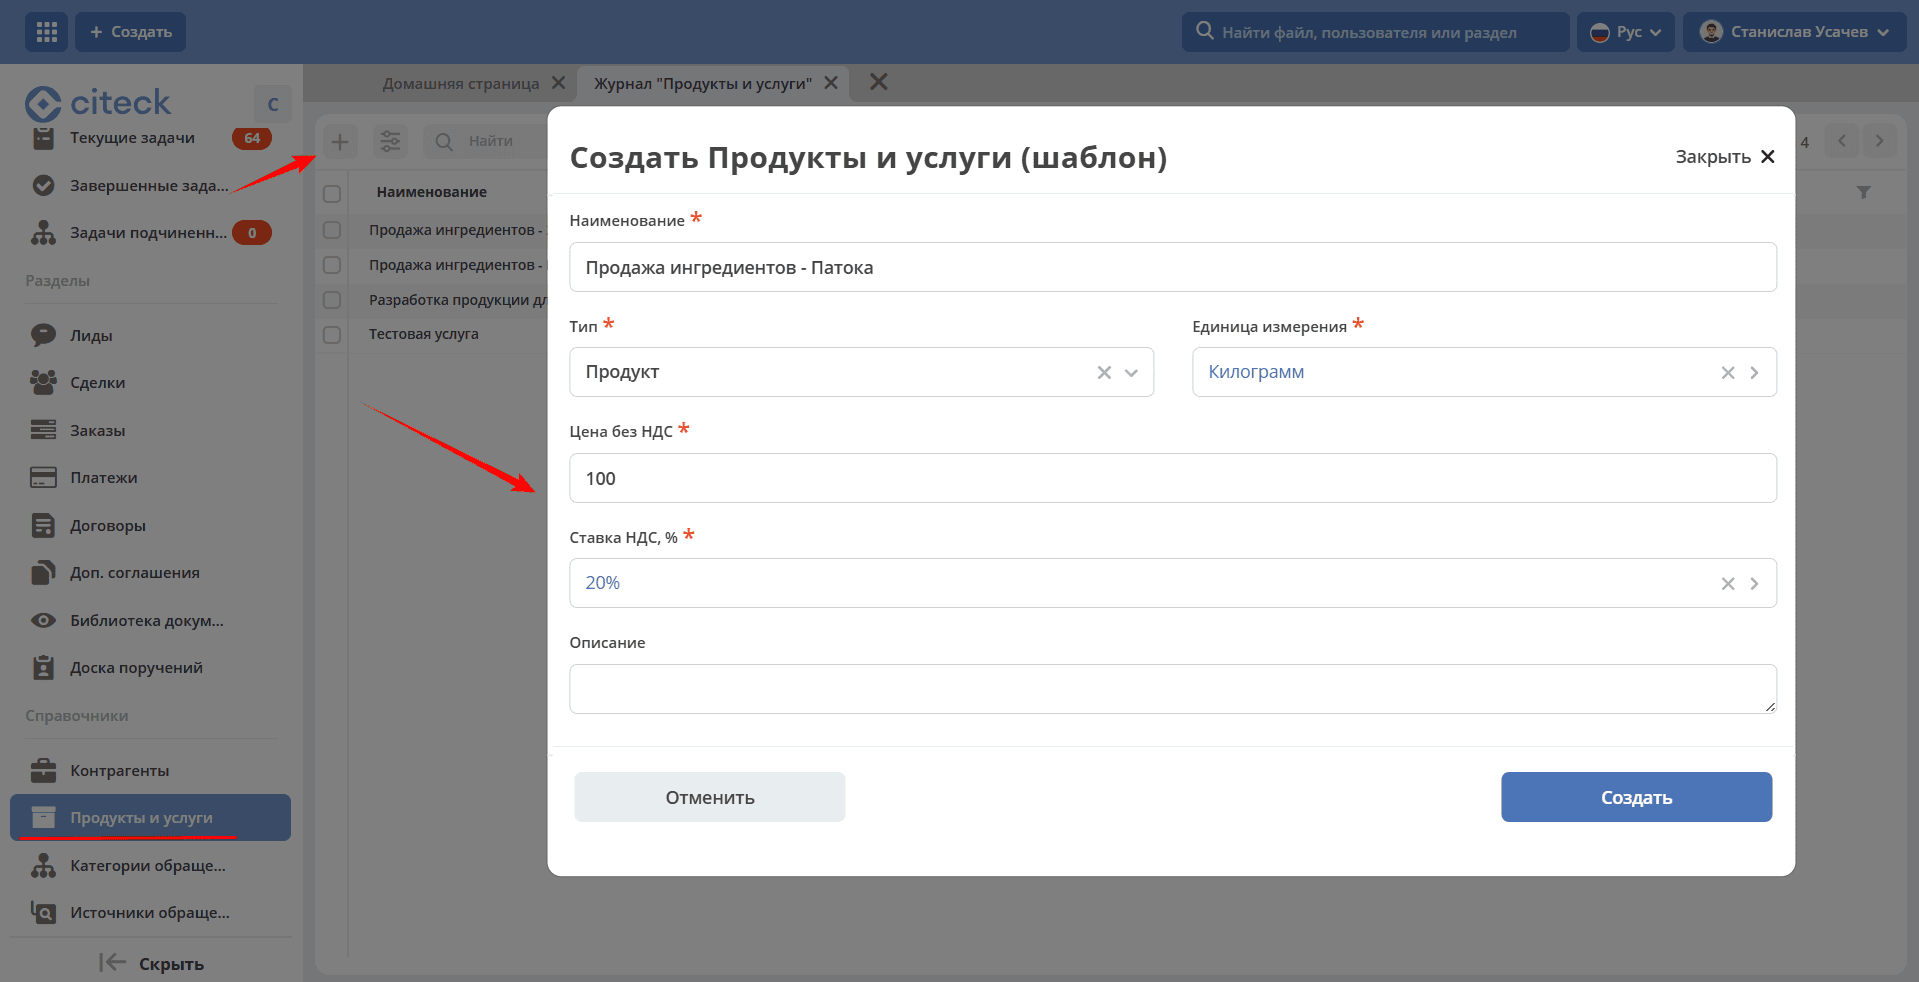
Creating a Card
A deal can be created from a lead, and then it will be noted in the deal:
or as an independent deal:
using the quick create button:

from the «Deals» journal using the + button.
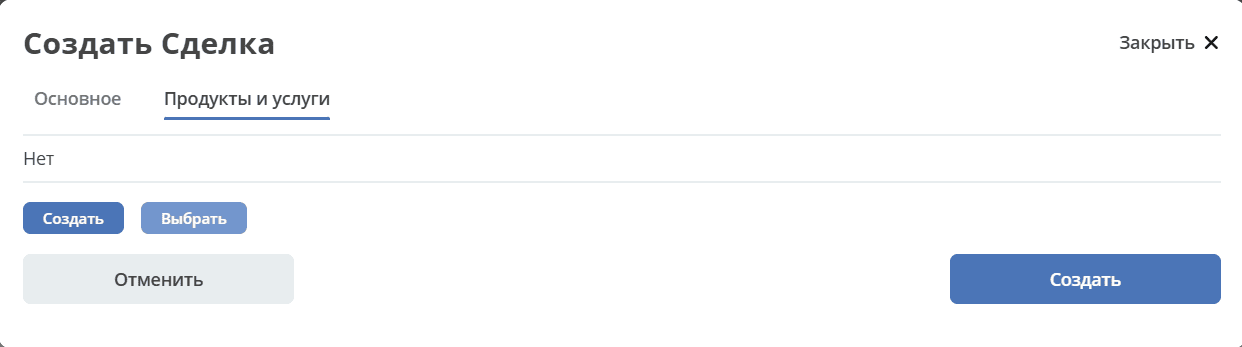
The card consists of tabs:
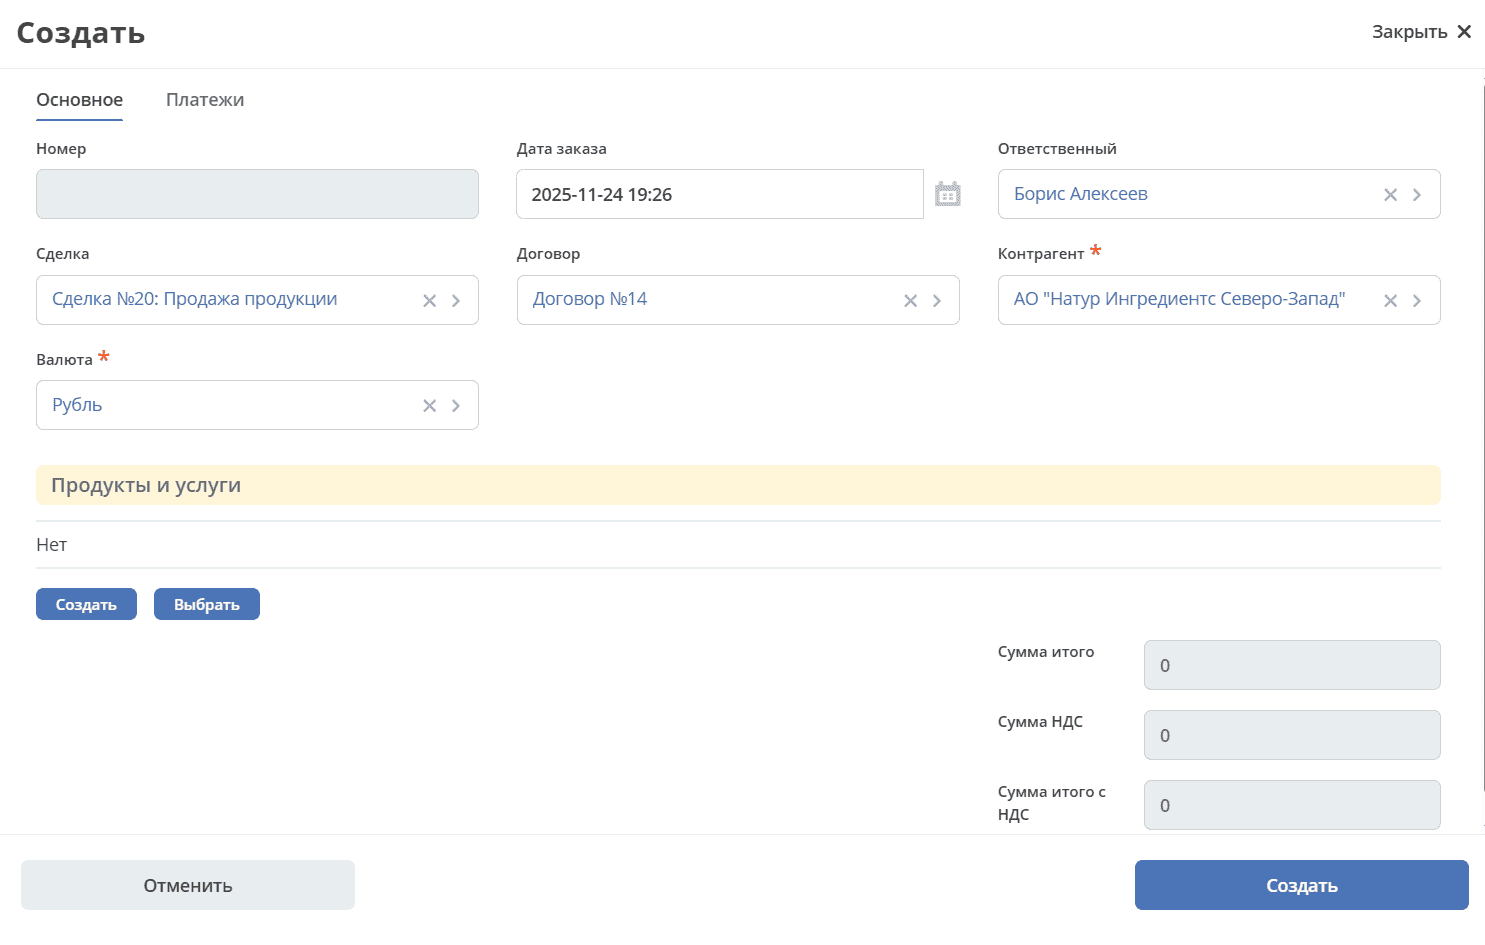
on the «Main» tab, fill in the necessary and mandatory fields and click «Create».

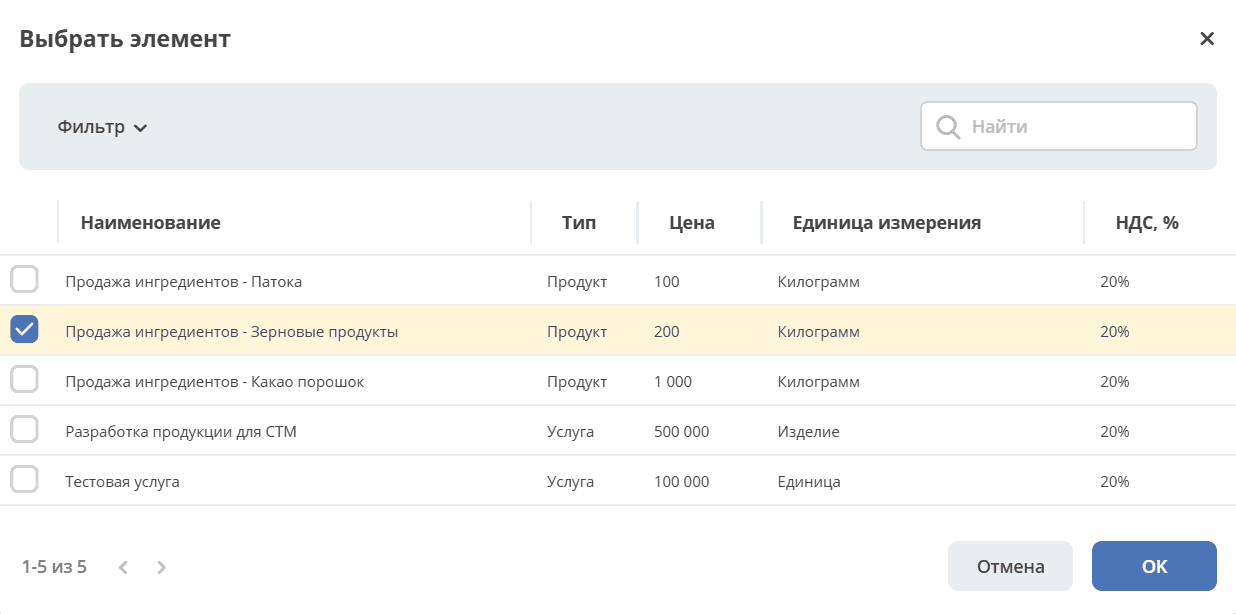
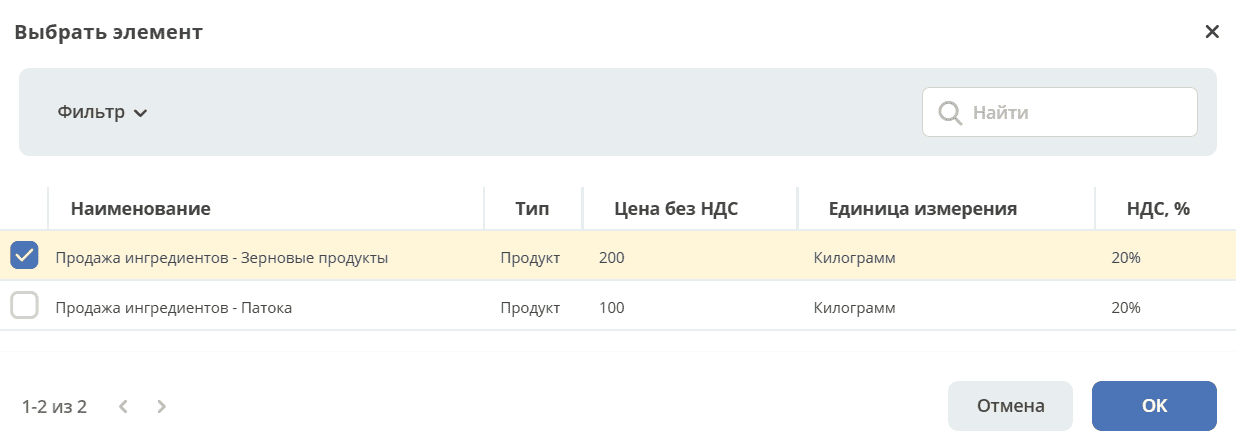
on the «Products and Services» tab, select from the list or create a product/service:
Let’s consider selection from the directory. Select a product/service, click OK:
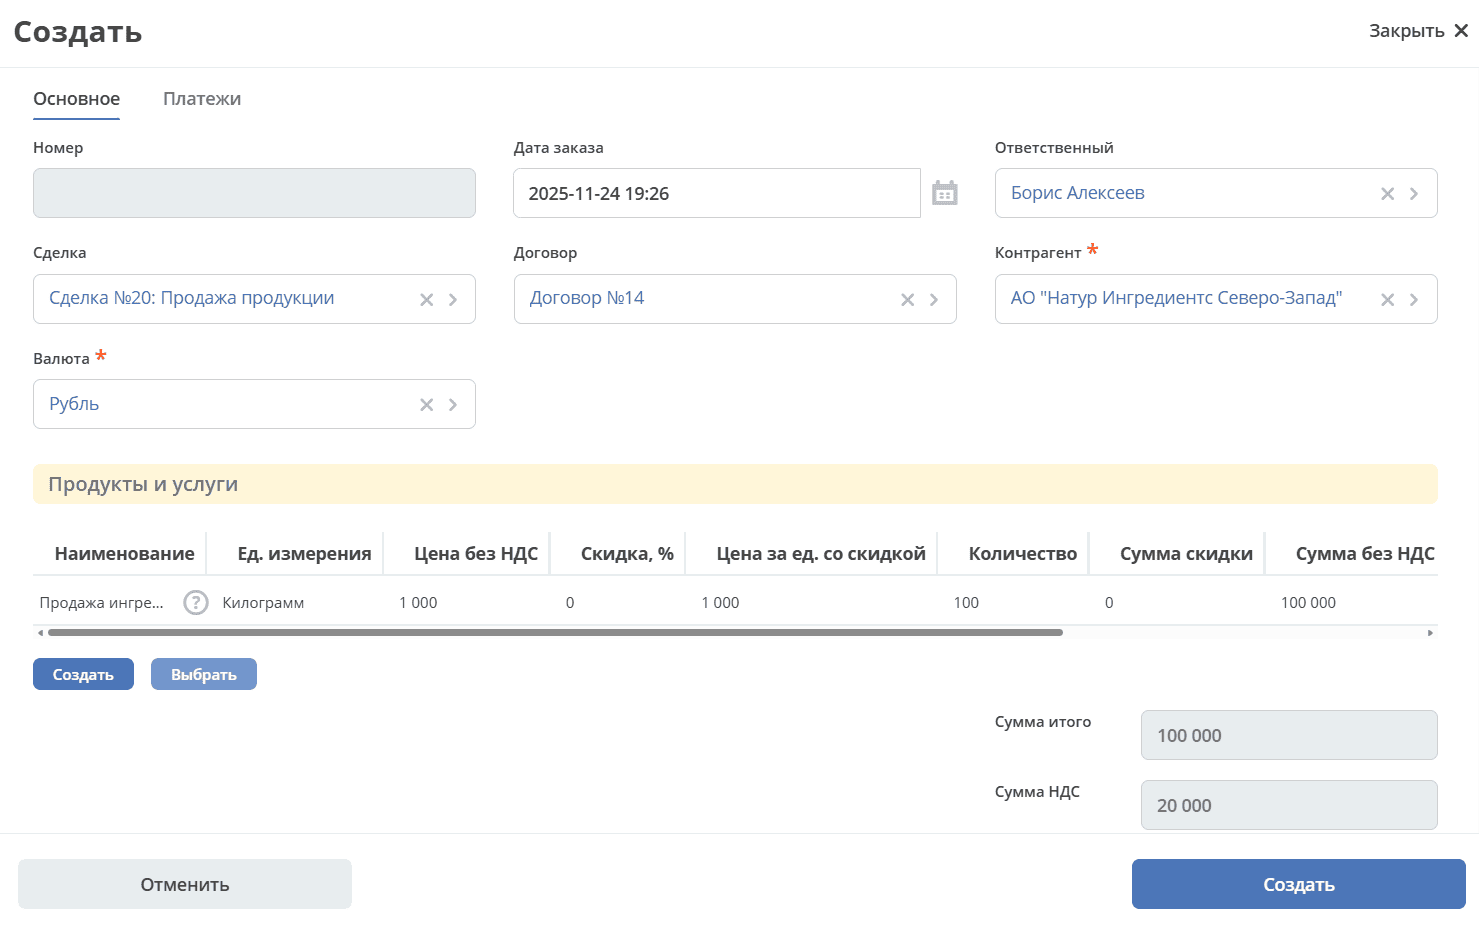
Clarify the presented information, make changes for this deal (if any), and save:
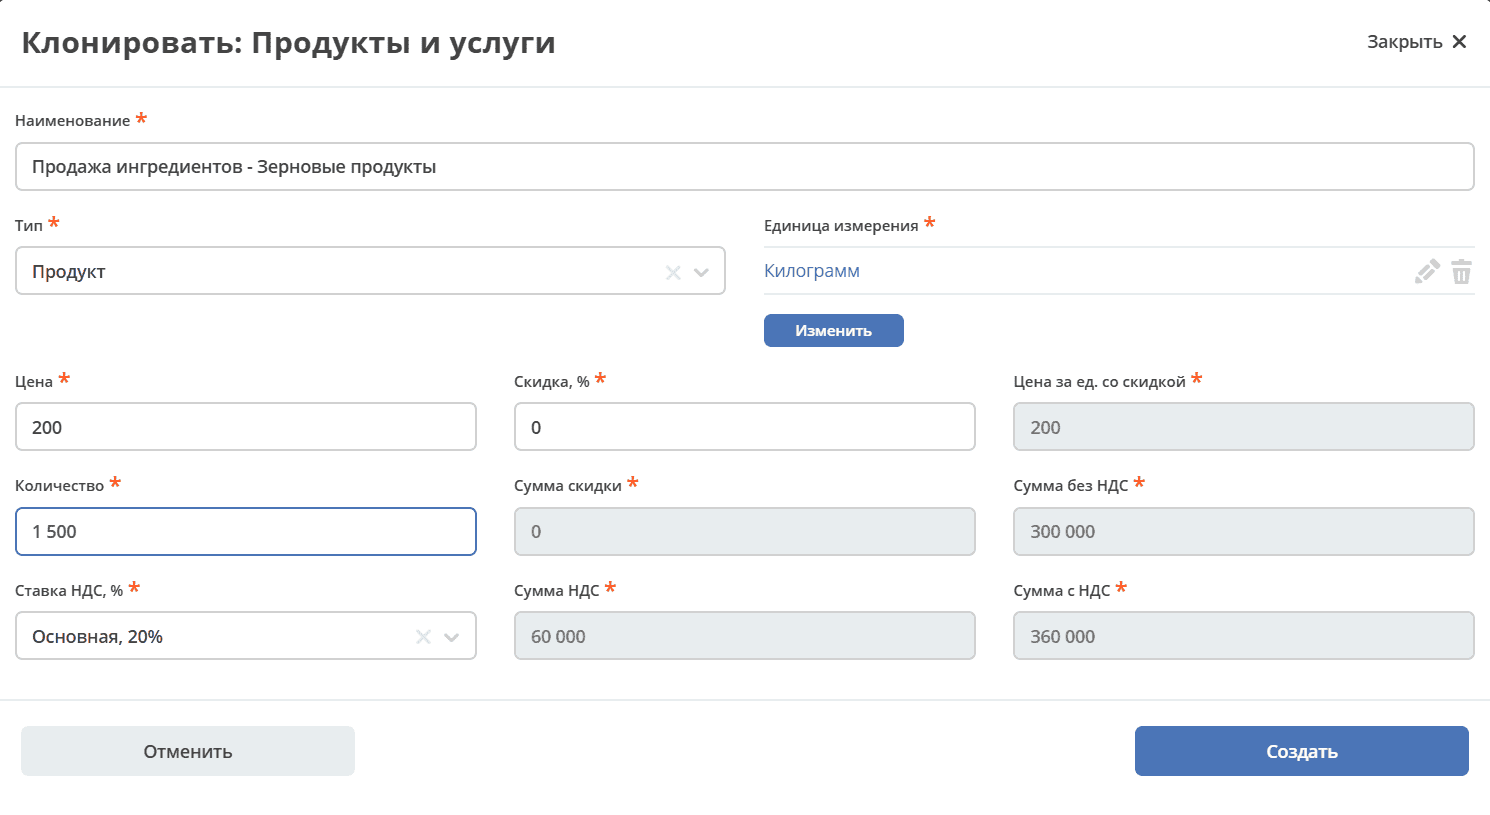
Filled tab:
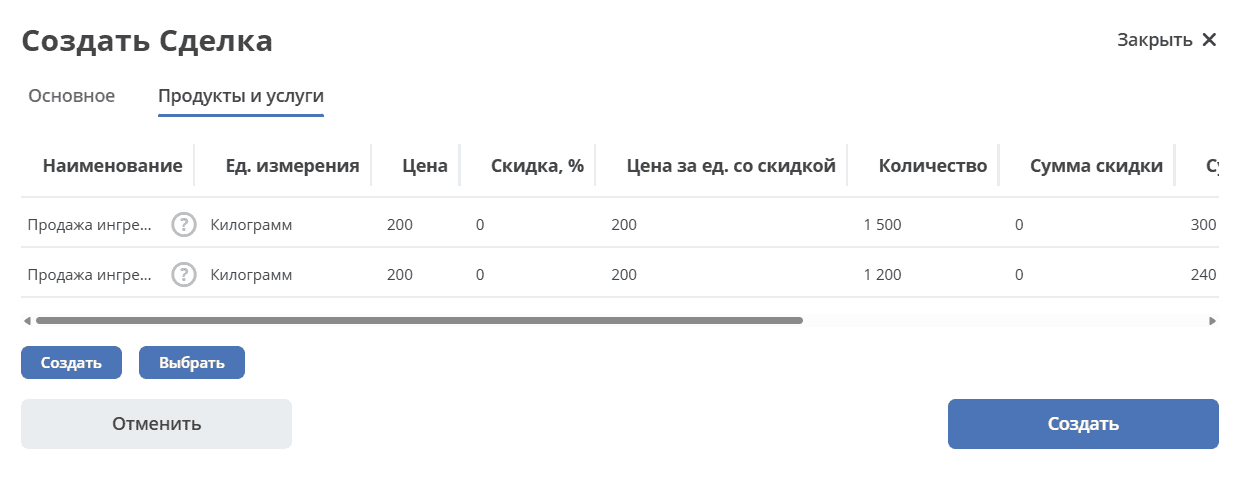
Save the card by clicking «Create».
Data about deal contacts and additional information can be entered into the «Contacts», «Marketing» widgets, similar to the lead card.
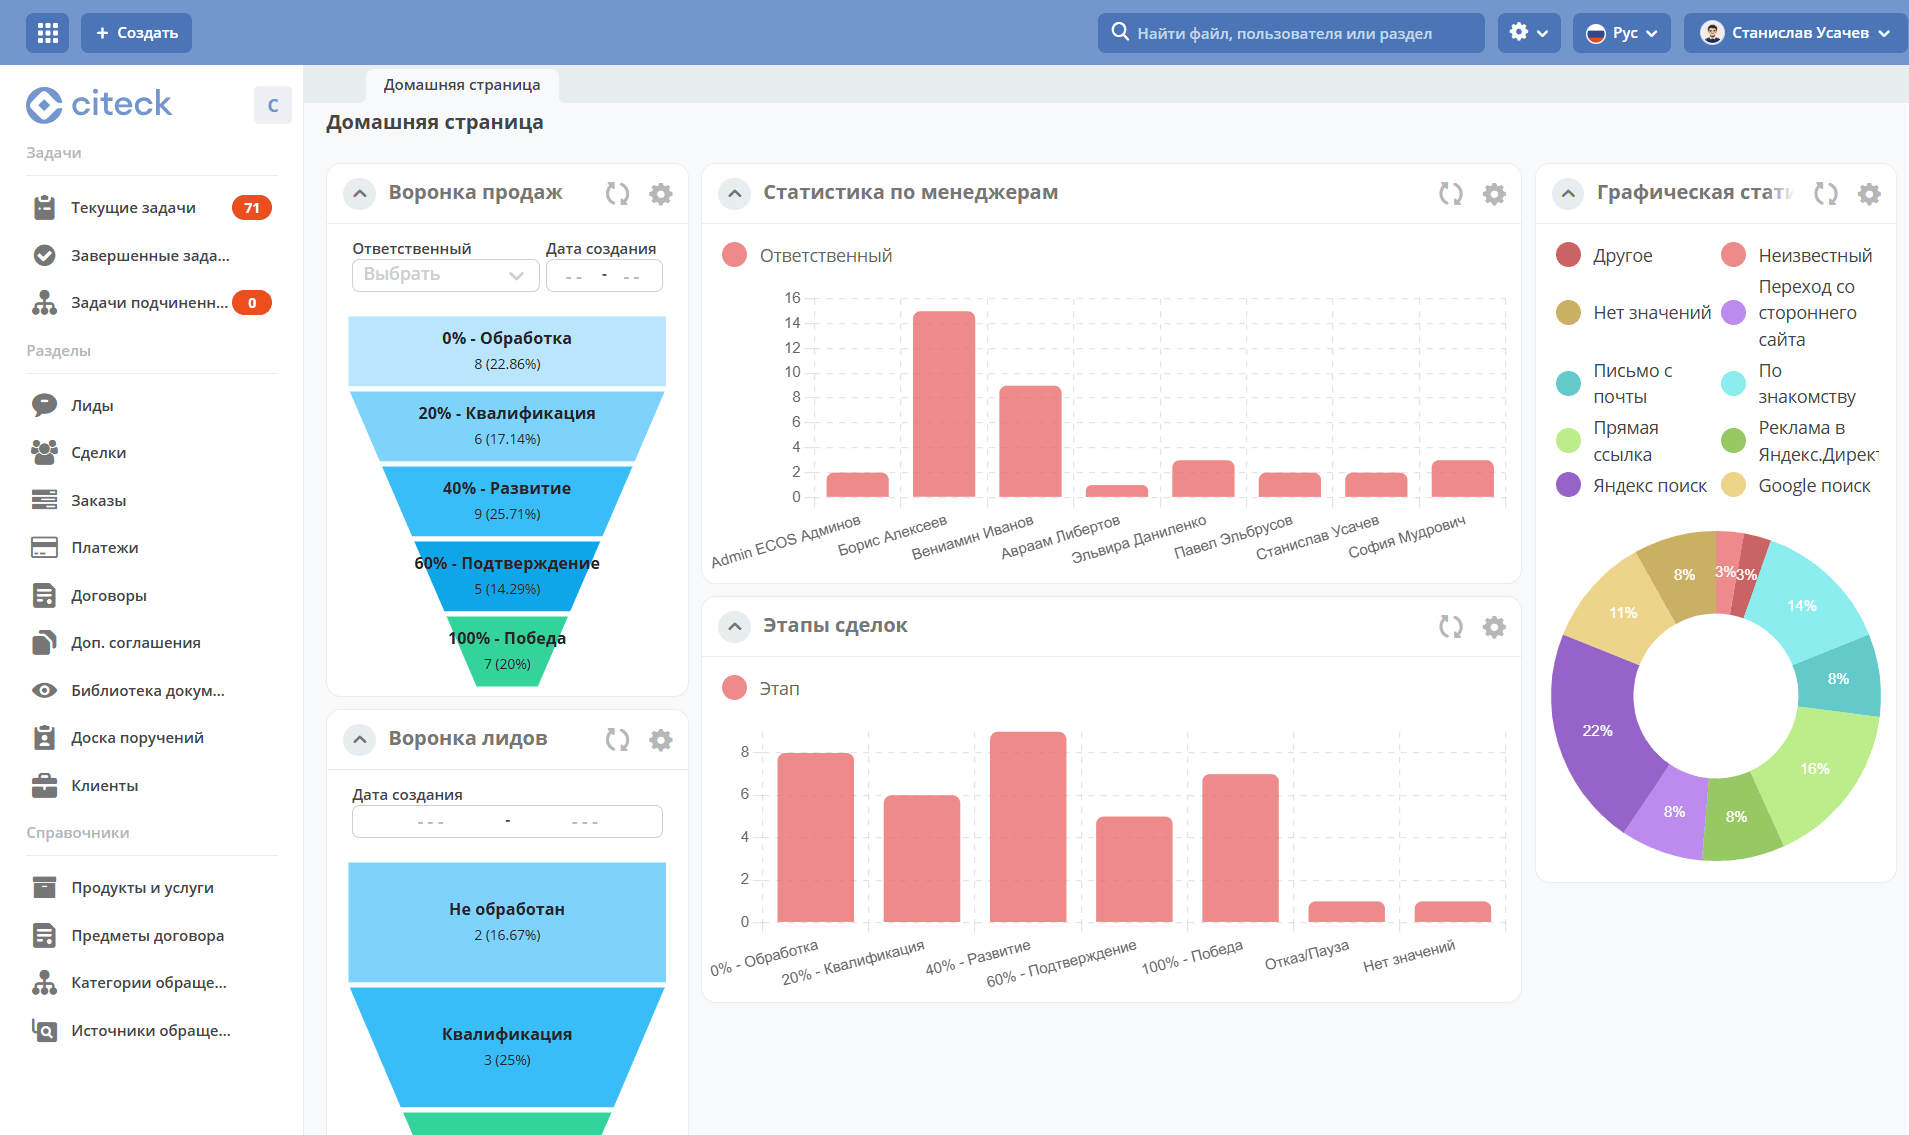
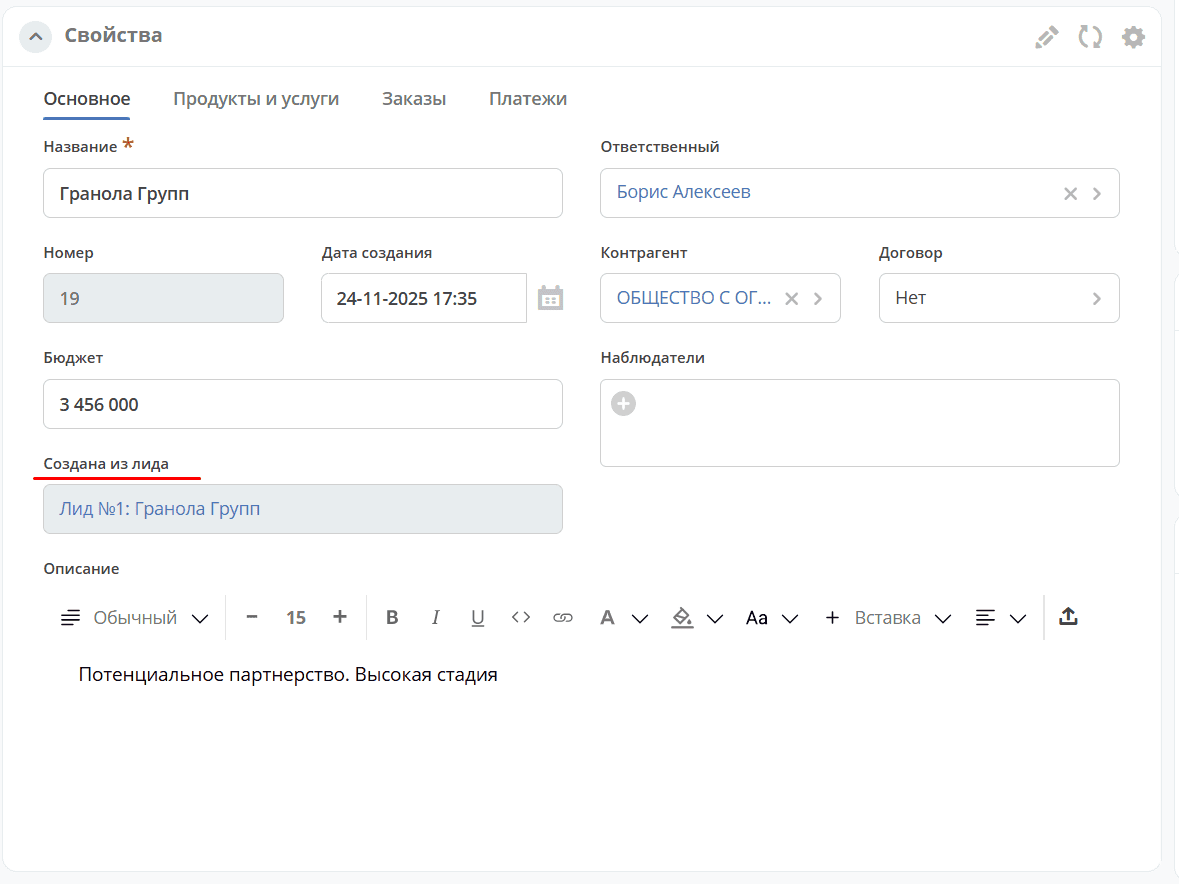
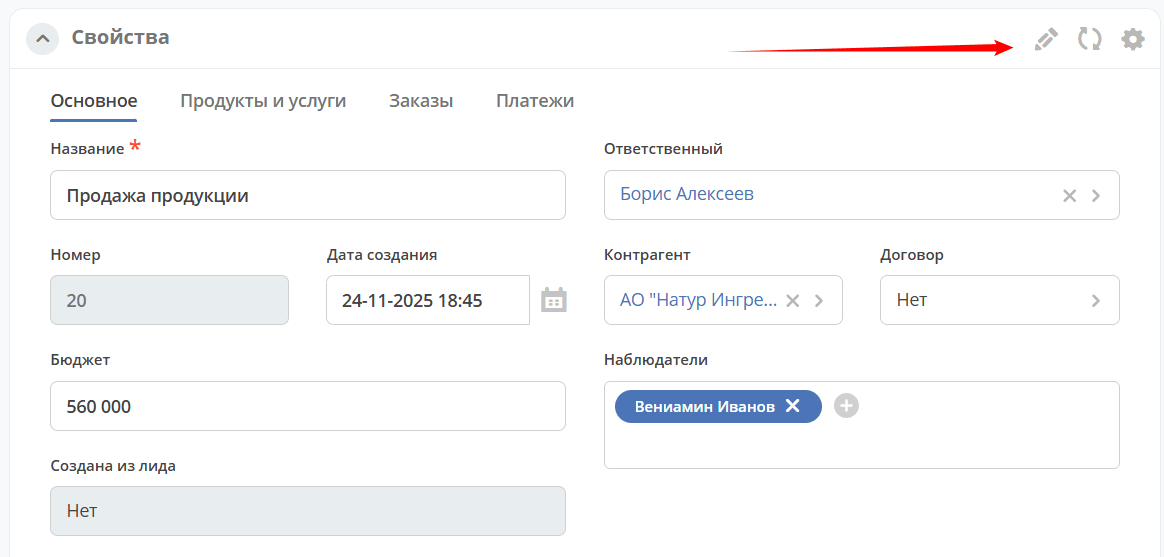
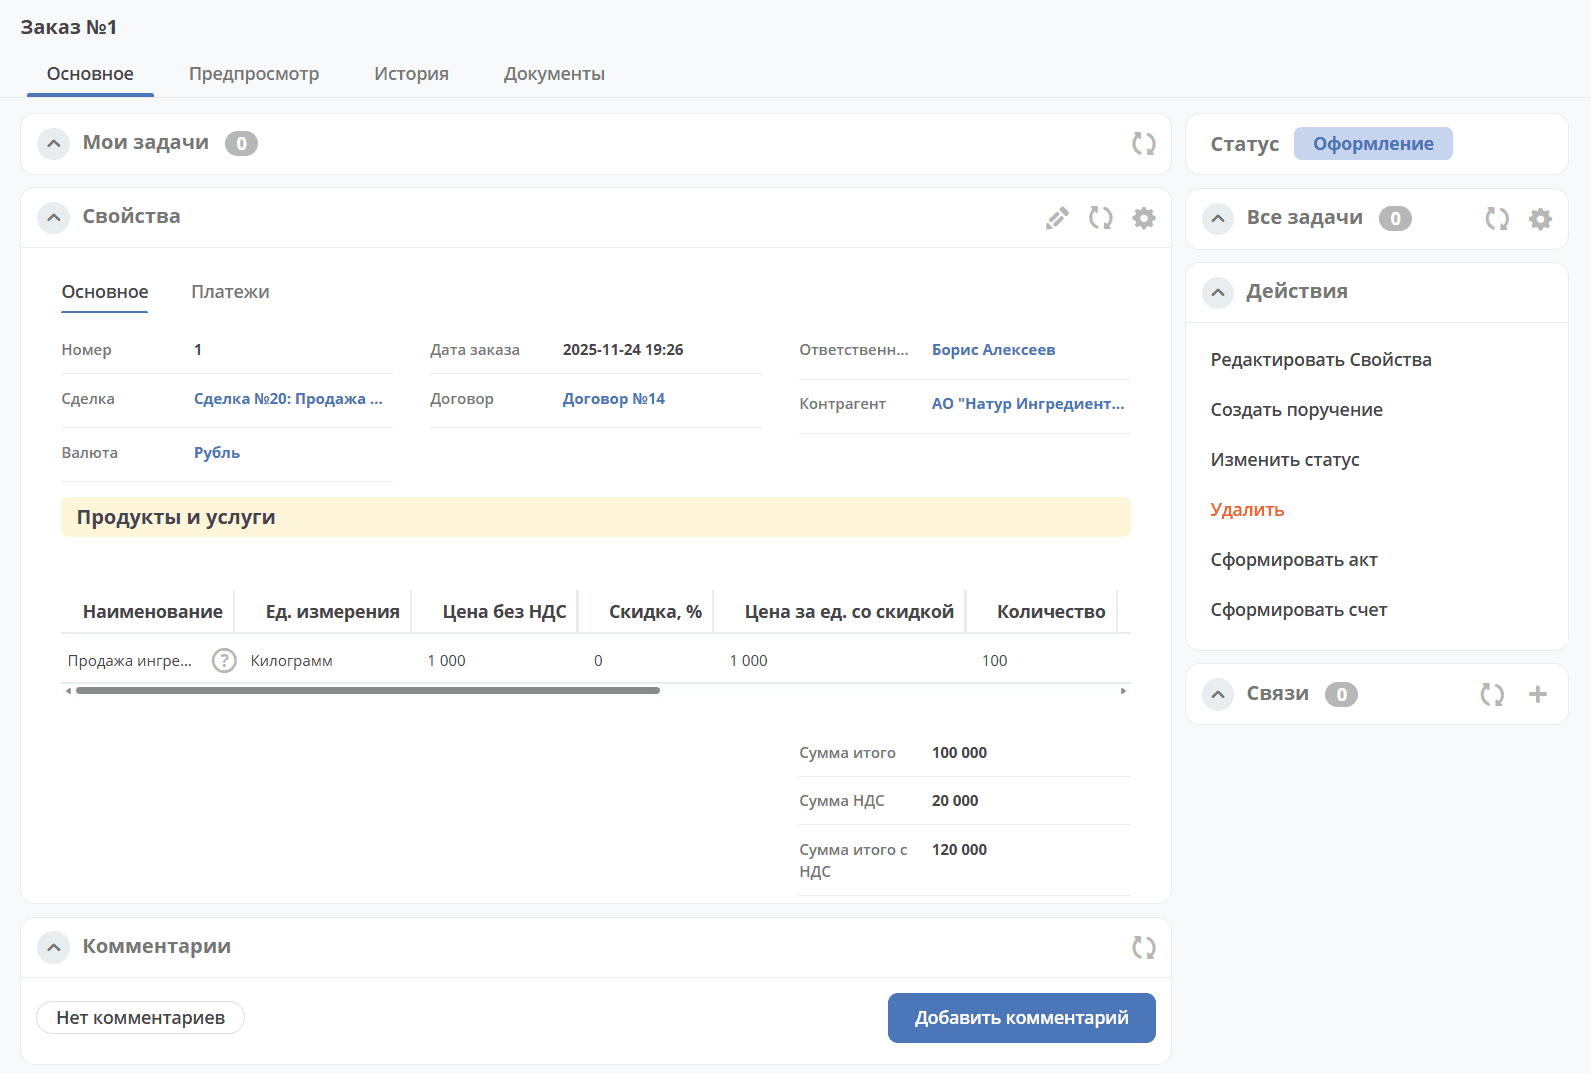
Deal Card
The card consists of the following widgets:
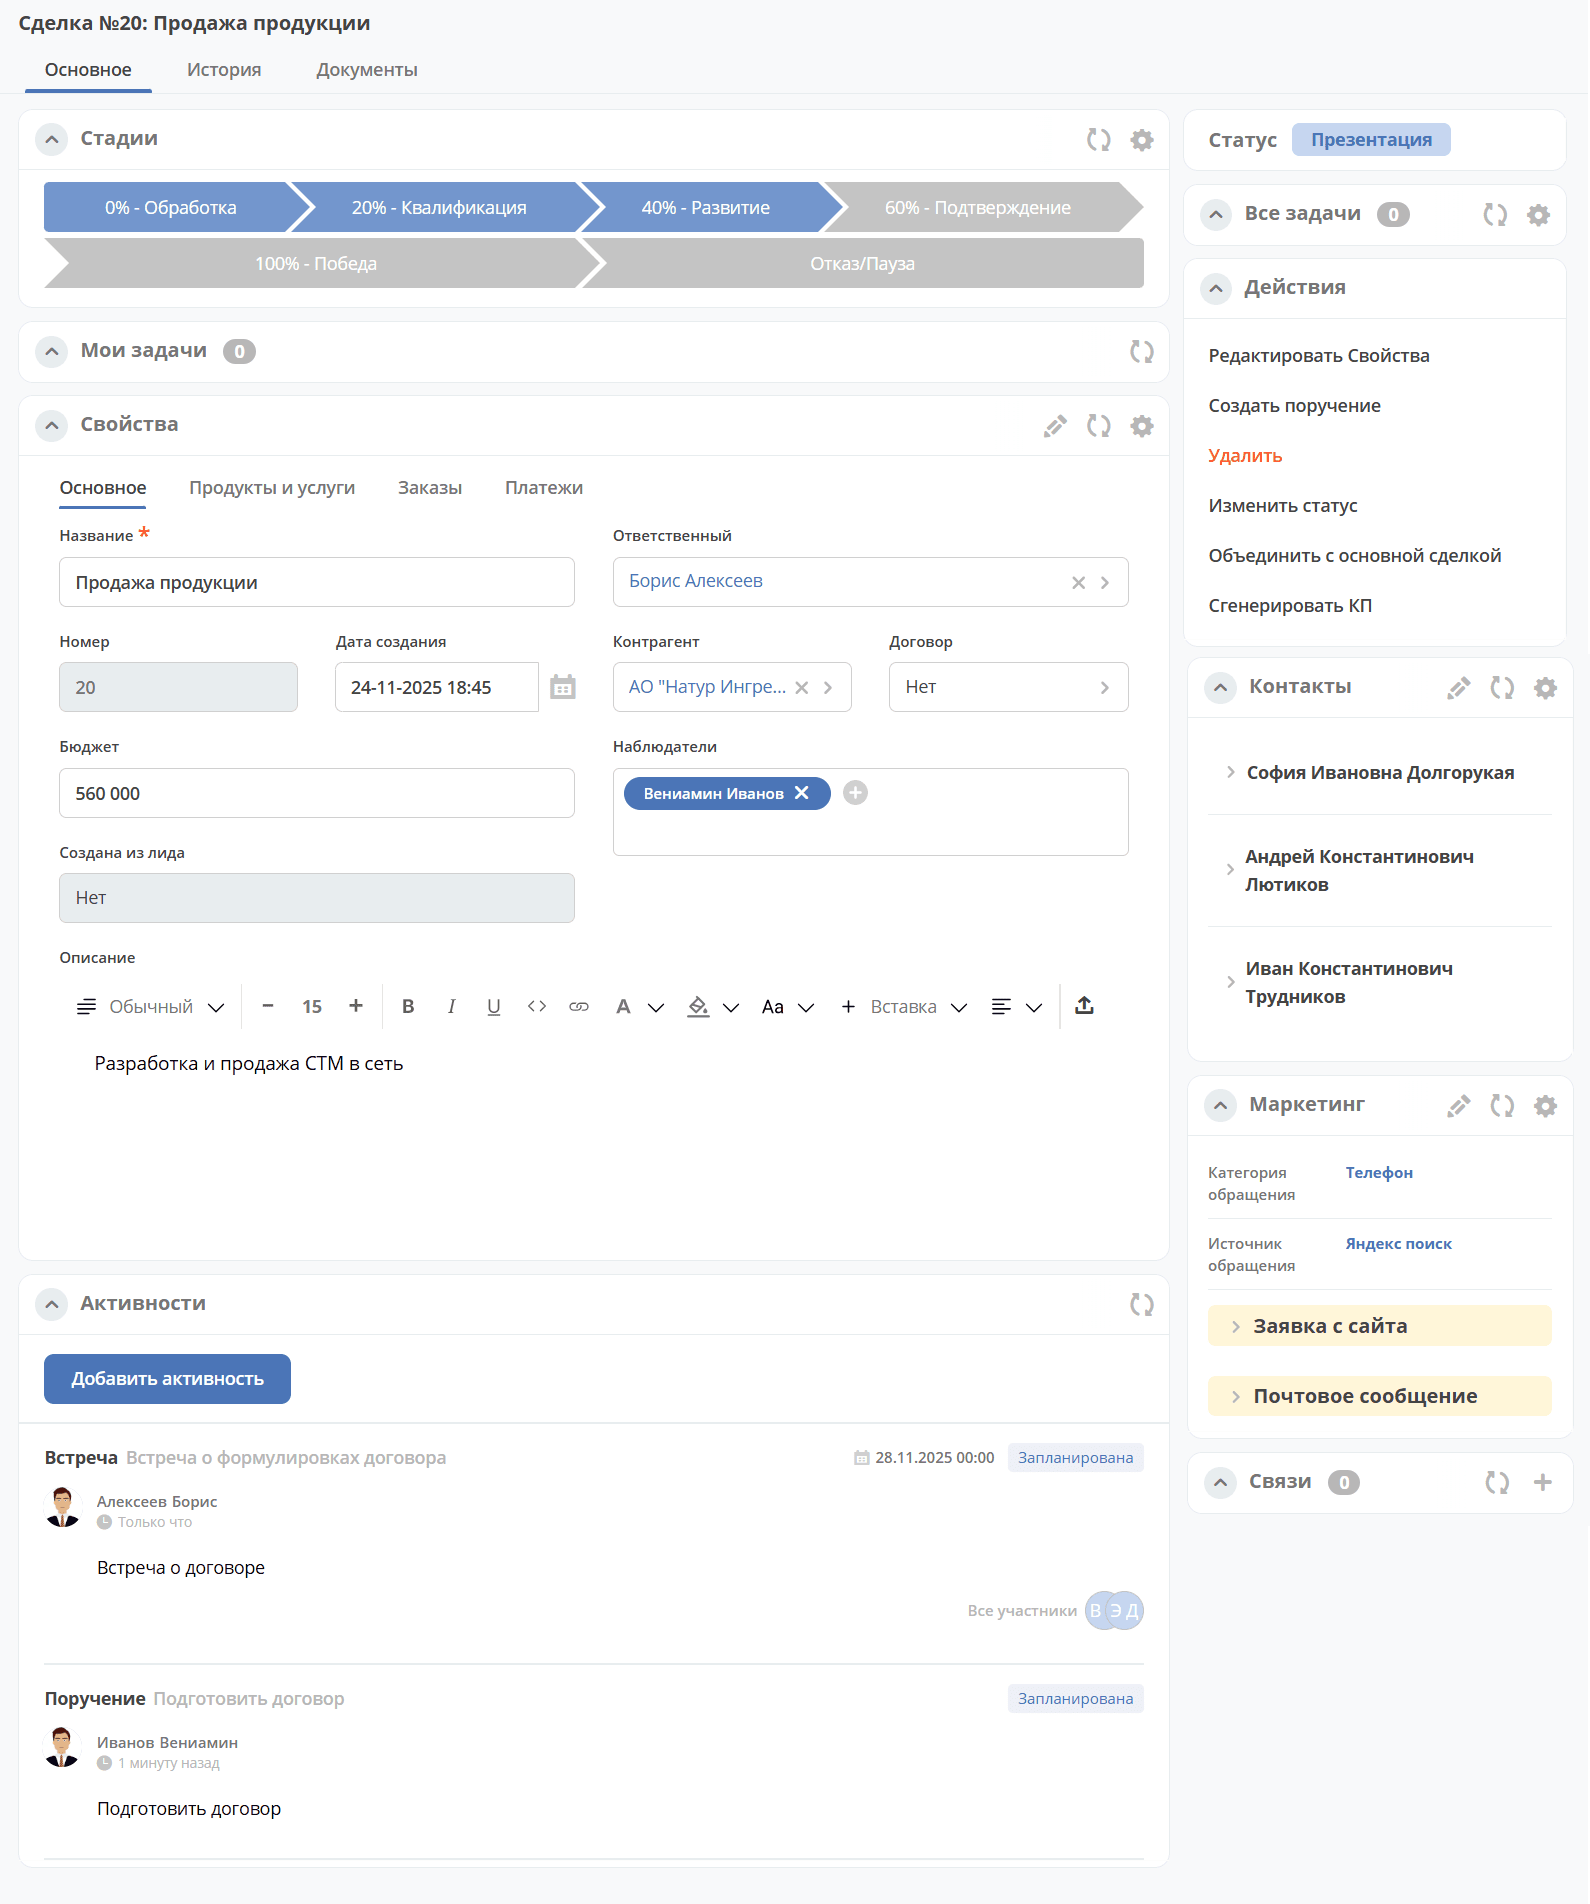
The «Stages» widget visualizes the progression of deal statuses and is only available in the enterprise version.

How statuses correspond to stages:
Stage
Corresponding Statuses
0% - Processing
Not Processed
20% - Qualification
Initial Contact, Needs Assessment
40% - Development
Presentation, Proposal Preparation, Prototype
60% - Confirmation
Decision Making
100% - Win
Completed
Rejection/Pause
Rejected, Paused
The «My Tasks» widget displays the tasks for the deal for the viewing user and their completion options.
The «Properties», «Contacts», «Marketing» widgets display information about the deal. The Email Message contains information from the email sent to the address. See the section below Creating a deal from an email
The «Status» widget displays the current status of the deal.
The «All Tasks» widget displays the tasks for the application and their executors.
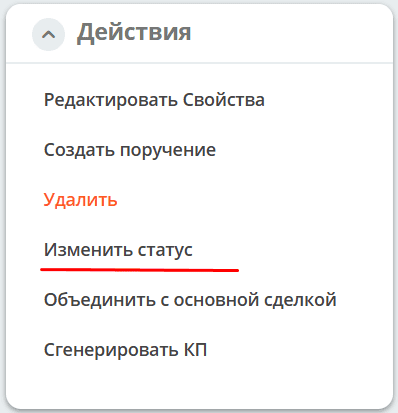
The «Actions» widget contains a list of available actions for the deal at its current status.
The «Activities» widget helps track the stages of working with the deal and view all planned and completed tasks (activities). The widget is only available in the enterprise version.
The «Document Links» widget for establishing links between the deal and other Citeck objects and displaying established links.
The following tabs are available in the card:
Main
Products and Services
Orders
Payments
The tabs are described in detail below.
Editing the Card
Changing Status
The status can be changed via the corresponding action in the card:
or by moving the card on the Kanban board:
or via an action in the journal:
Generating a Proposal
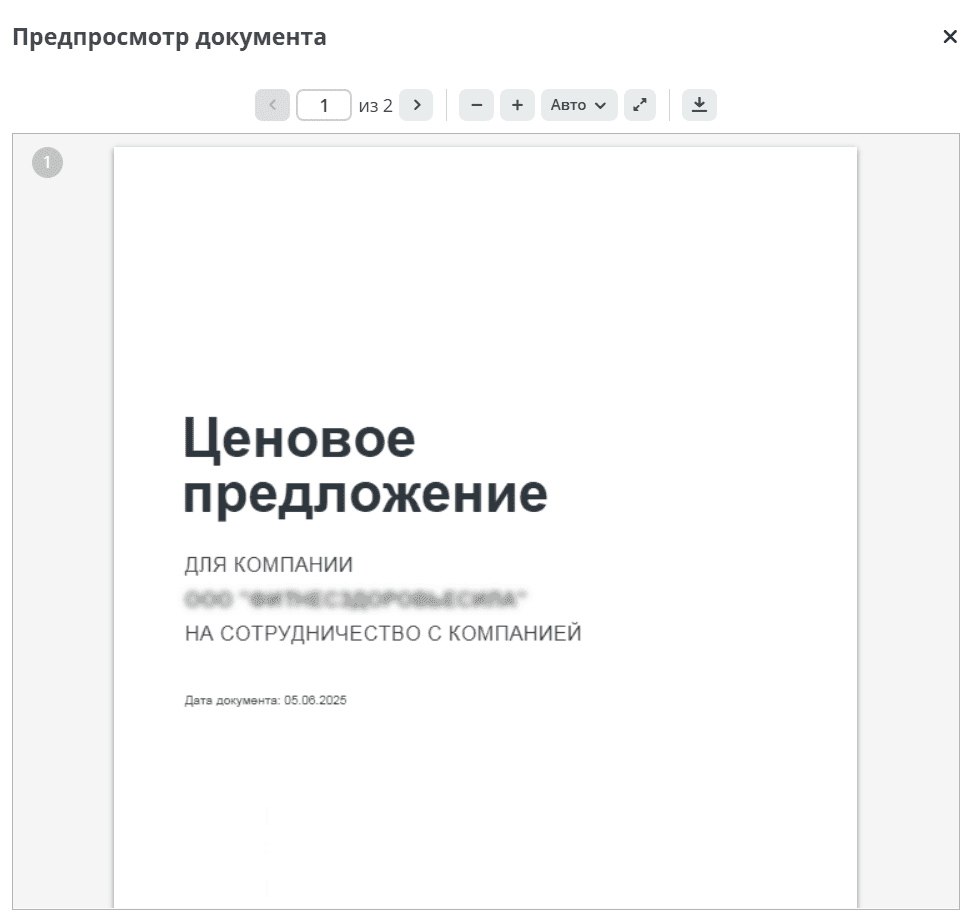
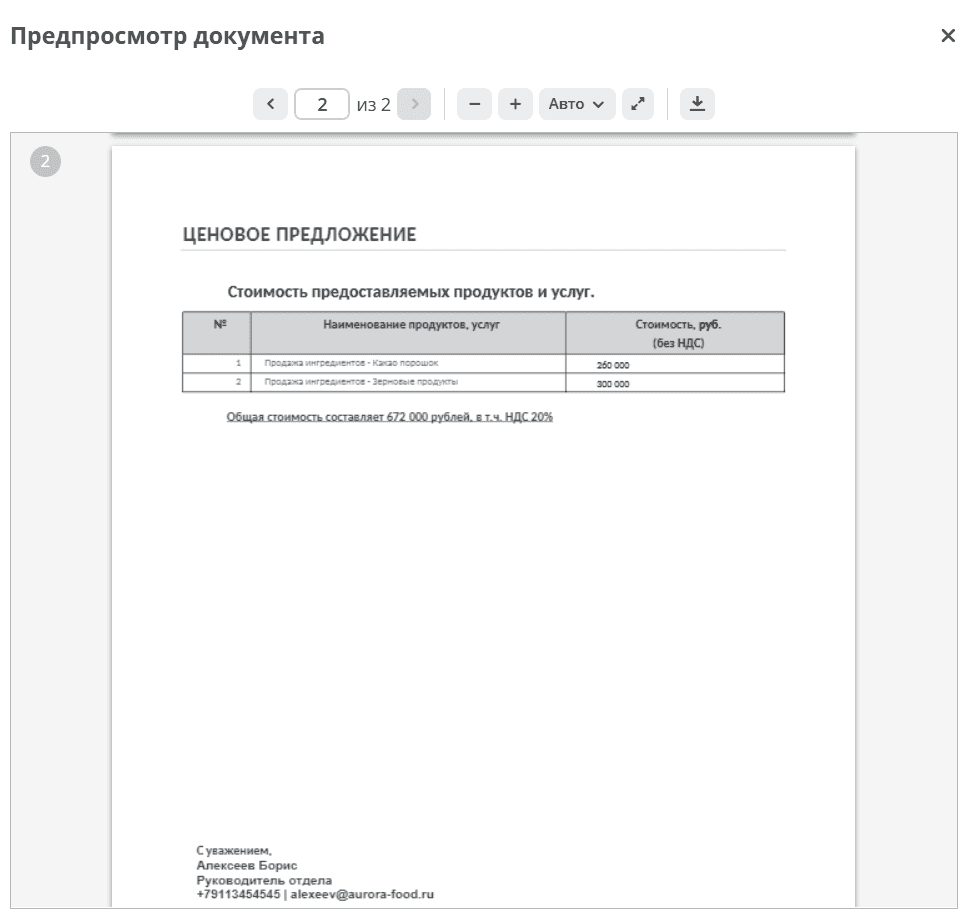
Select the action «Generate Proposal» and based on the selected products/services and deal data, a commercial proposal will be generated according to the template, which will be available in the «Documents» tab:
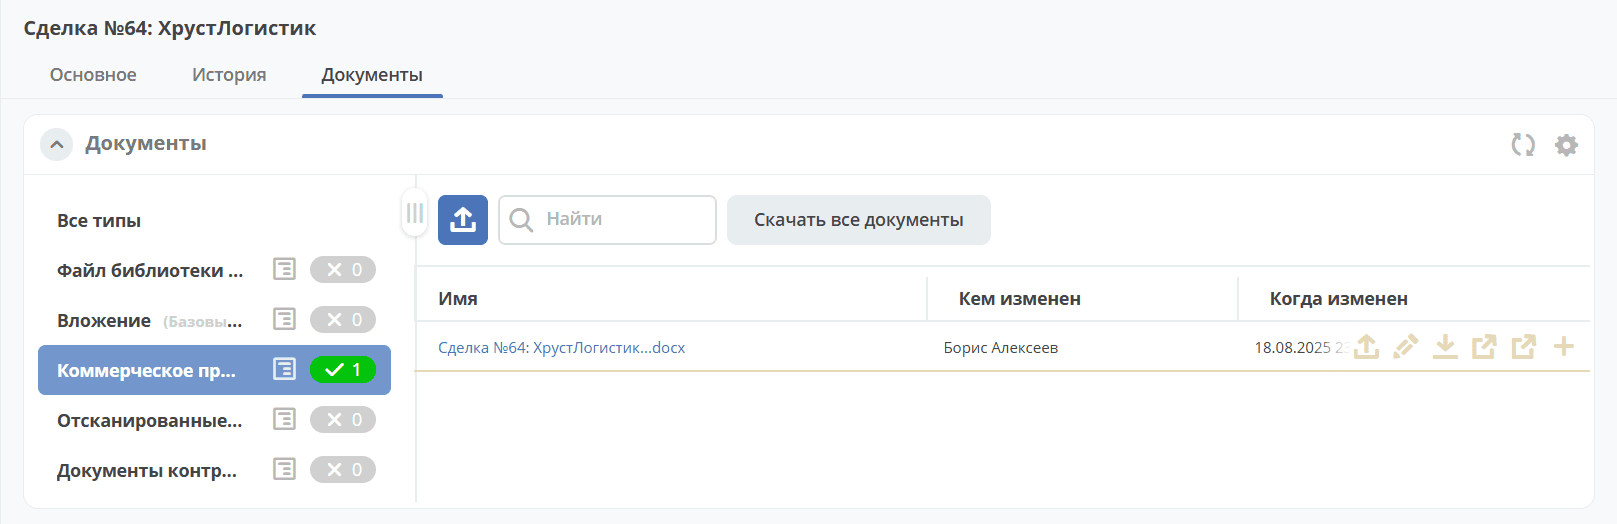
Clicking on the file name opens the document:
The following actions are available for the document:
Download
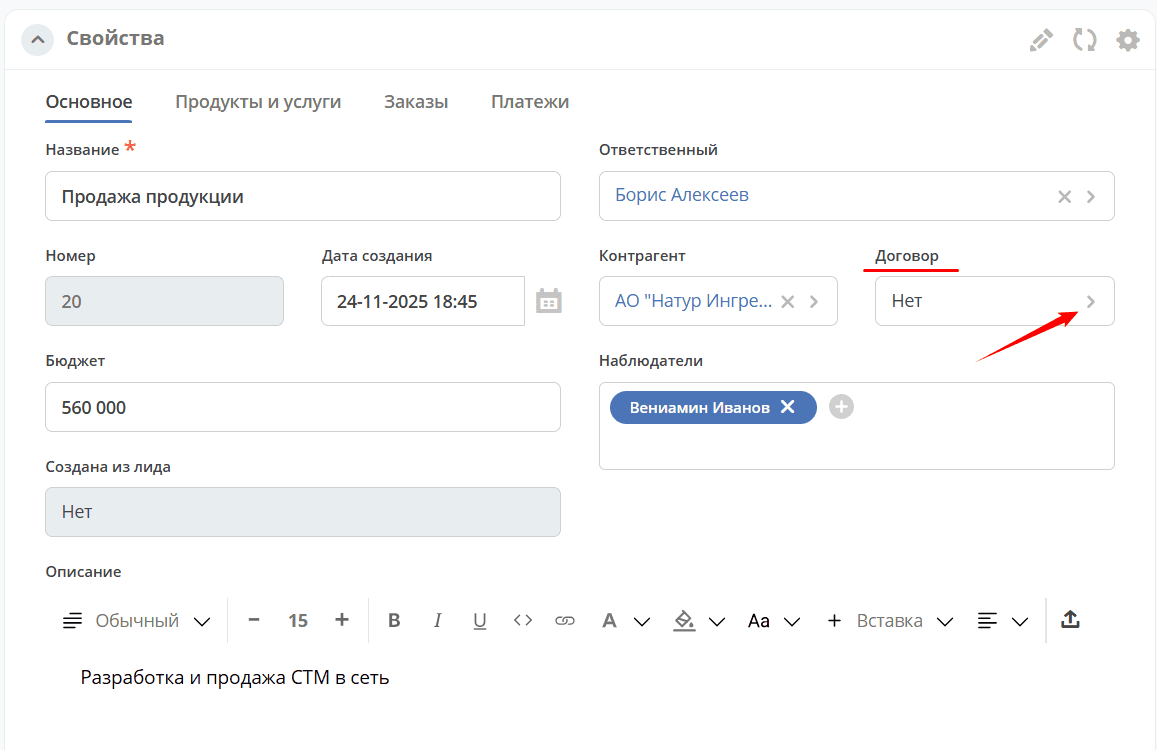
Creating a Contract
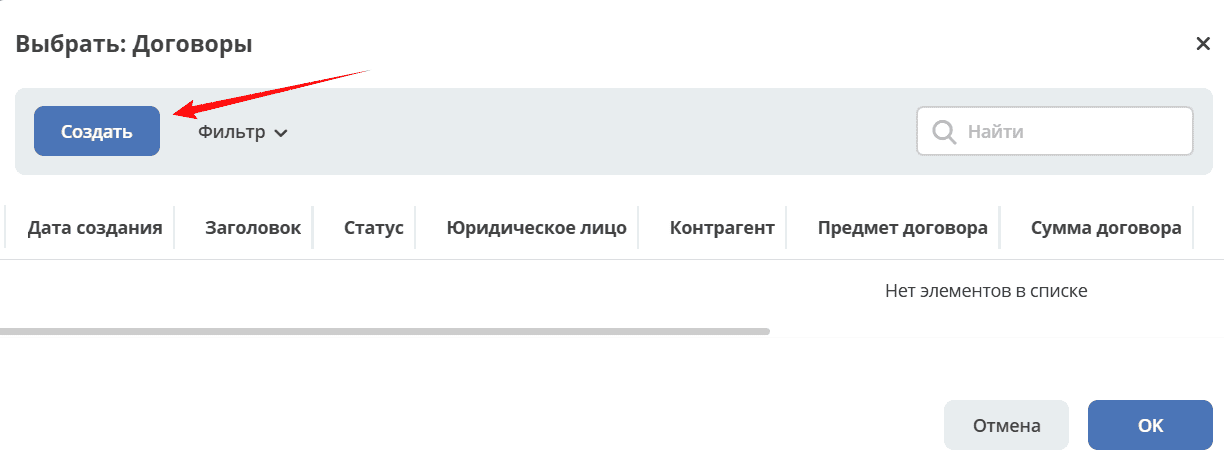
To add a contract based on the deal, click «Select»:
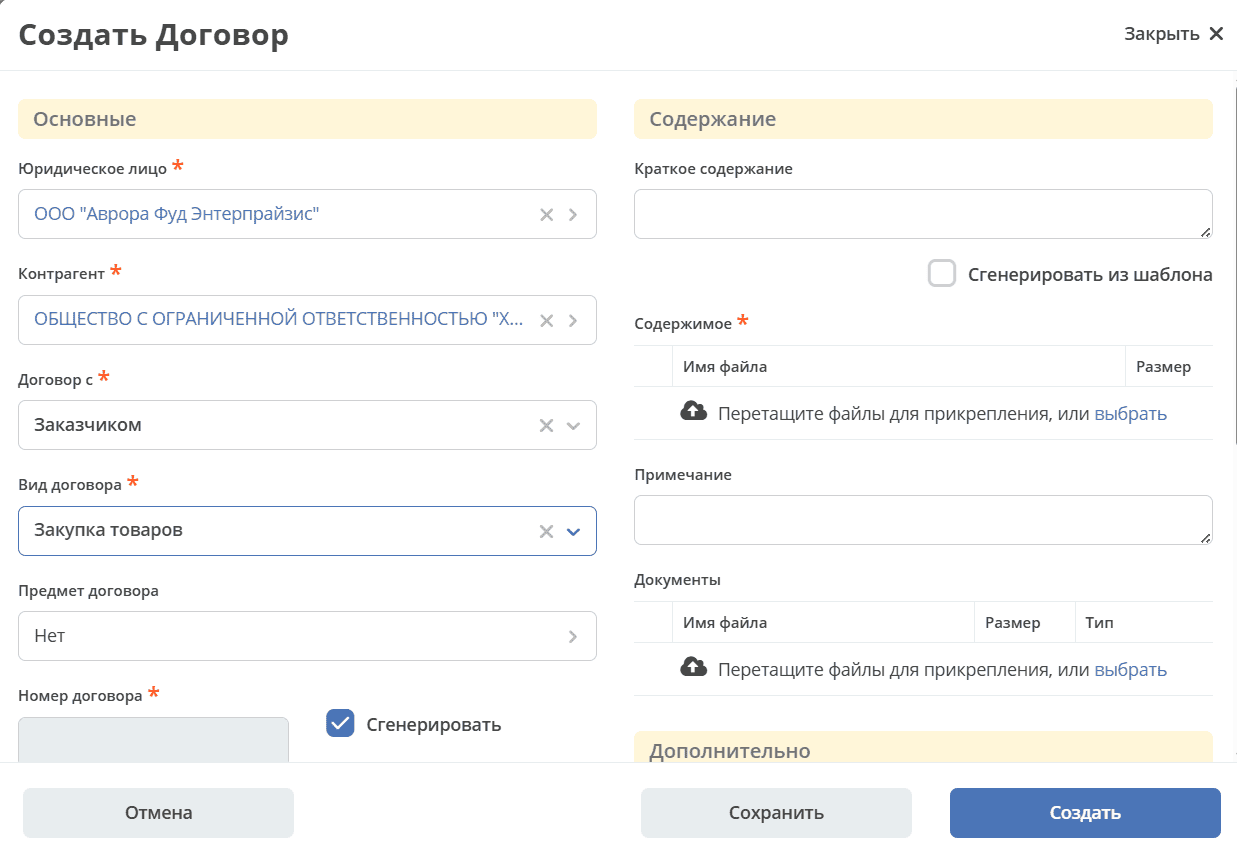
Then «Create»:
And in the opened form, fill in the mandatory and necessary fields:
The further procedure for working with the contract is described in the Contracts module.
And for the contract to be linked to the card, select it from the list:

Save the card:

Changing/Assigning Responsible Person
Note
The action is available to a user with the Commercial Director (crm-manager) role
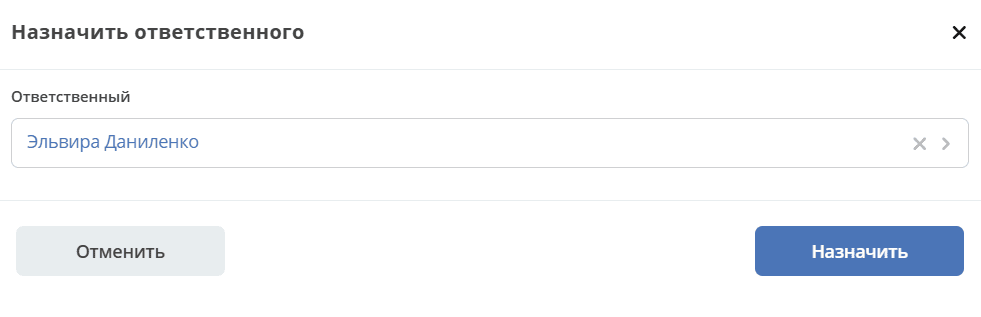
Select the action «Assign Responsible Person», select an employee from the organizational structure, click «Assign»:
Creating and Working with an Order
Creating an Order
To create an order for a deal, go to the «Orders» tab in the card:
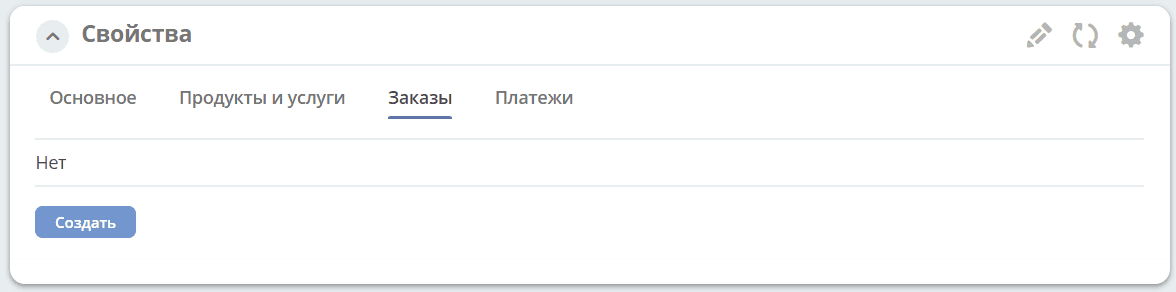
Click «Create»:
And in the card, create/select products/services:
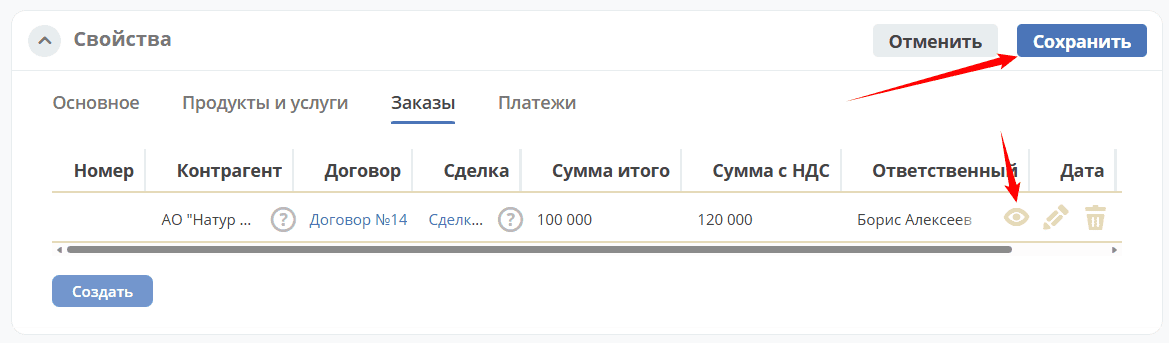
Make changes for this order and save:

Save the order card by clicking «Create»:
Save the deal card and go to the order card:
Order Card:

Order Documents
Invoice
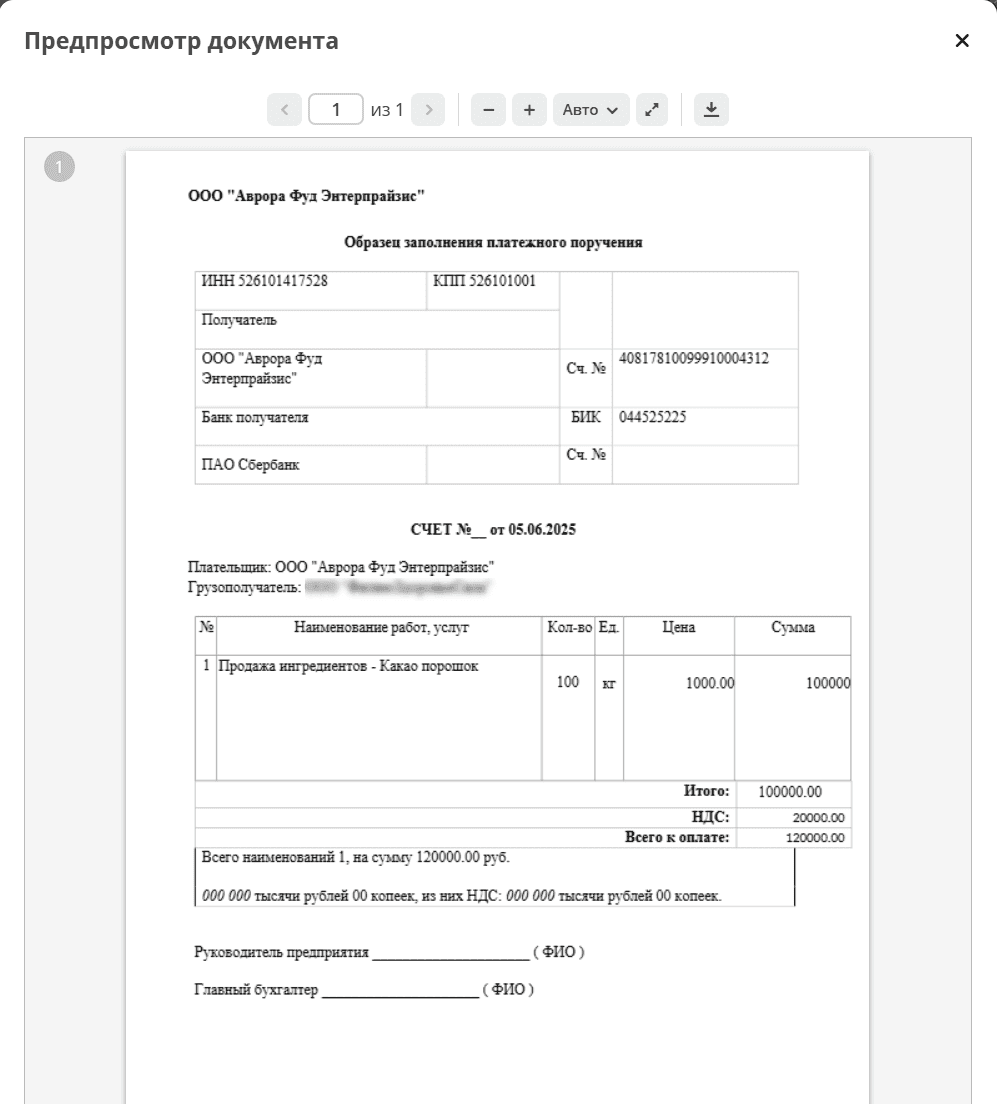
In the order card, select the action «Generate Invoice». Based on the legal entity data from the contract and the specified products/services in the application, an invoice will be generated, which will be available in the «Documents» tab:
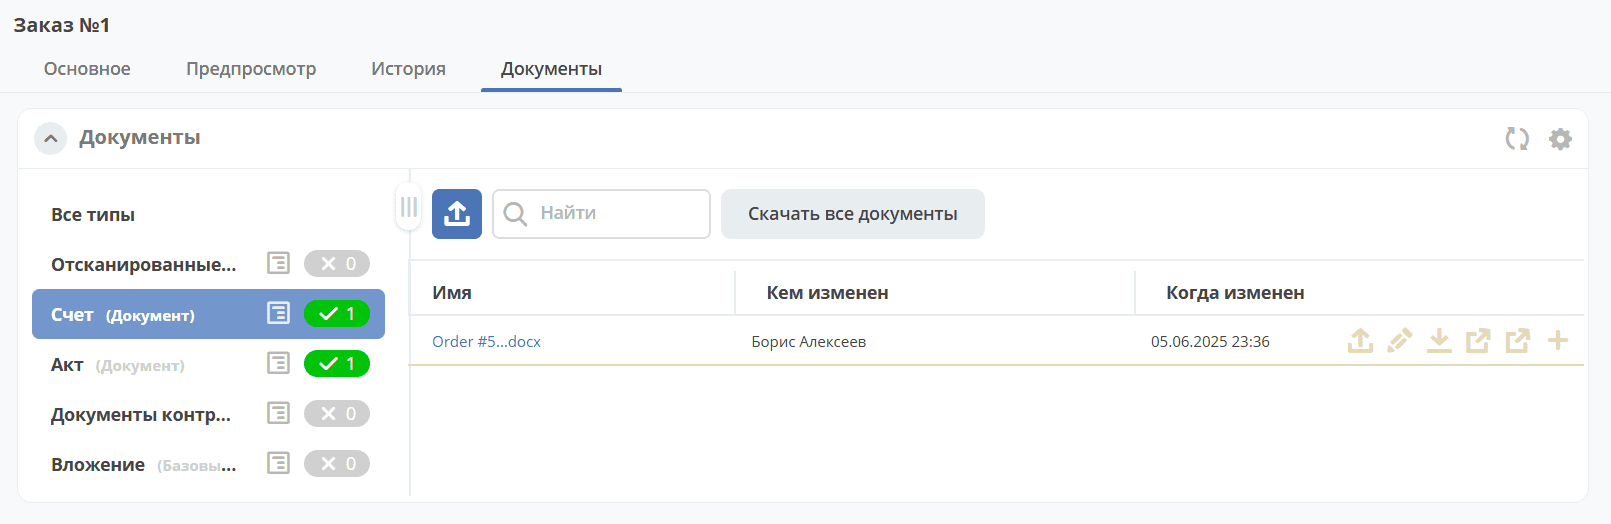
Clicking on the file name opens the document:
- The following actions are available for the document:
Download
Act
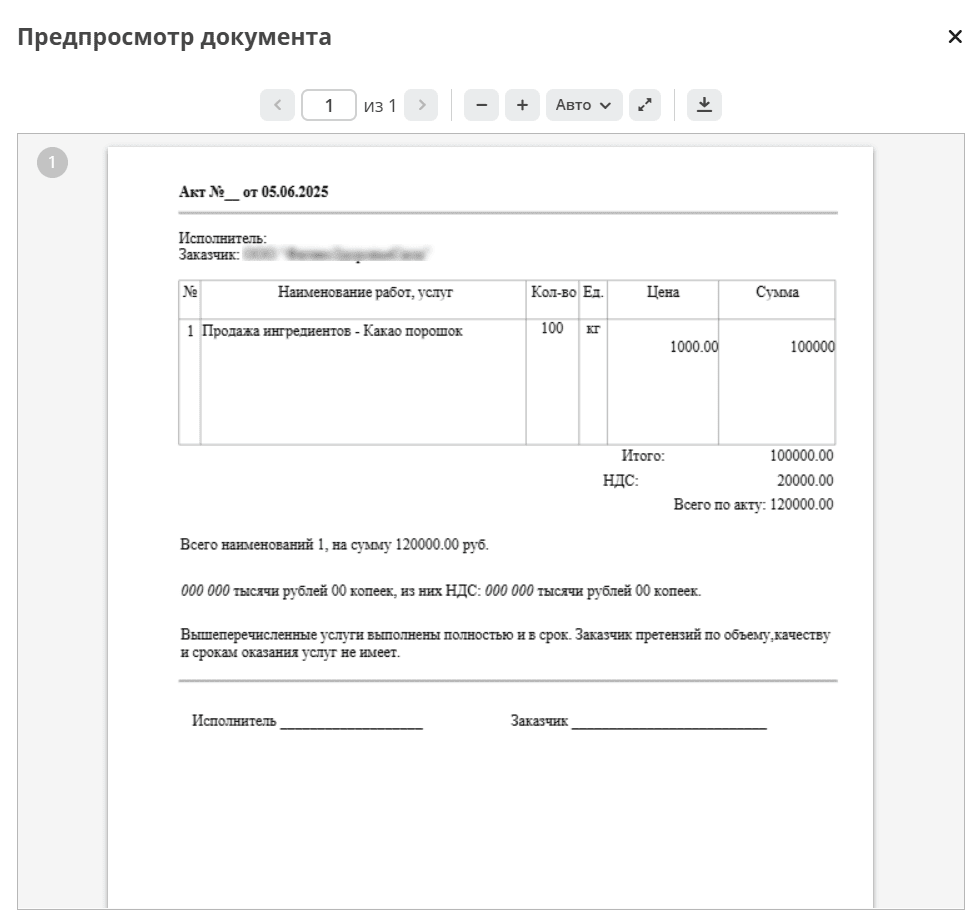
In the order card, select the action «Generate Act». Based on the legal entity data from the contract and the specified products/services in the application, an act will be generated, which will be available in the «Documents» tab:
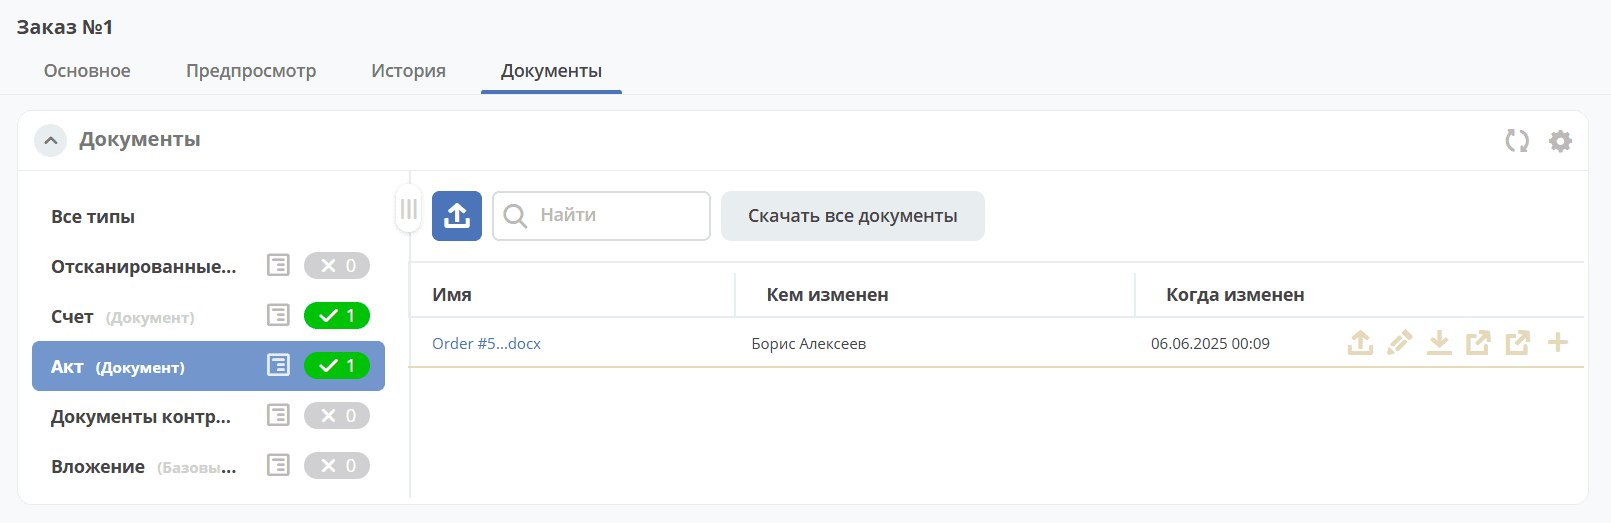
Clicking on the file name opens the document:
- The following actions are available for the document:
Download
Changing the Status of an Invoice, Act
The status can be changed via the corresponding action in the card:
Creating and Working with a Payment
Creating a Payment
To create a payment for a deal, go to the «Payments» tab in the card:
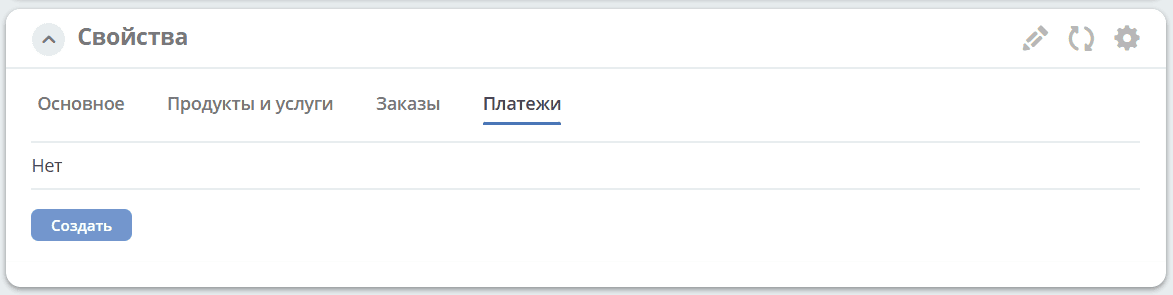
Click «Create»:
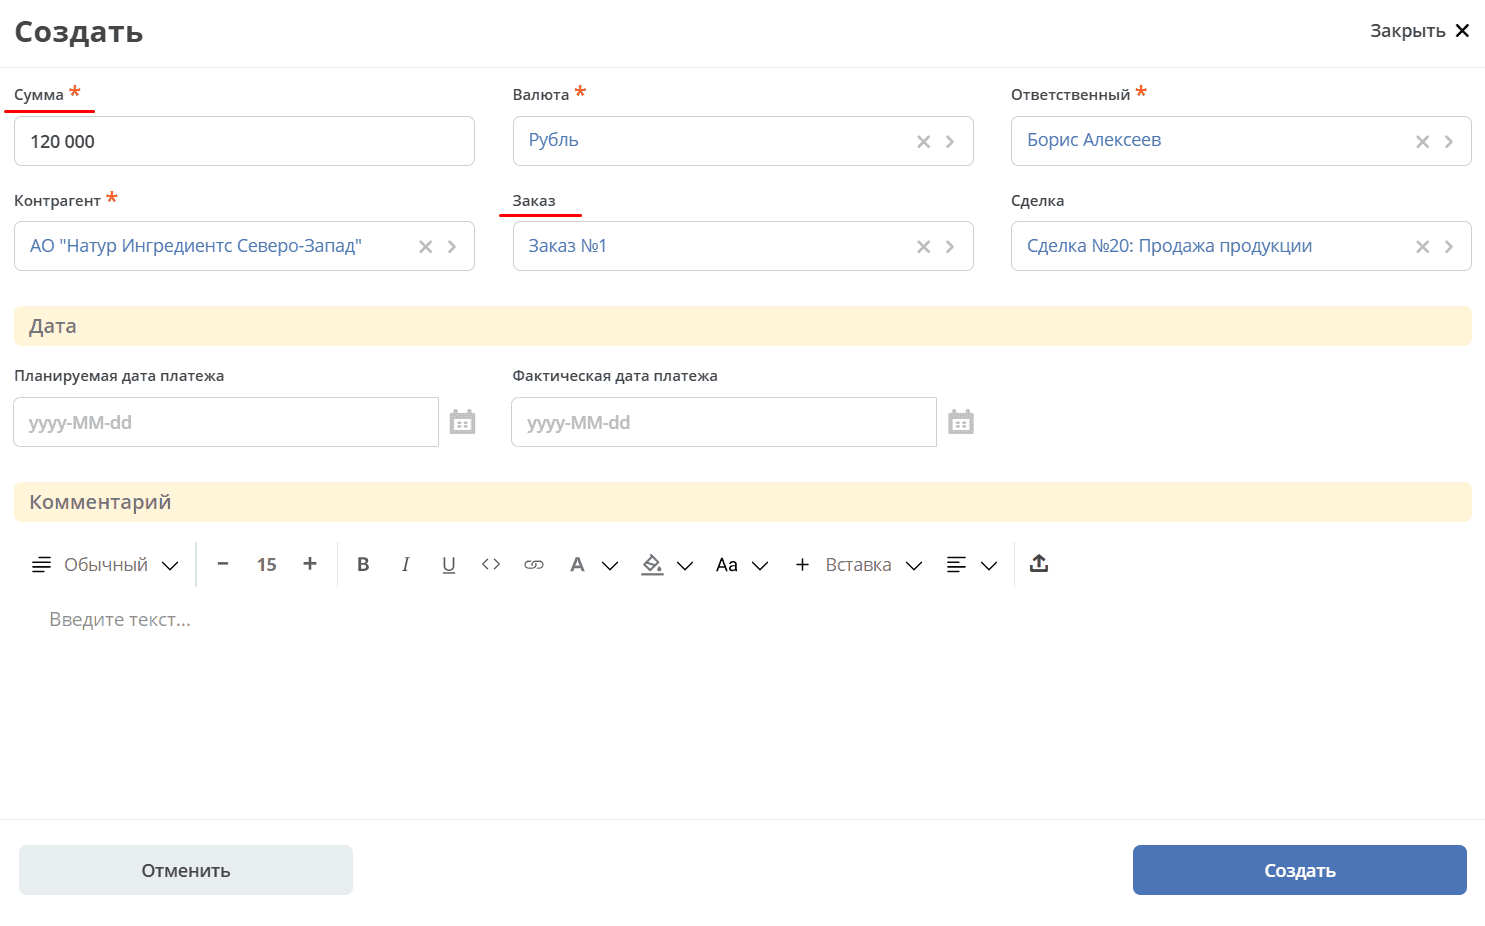
Specify the amount, select the order, fill in the necessary fields, and save. Save the deal card and go to the payment card:
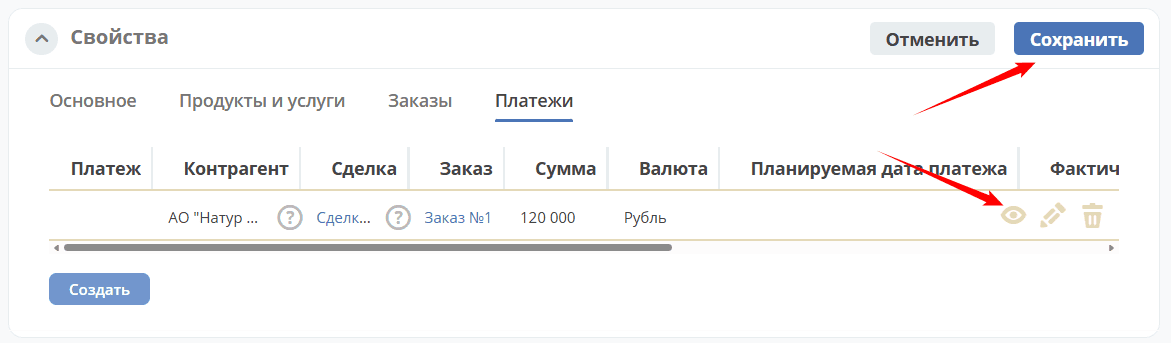
Order Card:
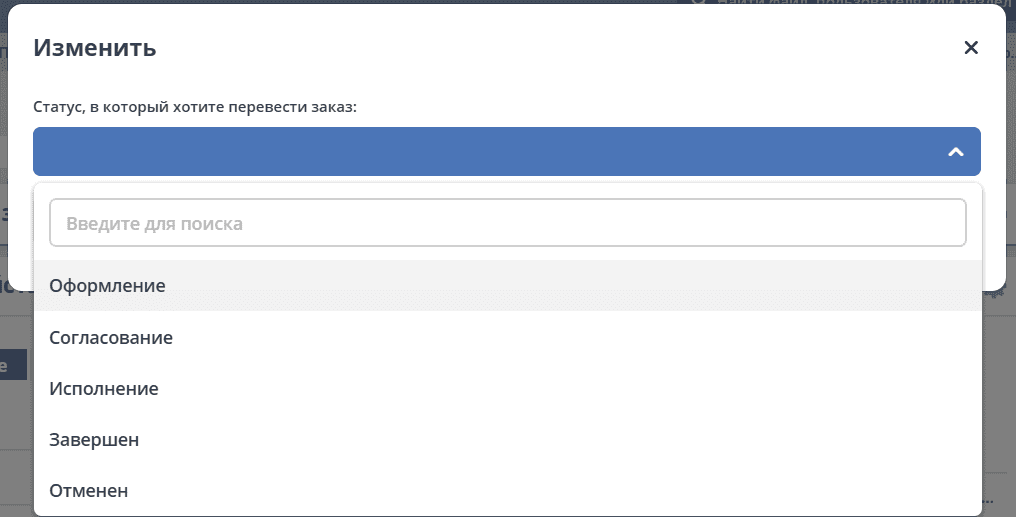
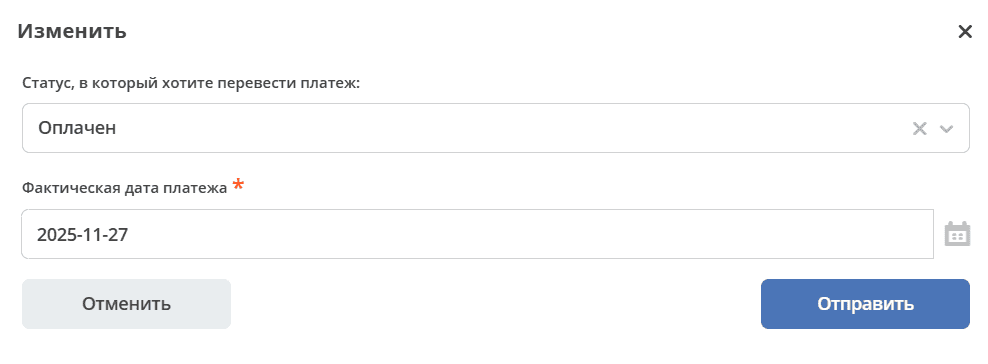
Changing Status
The status can be changed via the corresponding action in the card:
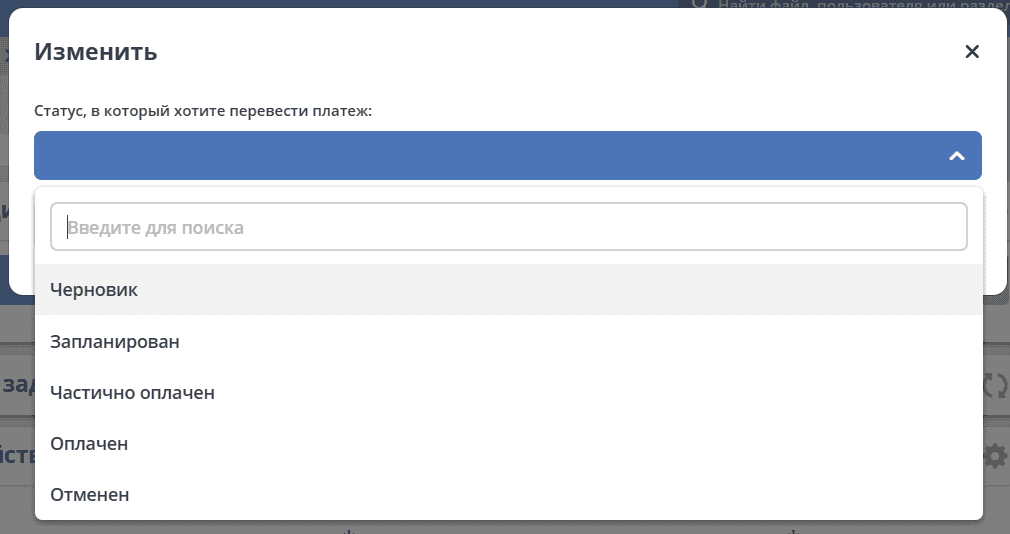
For the «Planned» status, specify the Planned Payment Date. For the «Paid» status, specify the Actual Payment Date.
Merging with the Main Deal
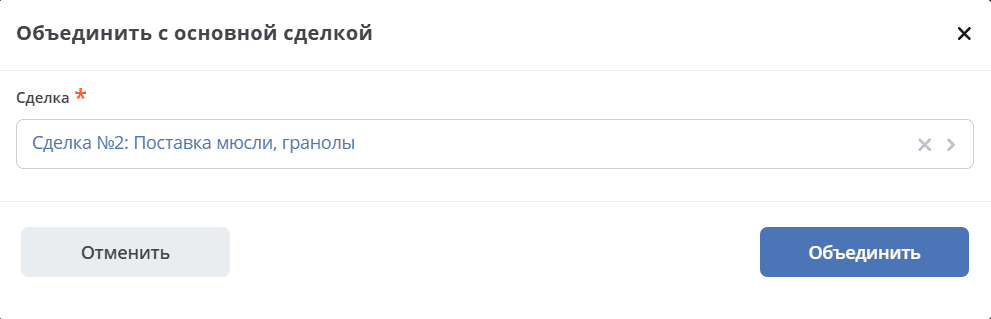
To merge deals, select the action «Merge with Main Deal» in the card:
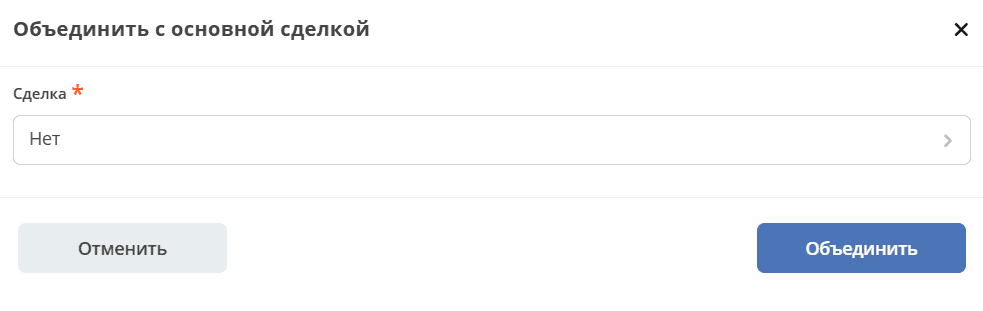
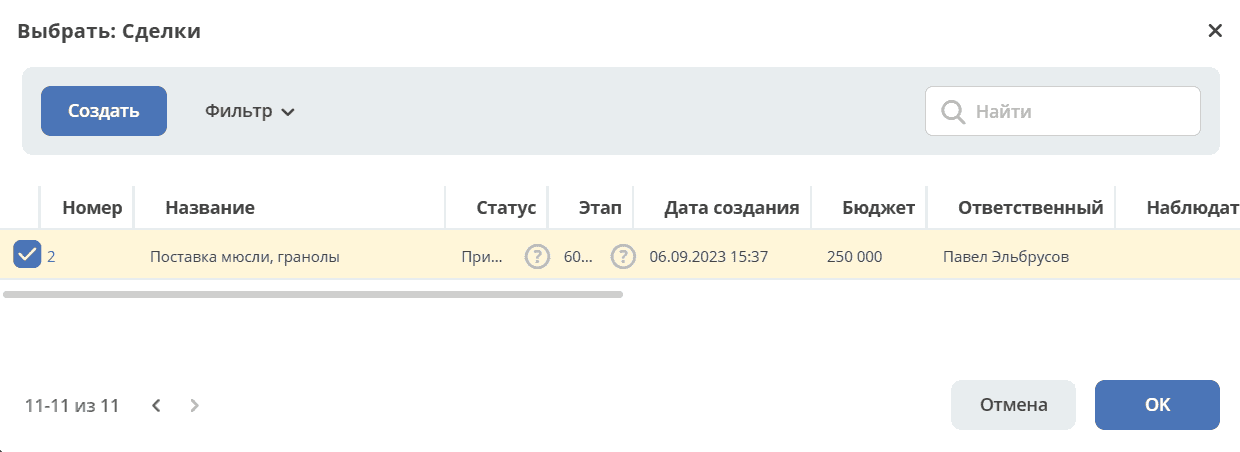
Select the deal from the list to transfer data into:
Confirm the merge:
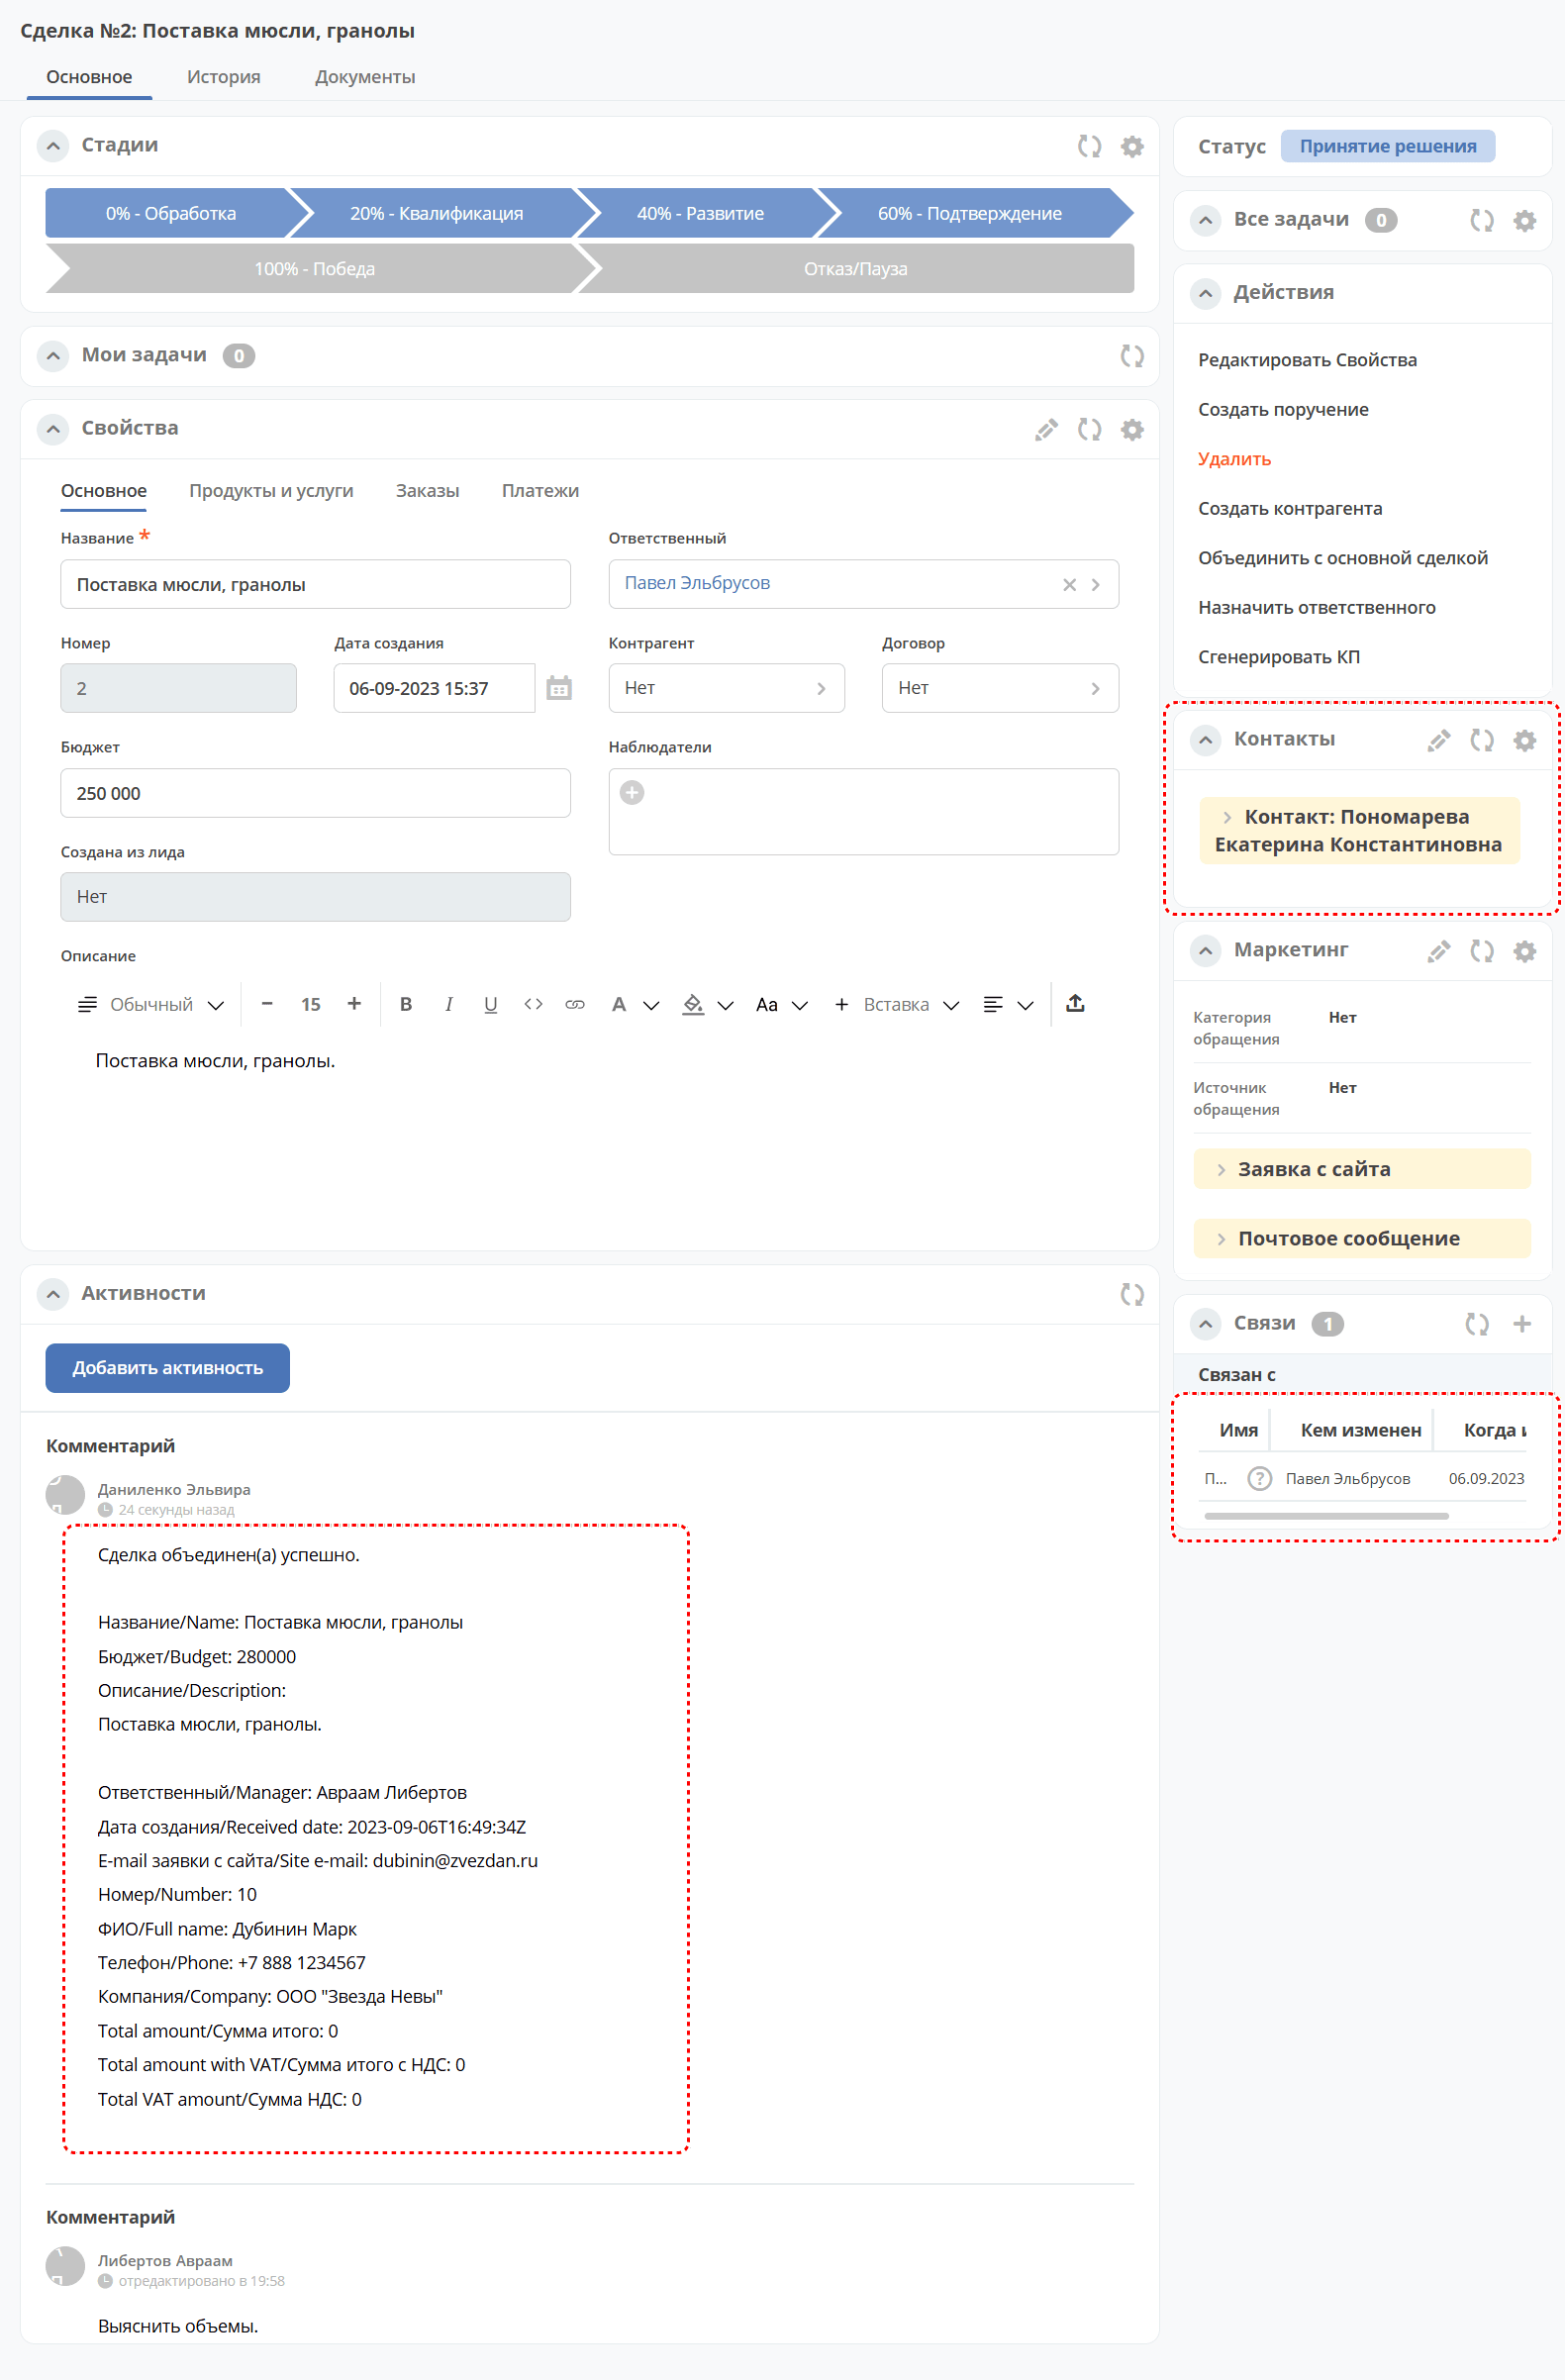
Contact data will be transferred to the deal card selected during the merge. And all information about it will be transferred to the deal comment:
Creating an Assignment for a Deal
An assignment can be created from the deal card by selecting the action «Create Assignment». See details: Creating an assignment from the card
Clients
Contains a list of counterparties; by default, counterparties with the type Buyer are displayed:
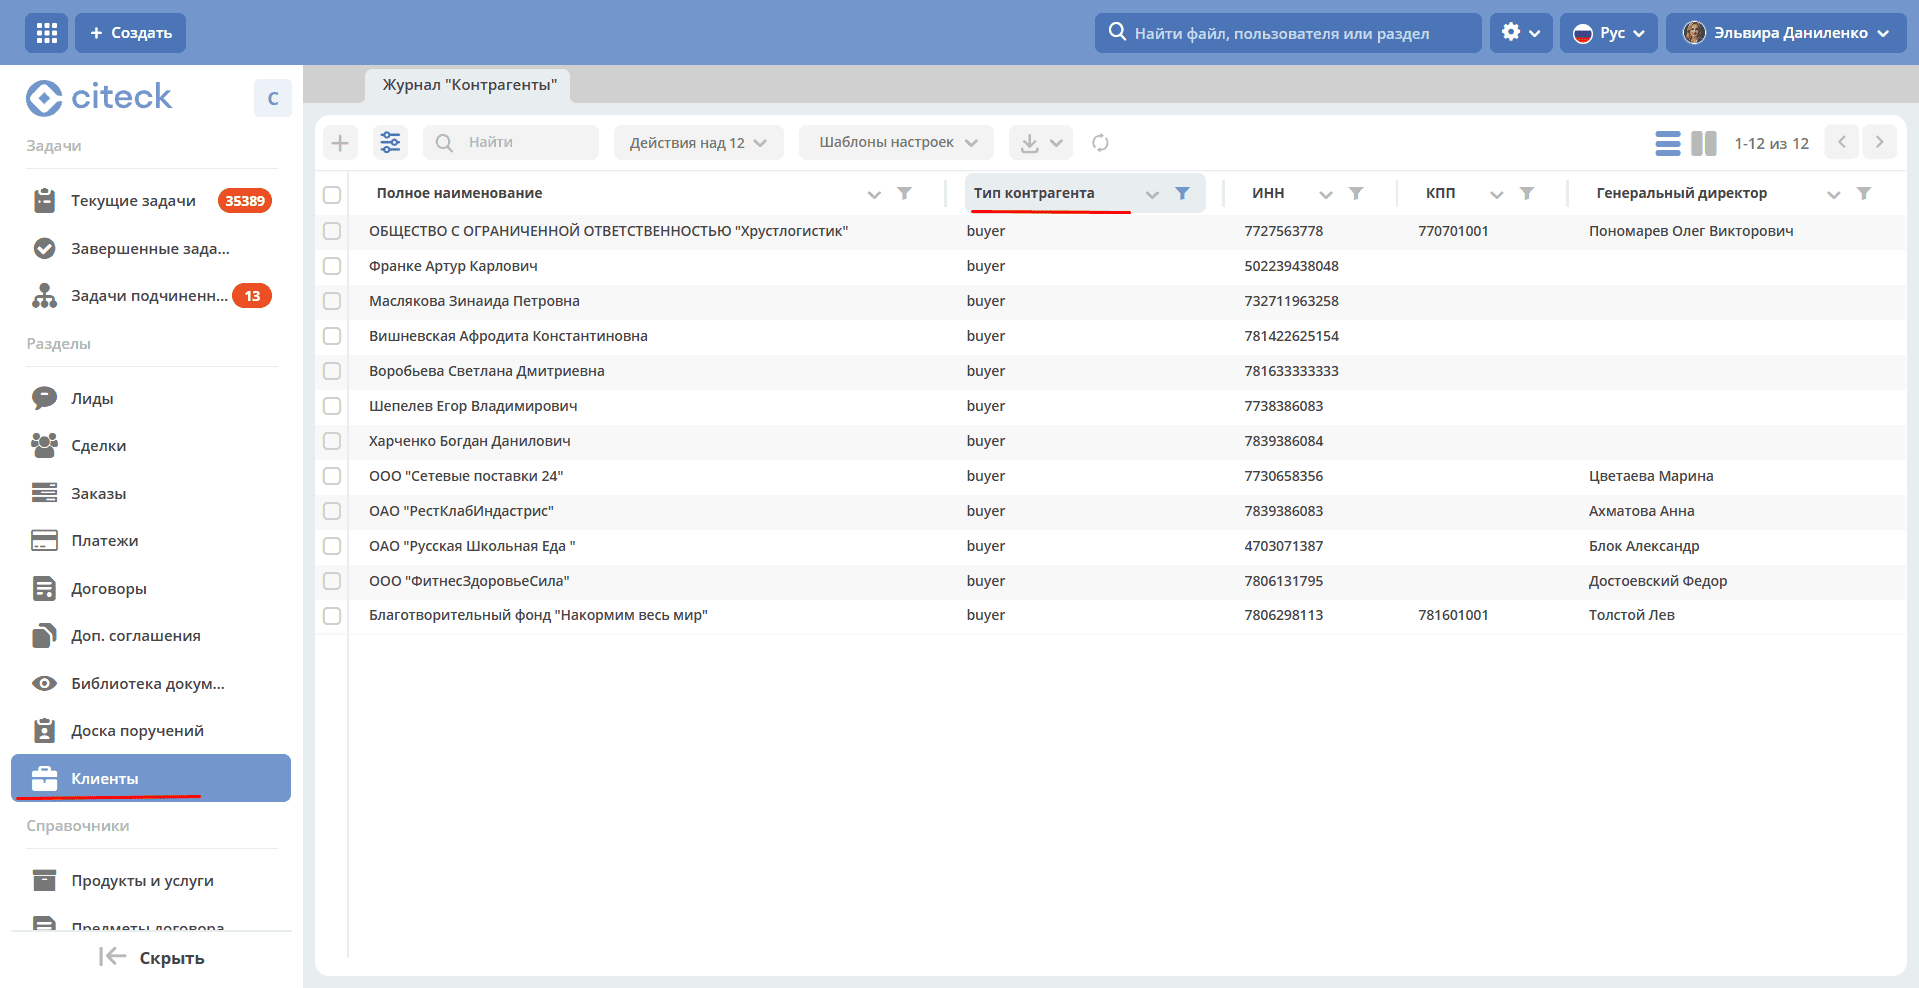
The filter can be reset.
Creating a Deal from an Email
When creating a deal from an email, data from the email is parsed into the Deal card, resulting in the following fields being filled:
Name - filled with the company name from the email;
Company - filled with the company name from the email;
Counterparty - filled with a link to the counterparty card if it exists in the system;
Contact Persons - if the contact is new, it is added to the list of contacts in the deal and to the counterparty card;
Number of Users - filled from the email;
Request Category - filled from the journal according to the email subject;
Description - filled with the text of the comment from the email.
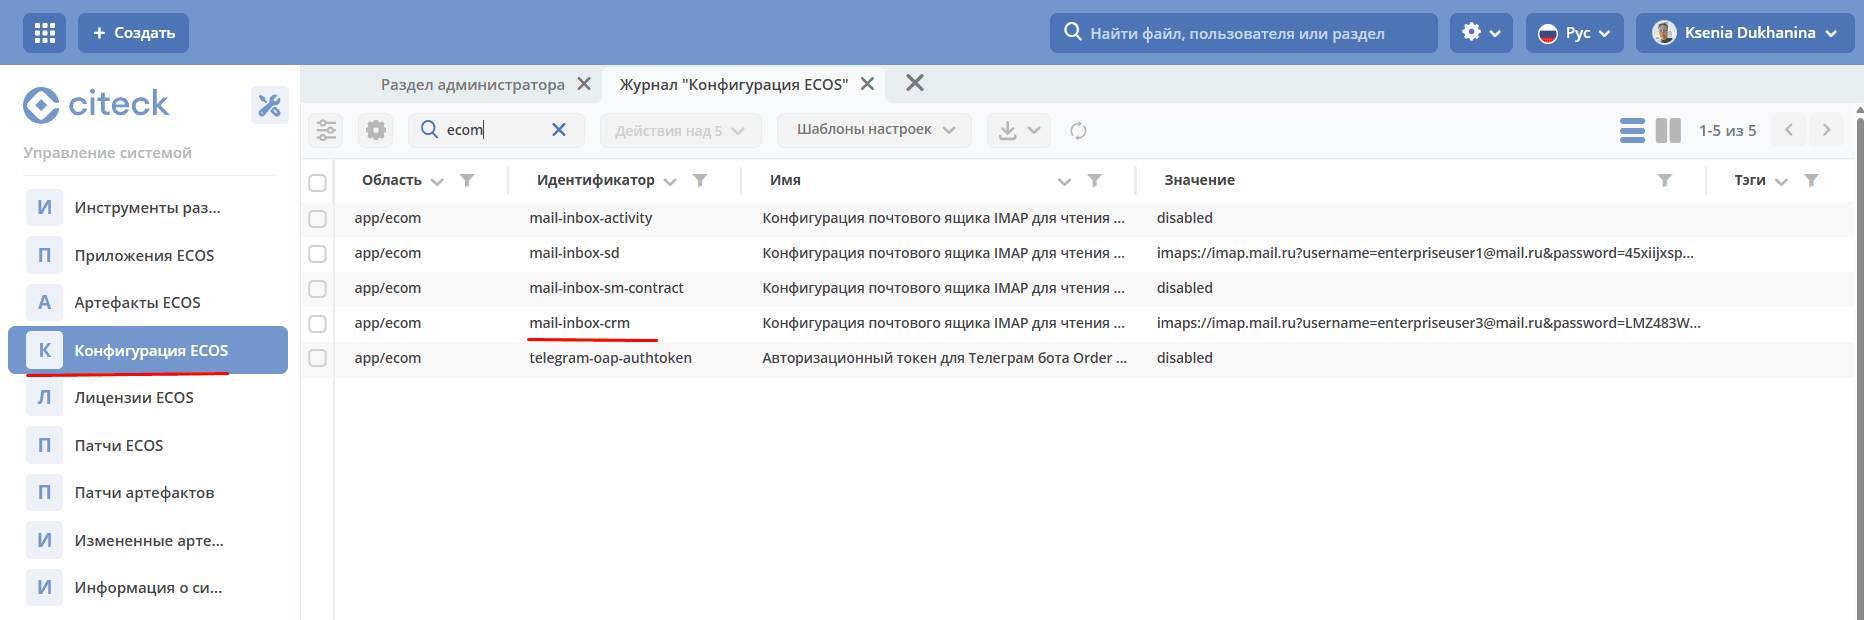
Settings for Email Parsing
Go to the «ECOS Configuration» journal. Setting mail-inbox-crm (IMAP Mailbox Configuration for Reading Emails in CRM Camel route):
For example:
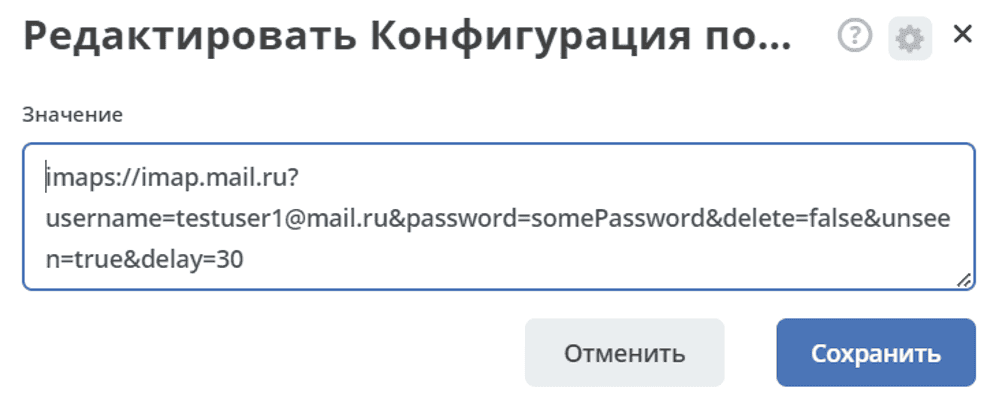
imaps://imap.mail.ru?username=testuser1@mail.ru&password=somePassword&delete=false&unseen=true&delay=30
Where:
username |
the email address that will handle message processing |
password |
password for connection |
delete |
whether to delete messages in the mail after processing. This is done by setting the DELETED flag in the email message.
If false, the SEEN flag is set instead.
|
unseen |
whether to limit to unread emails only. |
delay |
mailbox check frequency (specified in milliseconds) |
Warning
Значения конфигураций mail-inbox-crm и mail-inbox-activity считываются микросервисом ecom один раз — при старте приложения (Camel-маршрут собирается на этапе инициализации Spring-контекста).
После любого изменения настройки (включая переключение значения с disabled на реальный IMAP URI и обратно) необходимо перезапустить микросервис ecom, иначе новые параметры подключения не применятся.
Enabling Email Processing in Activities
To enable email processing in the “Activities” widget, it is necessary to specify a mailbox in the setting mail-inbox-activity (IMAP Mailbox Configuration for Reading Emails in Activity Camel Route) similarly as described above.
Note
It is advisable that email processing for activities and deal creation be handled through different mailboxes.
For an email to be processed and added as an activity, it is necessary to add and configure the Has Activities aspect to the deal type.
If the email had an attachment, then a record with the type Email is created in the Activities widget, containing the email text and the attachment itself.