Project Management
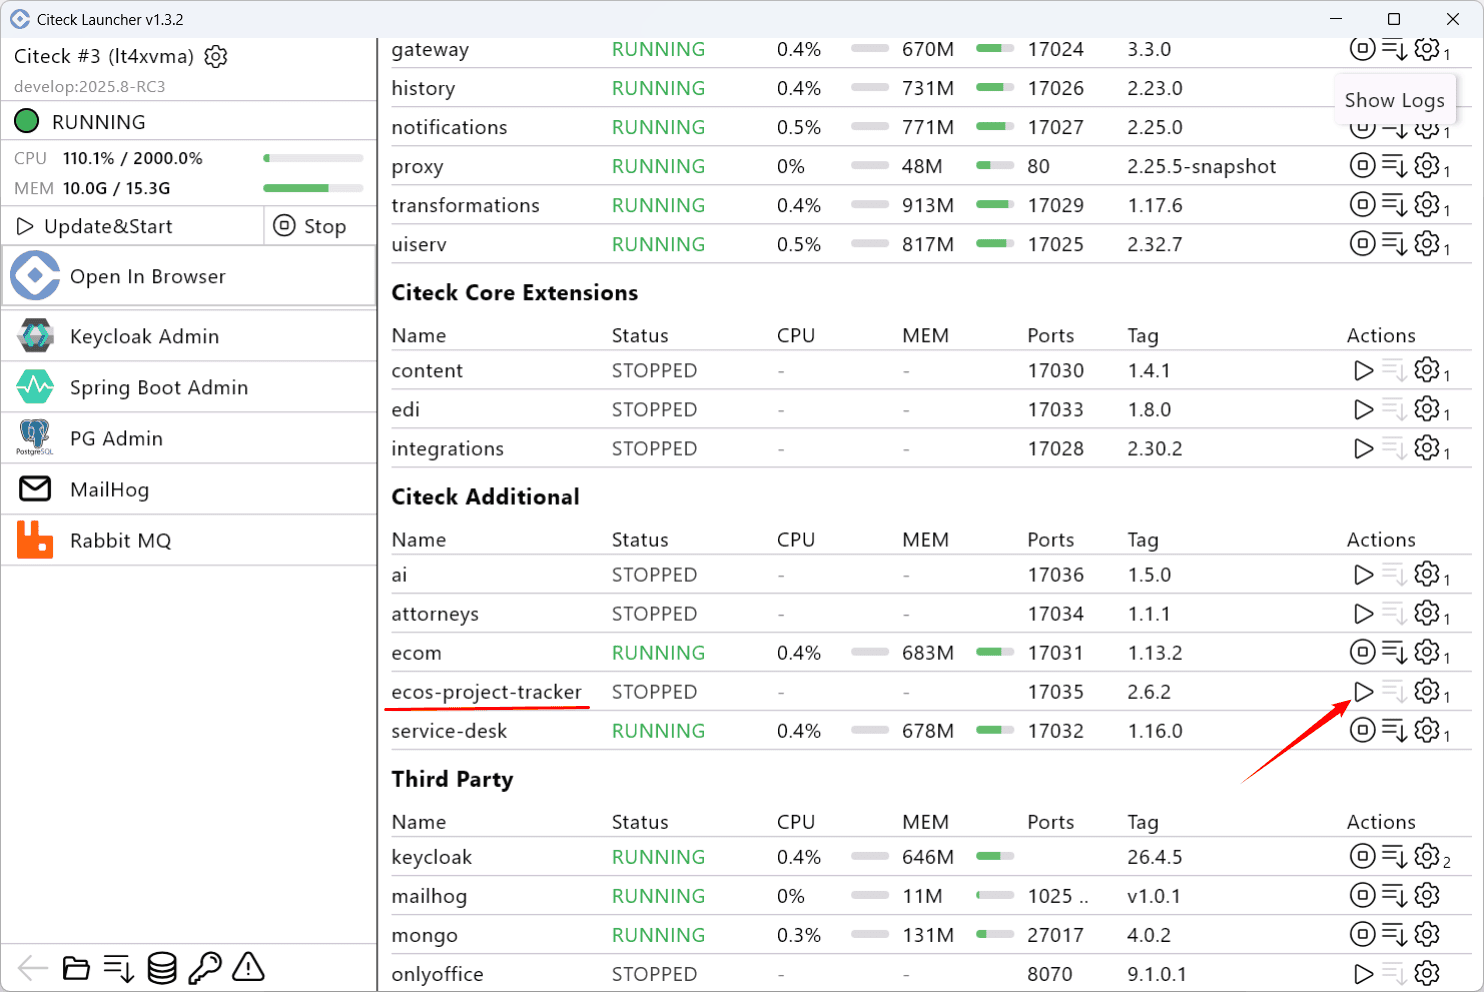
Project tracker - a tool for project management, organizing team workflows, and task monitoring. Project tracker provides:
creation of separate projects;
sprint planning;
maintaining a task backlog;
task assignment and tracking their status in the current sprint on a Kanban board;
time tracking for work on tasks.
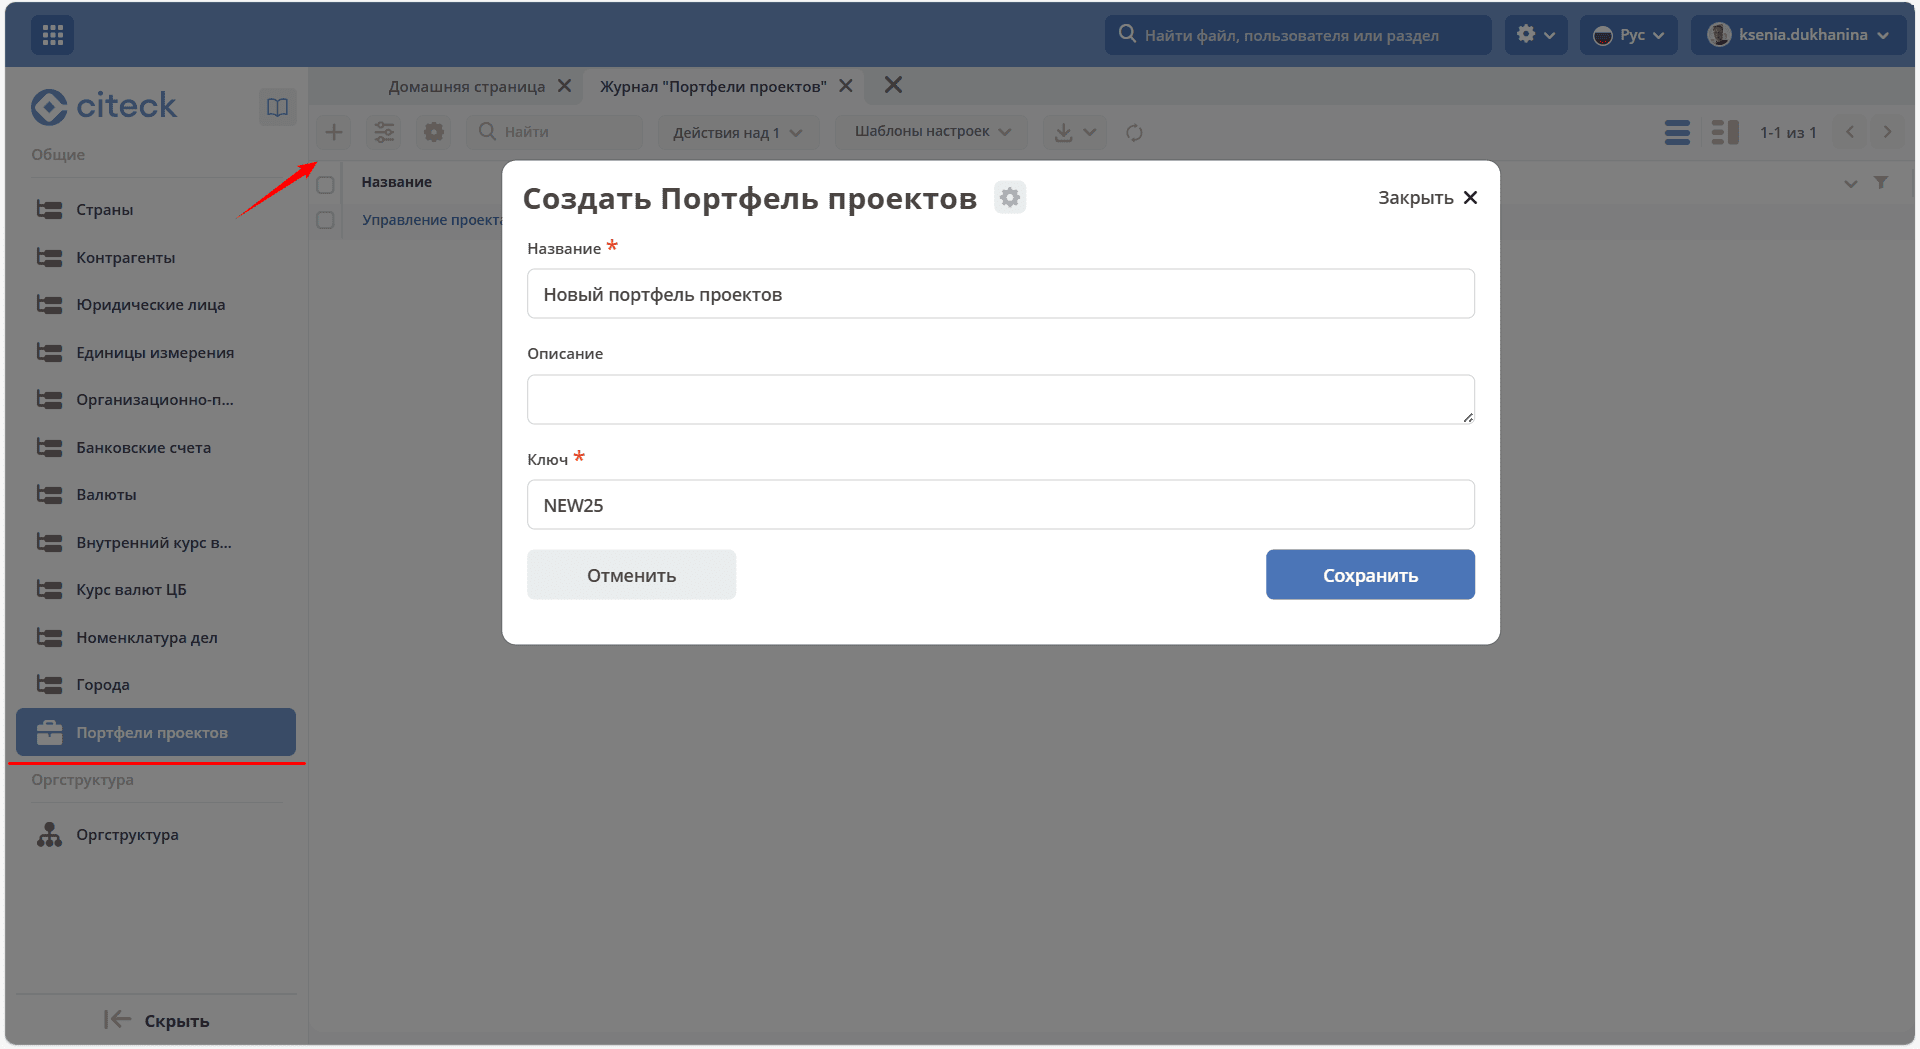
Creating a Project Portfolio
To create a project portfolio, go to the Directories workspace, navigate to Project Portfolios, click +, fill in the information, and save:
Information about the created portfolio will open:
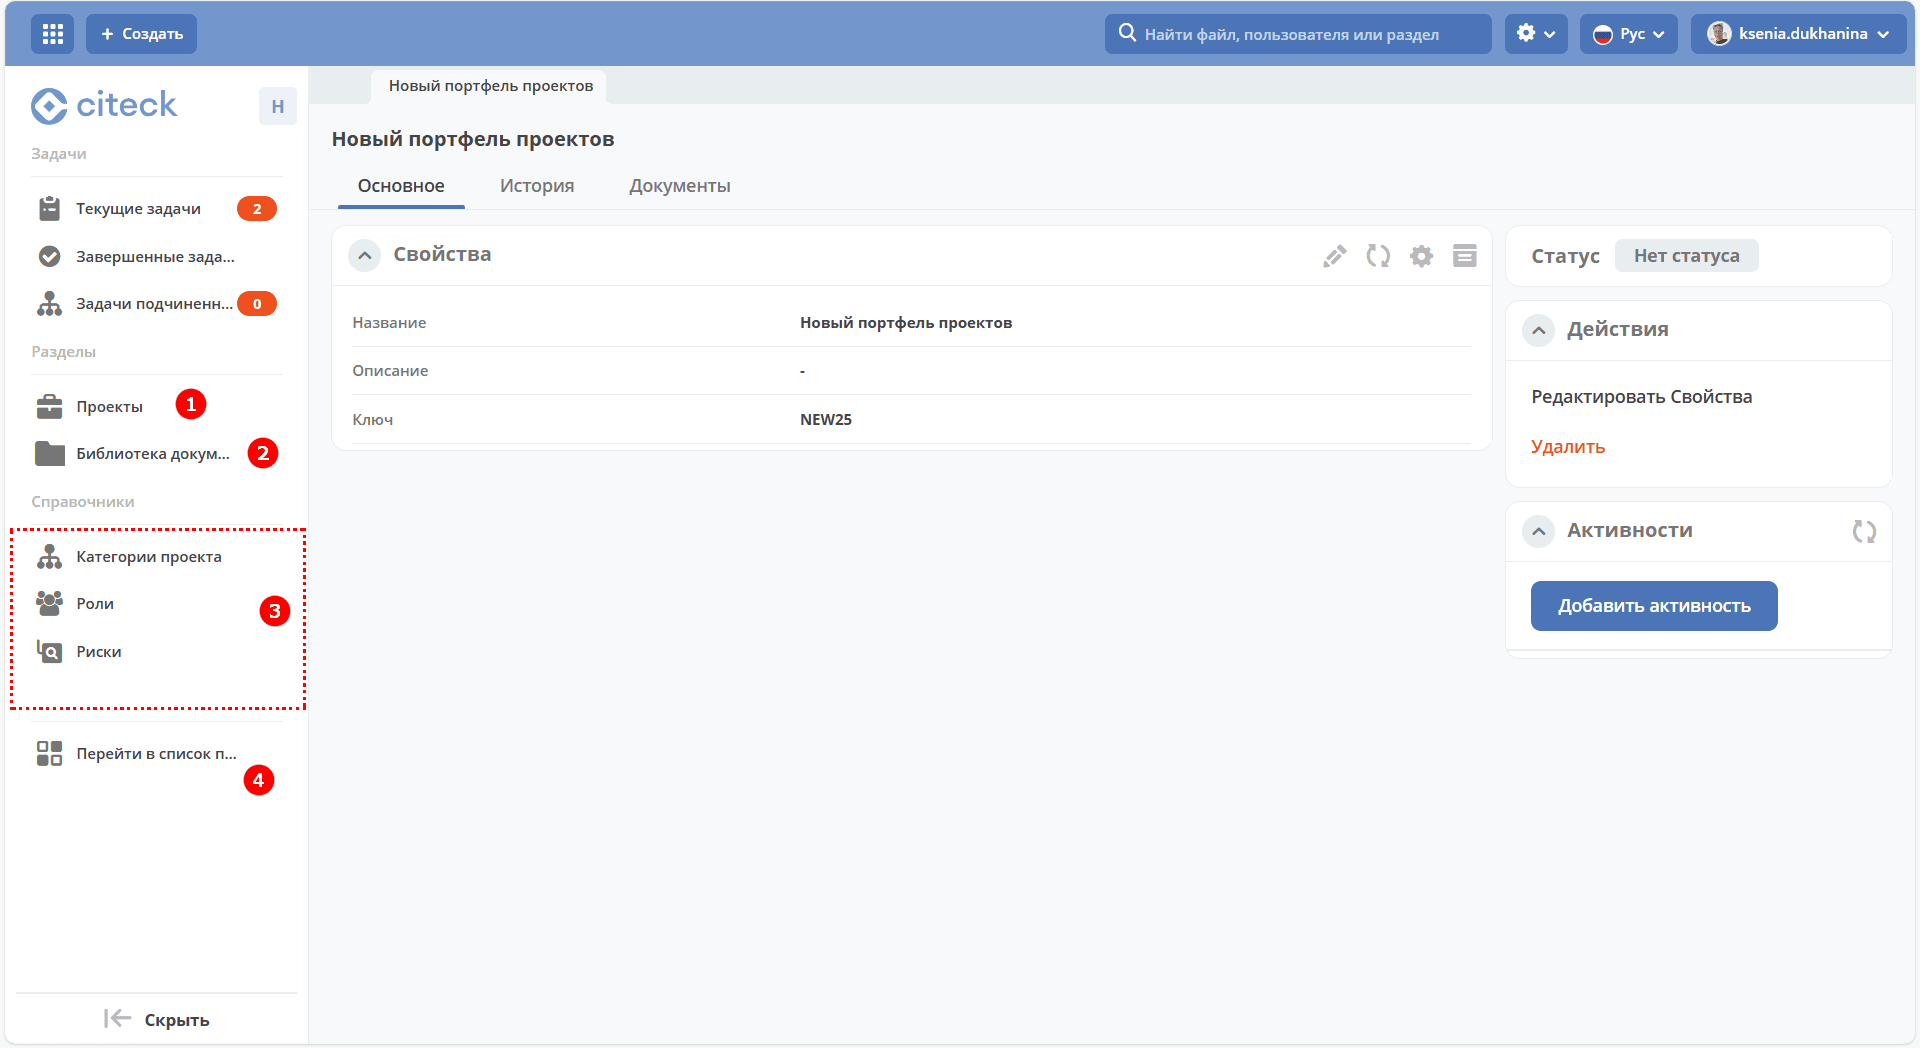
The menu provides a section with the project list (1), document library (2), directories in use (3), and a link to the portfolio list (4).
A workspace will be automatically created for the project.
The portfolio card contains the «Activities» widget.
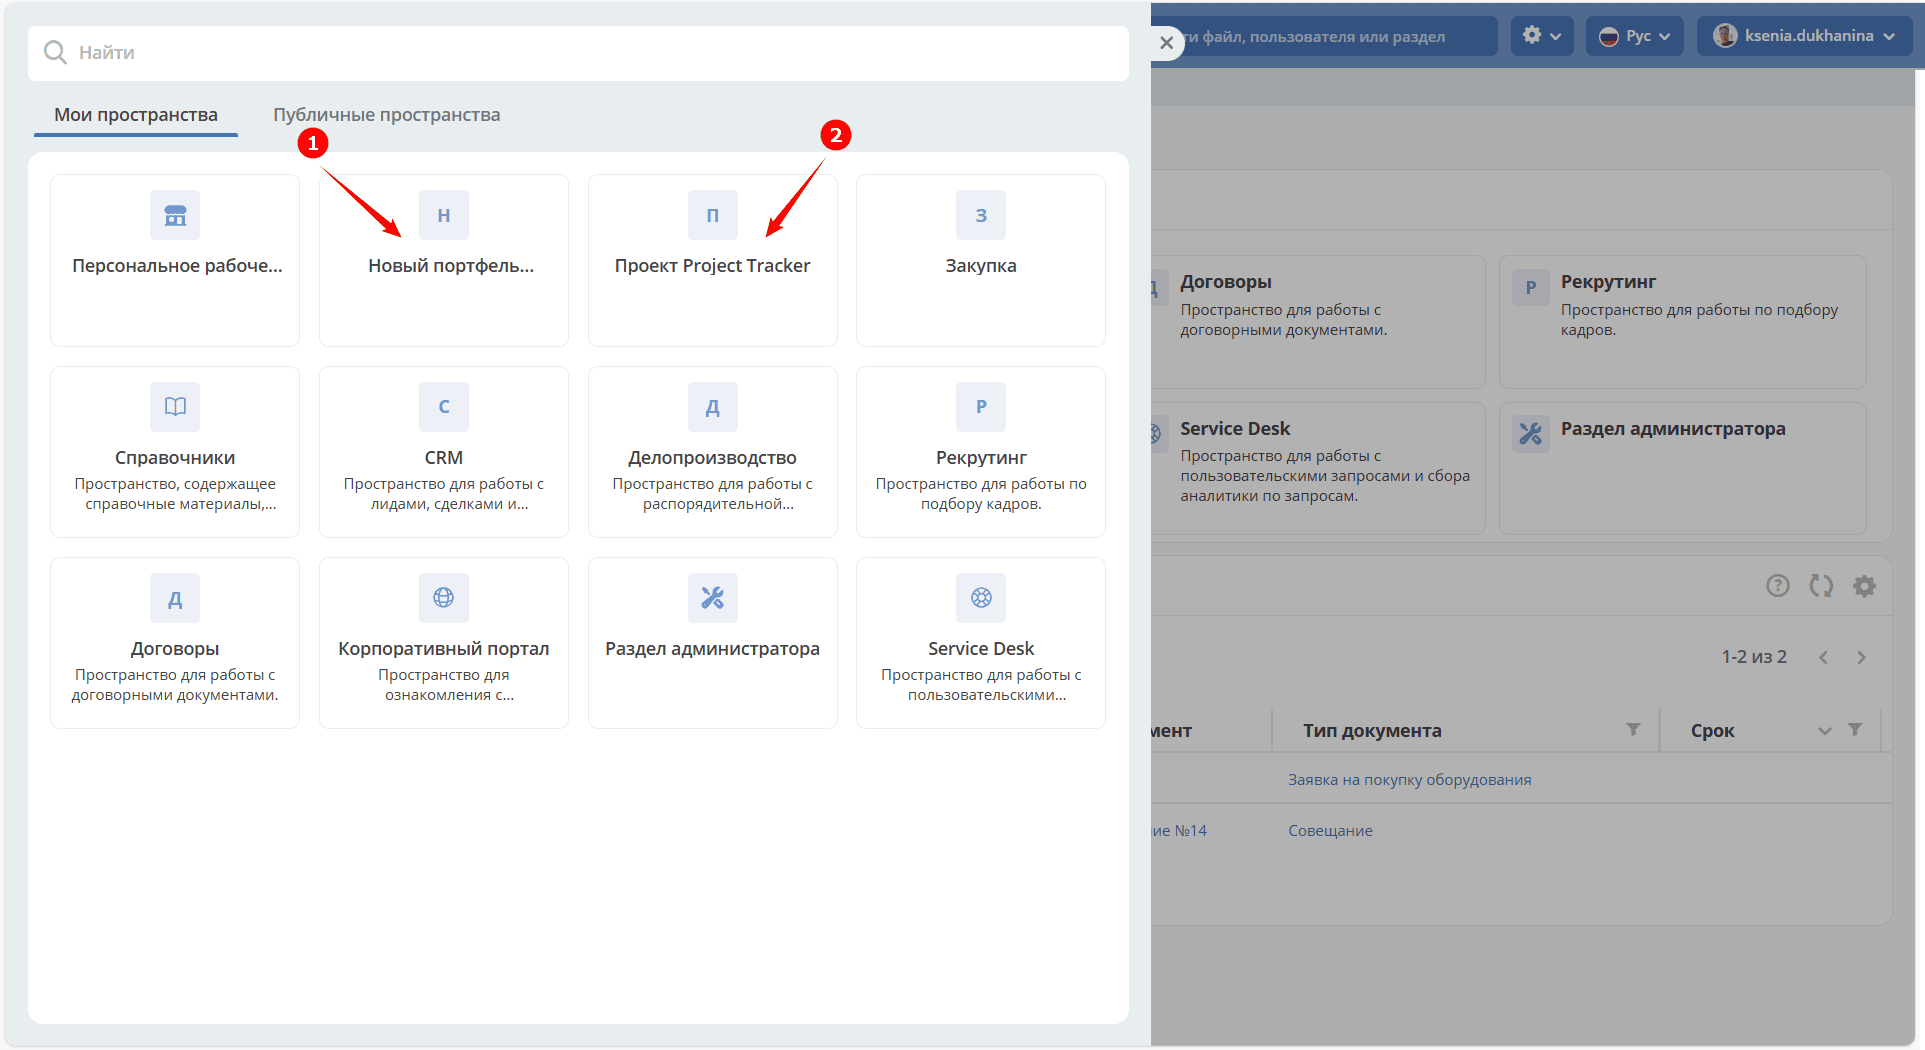
Creating a project
Go to Projects and click +:
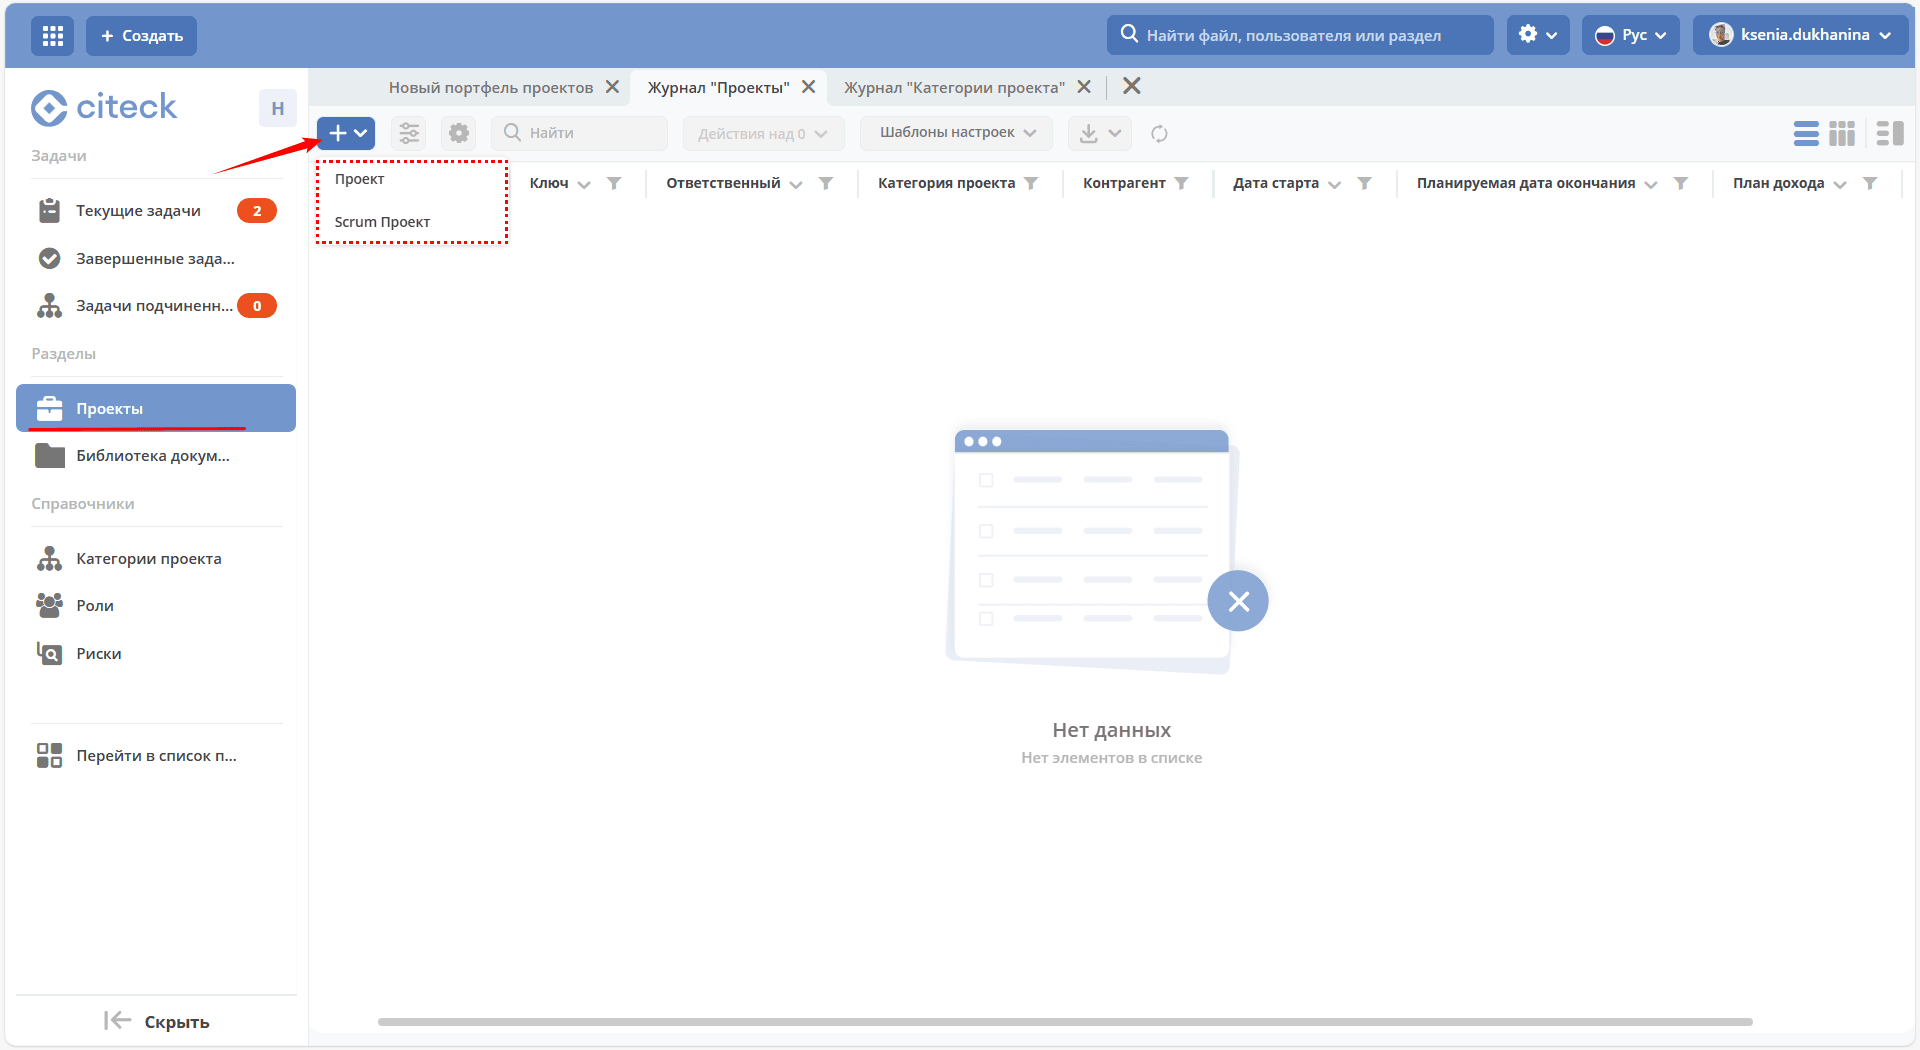
Available for creation:
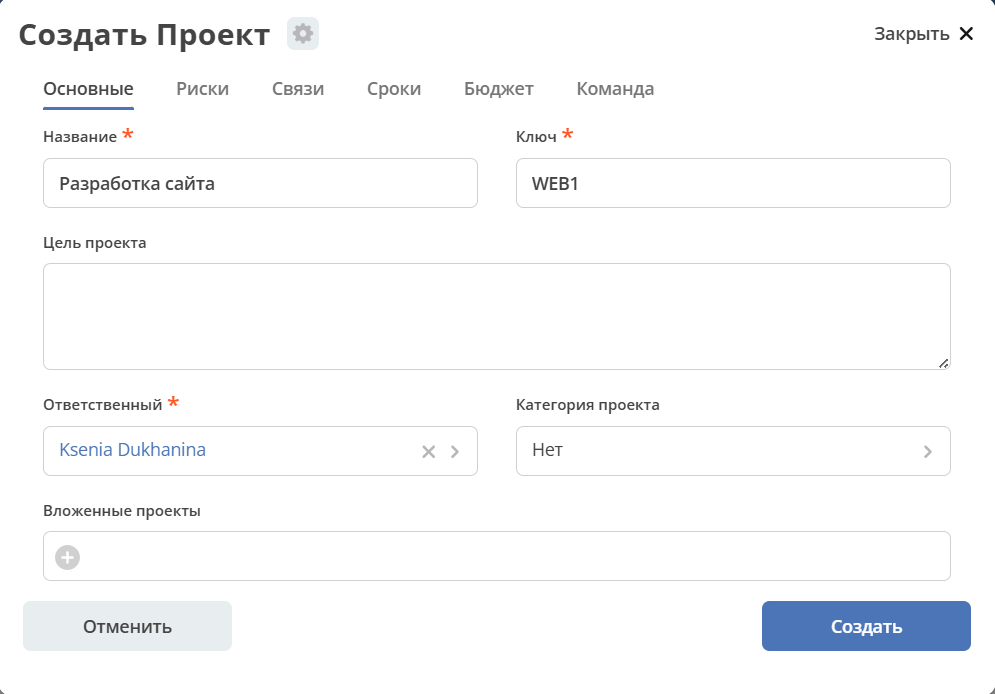
a simple project, consisting of tasks and stages, without sprints and a backlog:
a scrum project that supports sprints and a backlog:
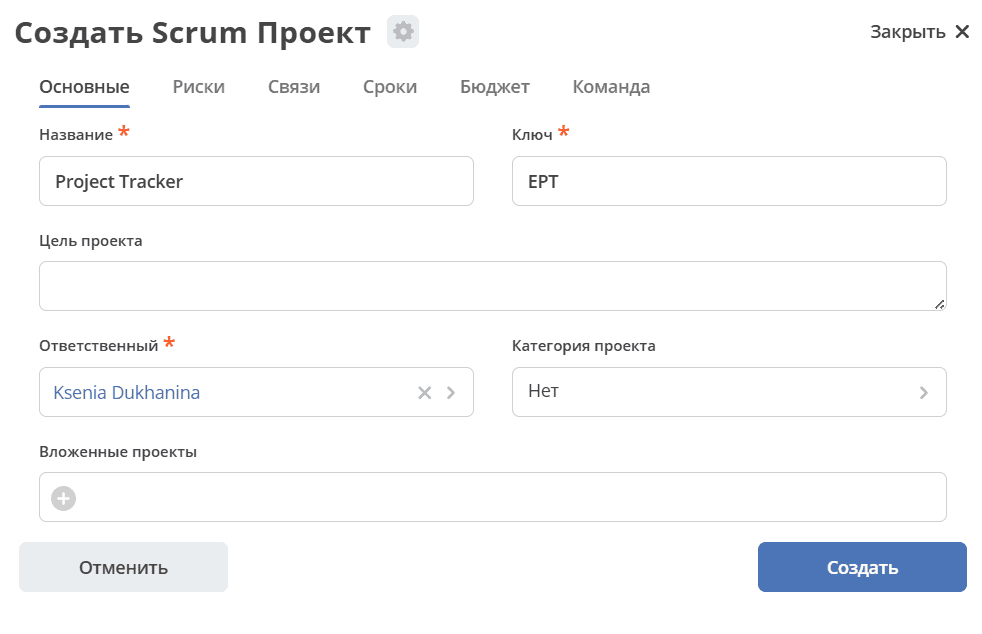

Create a project – specify the Name, the Key will be automatically generated from the first letters of the project name, save.
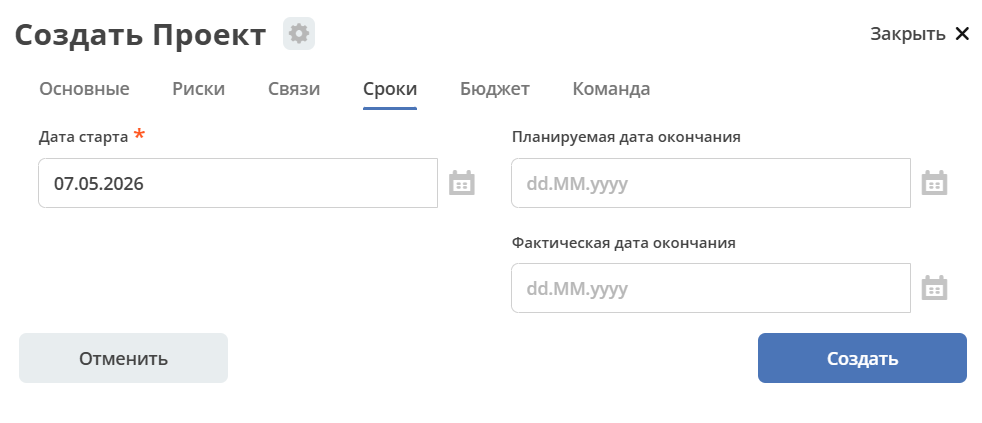
On the Dates tab, specify the Start Date and Planned End Date. If needed, fill in additional fields in the other tabs. Save.
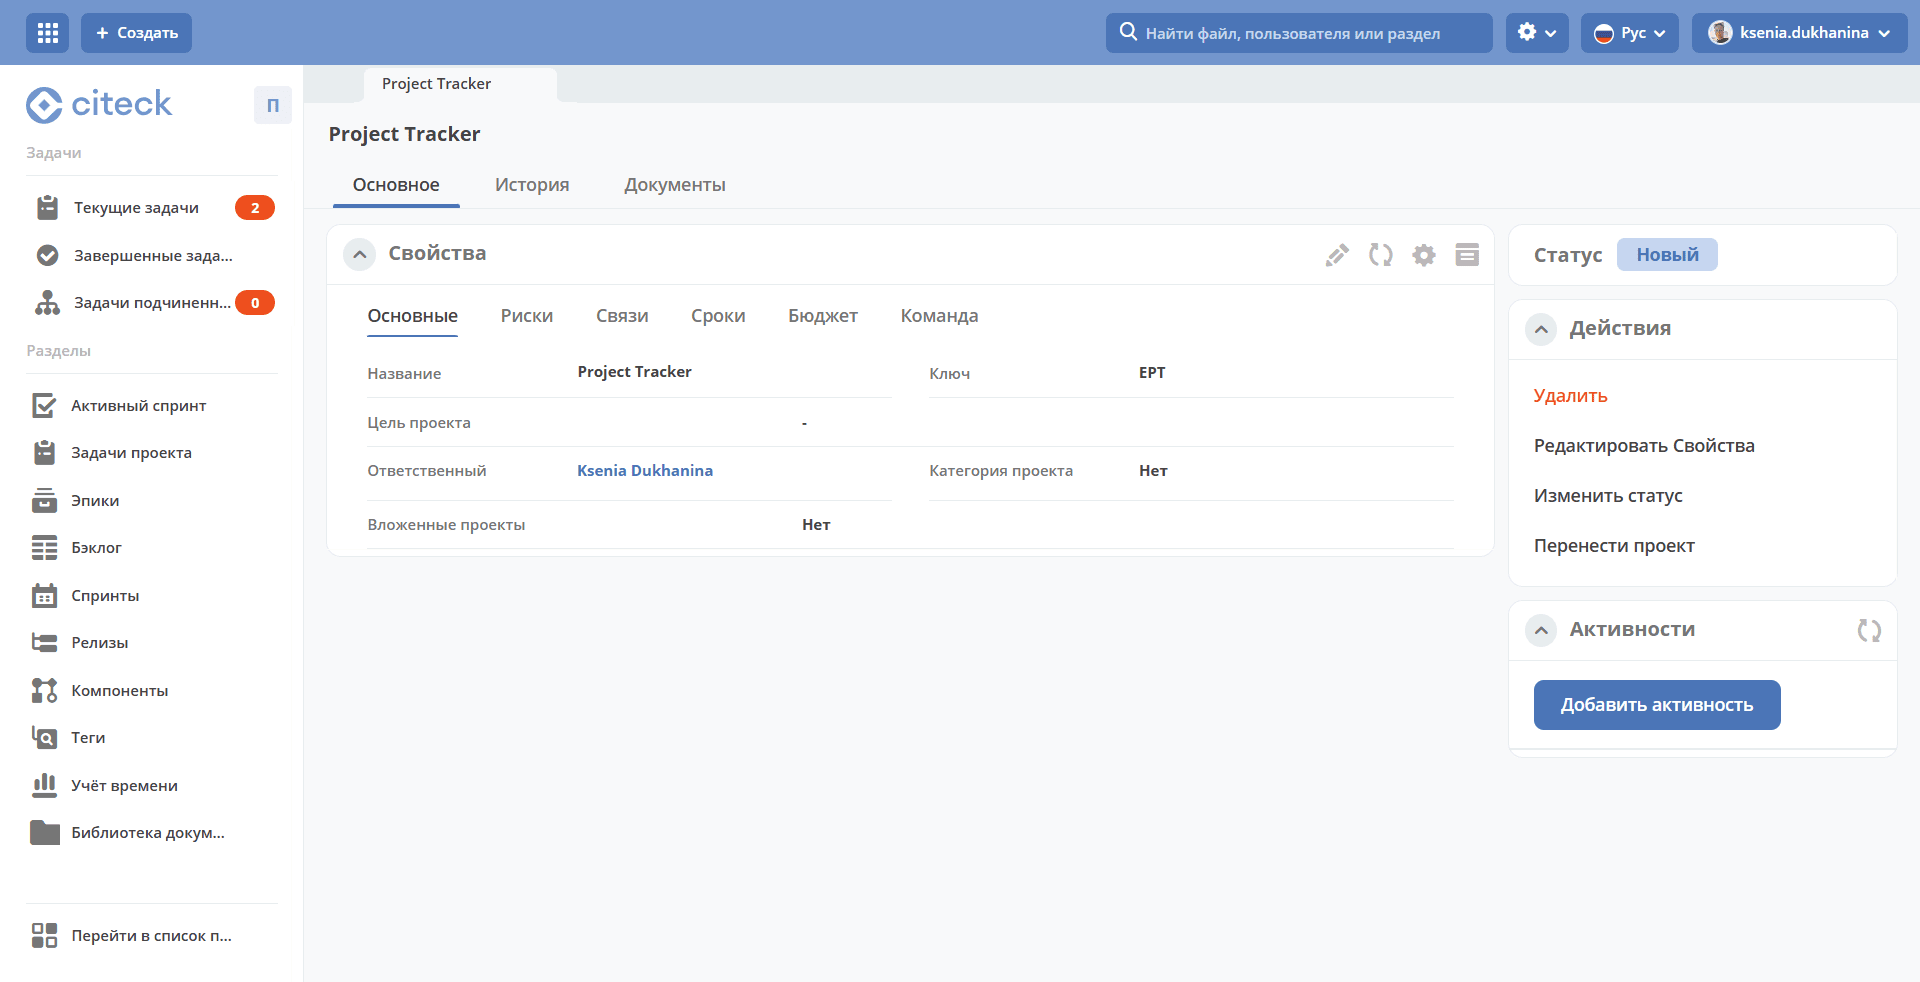
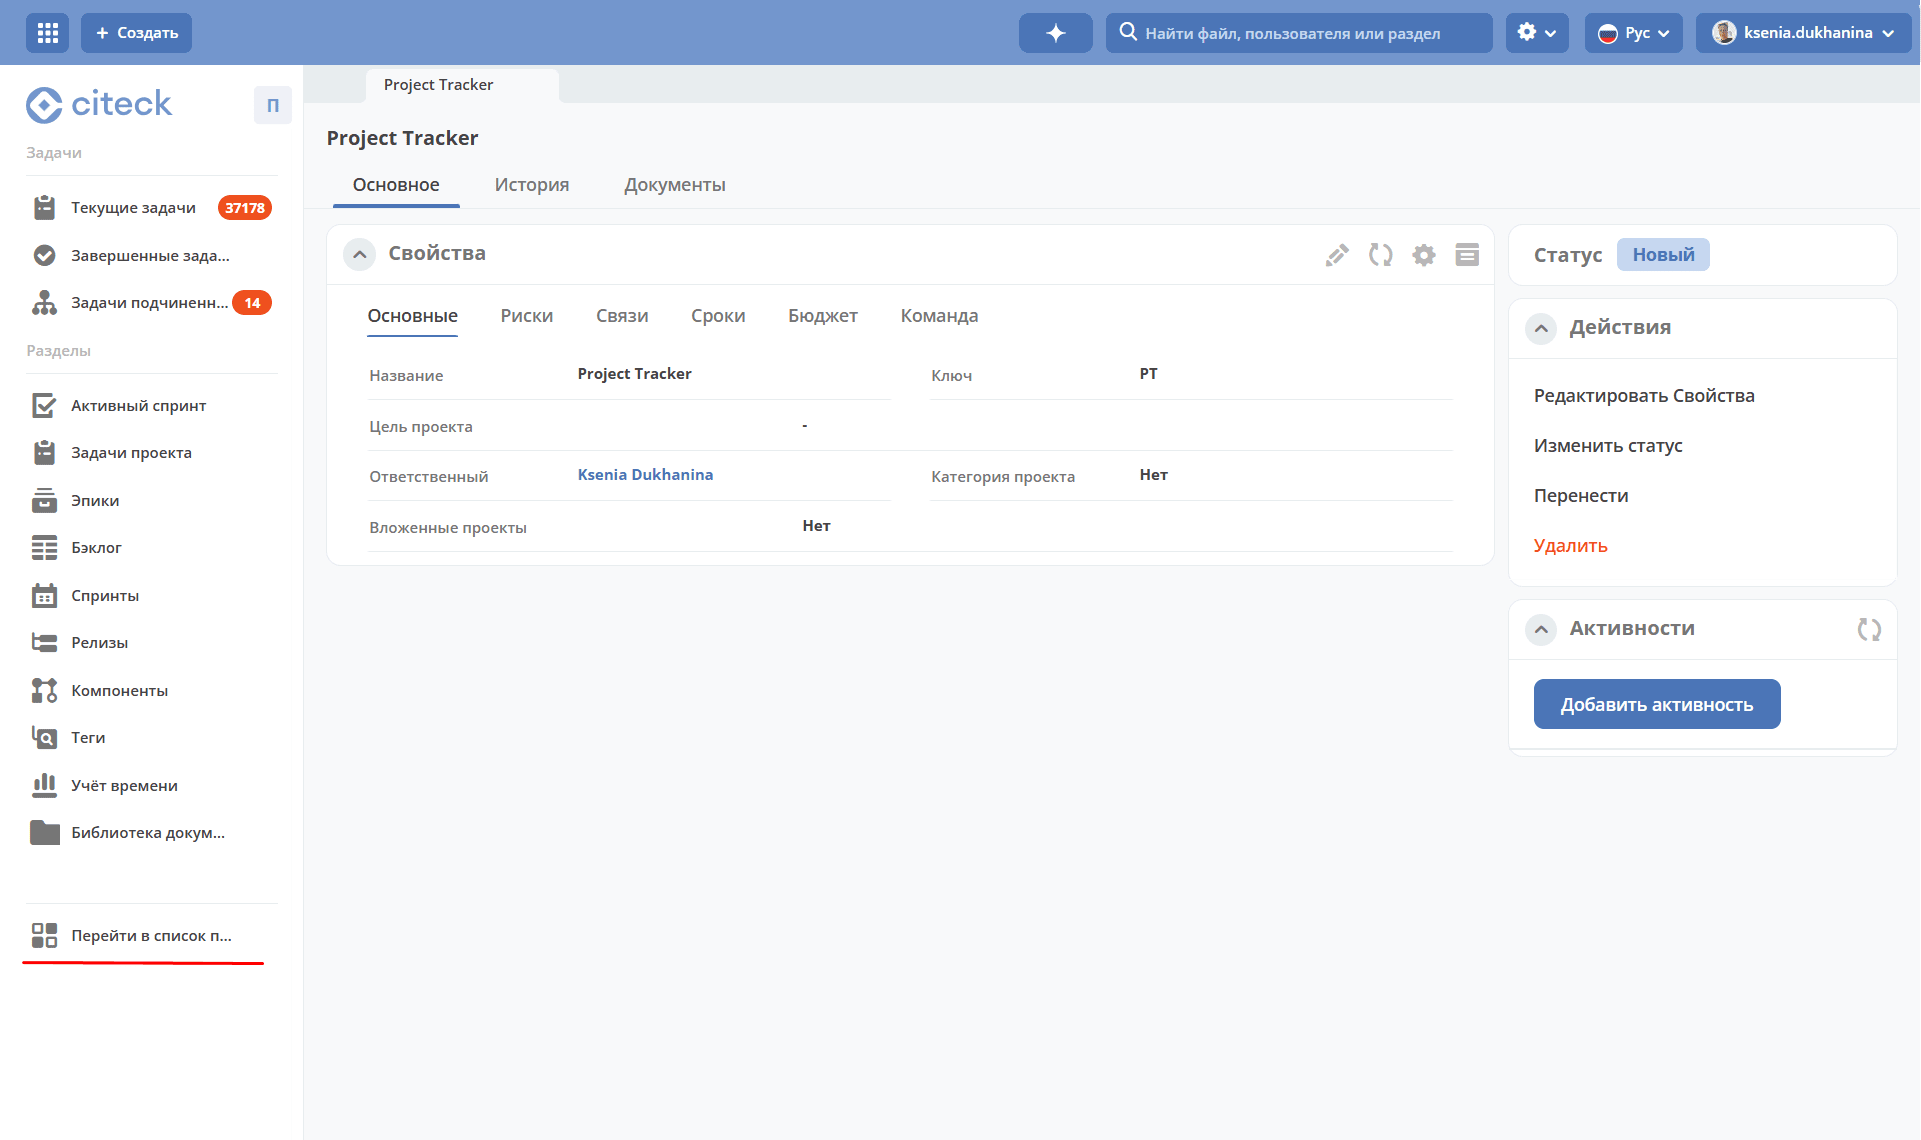
A workspace will be automatically created for the project.
Project workspace
Specifying workspace and project
The portfolio (1) and its projects (2) will later be available in the workspace list:
You can also navigate to the portfolio from the project:
The project card contains the «Activities» widget.
Granting access to the workspace
Switch to edit mode:
Workspace card:
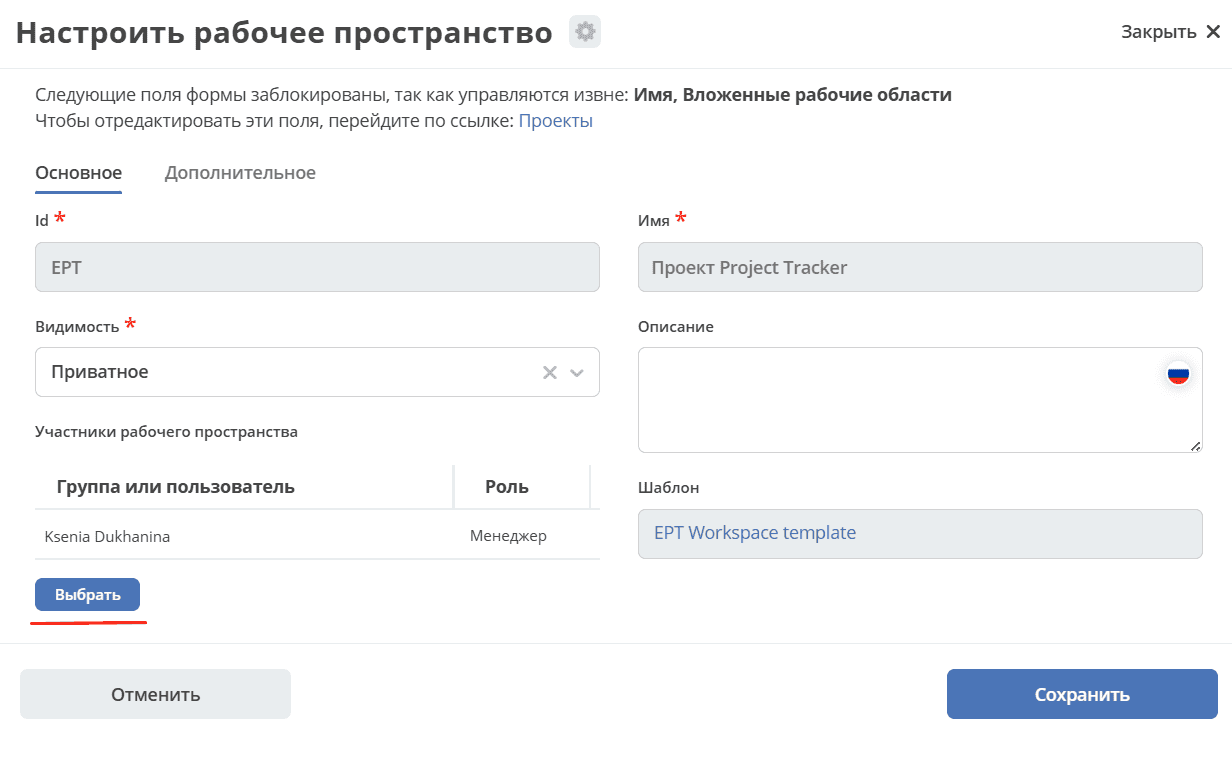
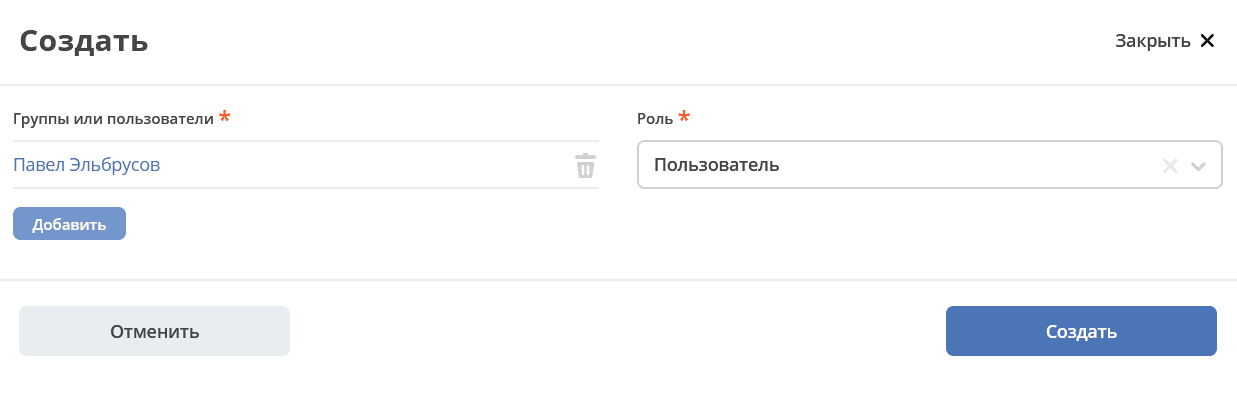
Define the participants. A participant can have user or manager rights (with the ability to manage the workspace). The user creating the space receives the «Manager» role.
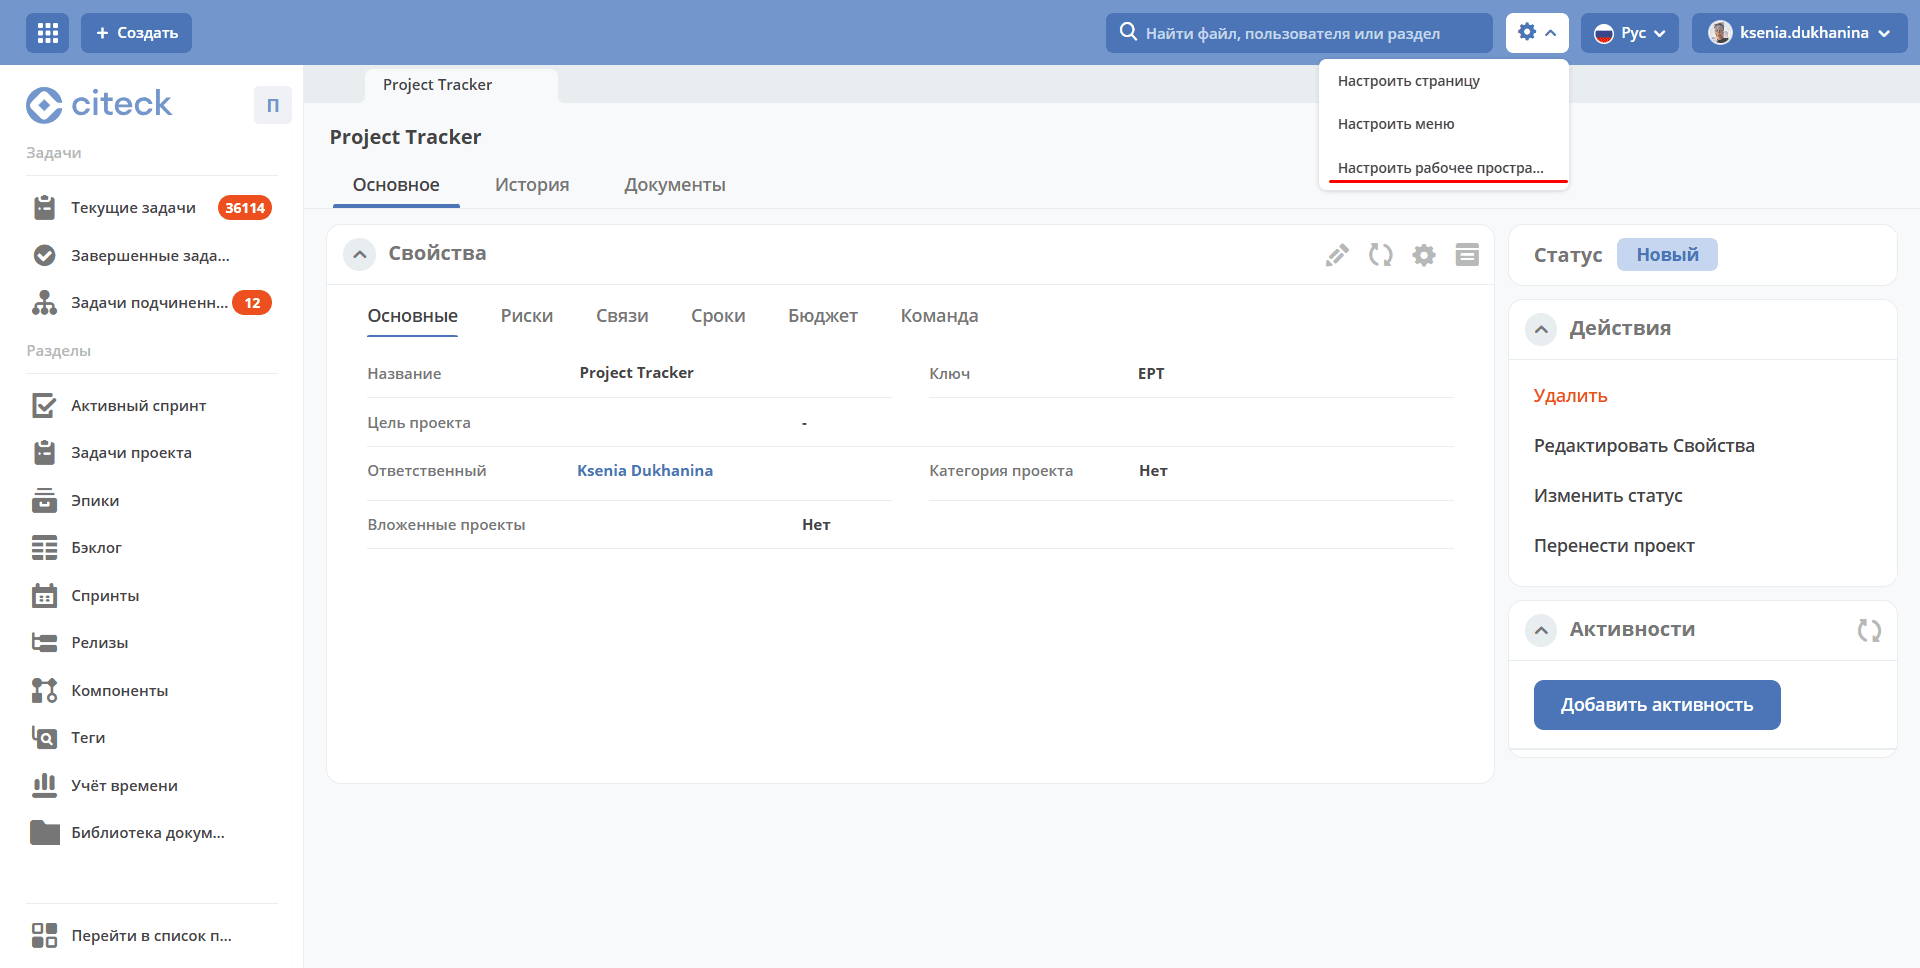
Workspace settings
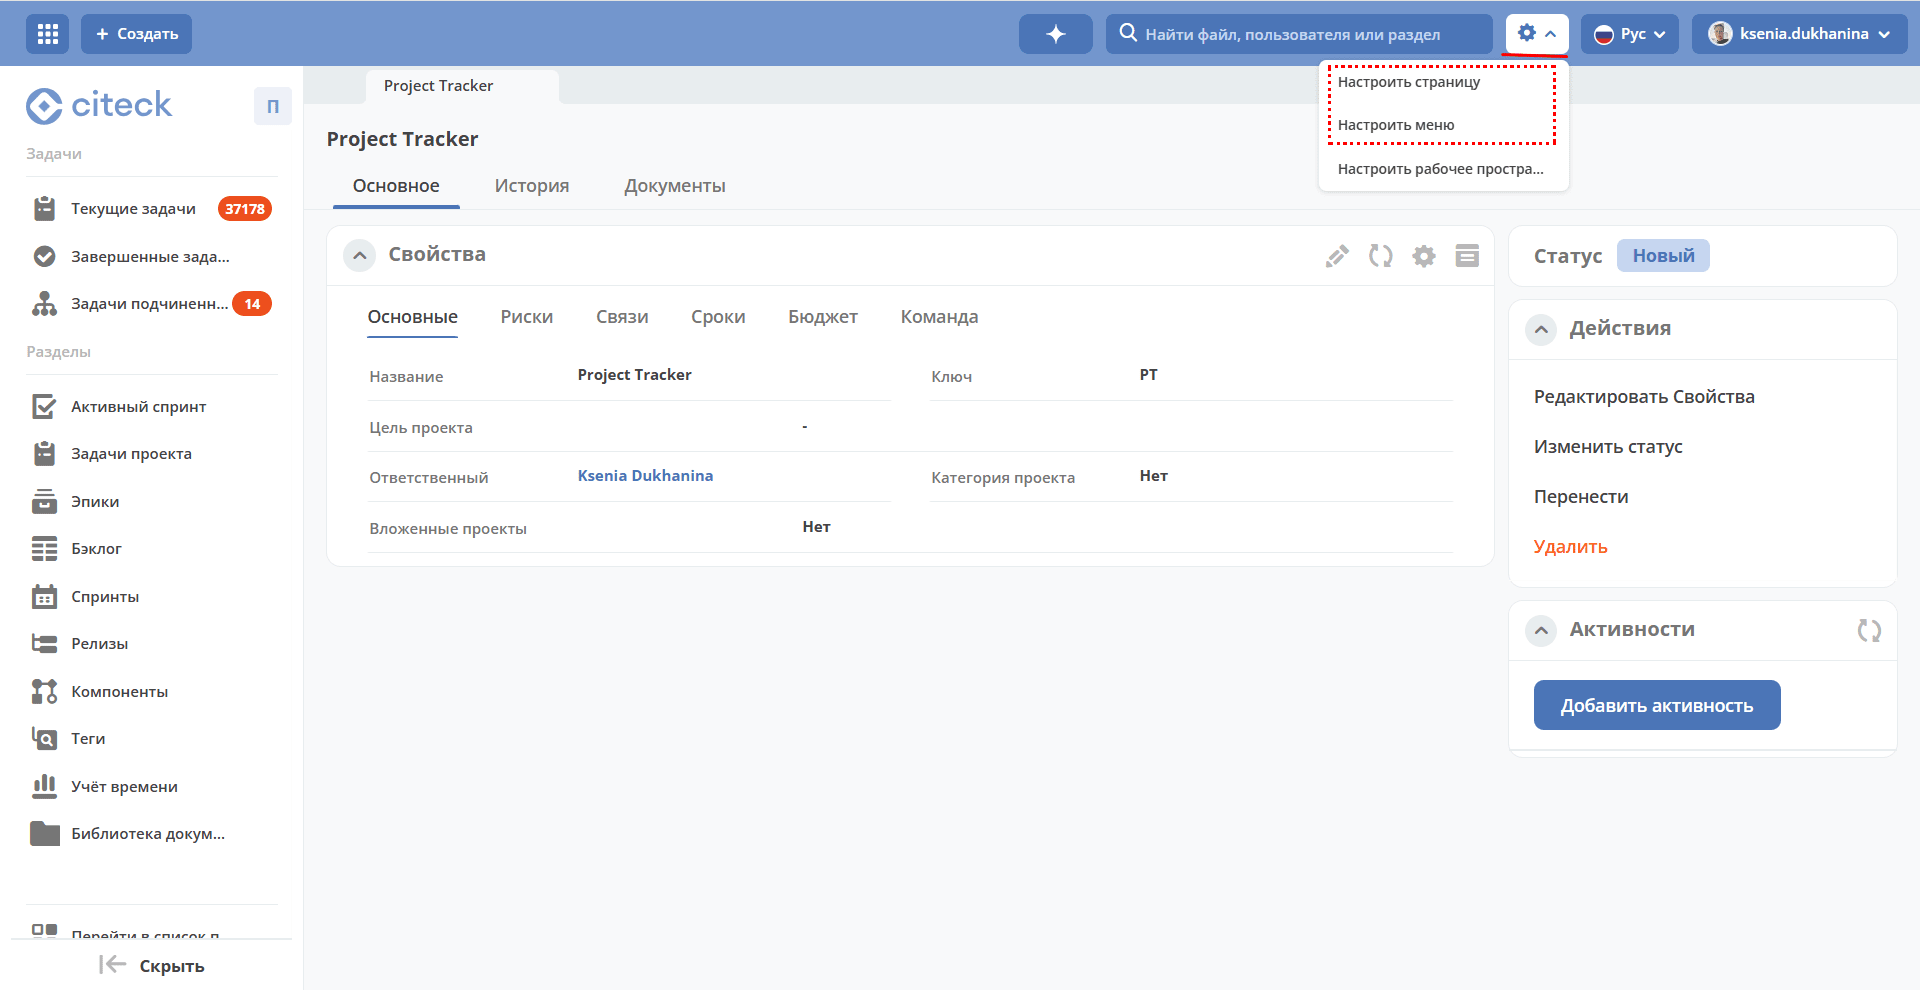
See detailed information on workspace settings
Project Actions
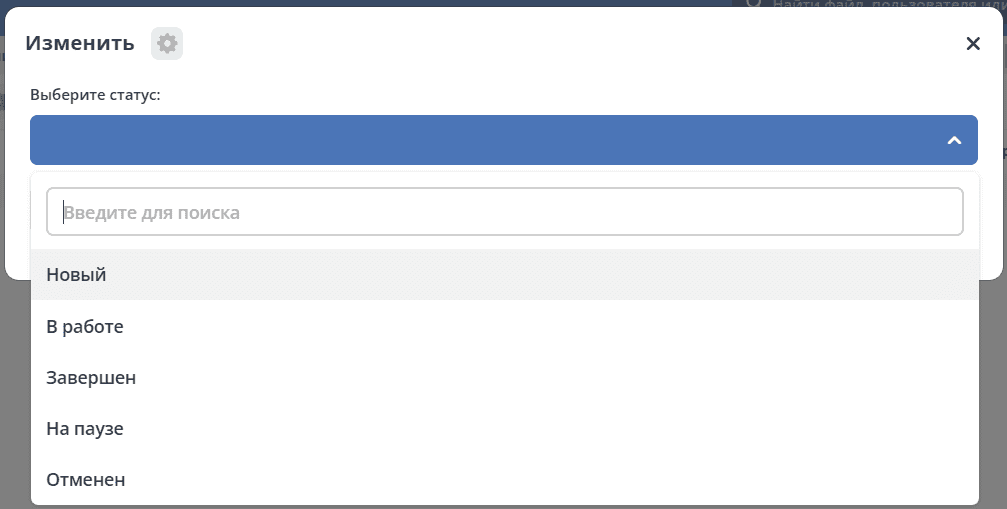
Change Status
Changing the project status:
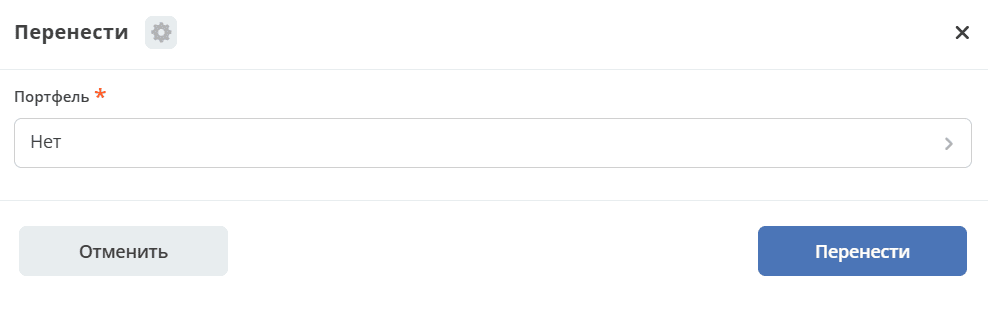
Move Project
Moving the project to another project portfolio:
Scrum project
Sections
Active sprint
The Scrum board displays tasks the team is currently working on. Tasks can be created and updated, and moved through the workflow using the ‘drag and drop’ function.
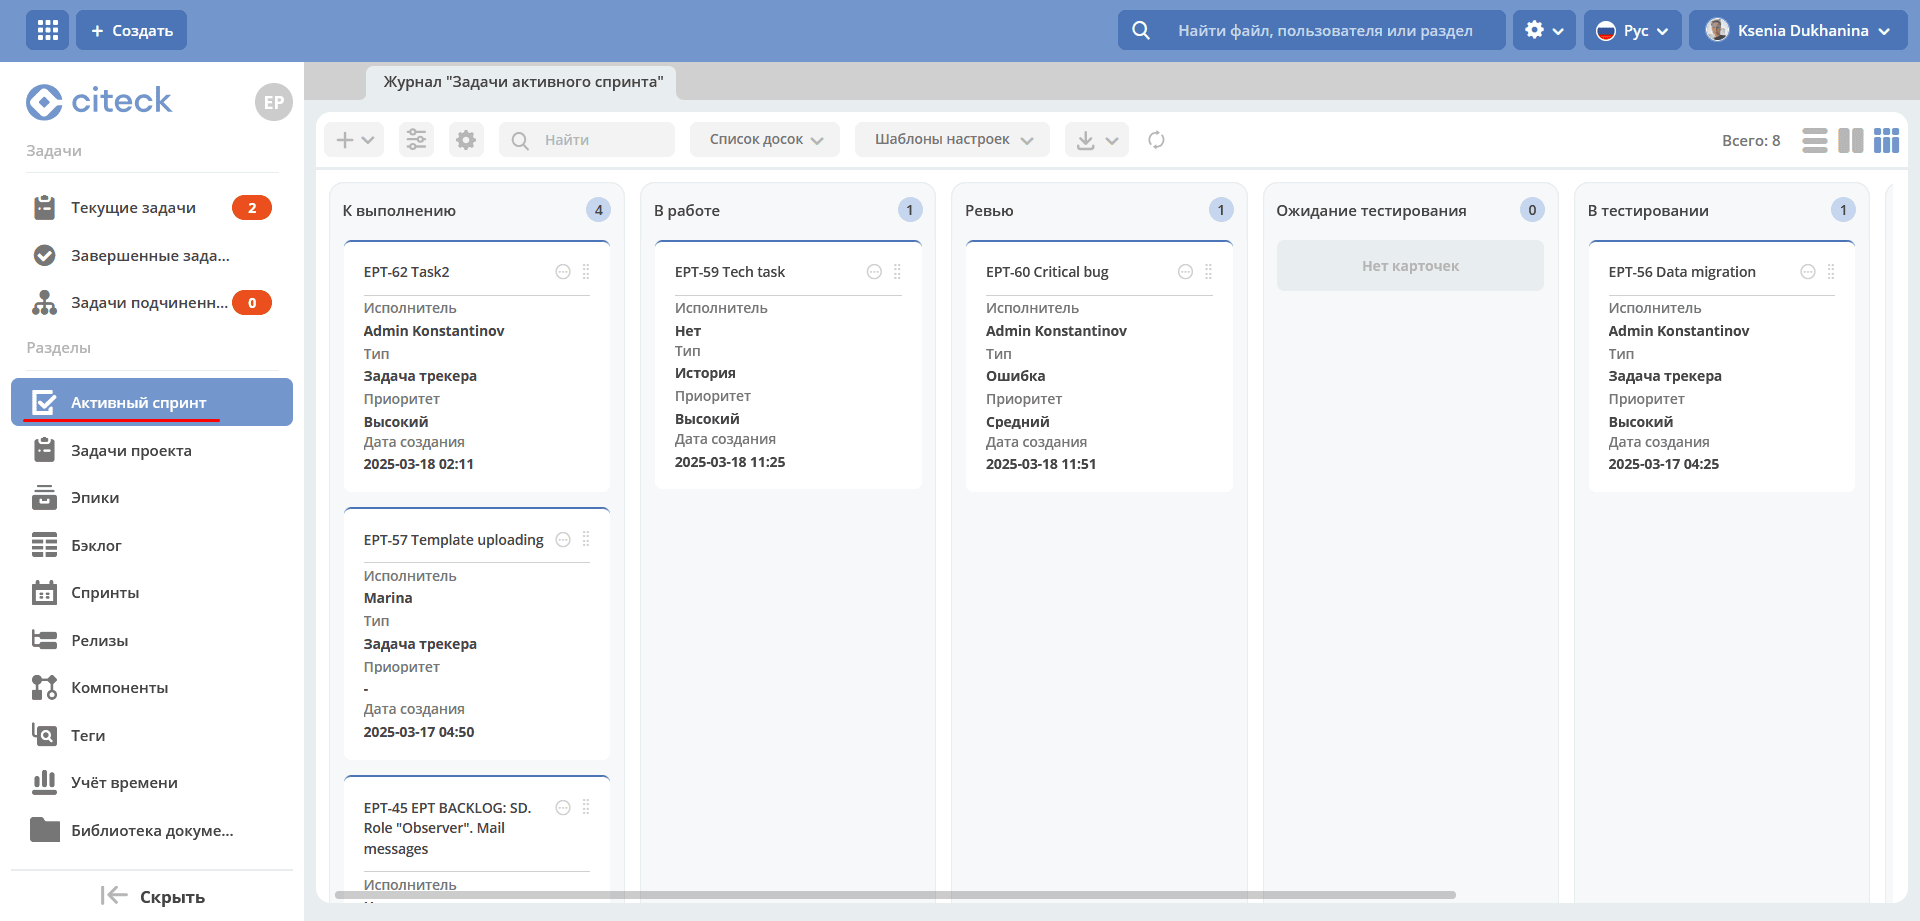
Note
Only 1 sprint can be active.
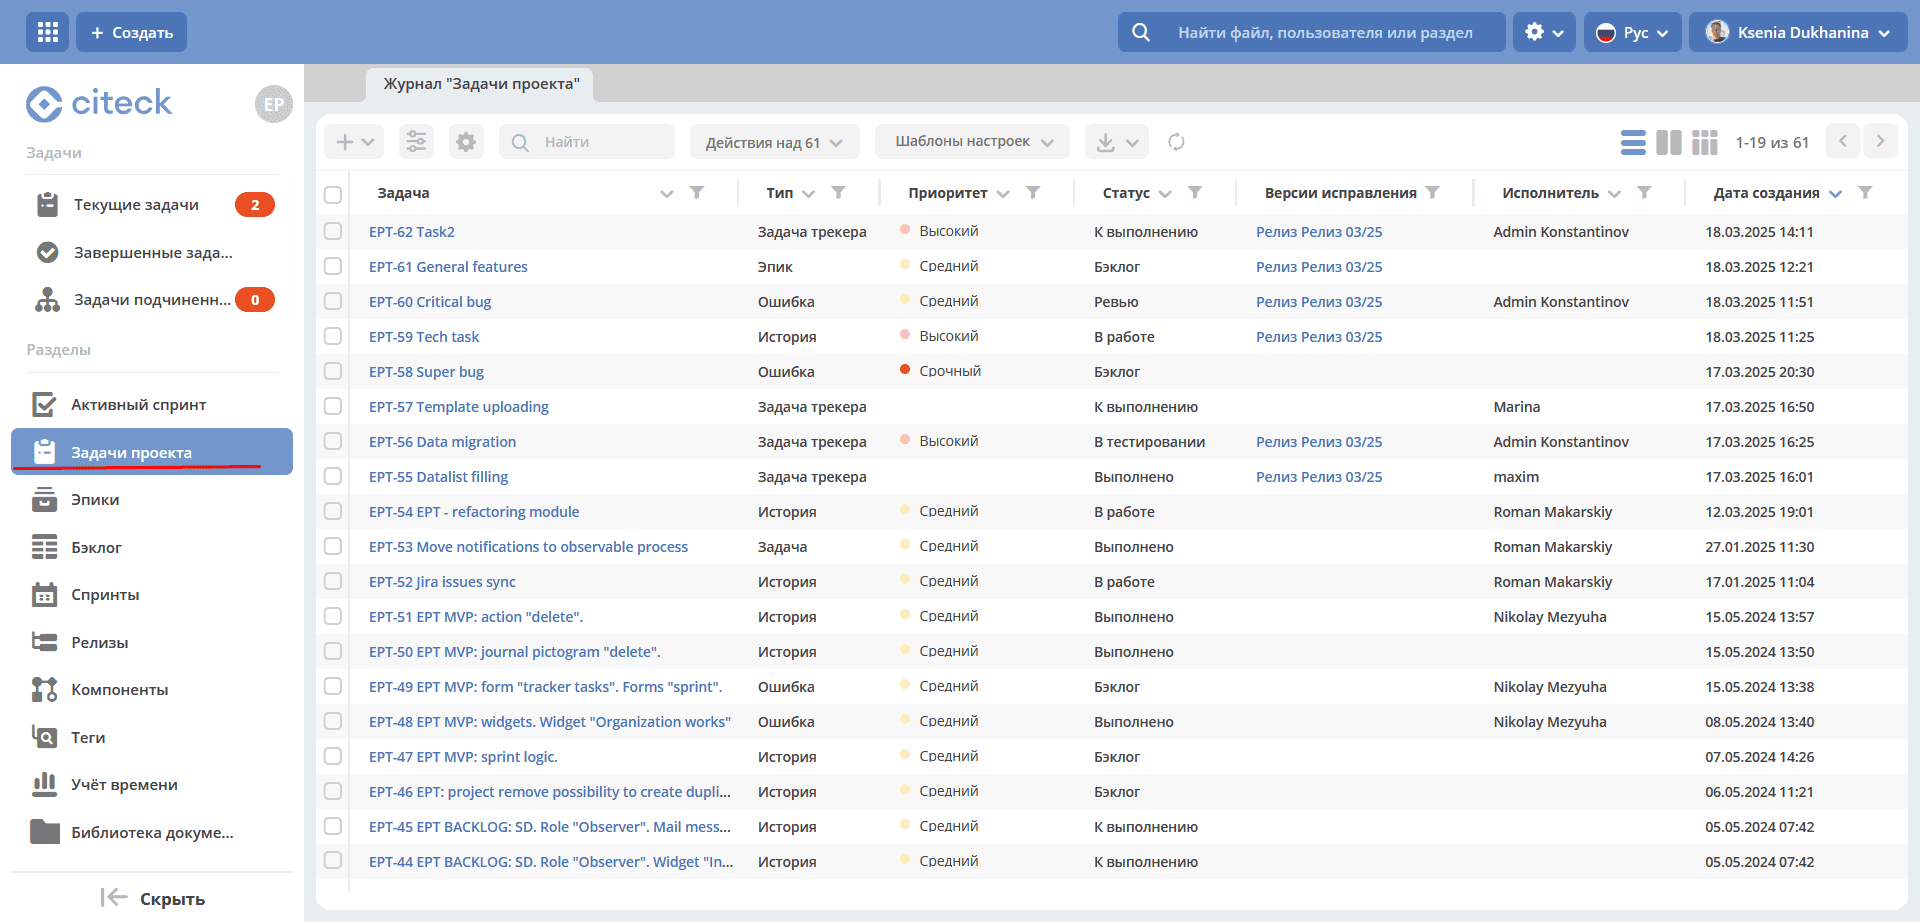
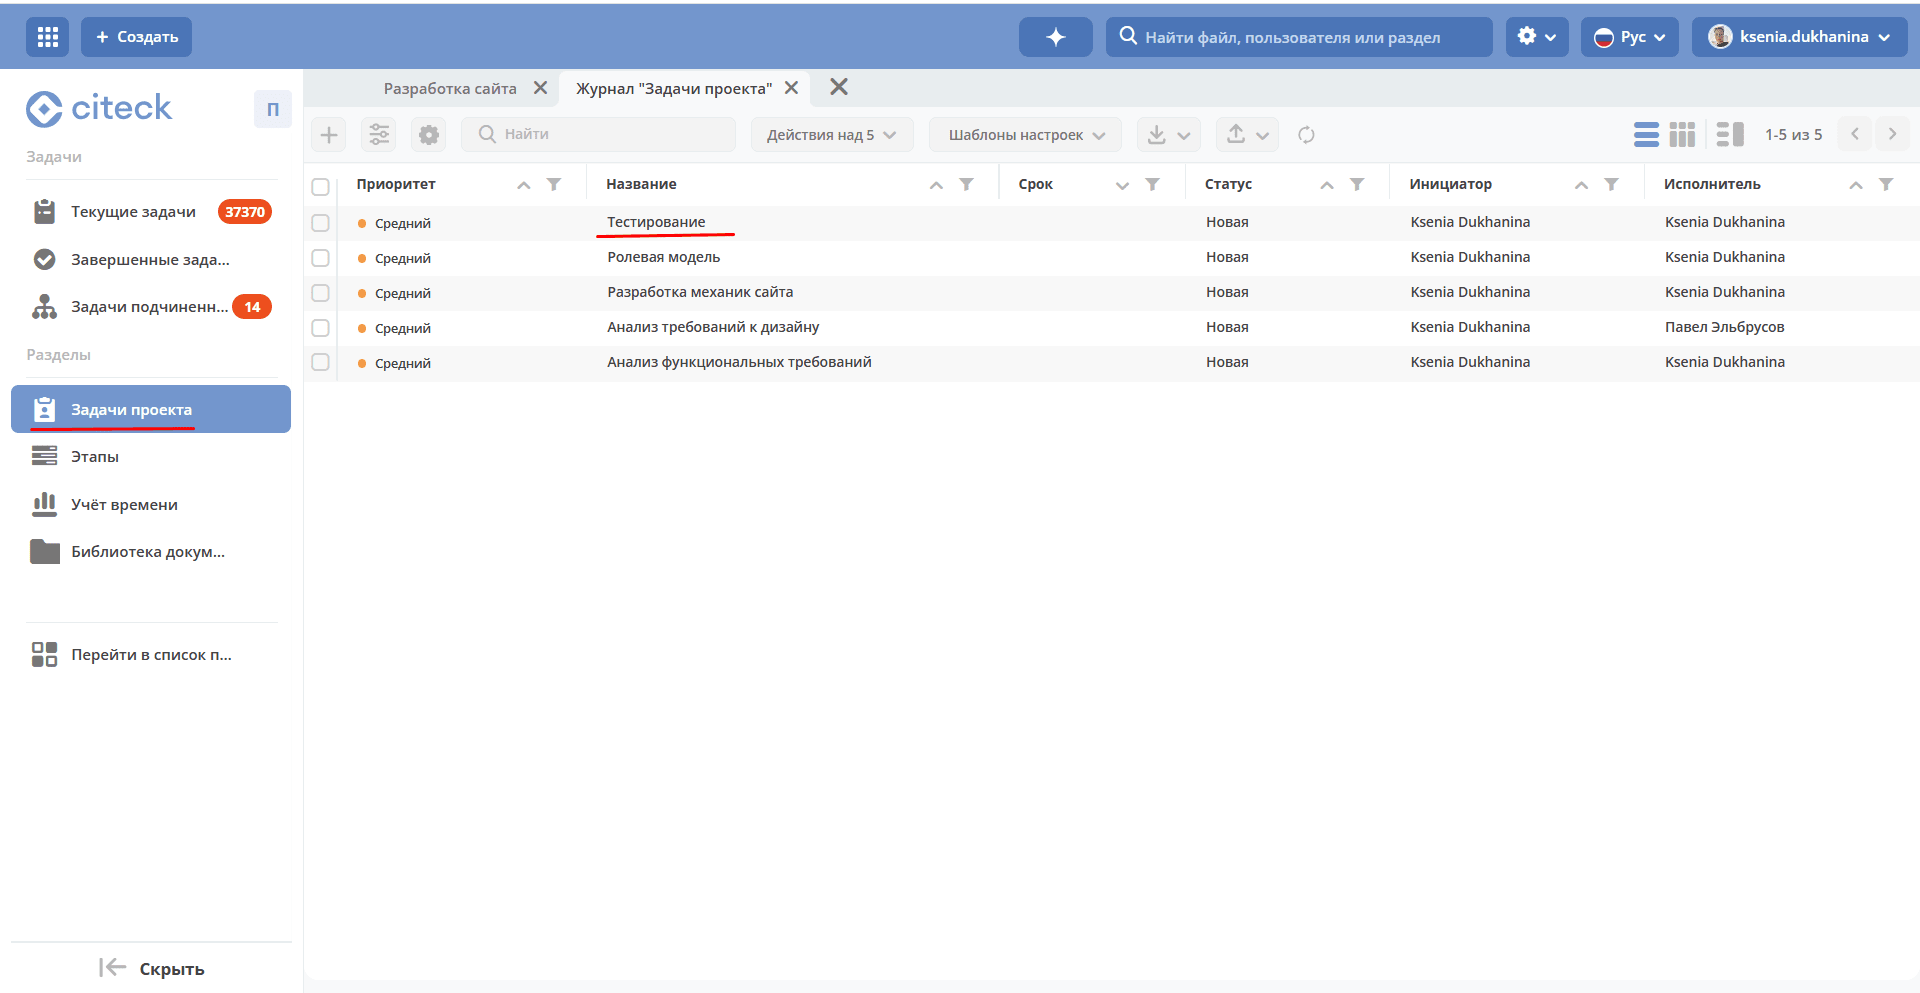
Project tasks
Contains a list of project tasks. Tasks in all statuses are shown.
Creating a task
Click +, select the task type
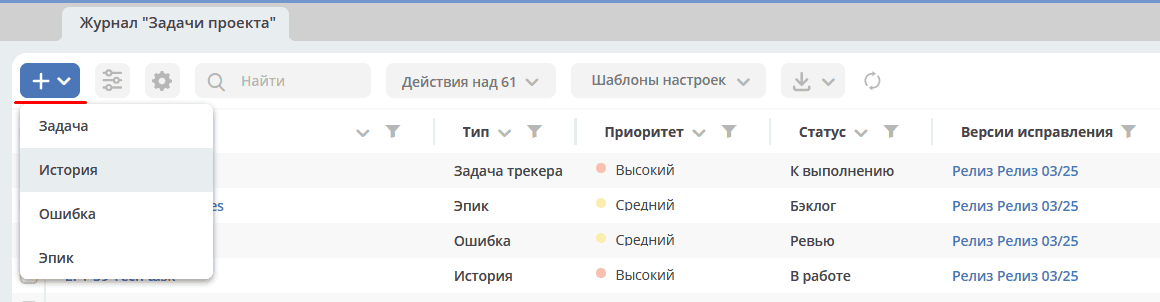
and fill in the form fields, attach files if necessary:
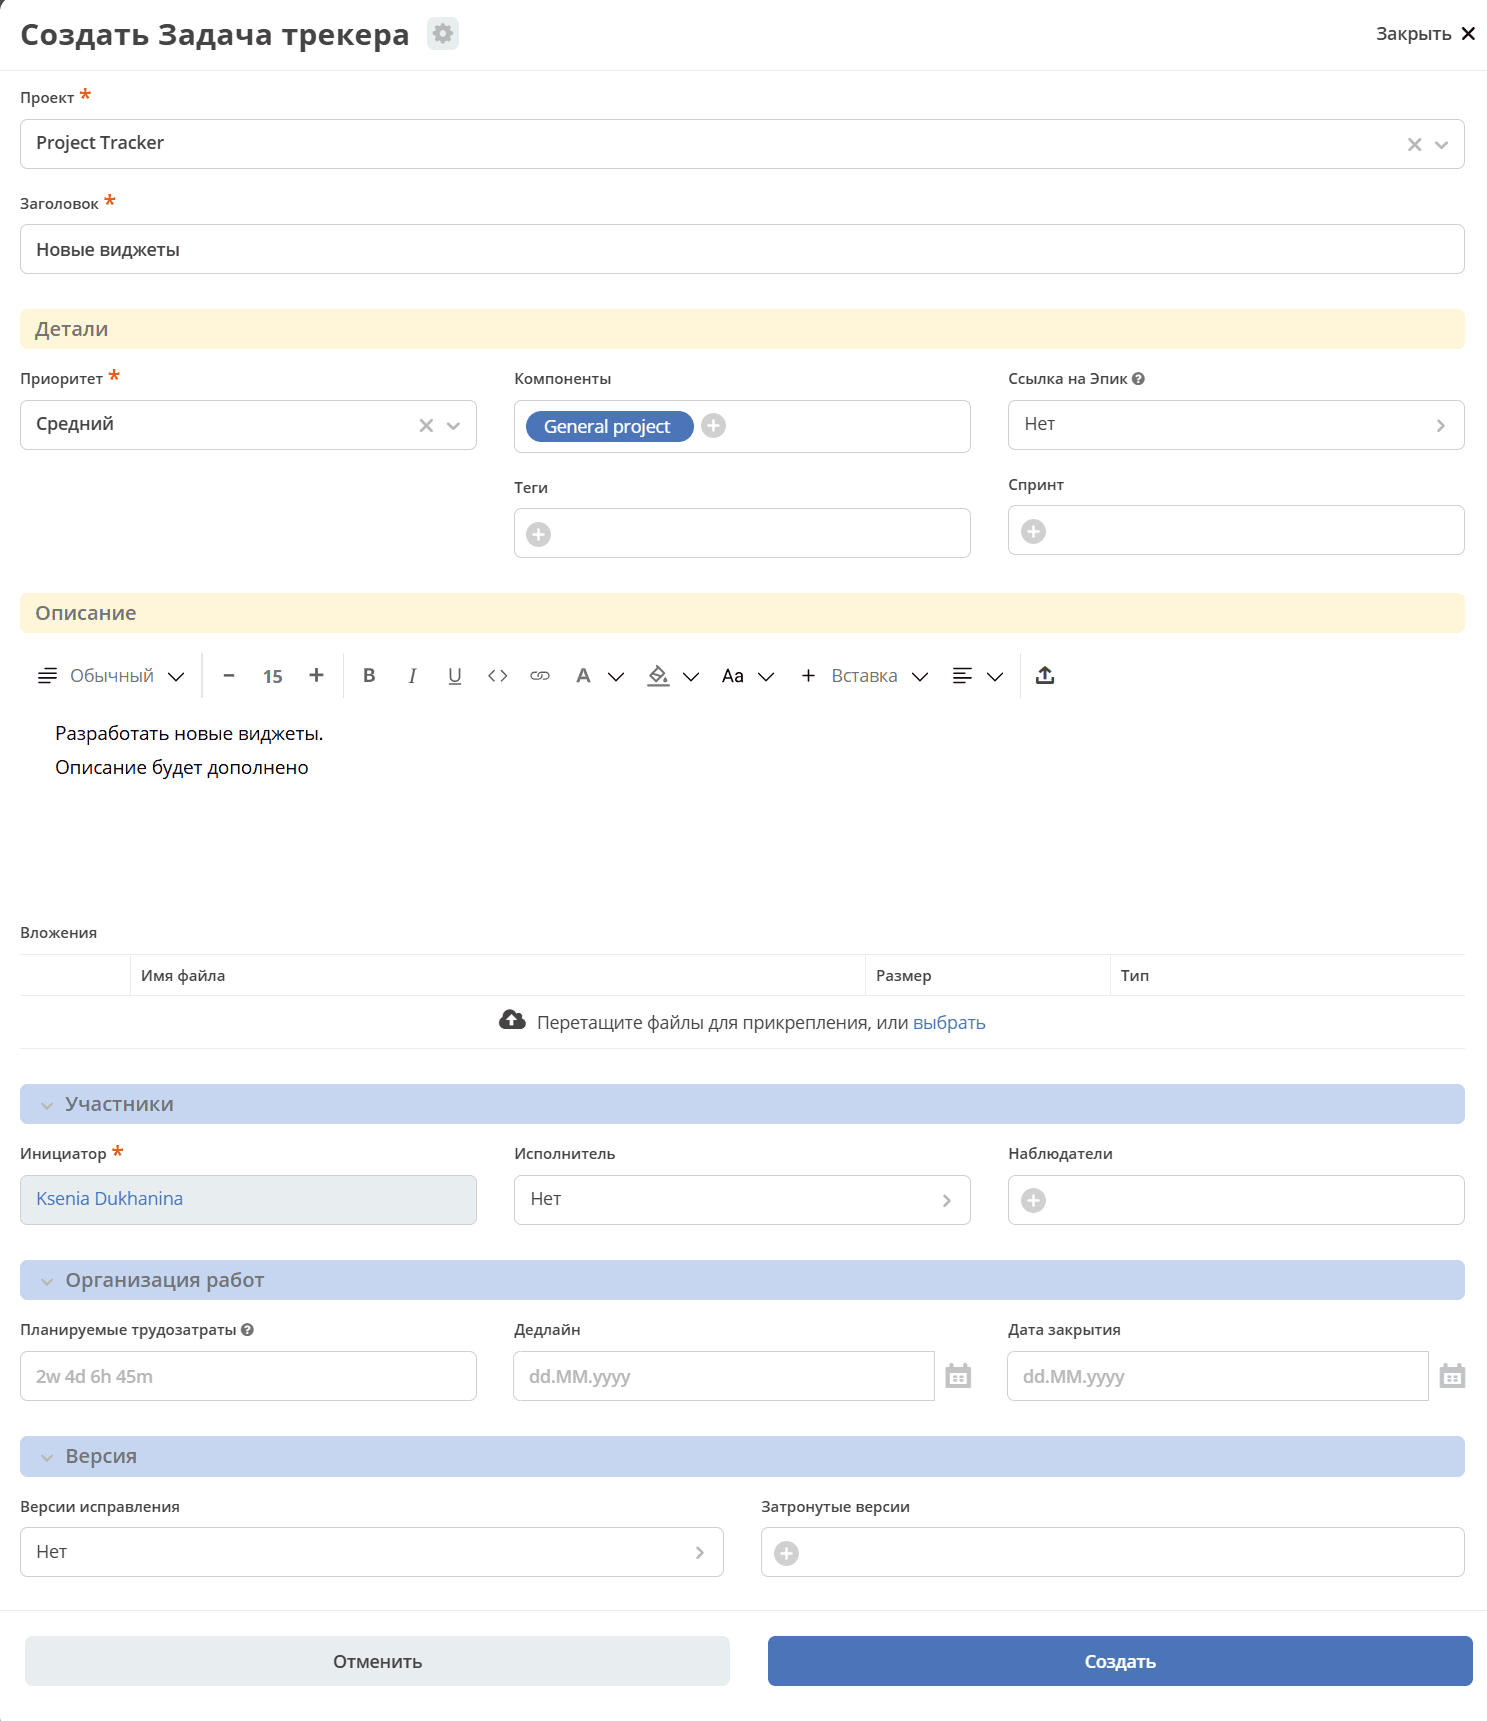
The default task status upon creation is backlog.
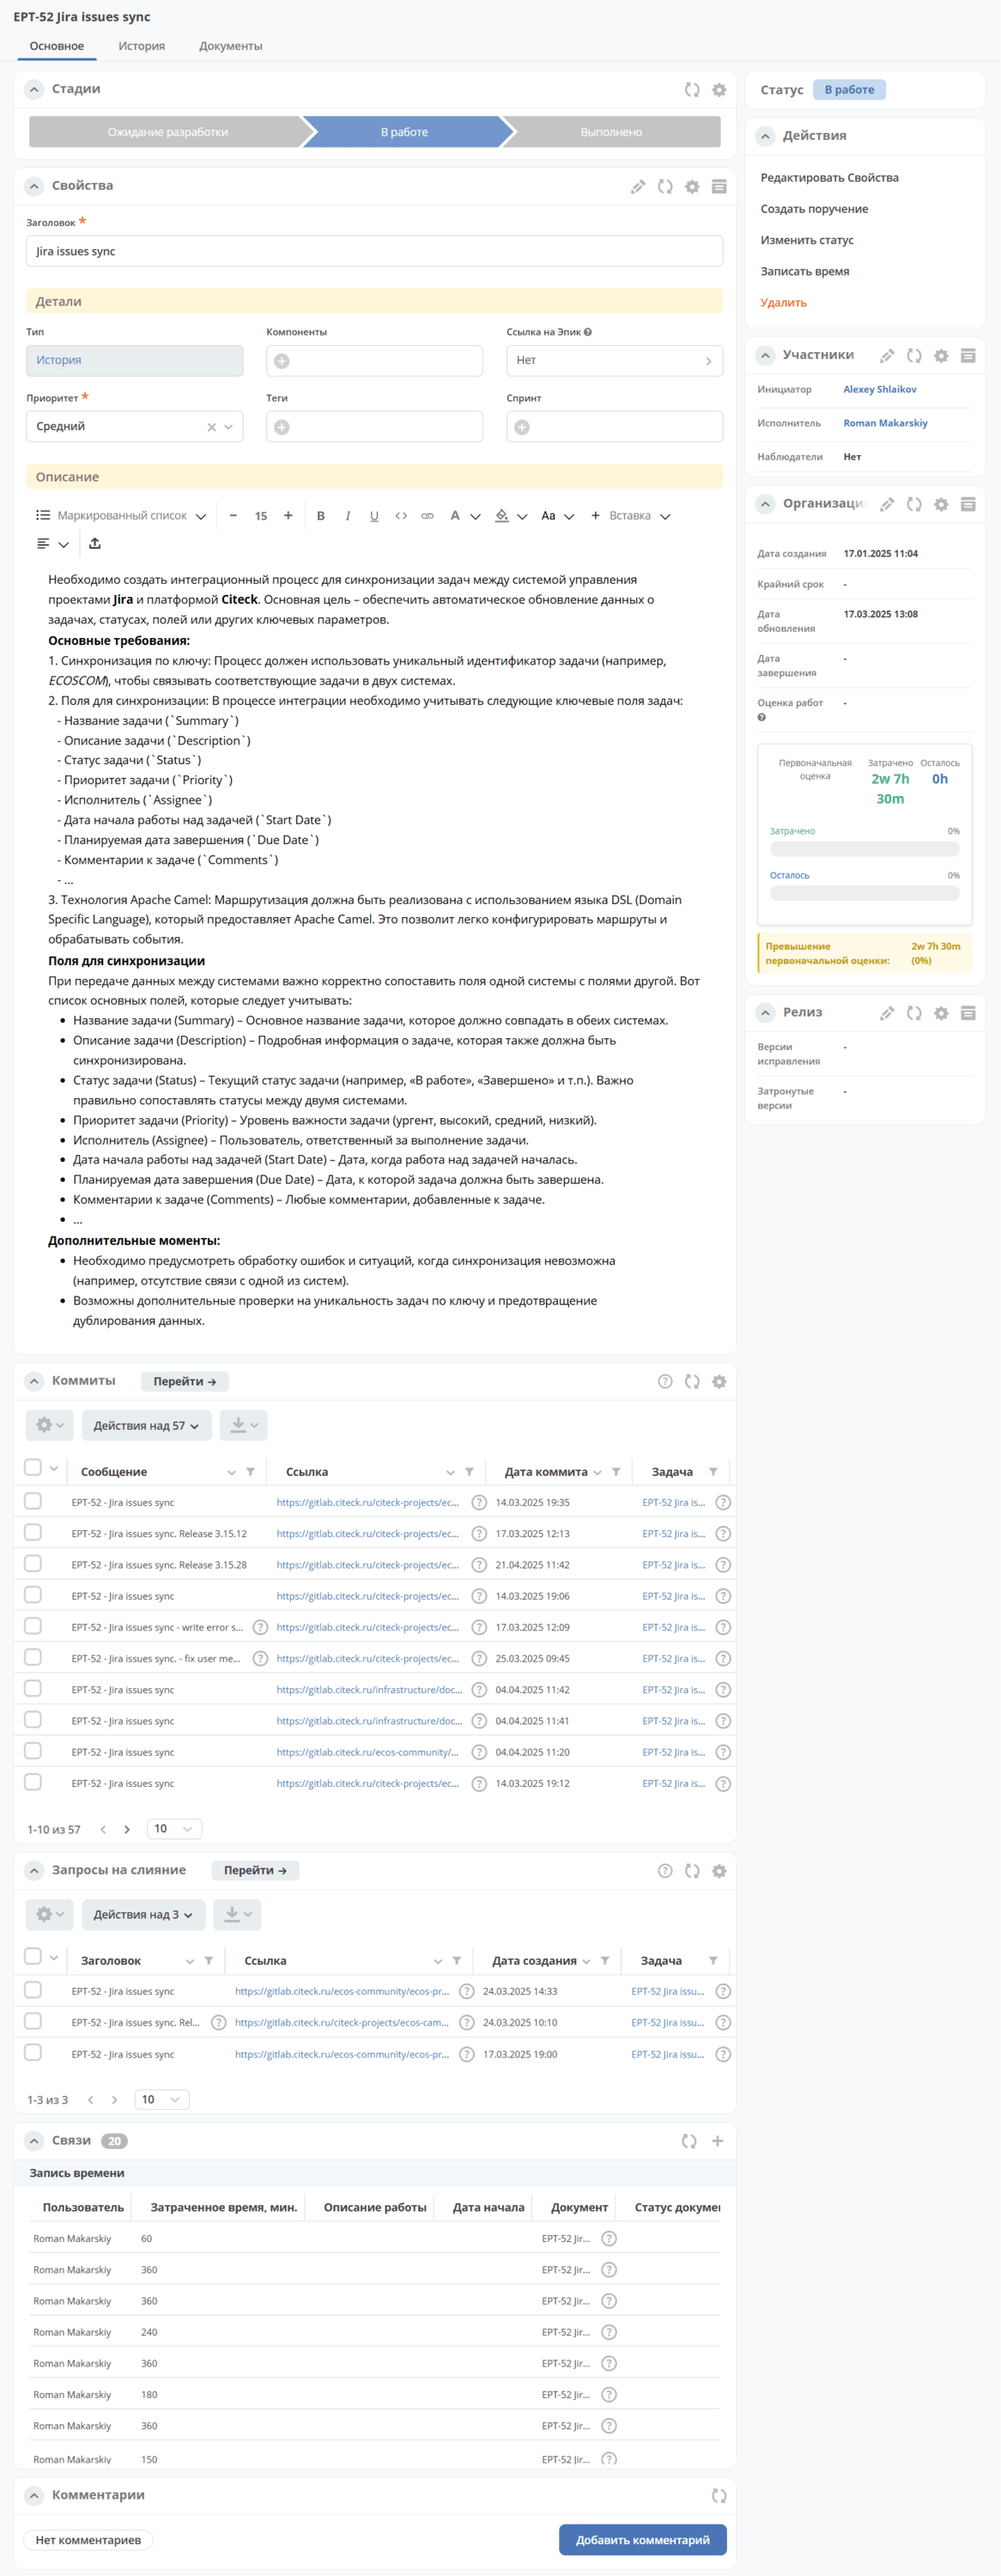
Task card
The task card consists of widgets:
Note
For a commit or MR (merge request) link to be added to the task, specify the task identifier from Project tracker in the commit comment (Commit message) or the merge request title (Title) in GitLab. For setting up synchronization with Gitlab, see below
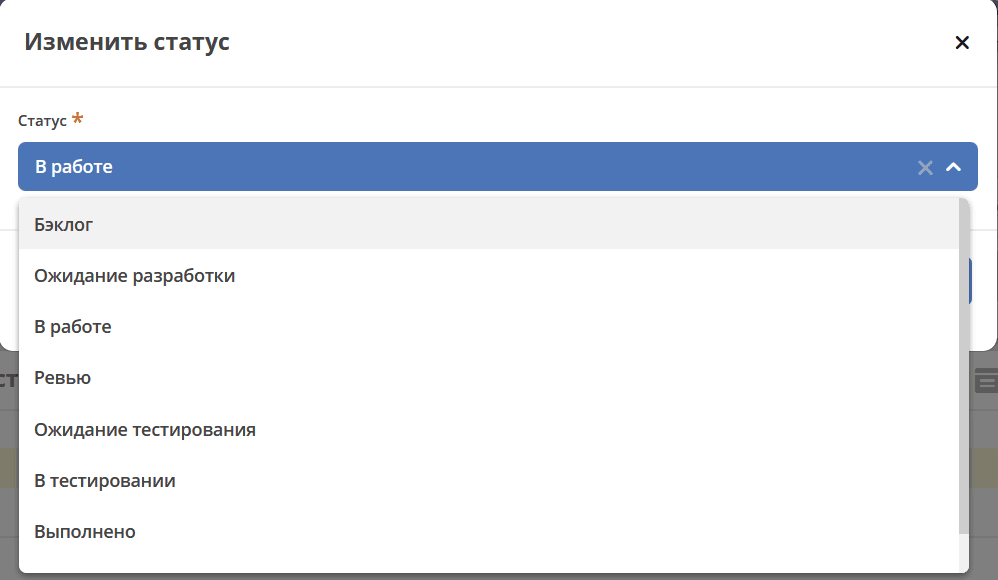
Changing status
Changing a task’s status is done via the «Change status» action:
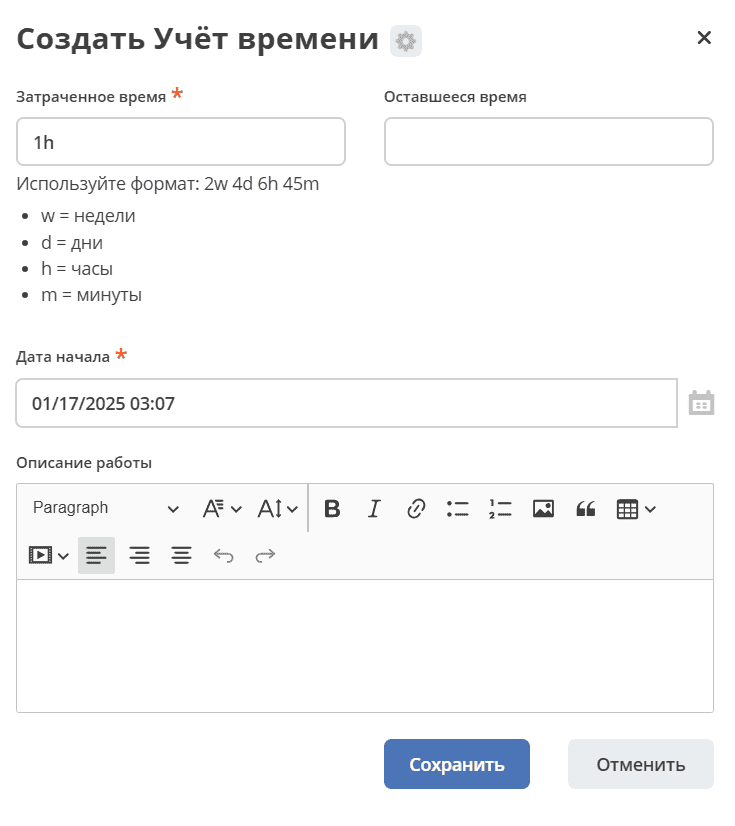
Logging time worked on a task
Logging time worked on a task is done via the «Log time» action:
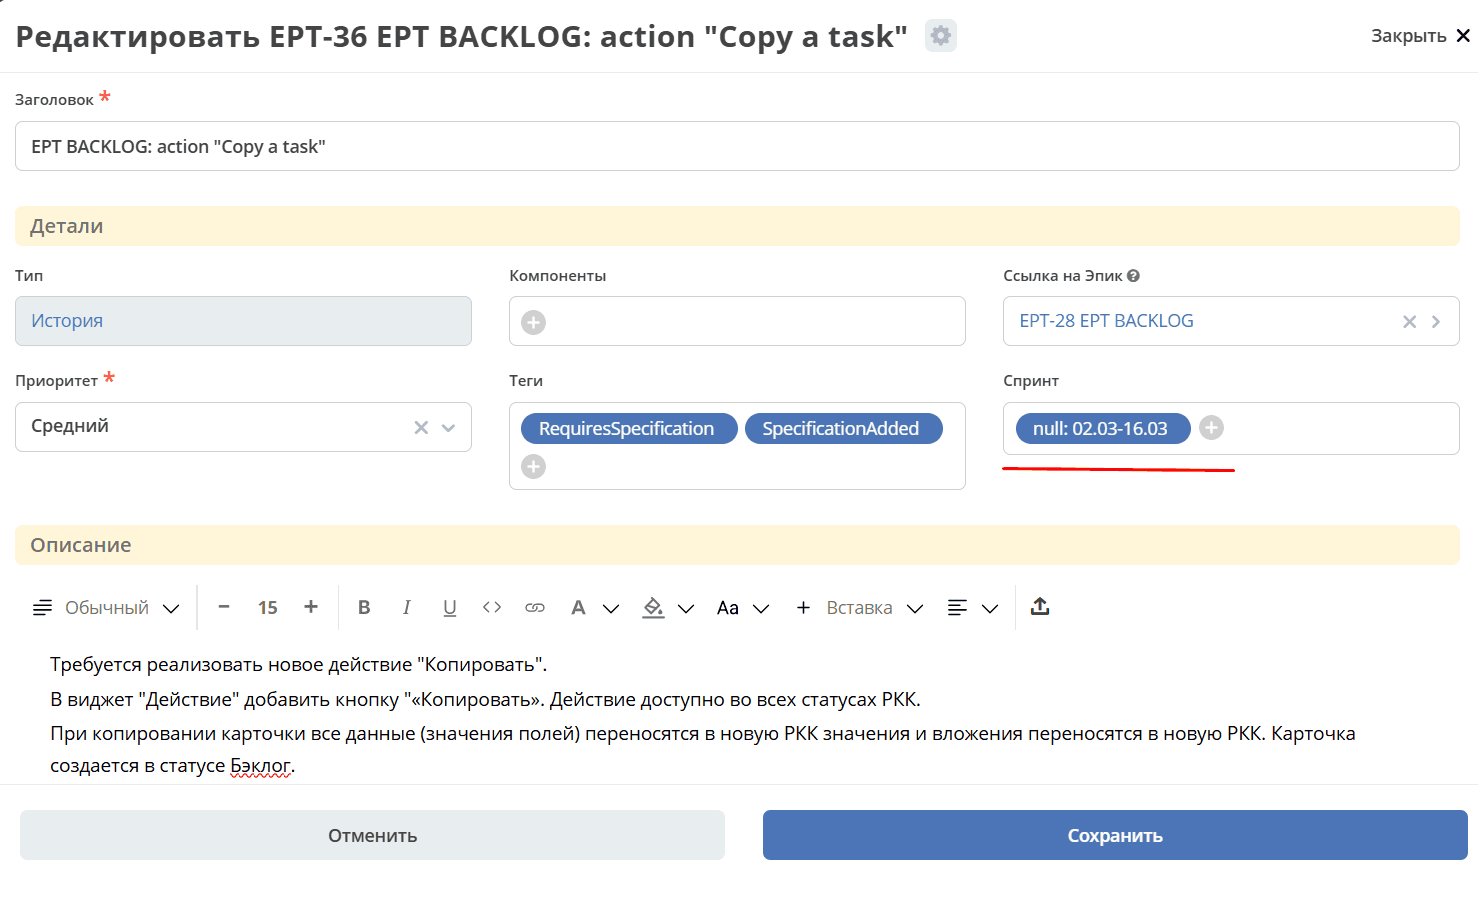
Adding a task to a sprint
Specify the sprint directly in the task card:
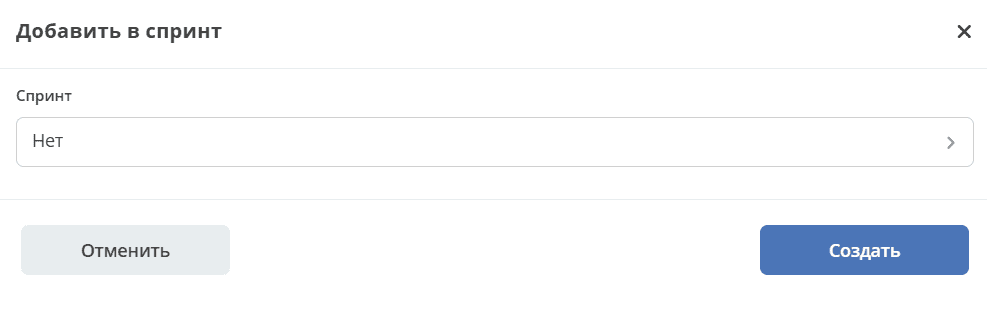
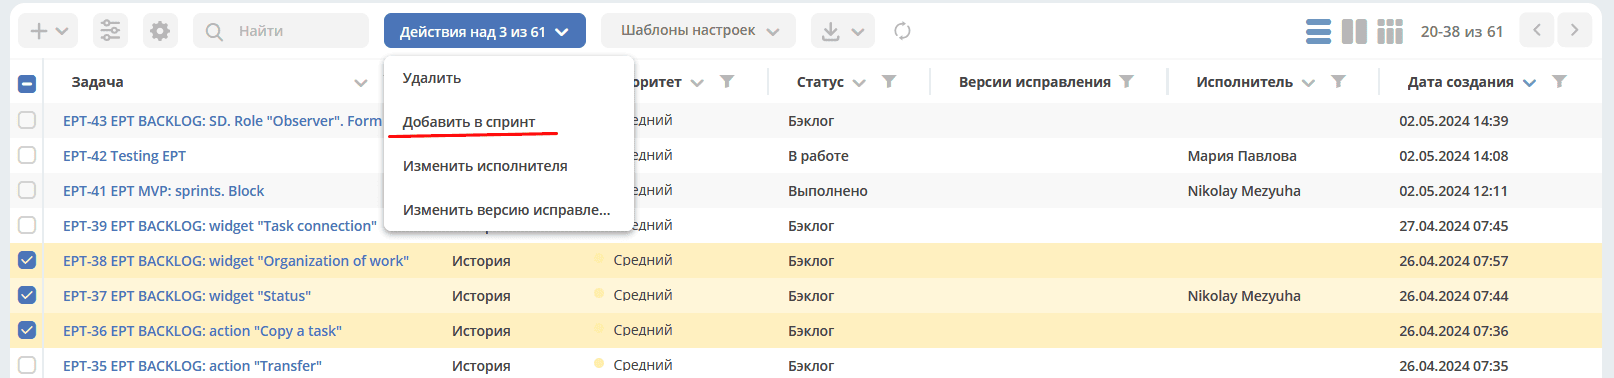
Select an action in the journal to quickly add a task to a sprint:
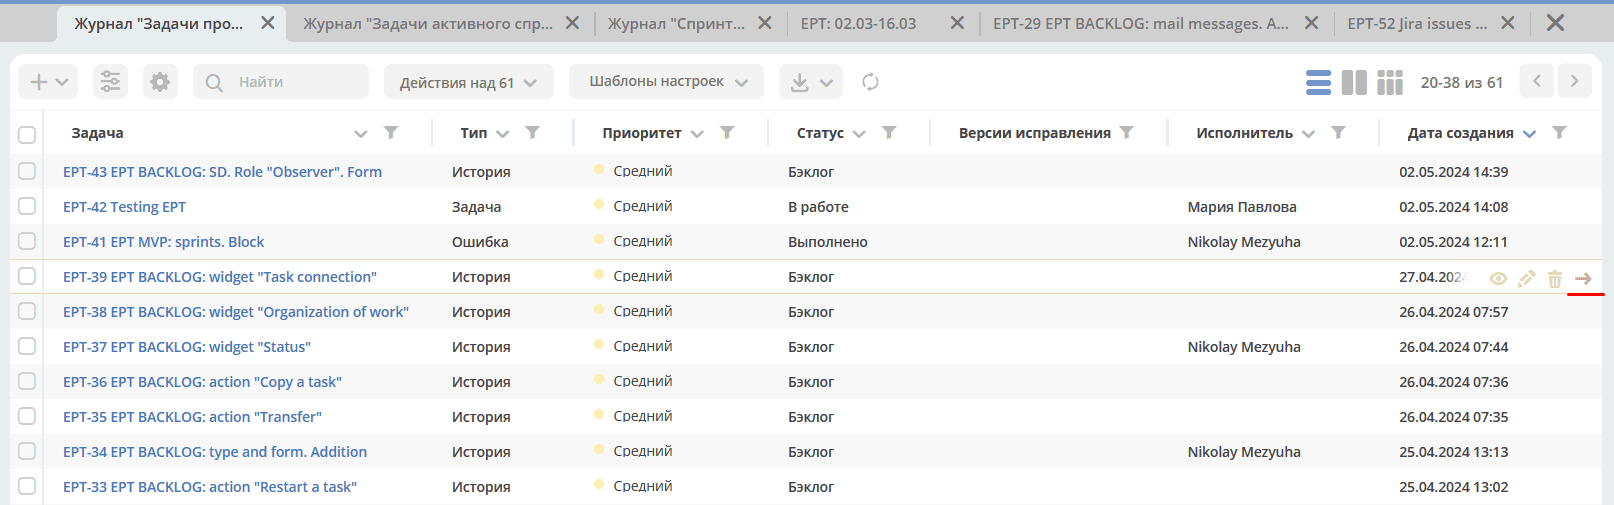
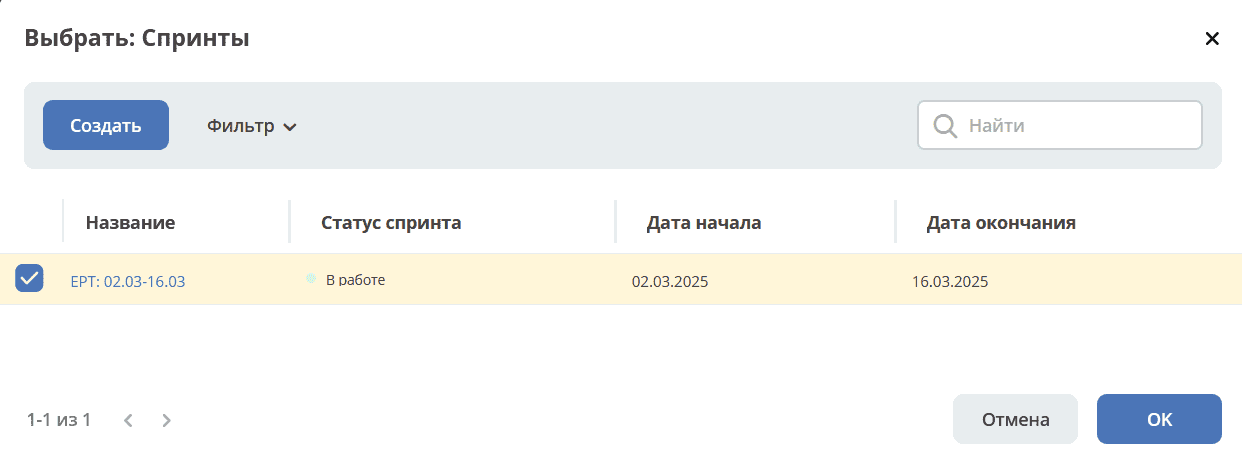
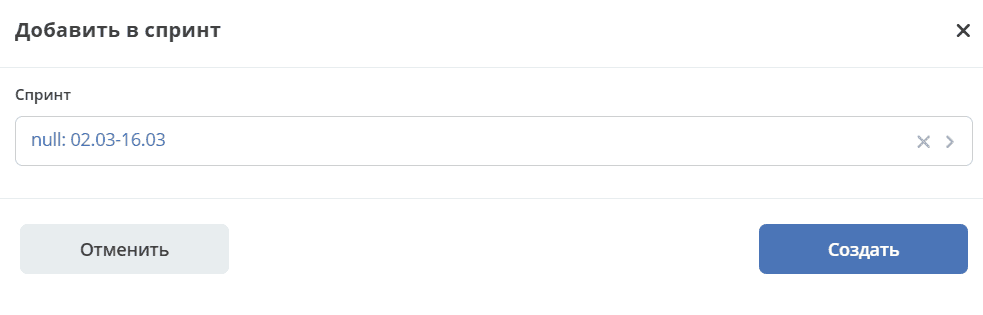
Select a sprint:
Via bulk action:
Epics
Epic — a large goal or task that includes many smaller tasks.
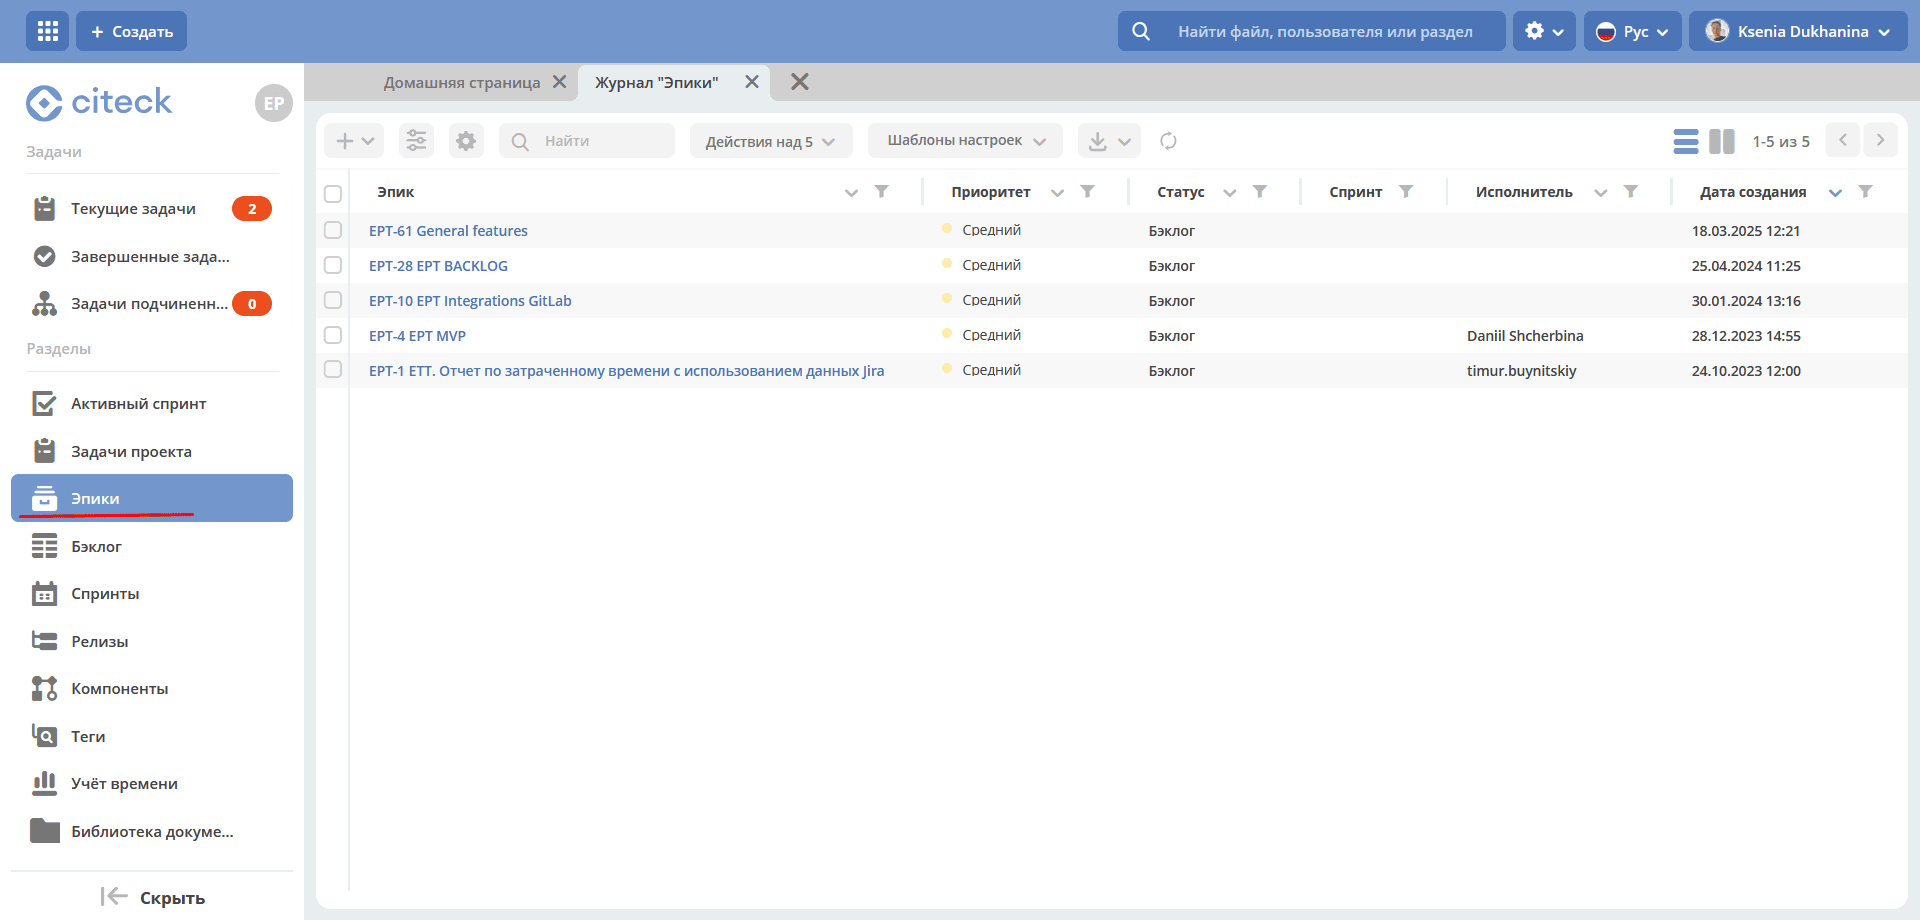
In the section, via the + button, you can create not only an epic but also tasks of other types.
Epic card

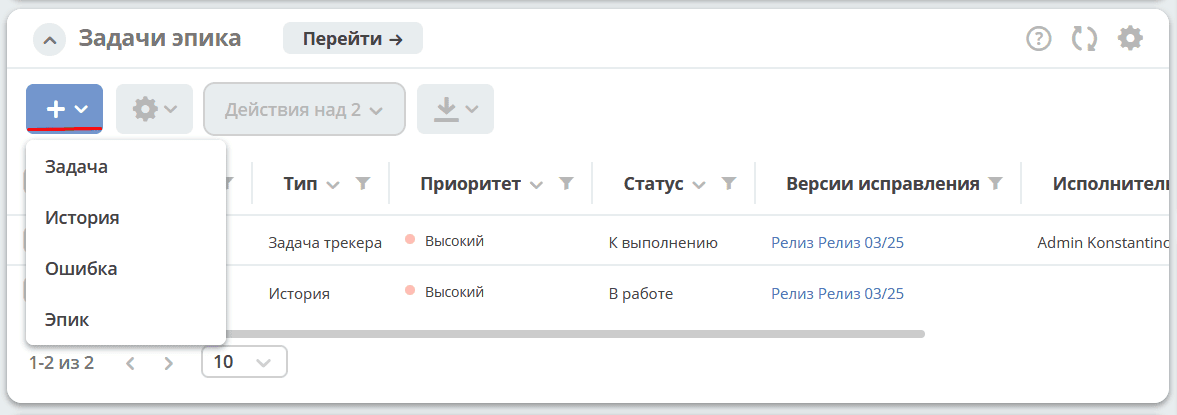
Adding a task to an epic
In the epic card, go to the «Epic tasks» widget:
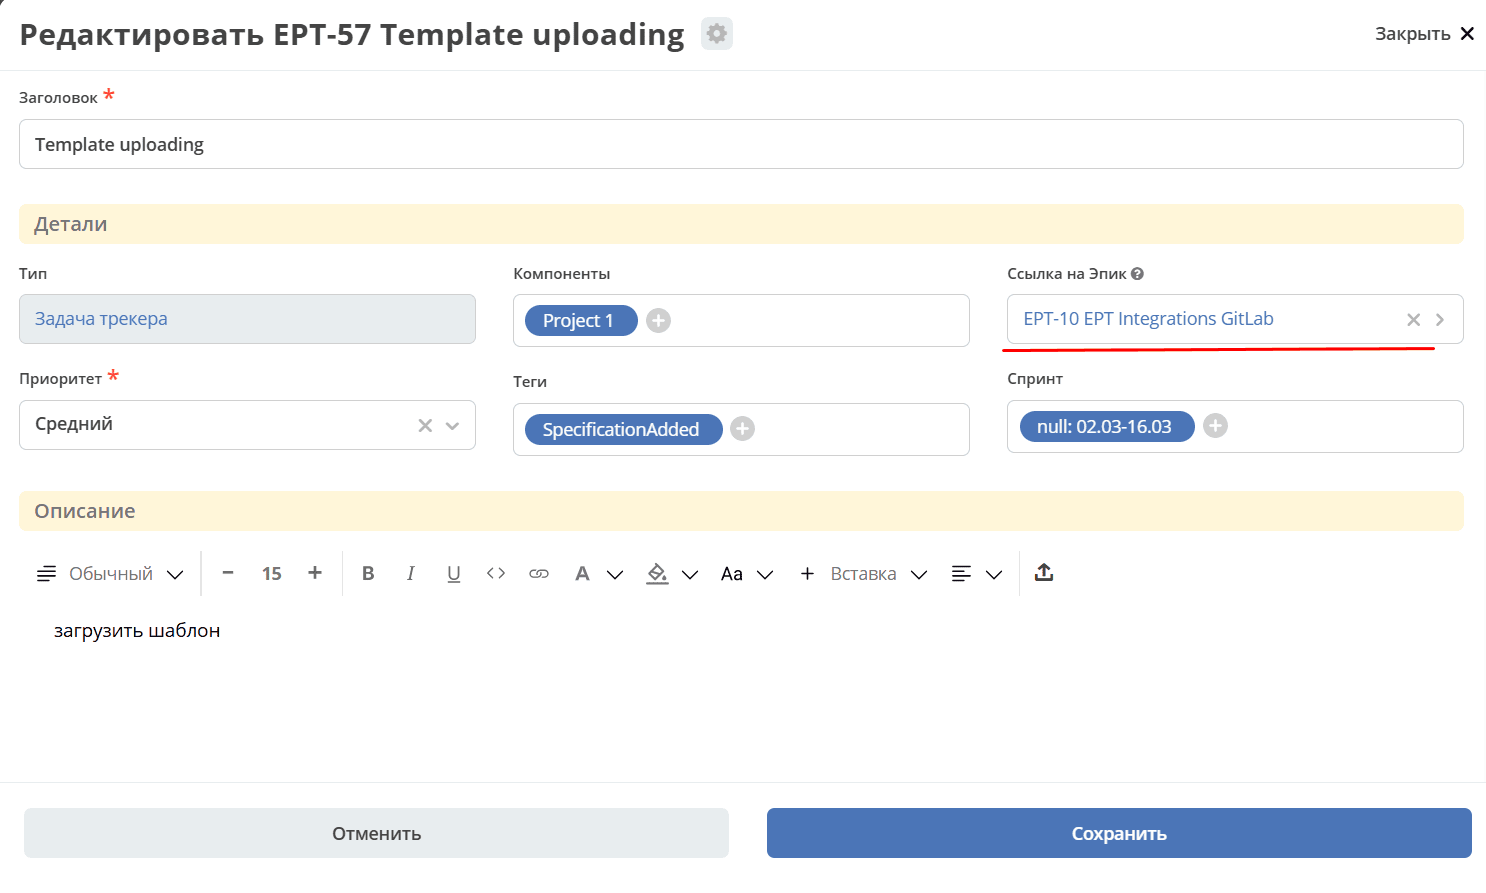
For already created tasks, specify the epic directly in the task card:
Backlog
Product backlog - an ordered and regularly updated list of all tasks planned for product development and improvement. Only tasks with the «Backlog» status are shown.
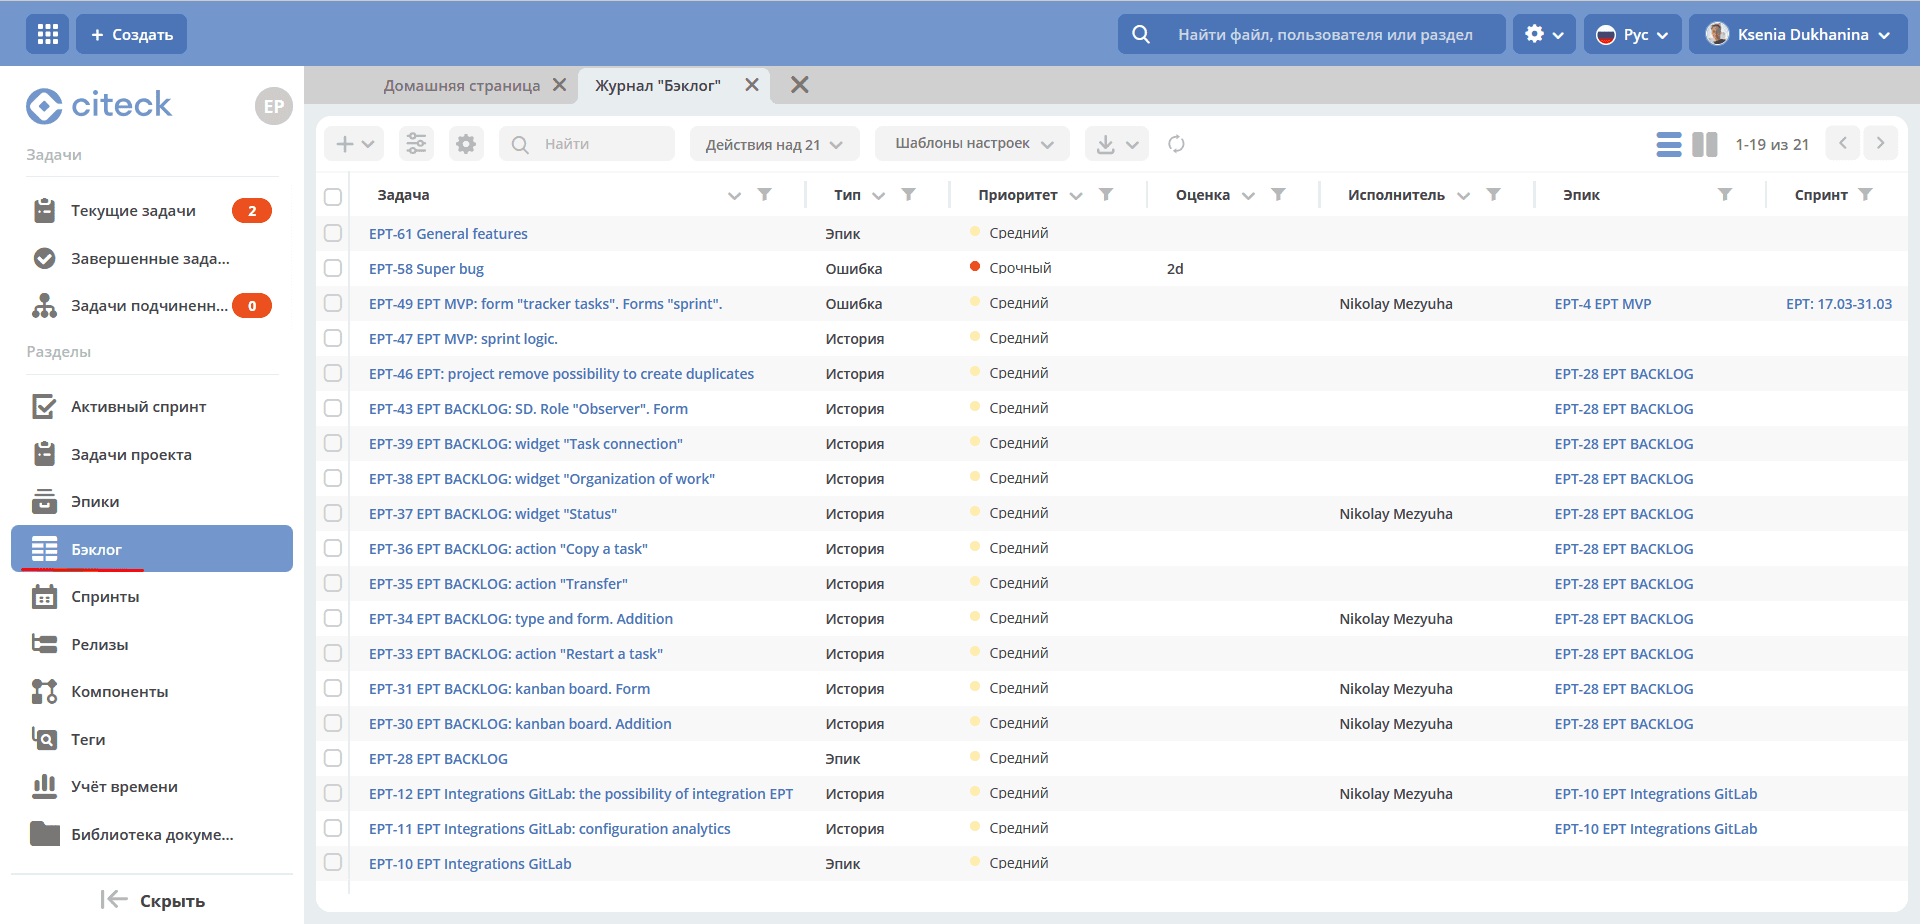
In the section, via the + button, you can create different types of tasks. See more Creating a task
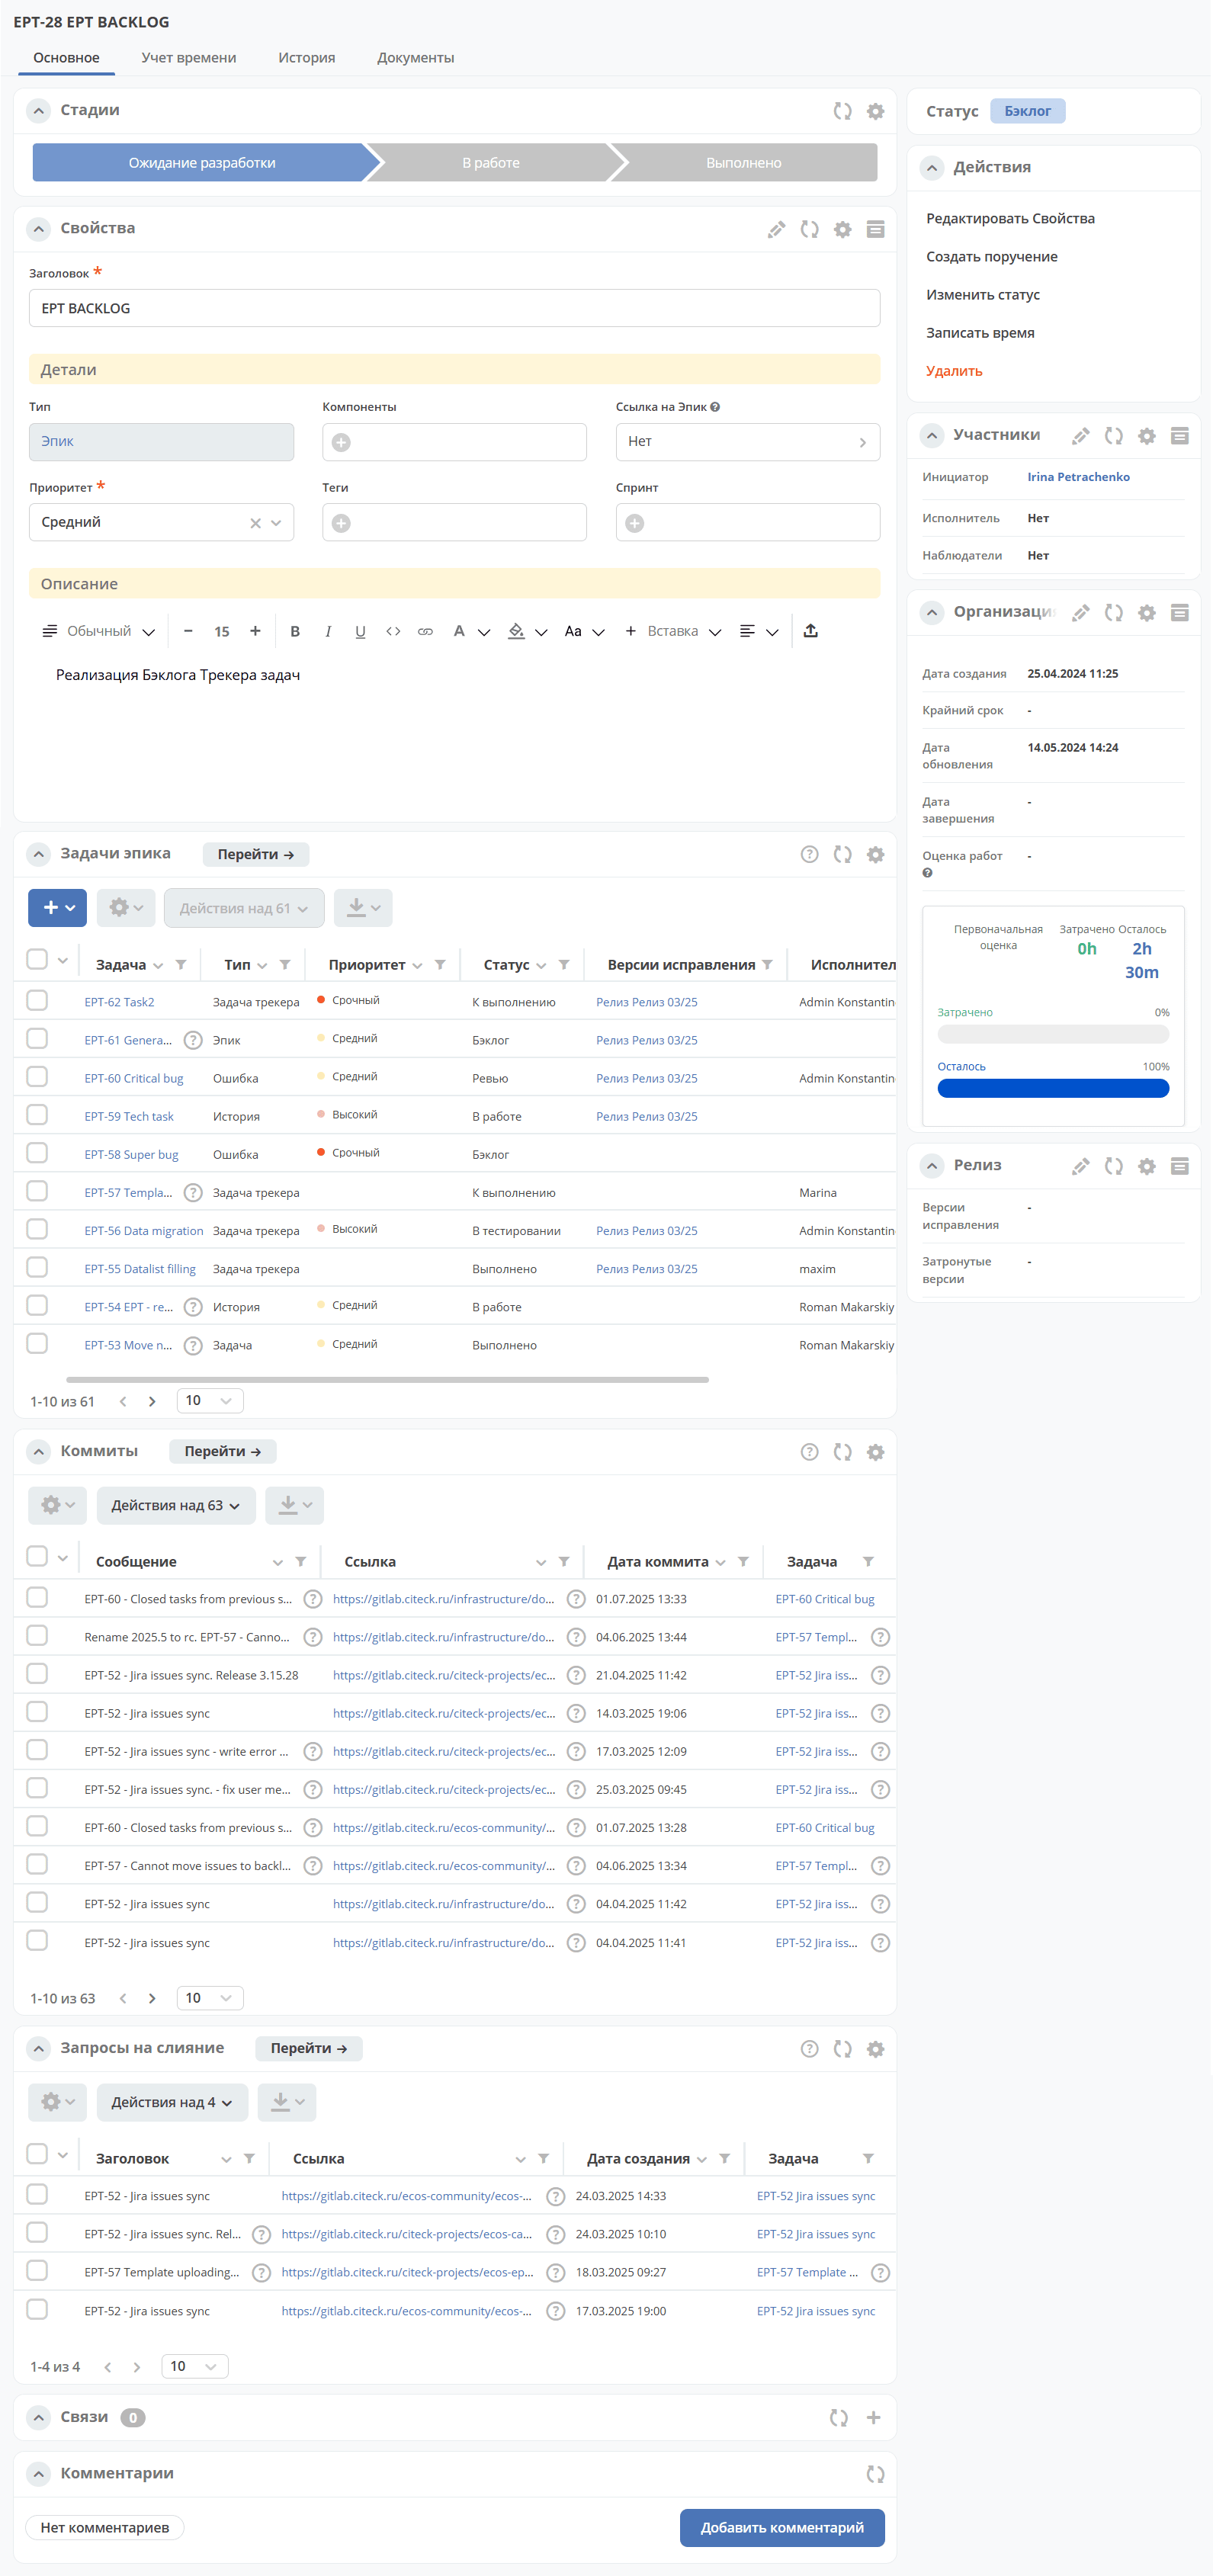
Backlog task card
The task card consists of widgets:
Adding a backlog task to a sprint
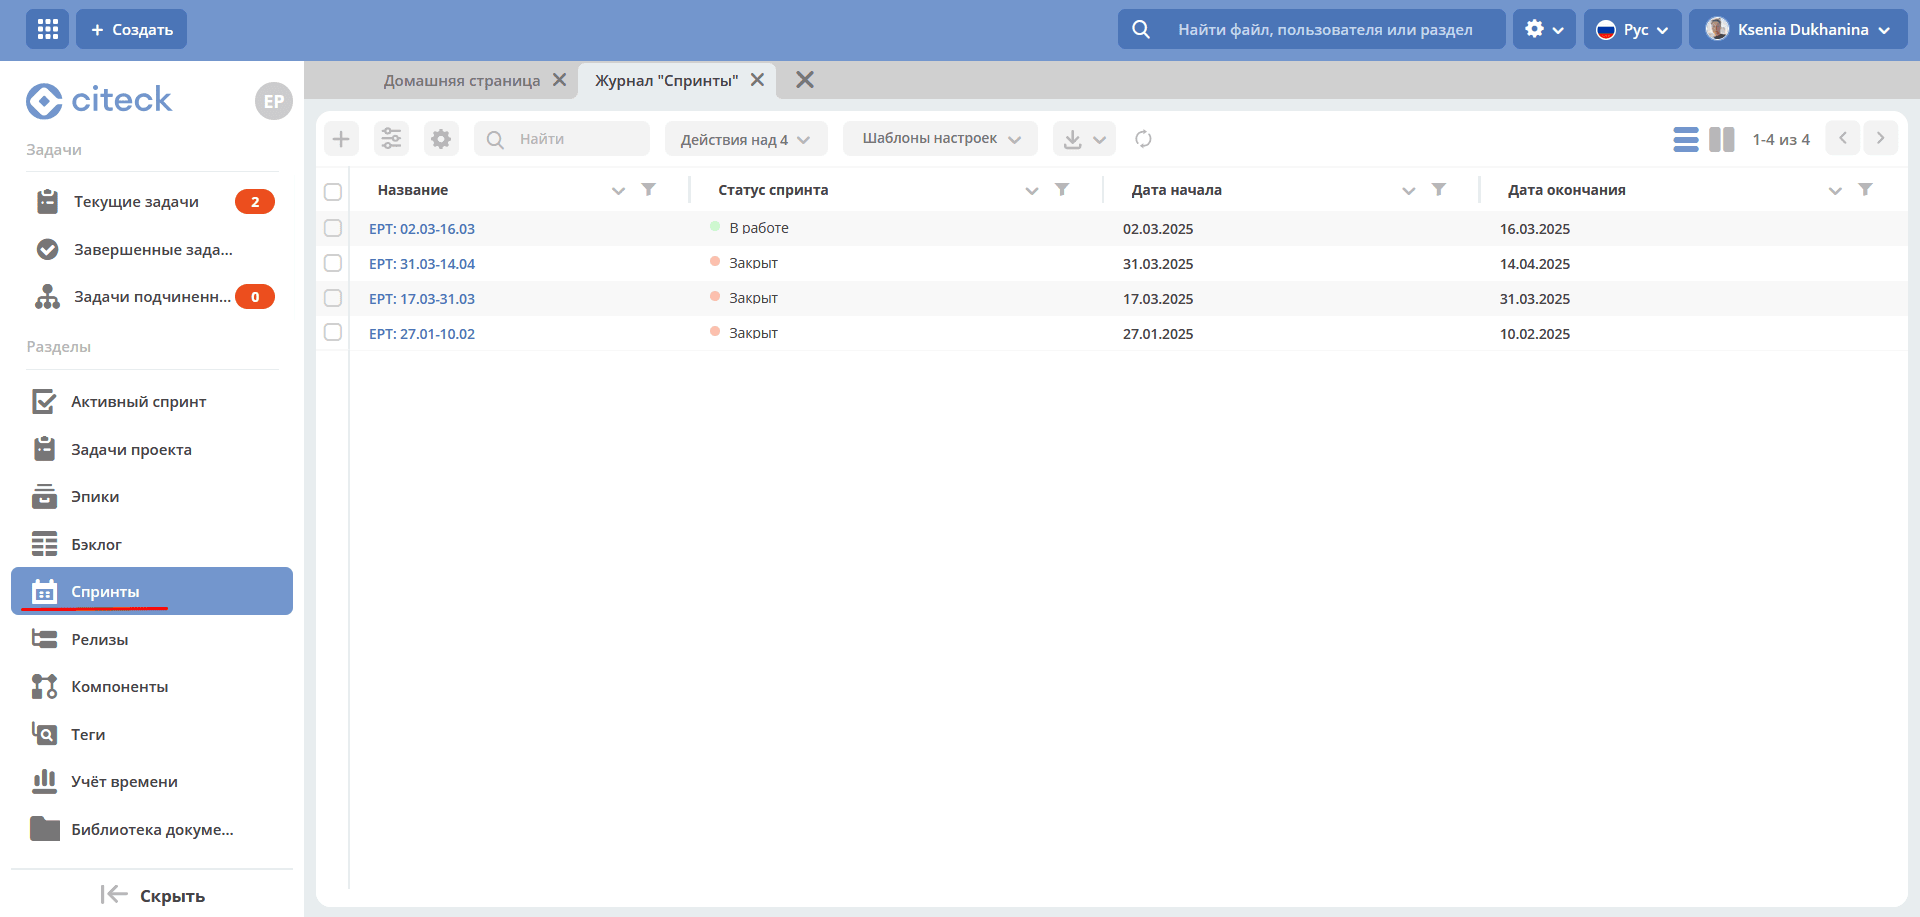
Sprints
Sprint — a fixed time interval in project activity during which specific tasks selected from the backlog are performed.
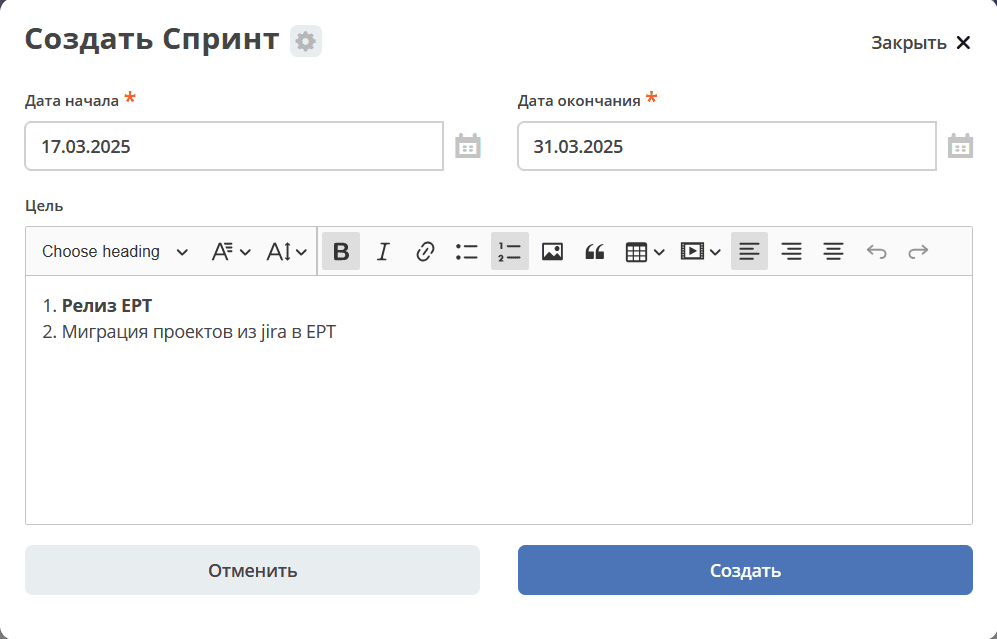
Creating a sprint
Click + and fill in the form fields:
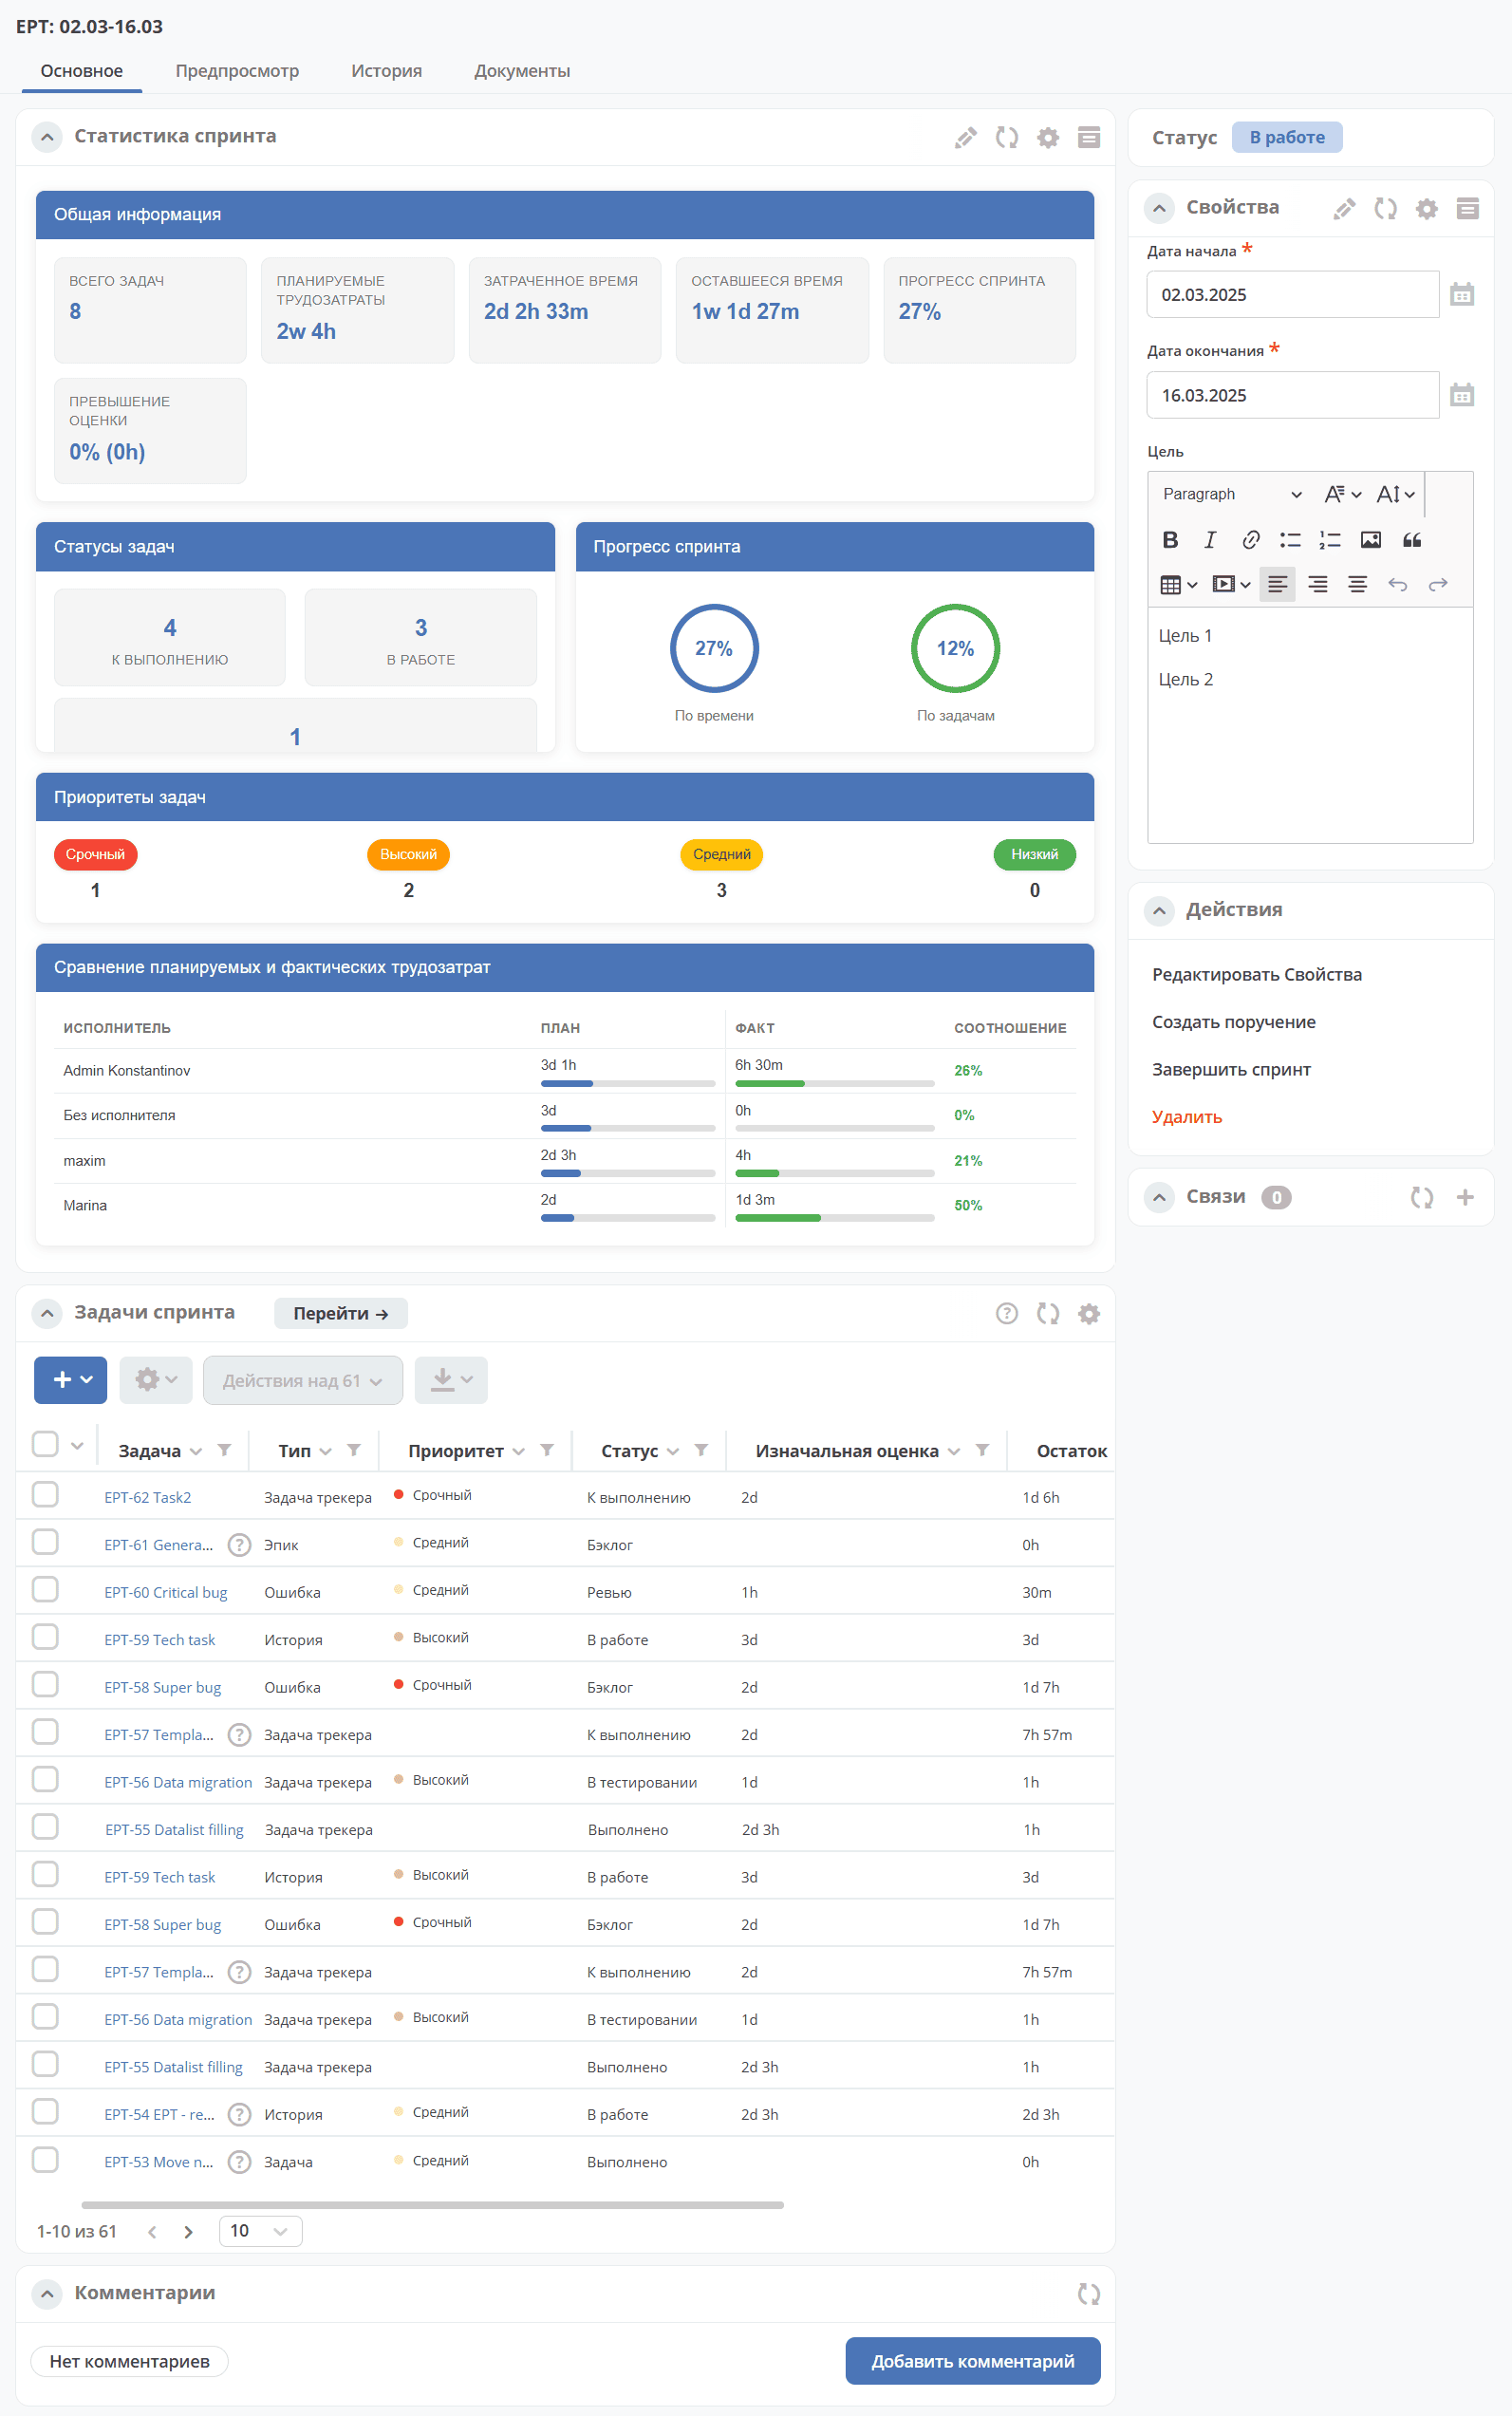
Sprint card
The sprint card contains statistics and progress of its execution, a list of tasks:
Starting a sprint
Go to the sprint card and select the action «Start sprint»
Confirm:
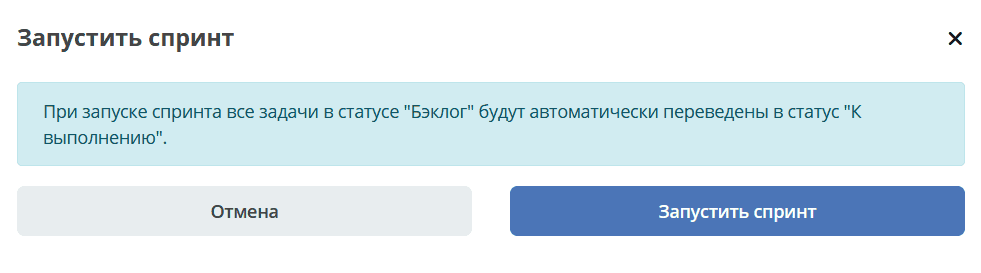
The sprint becomes active, all sprint tasks with the «Backlog» status will be automatically moved to the «To Do» status
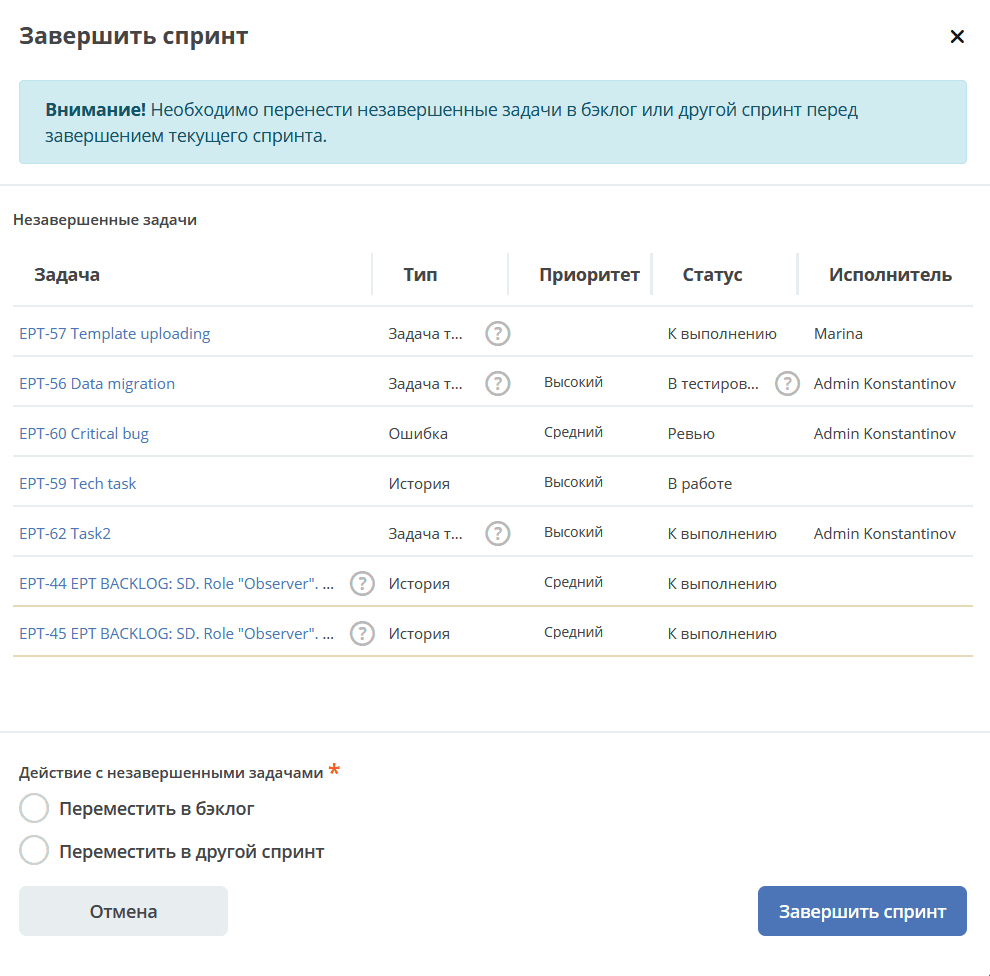
Completing a sprint
Go to the sprint card and select the action «Complete sprint»
Note
If there are unfinished tasks in the sprint, they must be moved to the backlog or another sprint before completing the current sprint.
Releases
Release — a list of finished product versions.
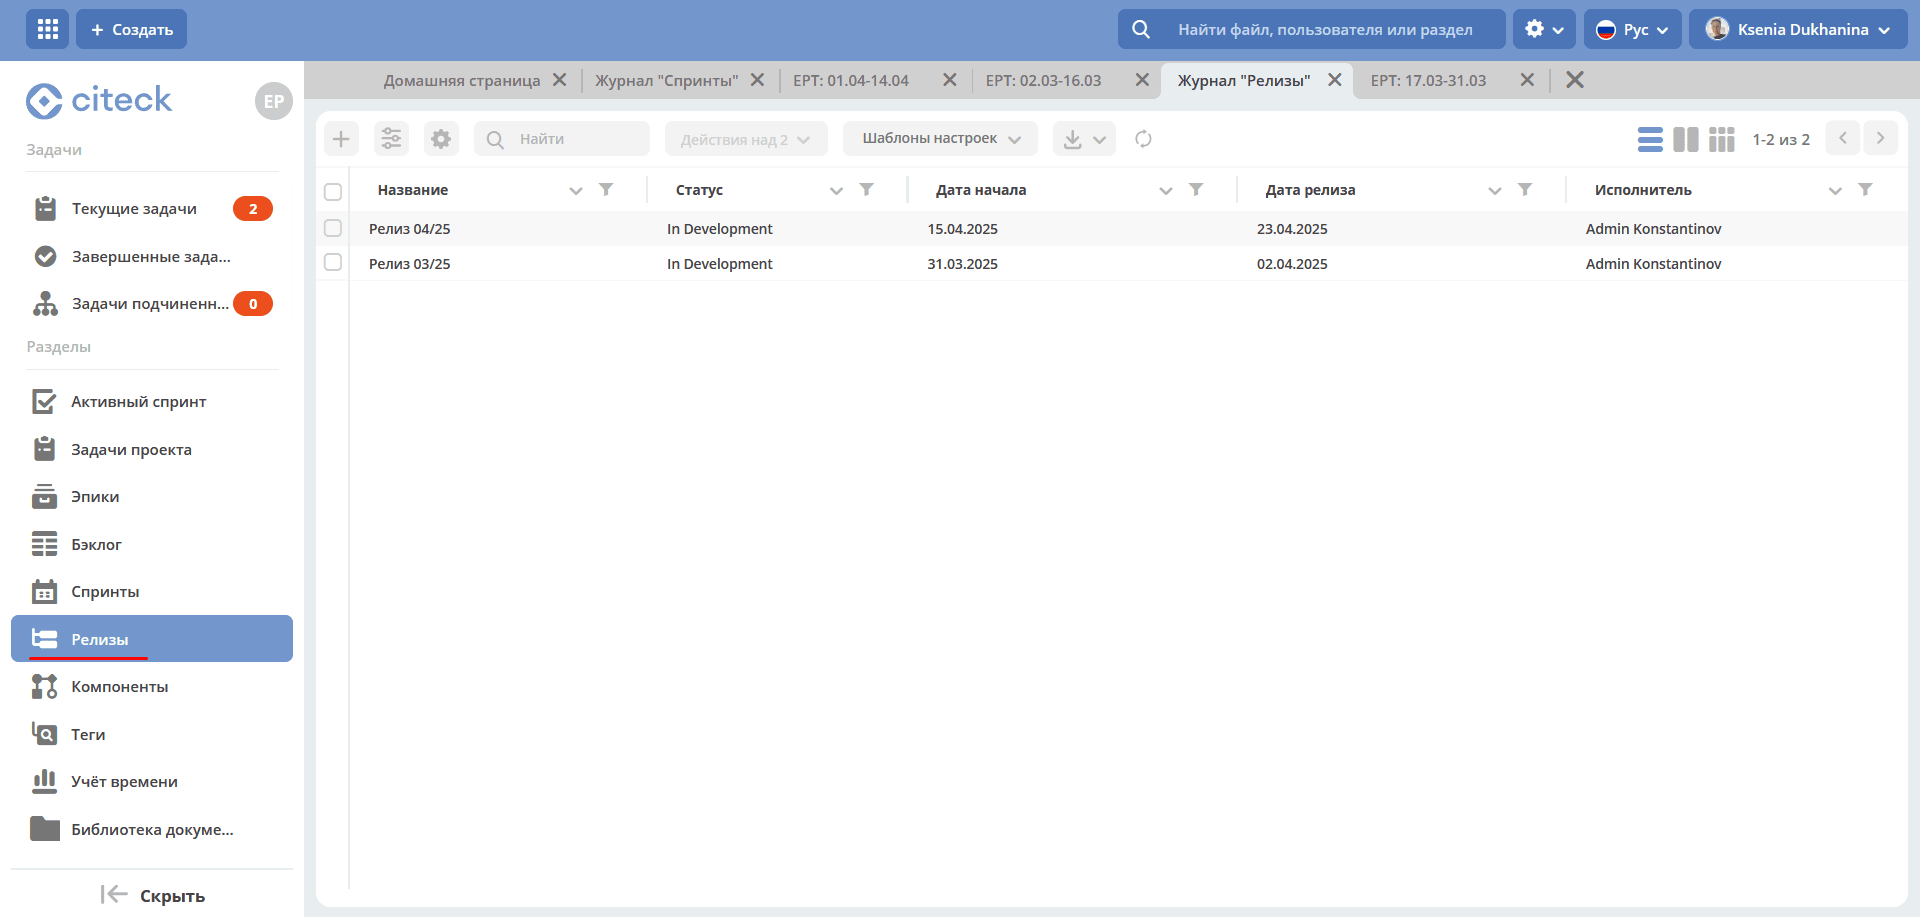
Release card:
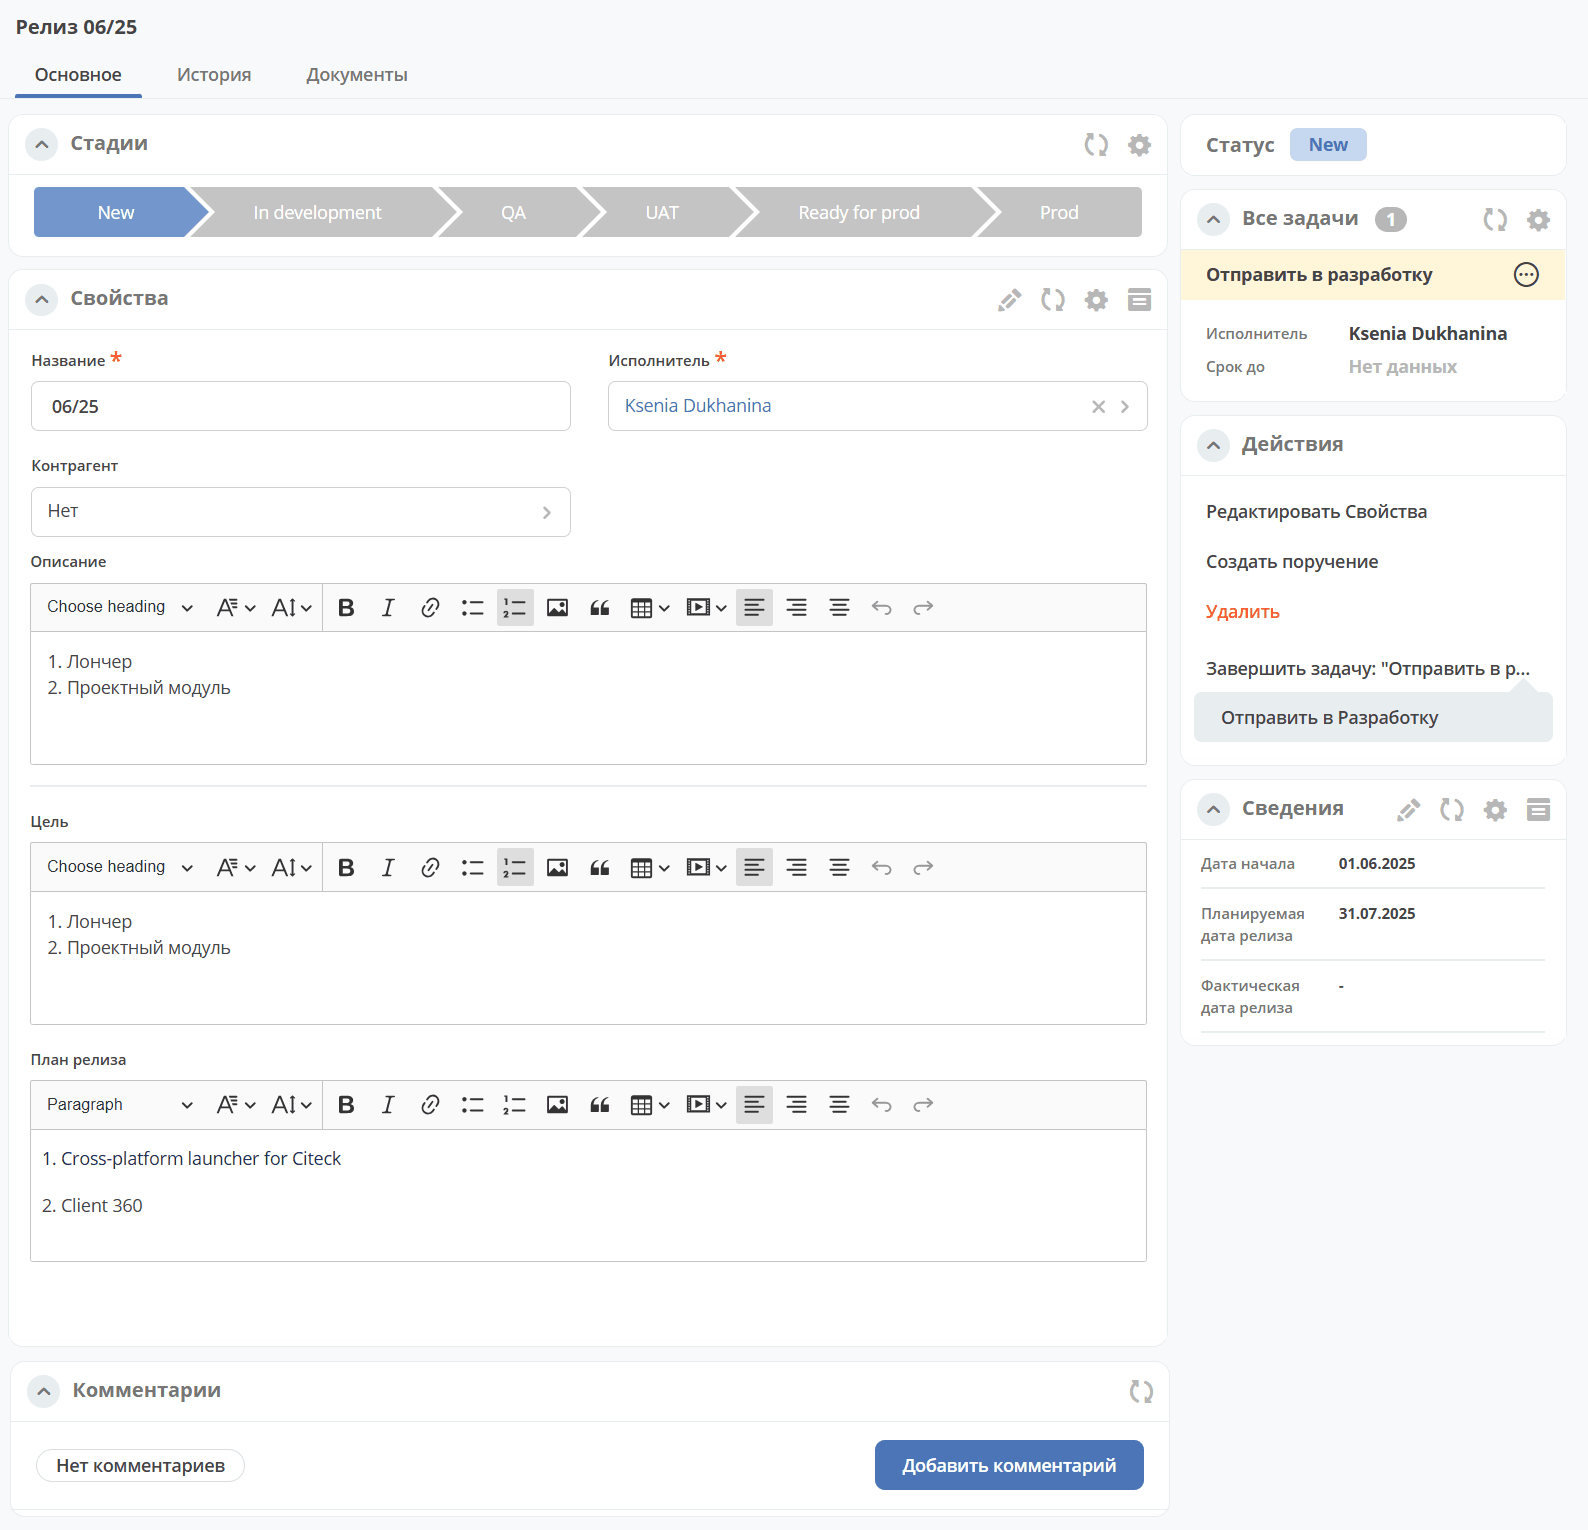
For detailed functionality, see Releases
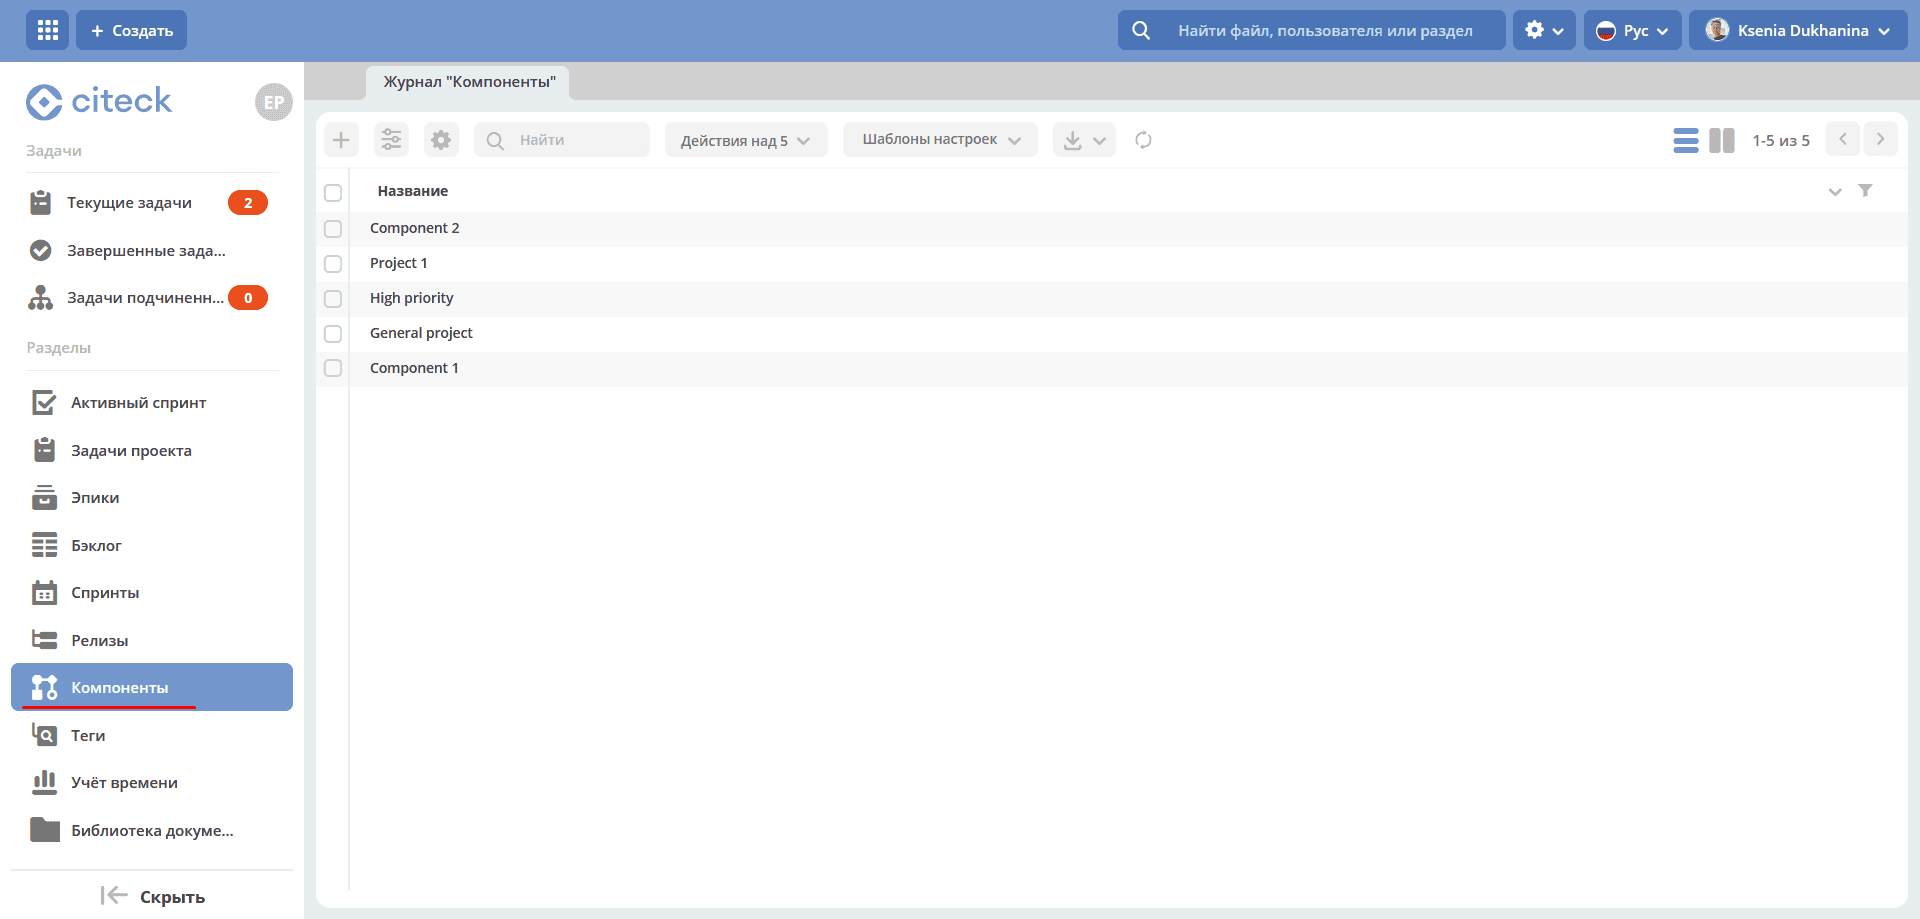
Components
Components serve as categories. They allow dividing work on a large project into separate parts.
Components added in this section become available for selection when creating a task.
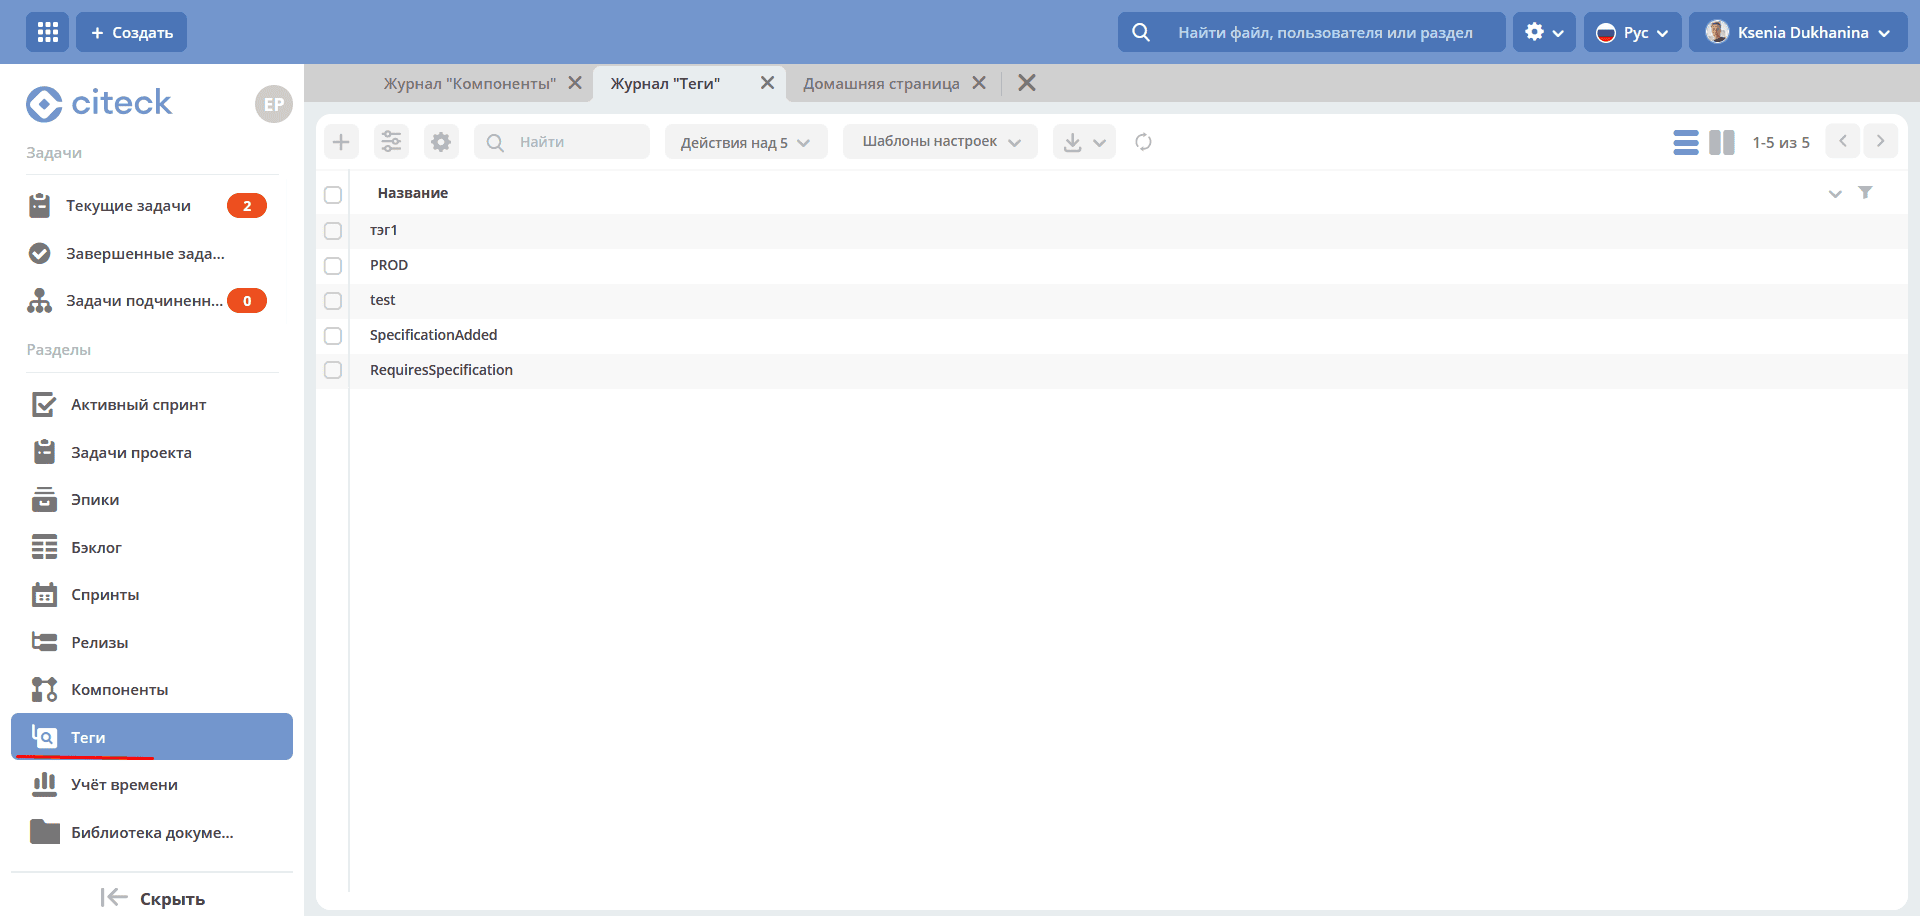
Tags
Tags allow classifying requests in a free form, less formally than components.
Tags added in this section become available for selection when creating a task.
Time tracking
Functionality that allows tracking time spent by an employee on a specific task or working with a document, directly from the task or document card.
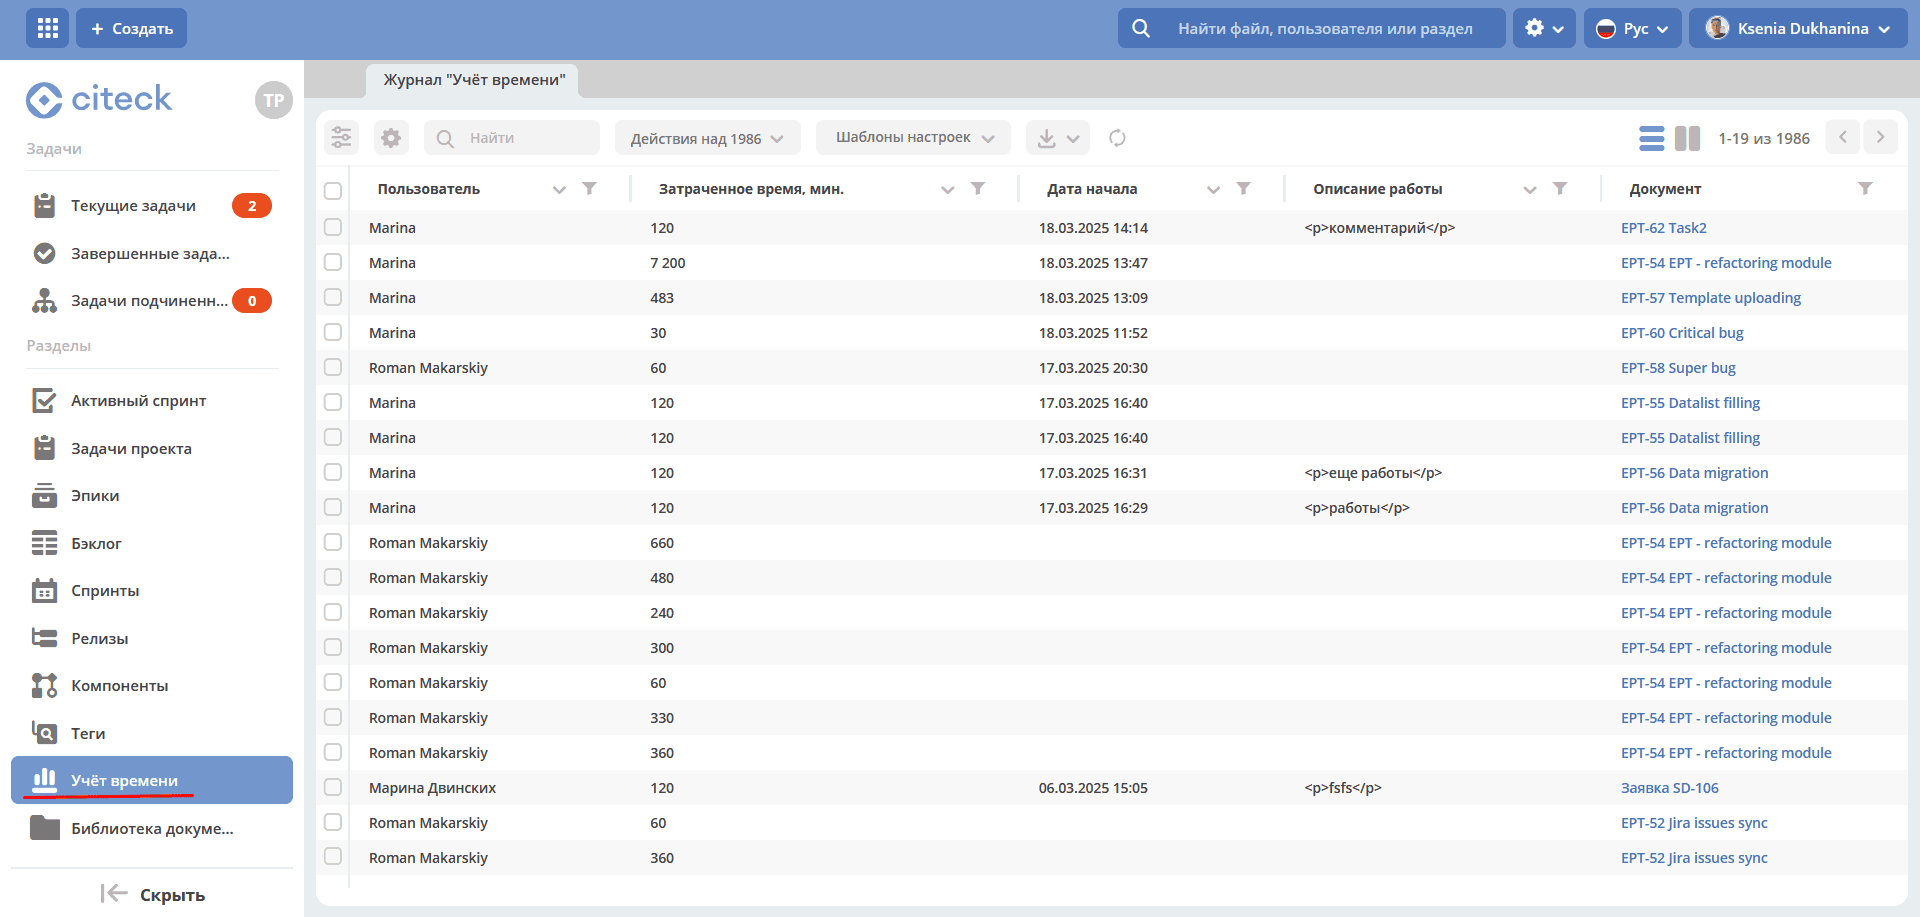
For detailed functionality, see Time tracking
Document library
A hierarchical interface for collaborative work with folders and documents.
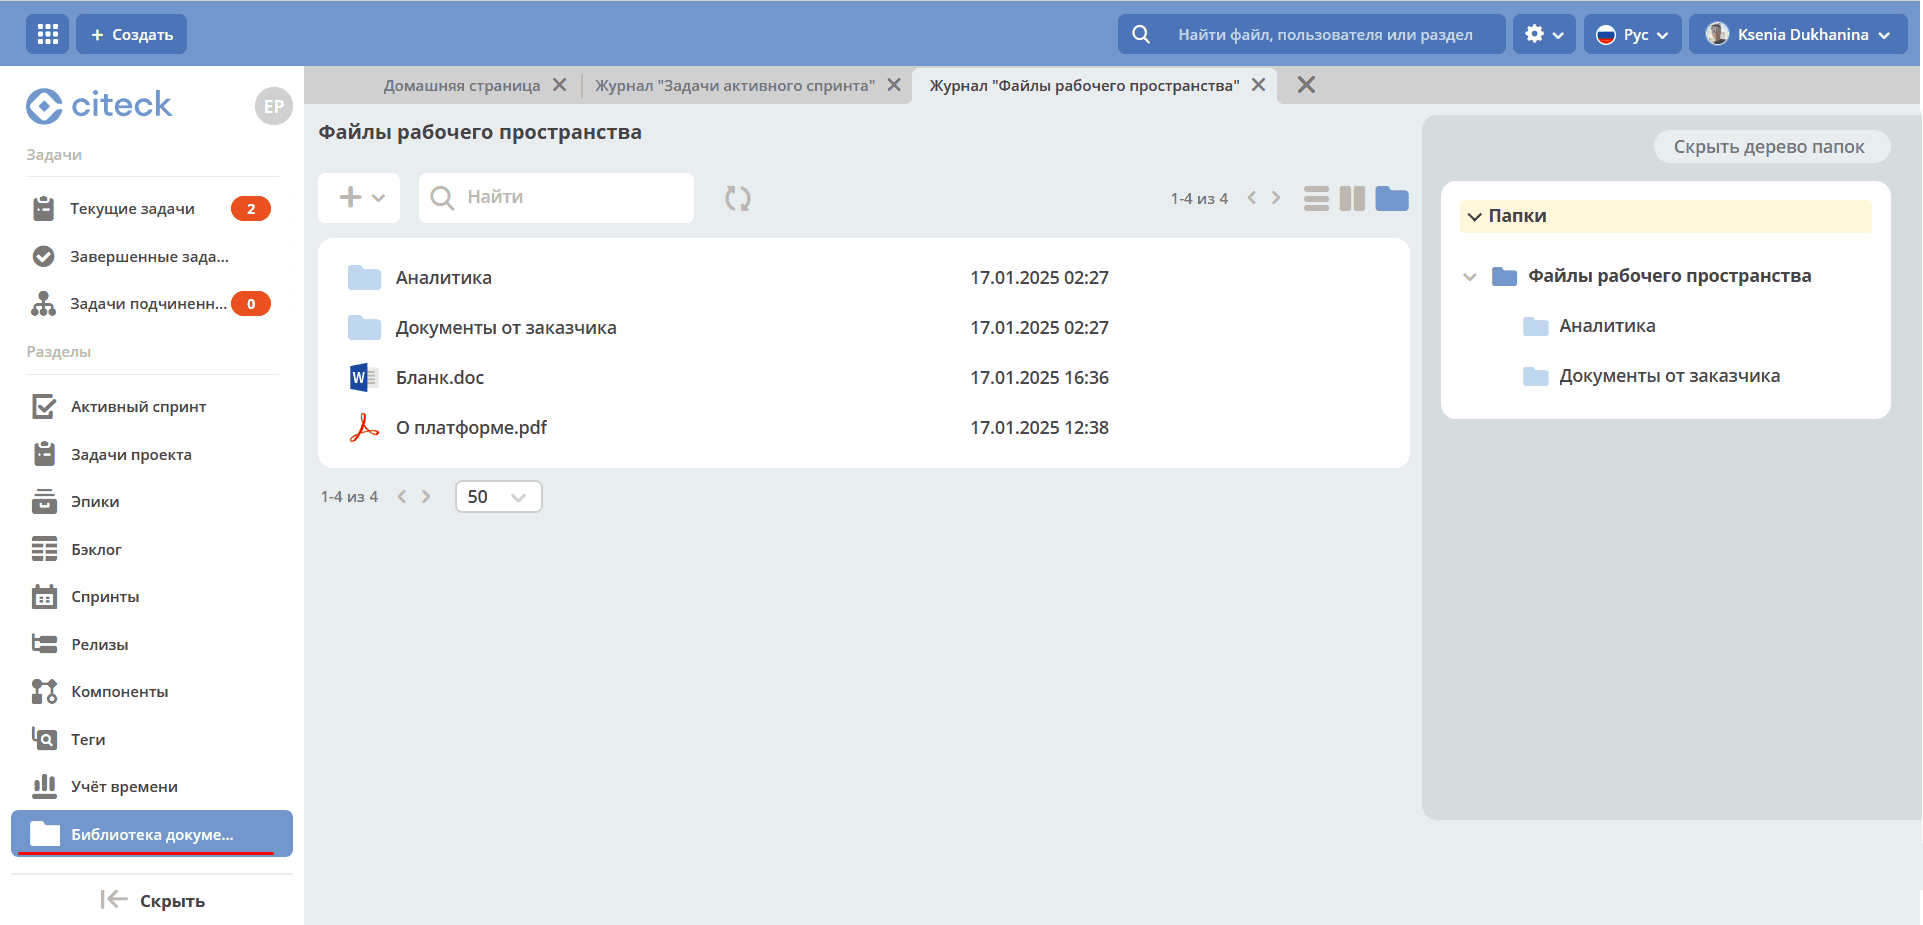
The library provides:
uploading files and folders via button or drag and drop.
creating documents (text, spreadsheets, presentations).
For detailed functionality, see Document library
Simple project
Sections
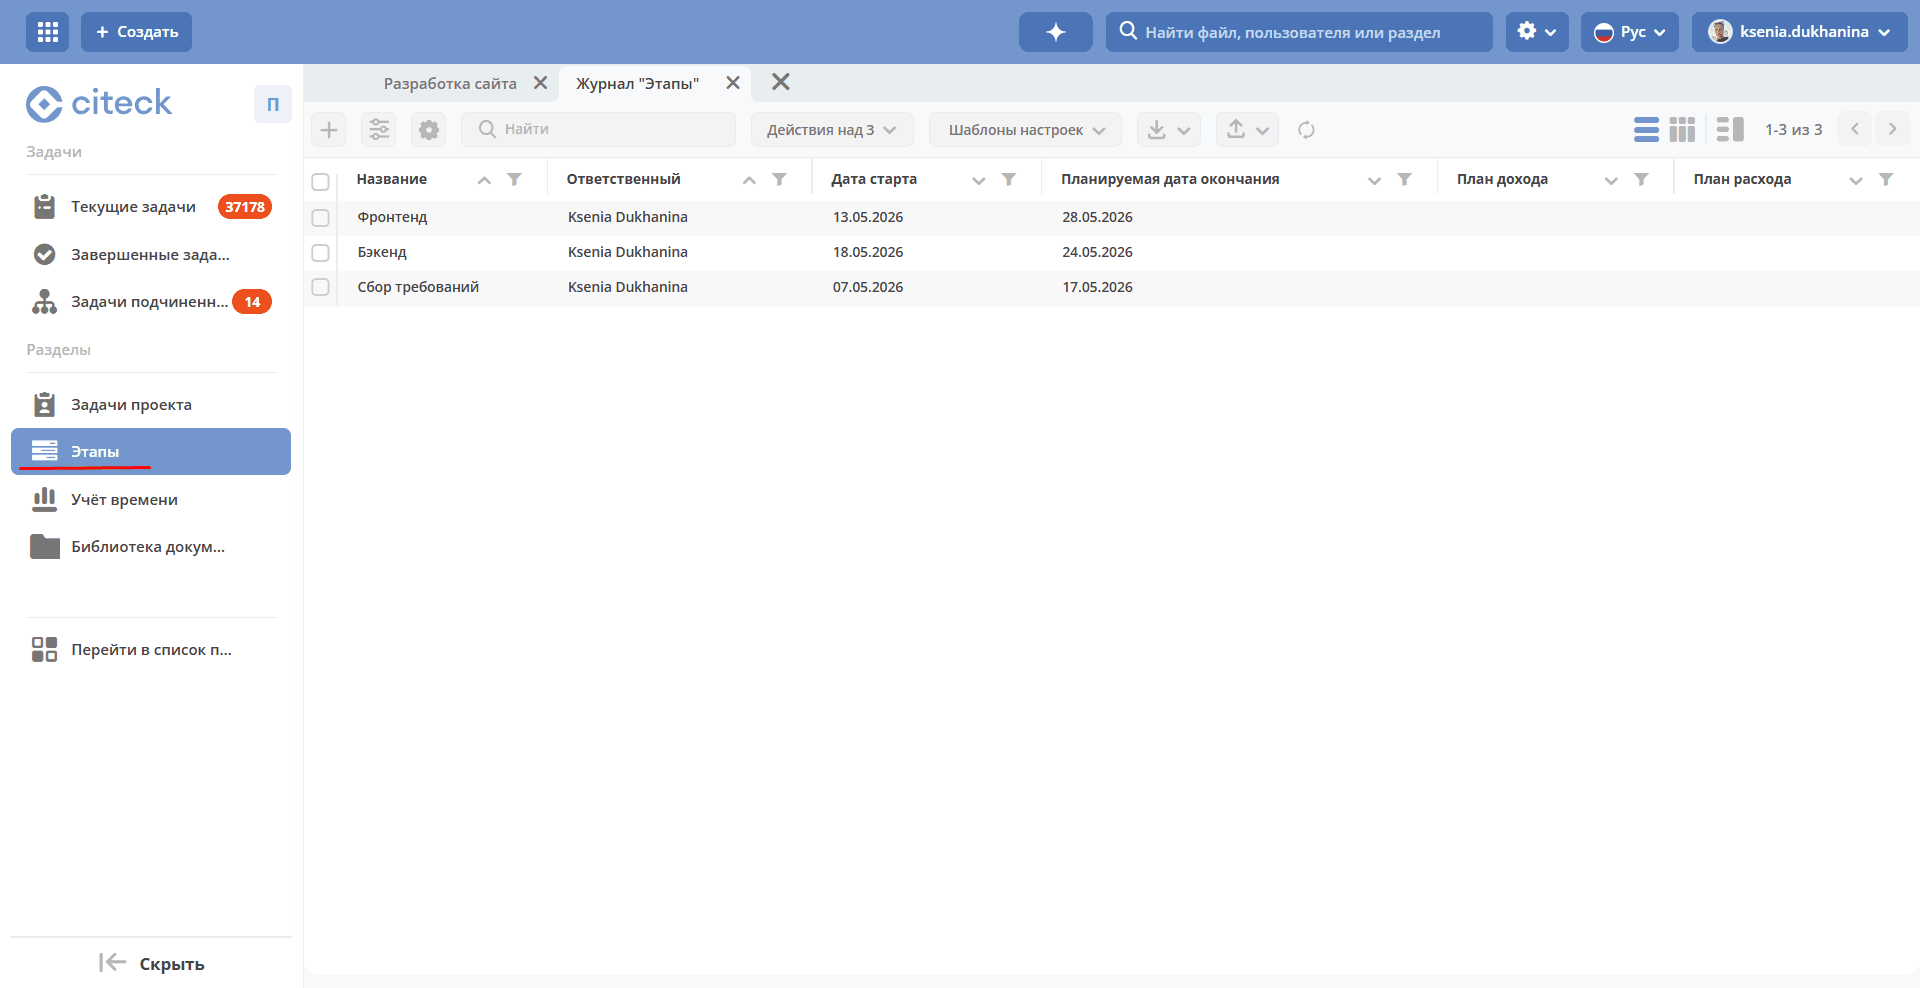
Stages
The section contains a list of project stages.
Creating a stage
Click + and fill in the form fields:
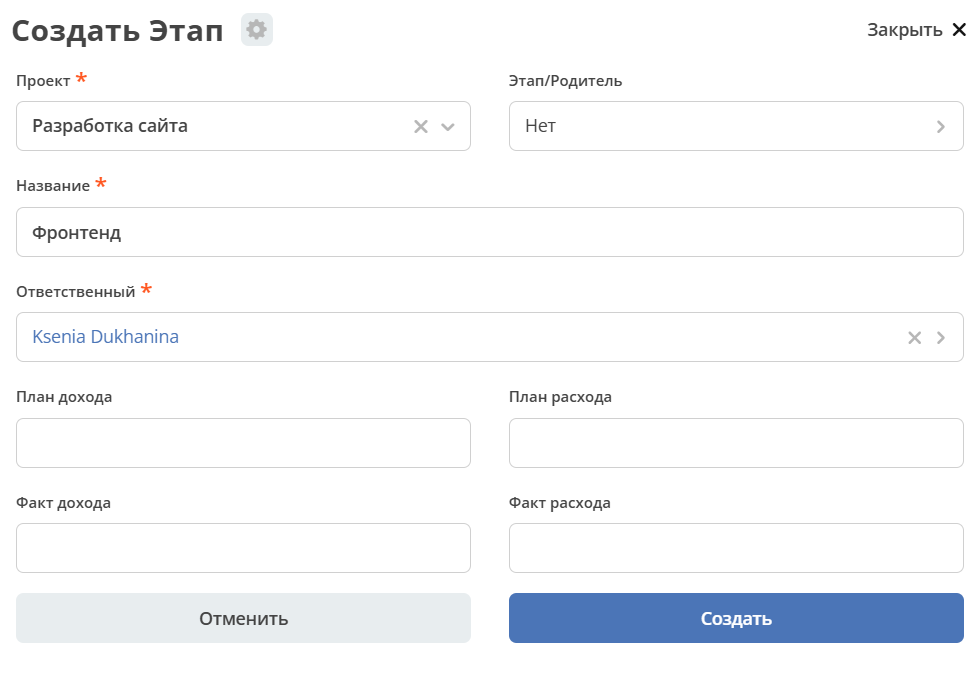
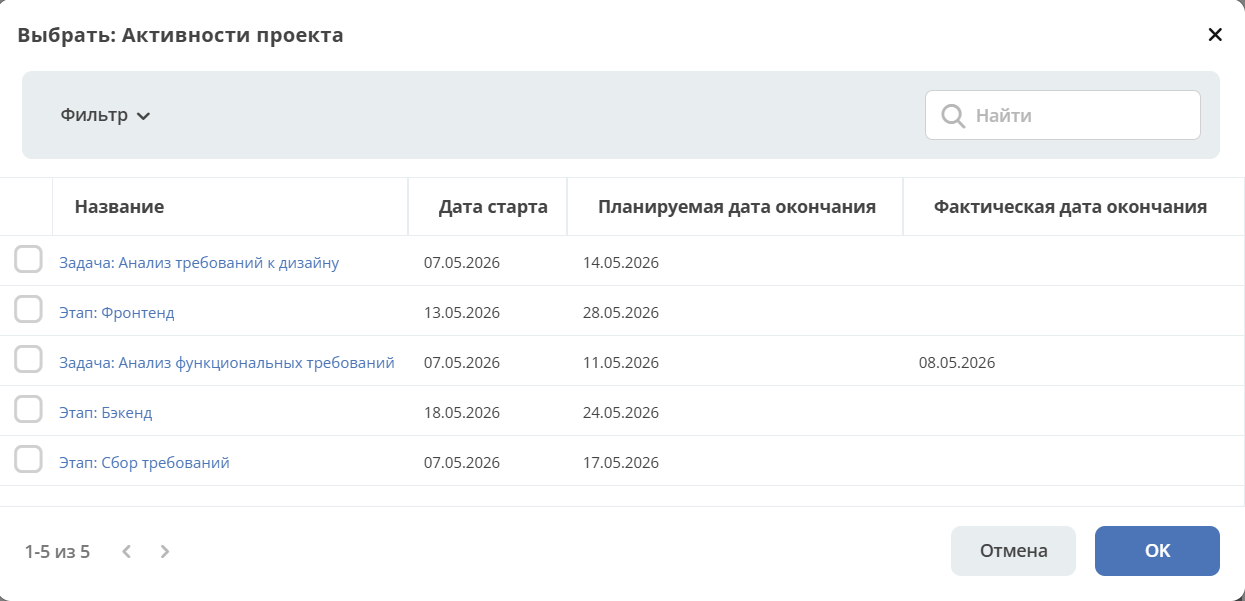
in the Stage/Parent field, specify the nesting of the stage within another stage or task, if necessary:
The default stage status upon creation is Open.
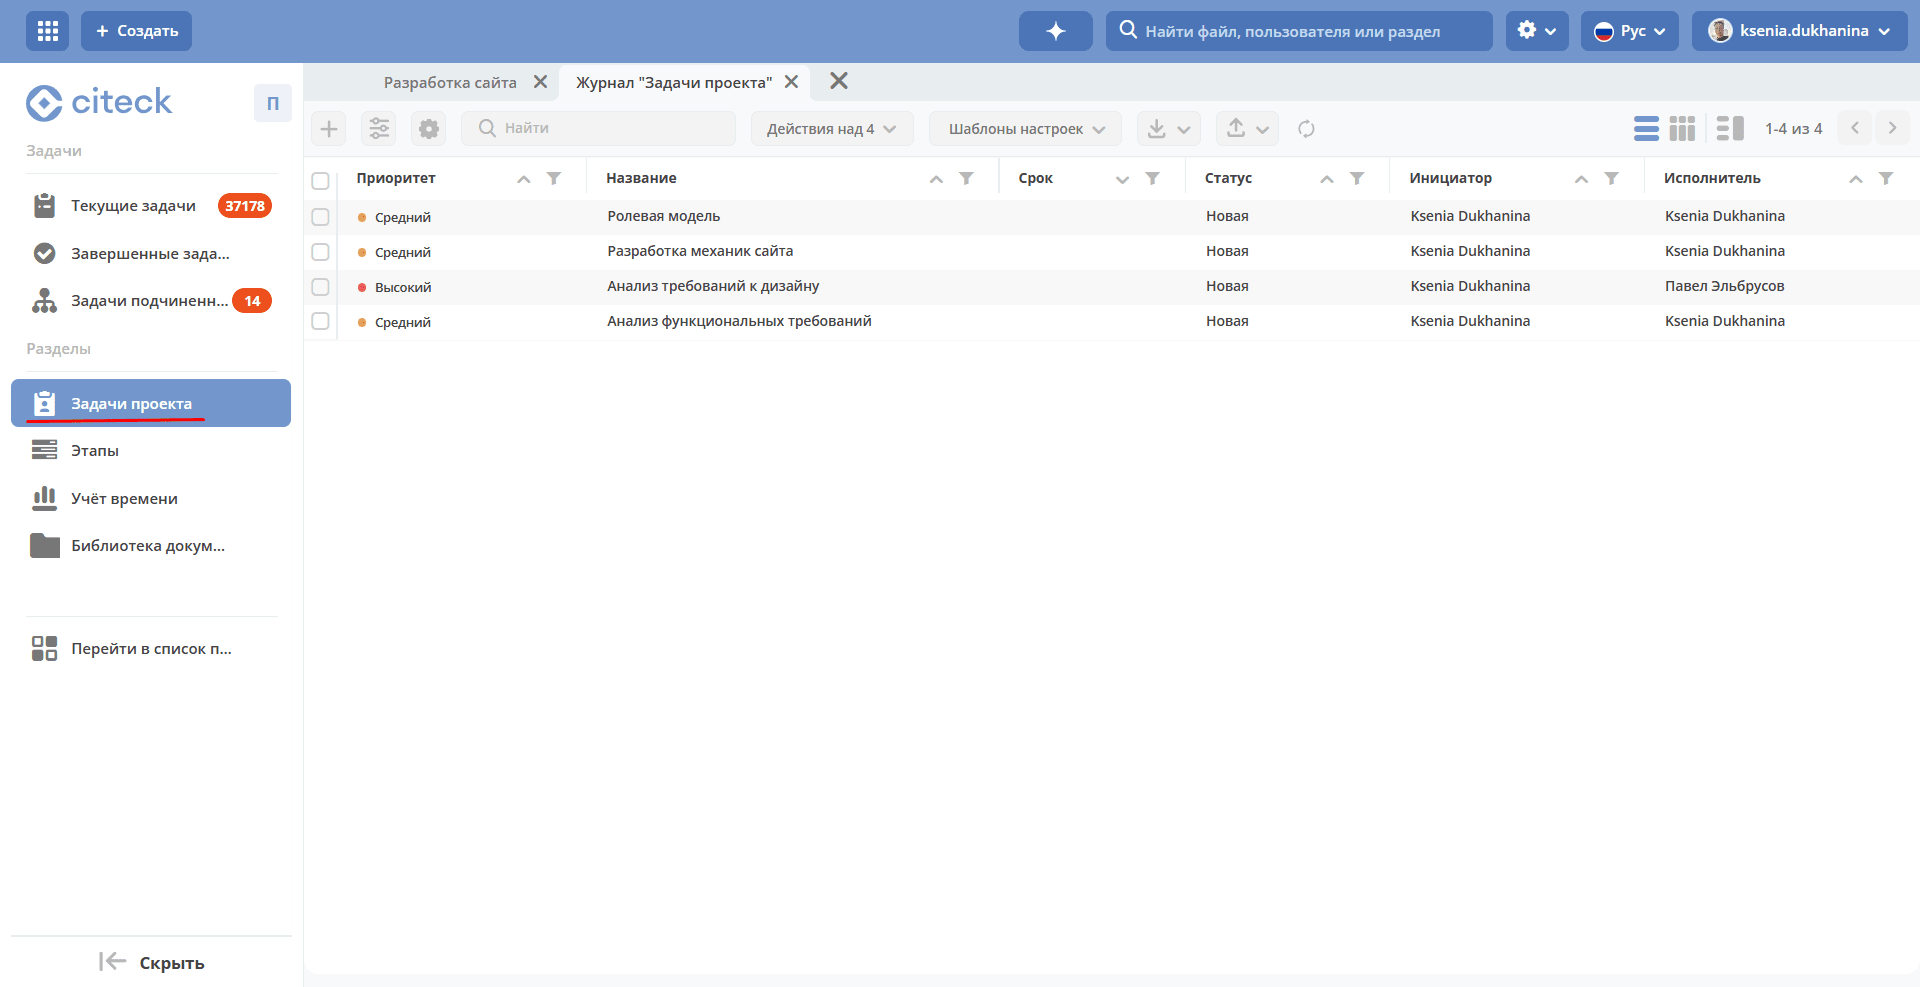
Project tasks
Contains a list of project tasks. Tasks in all statuses are shown.
Creating a task
Click + and fill in the form fields:
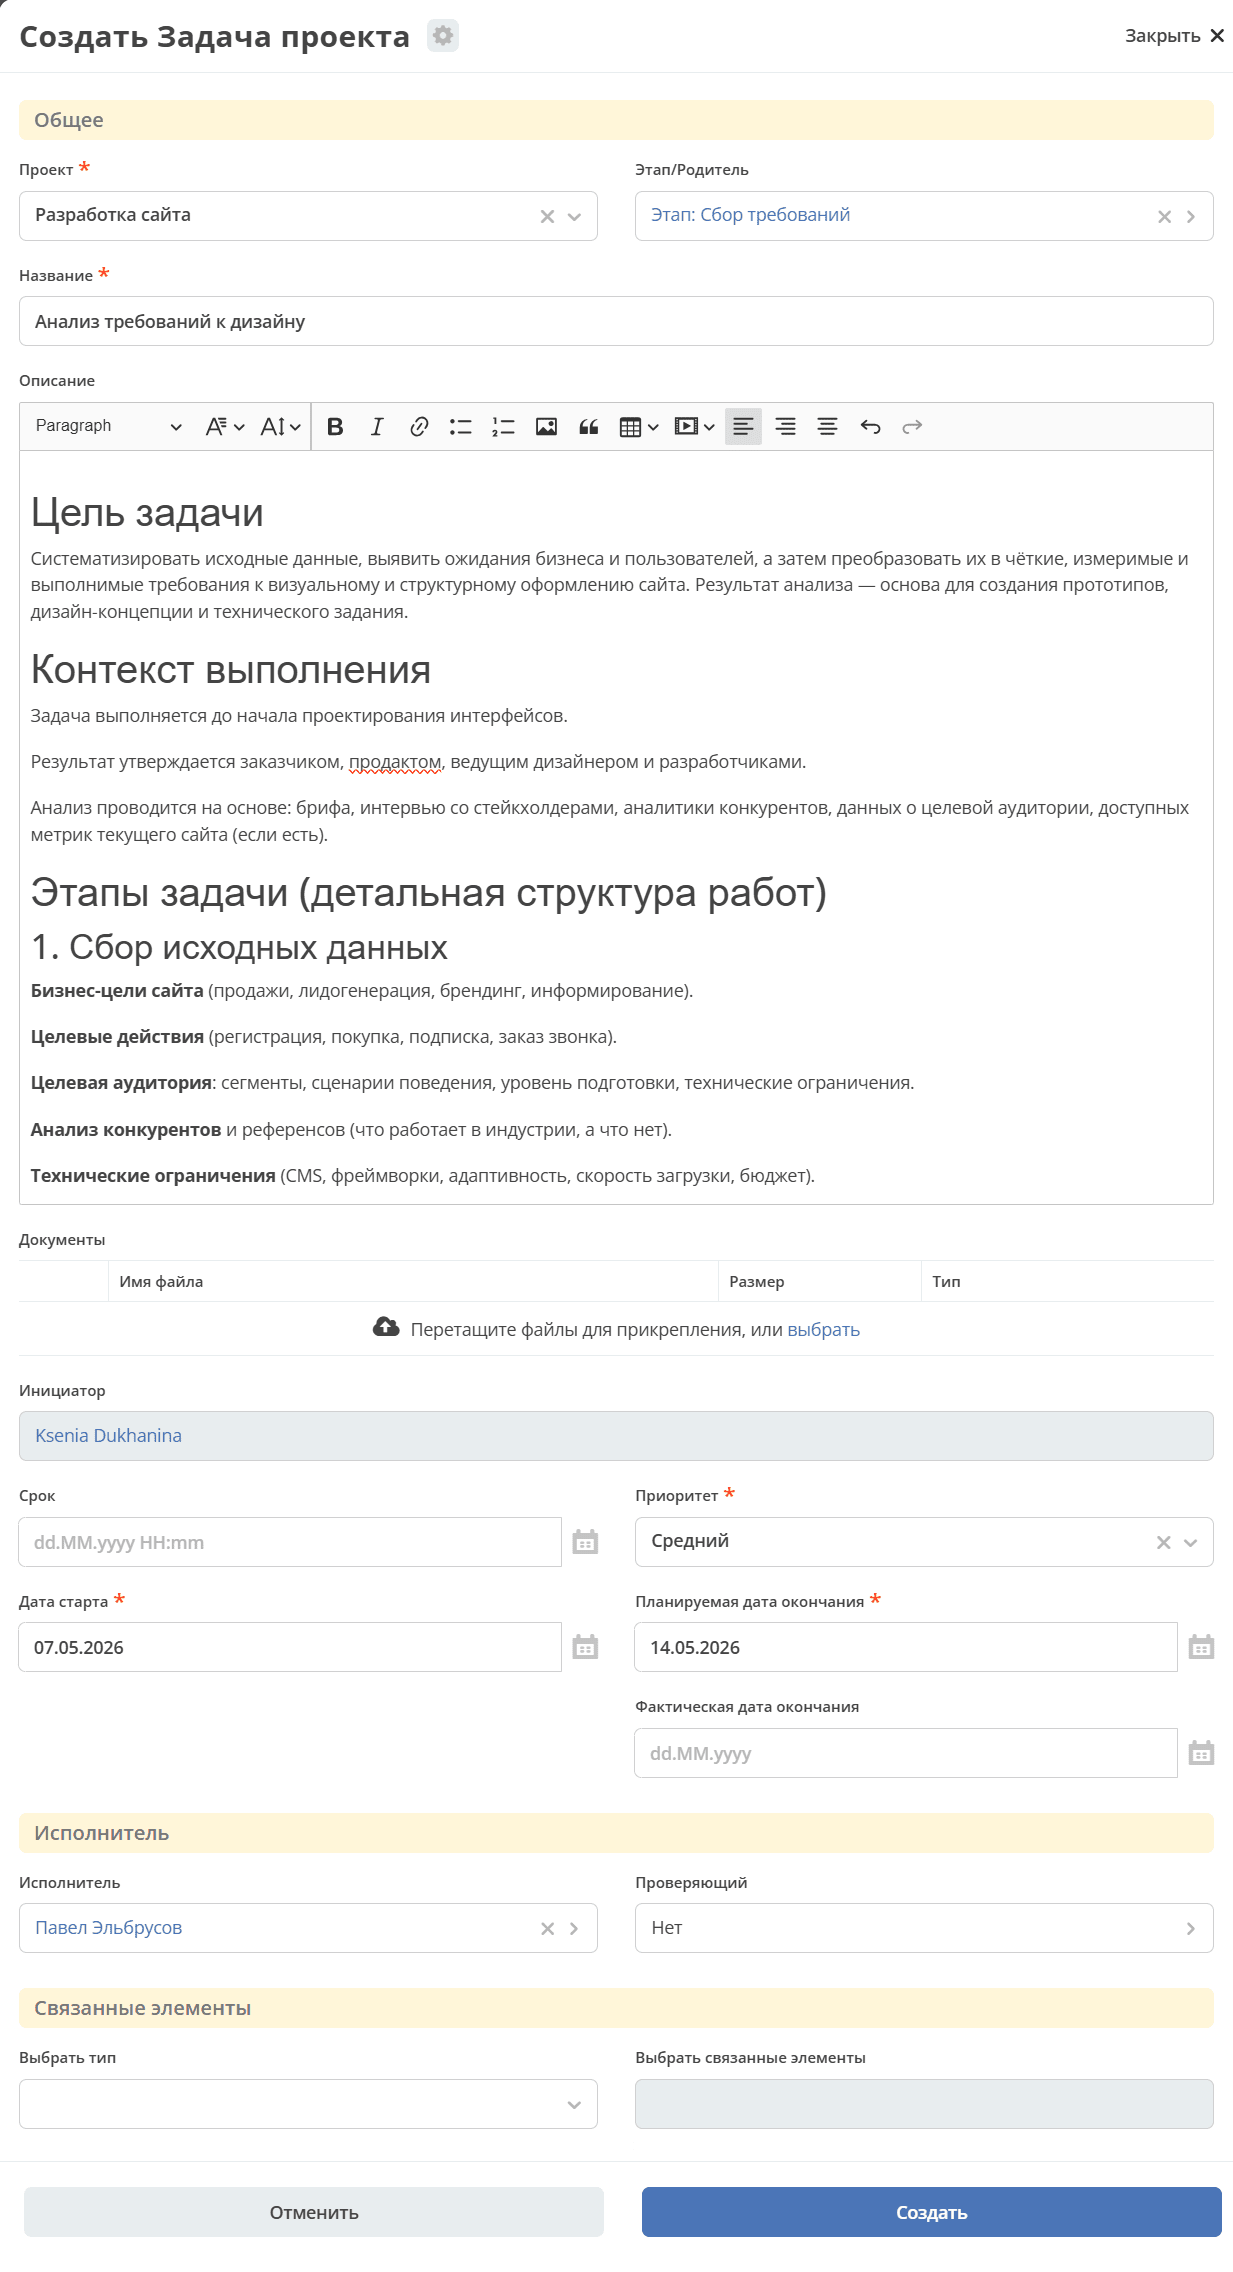
in the Stage/Parent field, specify the nesting of the task within a stage or another task, if necessary:
The default task status upon creation is New.
Gantt Chart
If the «Gantt Chart» widget is added to the project workspace, it displays the project’s tasks and stages: their hierarchy, due dates, and dependencies between them.
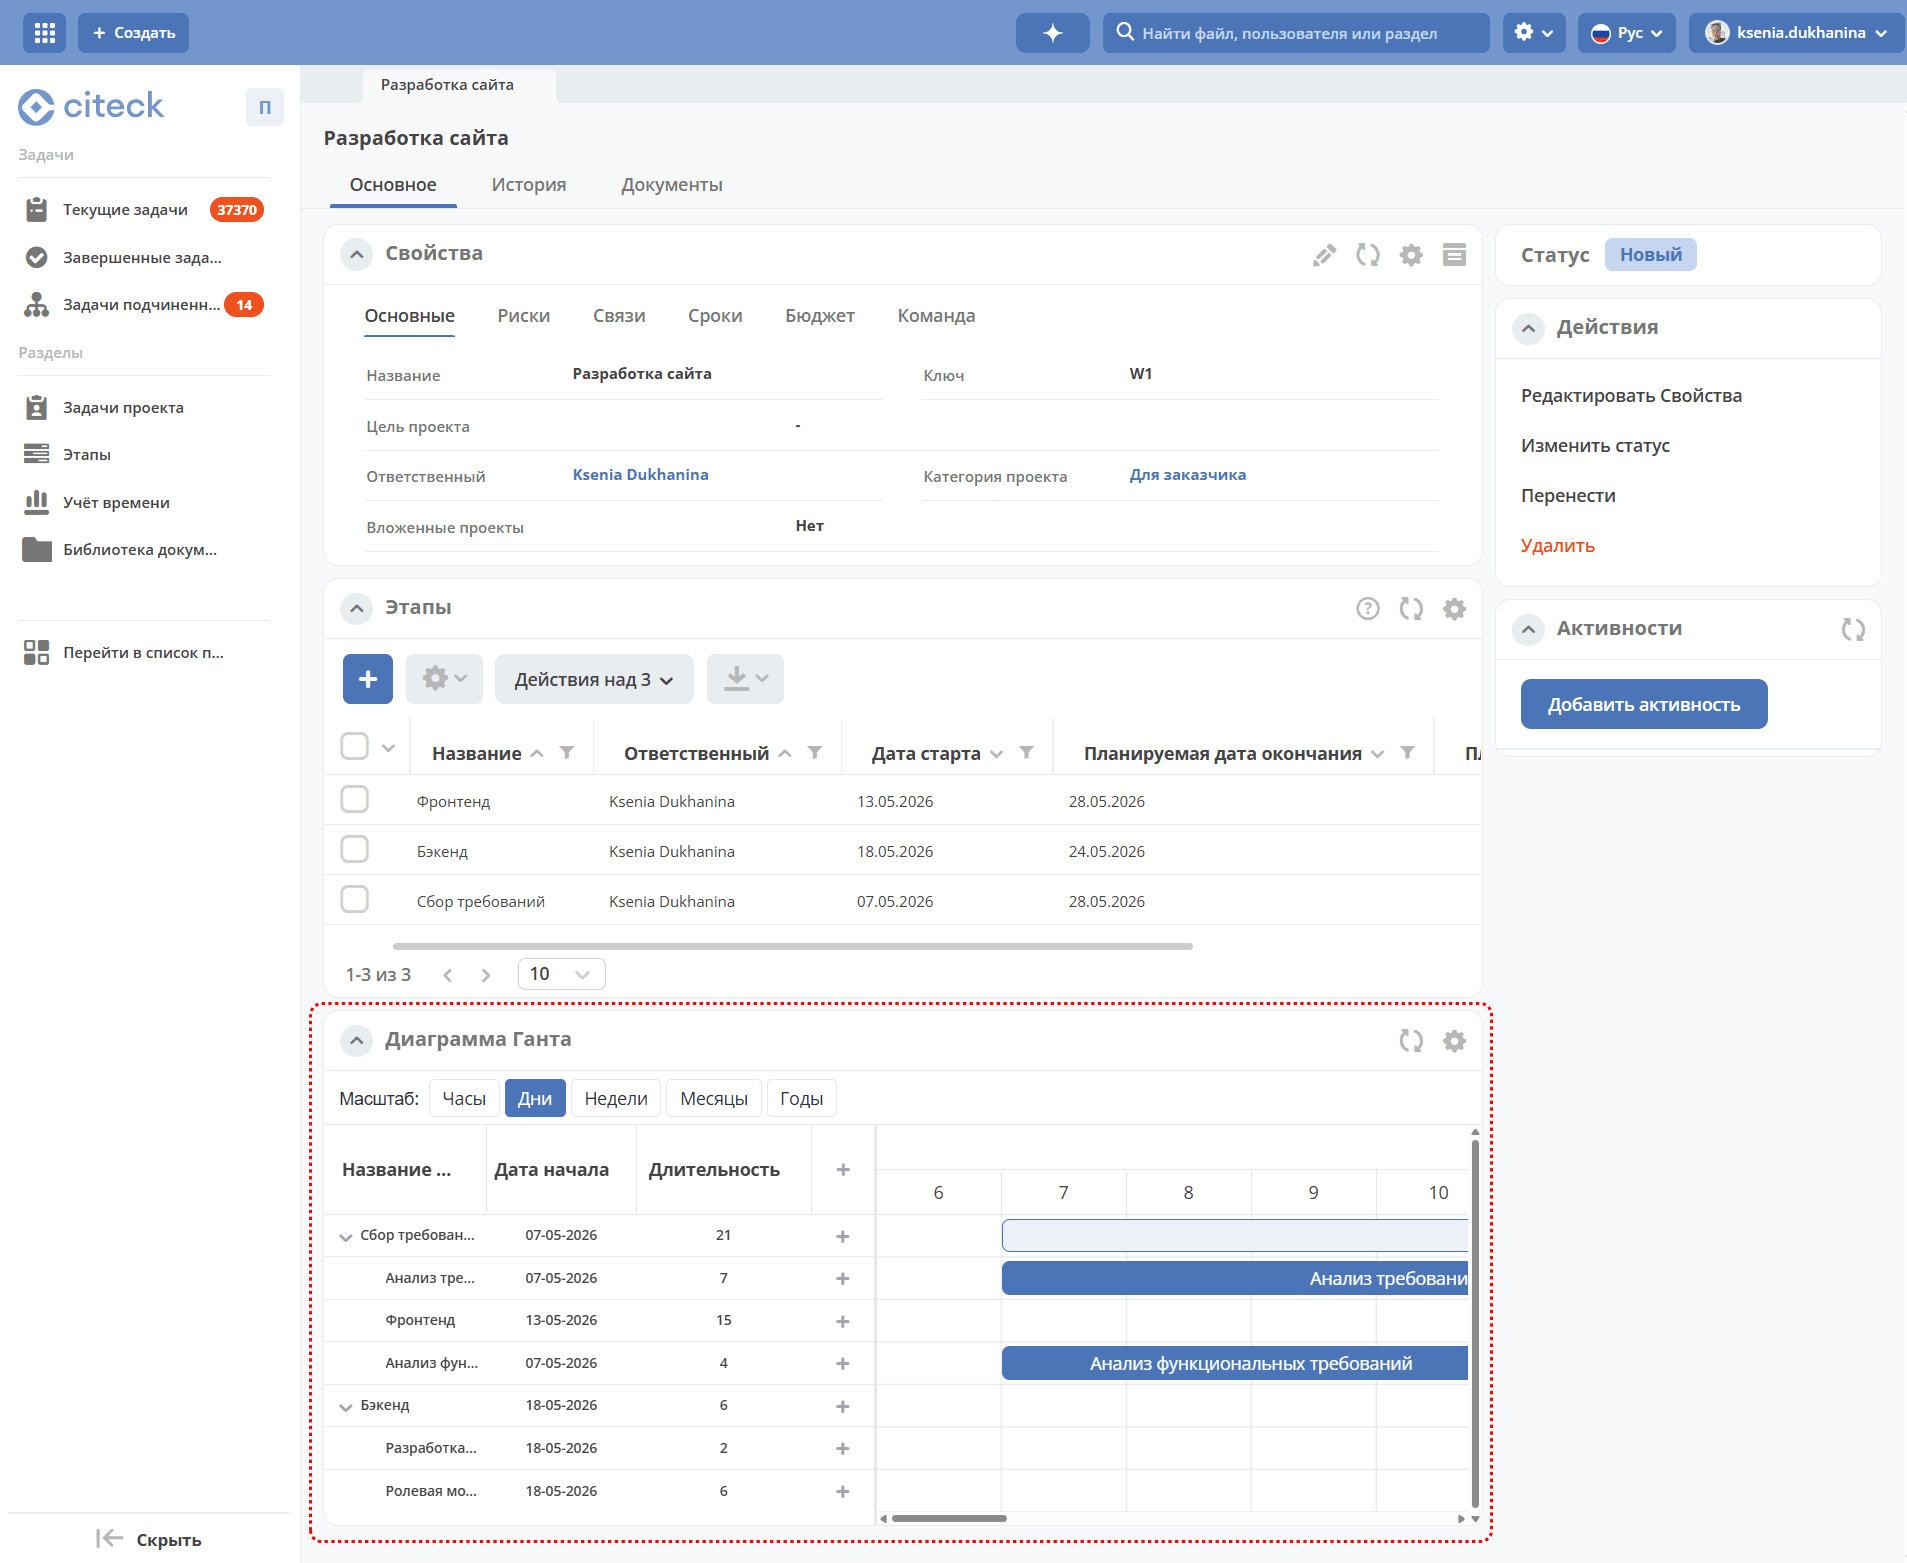
Directly on the chart, you can create tasks and stages, specify due dates, and set dependencies between tasks and stages.
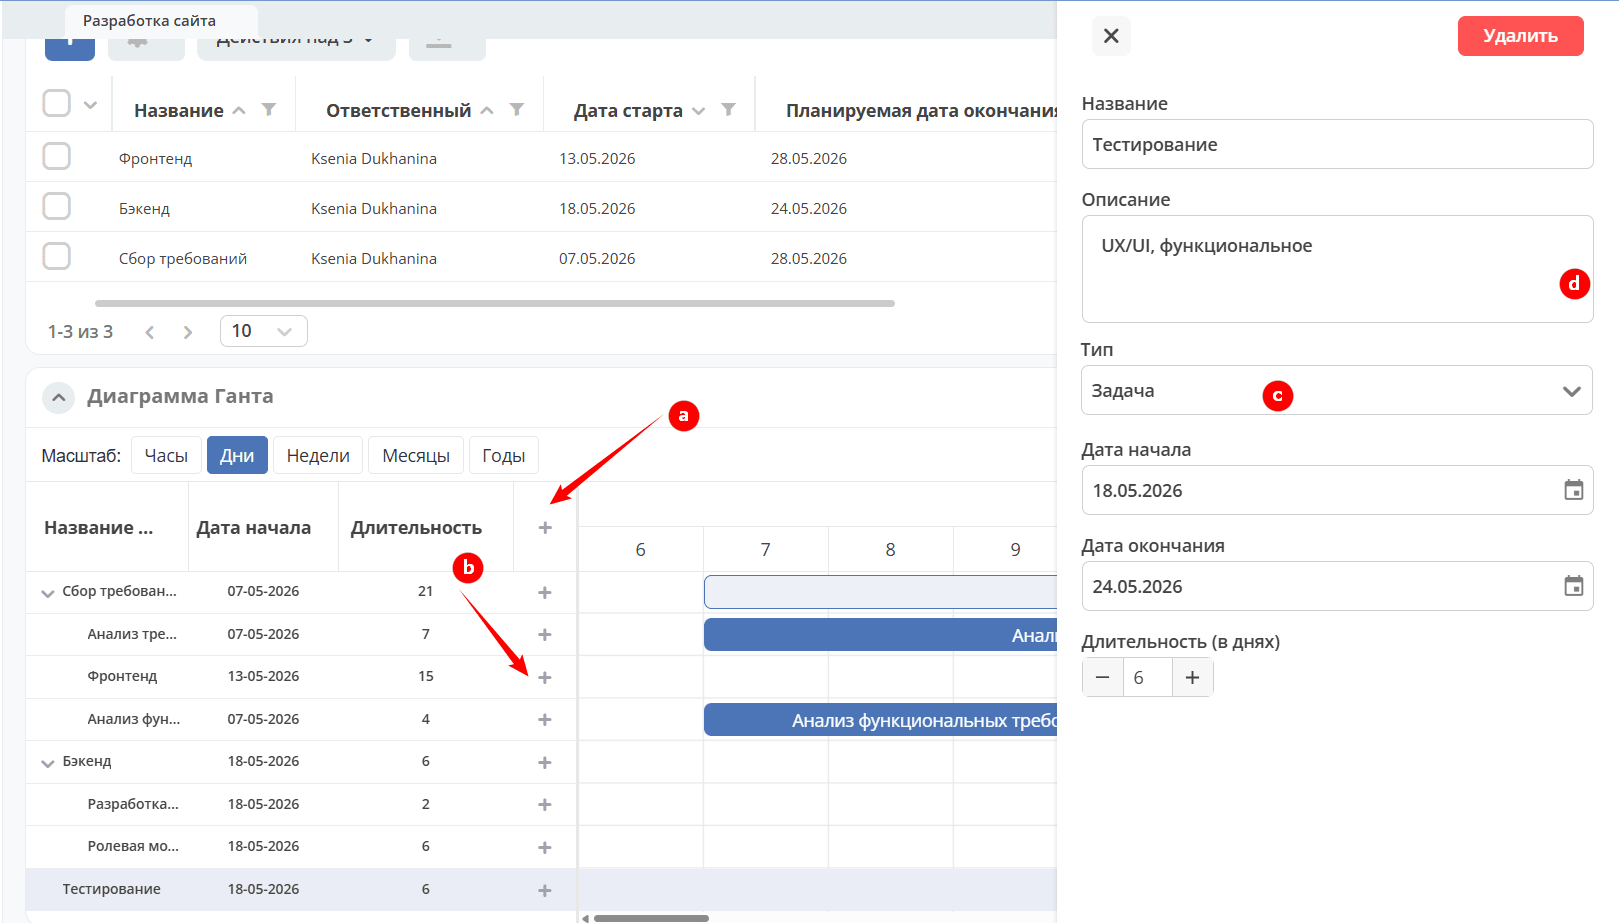
To add a task or stage:
Click (a) — for a task/stage, or (b) — for a subtask/substage. The item will be added to the list.
Select the type (c).
In the right panel, fill in the fields for the task/stage (d).
A task created on the chart will appear in the Project tasks or Stages section depending on the selected type.
For detailed functionality, see «Gantt Chart».
Time tracking
See above Time tracking
Document library
See above Document library
Commit and Merge request synchronization settings
Enabling this integration allows automatically displaying information about commits and merge requests from GitLab in project task cards.
To start commit and merge request synchronization, you need to:
Create an Access token in GitLab. In the GitLab profile, go to User settings -> Access tokens

When creating the token, it is mandatory to specify Select scopes - read_api
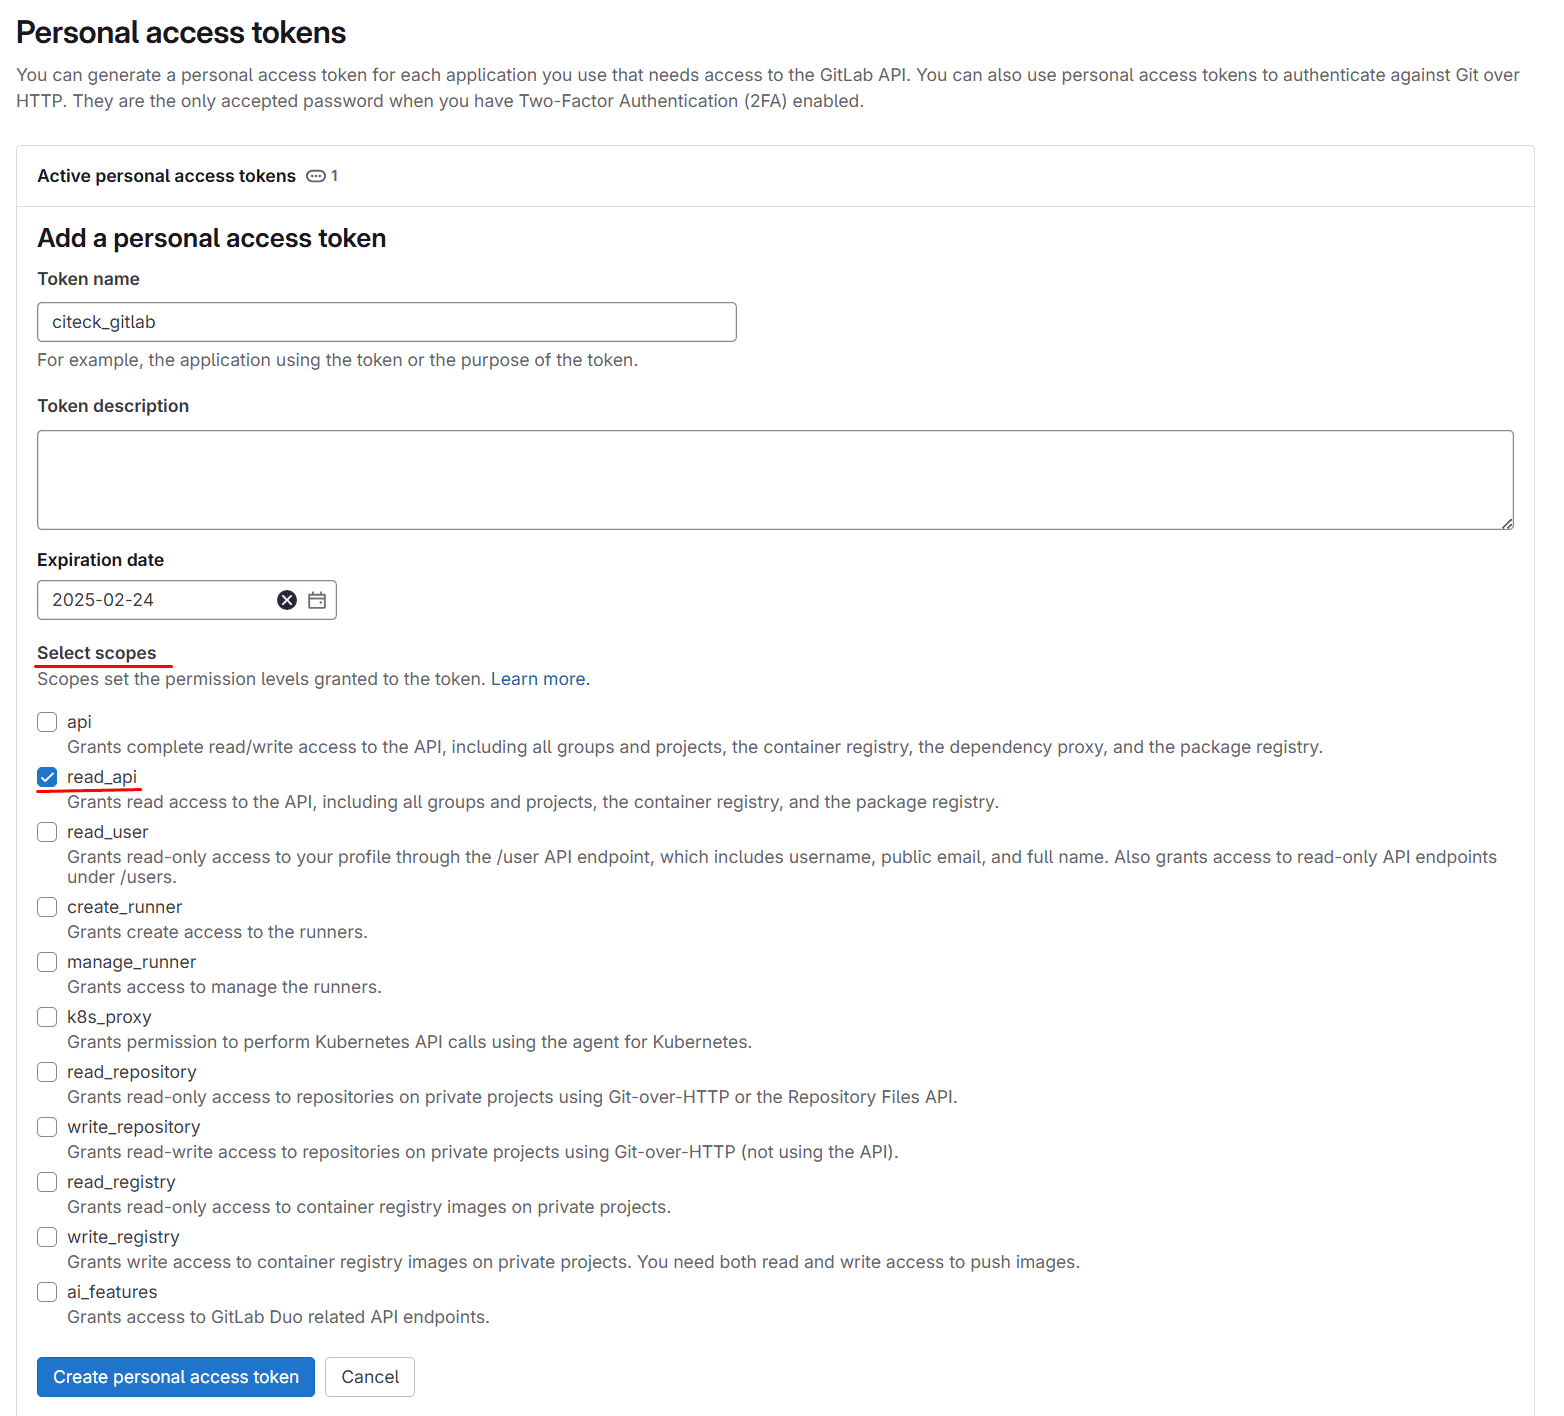
Then copy the created token:

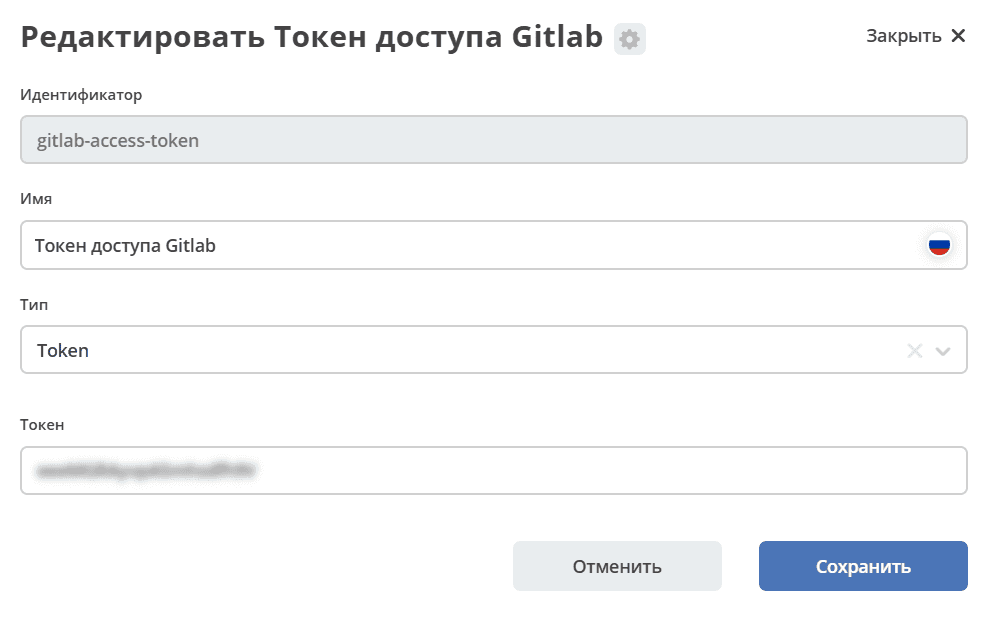
Go to Workspace «Admin Section» → Model → Secrets and specify it in the gitlab-access-token Secret
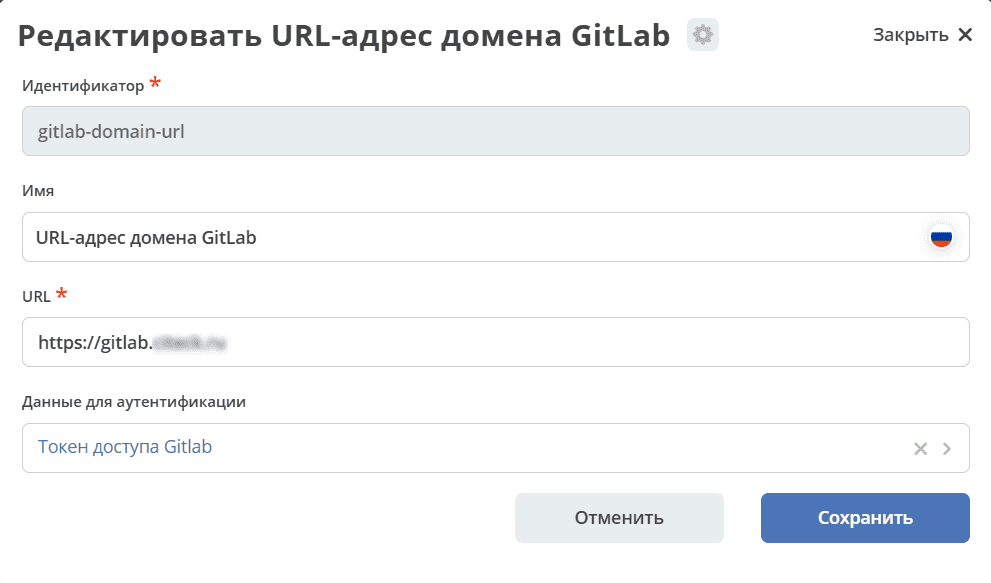
Go to Workspace «Admin Section» → Model → Endpoints and configure the gitlab-domain-url endpoint:
specify the GitLab URL – for example, https://gitlab.yourcompany.ru
select Gitlab Access Token in the Authentication Data
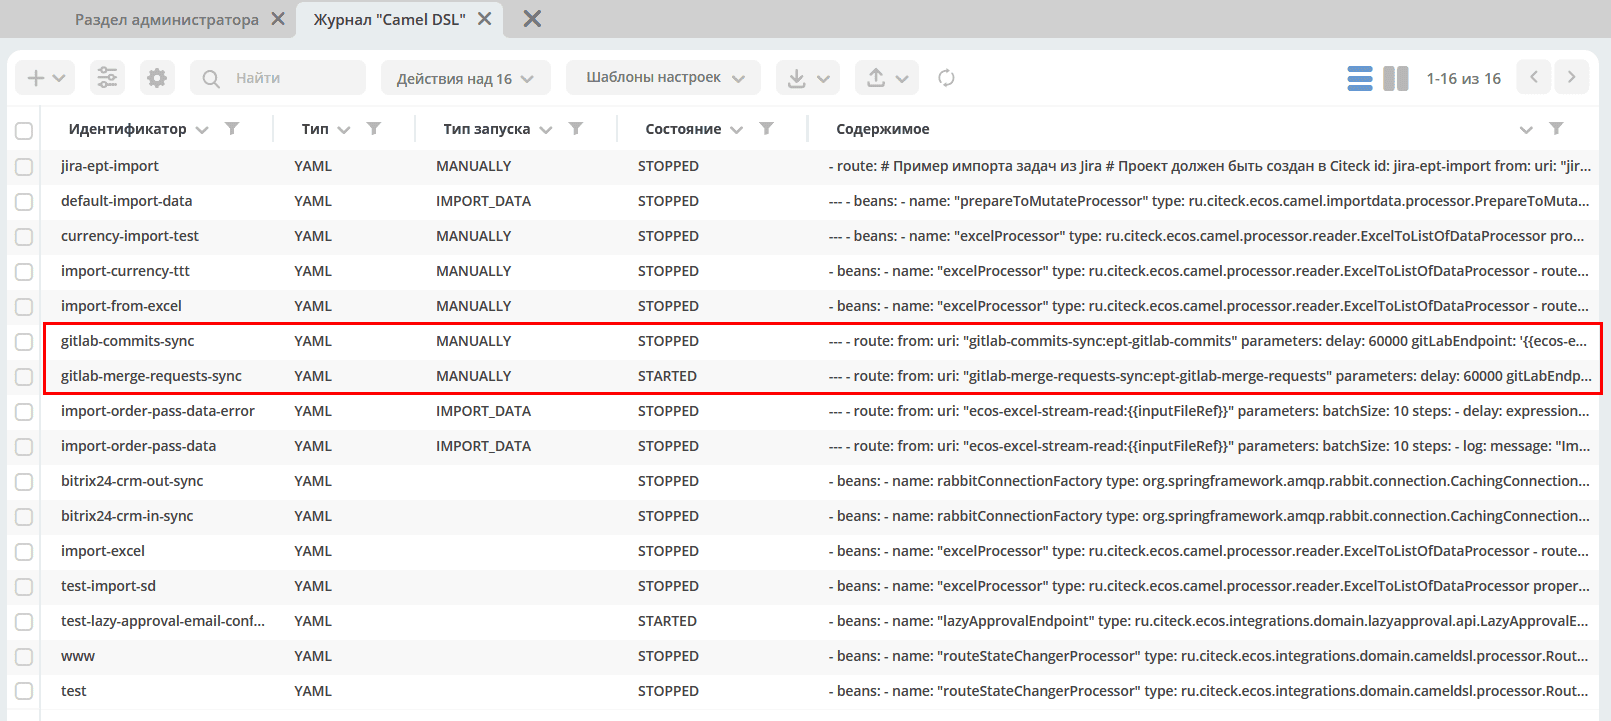
Go to Workspace «Admin Section» → Integration → Camel DSL, start gitlab-merge-requests-sync and gitlab-commits-sync:
Note
Synchronization will occur for all projects in GitLab that the created token has access to
Mapping of commits and MRs to tasks happens via the Project tracker task key specified in the commit comment or MR title in GitLab. That is, if the task key in Project Tracker is PT-1, then PT-1 must be specified in the commit comment or MR title in GitLab
More about actions available with Camel DSL.
Setting up task import from Jira
Introduction
This section describes setting up project synchronization from Jira to Citeck. The functionality is implemented using Apache Camel DSL and allows configuring flexible data import scenarios.
Main features
Import tasks (issues) from a Jira project to Citeck;
Import task comments;
Import time spent (work logs);
Import components;
Import tags (tags/labels);
Import releases;
Import sprints;
Import attachments;
Customizable mapping of task types, statuses, and priorities;
Customizable attribute transformation;
Import links between tasks.
Configuration example
- route:
    # Пример импорта задач из Jira
    # Проект должен быть создан в Citeck
    id: jira-crm-import
    from:
      uri: "jira-issues:crm-import"
      # Проверьте доступ к jira пользователя, под которым запускается импорт
      parameters:
        delay: 5000
        jiraHost: '{{ecos-endpoint:jira-host/url}}'
        jiraUser: '{{ecos-endpoint:jira-host/credentials/username}}'
        jiraToken: '{{ecos-endpoint:jira-host/credentials/password}}'
        projectKey: "ECOSCRM"
      steps:
        #- to: log:raw-jira-issues?level=INFO&showBody=true
        # Указание workspace и проекта обязательно
        - set-property:
            name: jiraImportedRecordIdPrefix
            constant: "imported-jira"
        - set-property:
            name: _workspace
            constant: "ECOSCRM"
        - set-property:
            name: link-project:project
            constant: "emodel/ept-project@eadfe69d-676a-42a5-b21f-2db7d5fc18bf"
        - set-property:
            name: "valuesMapping"
            constant: >
              {
                "_type": {
                  "10000": "emodel/type@ept-issue-epic",
                  "10001": "emodel/type@ept-issue-story",
                  "10002": "emodel/type@ept-issue-task",
                  "10003": "emodel/type@ept-issue-subtask",
                  "10004": "emodel/type@ept-issue-bug",
                  "10501": "emodel/type@ept-issue-task",
                  "10500": "emodel/type@ept-issue-story",
                  "10503": "emodel/type@ept-issue-bug"
                },
                "priority": {
                  "1": "100_urgent",
                  "2": "200_high",
                  "3": "300_medium",
                  "4": "400_low"
                },
                "_status": {
                  "1": "backlog",
                  "10010": "backlog",
                  "3": "in-progress",
                  "10000": "to-do",
                  "10561": "to-do",
                  "10011": "to-do",
                  "10510": "review",
                  "10101": "waiting-for-qa",
                  "10100": "in-qa-review",
                  "10537": "in-qa-review",
                  "10565": "in-qa-review",
                  "10001": "done",
                  "10541": "done",
                  "10530": "on-hold",
                  "10006": "on-hold",
                  "10531": "on-hold"
                },
                "resolution": {
                  "10000": "emodel/ept-issue-resolution@done",
                  "10001": "emodel/ept-issue-resolution@wont-do",
                  "10002": "emodel/ept-issue-resolution@duplicate",
                  "10003": "emodel/ept-issue-resolution@cannot-reproduce",
                  "10400": "emodel/ept-issue-resolution@cannot-reproduce"
                }
              }
        - set-property:
            name: "valuesConverter"
            constant: >
              {
                "description": "jiraRenderedFieldToTextArea",
                "_created": "jiraDateToInstant",
                "_modified": "jiraDateToInstant",
                "endDate": "jiraDateToInstant",
                "reporter": "emailToPersonRef",
                "implementer": "emailToPersonRef",
                "epicLink": "issueKeyToRef",
                "remainingEstimateMills": "secondsToMills"
              }
        - set-property:
            name: "attributesMapping"
            # Json path to EPT field
            constant: >
              {
                "fields.issuetype.id": "_type",
                "fields.priority.id": "priority",
                "fields.summary": "summary",
                "fields.description": "description",
                "fields.resolution.id": "resolution",
                "fields.labels": "tags",
                "fields.resolutiondate": "endDate",
                "fields.status.id": "_status",
                "fields.reporter.emailAddress": "reporter",
                "fields.assignee.emailAddress": "implementer",
                "fields.timetracking.originalEstimate": "estimatedWorks",
                "fields.timetracking.remainingEstimateSeconds": "remainingEstimateMills",
                "fields.created": "_created",
                "fields.updated": "_modified",
                "fields.customfield_10002": "epicLink"
              }
        - set-property:
            name: "staticAttributes"
            constant: >
              {
                "__disableAudit": true
              }
        - set-property:
            name: "linksMapping"
            constant: >
              {
                "10000": "issue-links:blocker",
                "10001": "issue-links:clone",
                "10002": "issue-links:duplicate",
                "10300": "issue-links:problem",
                "10003": "issue-links:relates"
              }
        - split:
            expression:
              simple: "${body}"
            steps:
              - set-property:
                  name: "originalIssue"
                  simple: "${body}"
              # Трансформация метаданных jira в поля ept
              - to:
                  uri: "transform-jira-issue:crm-import"
                  parameters:
                    jiraHost: '{{ecos-endpoint:jira-host/url}}'
                    jiraUser: '{{ecos-endpoint:jira-host/credentials/username}}'
                    jiraToken: '{{ecos-endpoint:jira-host/credentials/password}}'
              - to: log:transformed-issue?level=INFO&showBody=true
              # Создание ept задачи через records
              - to: "ecos-records-mutate:?sourceId=emodel/ept-issue"
              #- to: log:created-record?level=INFO&showHeaders=true

              - set-header:
                  name: eptIssueRef
                  simple: "${header.recordsMutated[0]}"

              - step:
                  id: import-comments
                  steps:
                    - set-body:
                        simple: "${exchangeProperty.originalIssue}"
                    - set-header:
                        name: commentLinkToRecord
                        simple: "${header.eptIssueRef}"
                    - to: "transform-jira-comment:crm-import"
                    - to: "ecos-records-mutate:?sourceId=emodel/comment"
                    #- to: log:importcomments?level=INFO&showBody=true

              - step:
                  id: import-components
                  steps:
                    - set-body:
                        simple: "${exchangeProperty.originalIssue}"
                    - set-header:
                        name: eptIssueRef
                        simple: "${header.eptIssueRef}"
                    - to: "import-jira-component:crm-import"
                    #- to: log:importcomponents?level=INFO&showBody=true

              - step:
                  id: import-jira-tags
                  steps:
                      - set-body:
                          simple: "${exchangeProperty.originalIssue}"
                      - set-header:
                          name: eptIssueRef
                          simple: "${header.eptIssueRef}"
                      - to: "import-jira-tags:crm-import"
                      #- to: log:importtags?level=INFO&showBody=true

              - step:
                  id: import-releases
                  steps:
                    - set-body:
                        simple: "${exchangeProperty.originalIssue}"
                    - set-header:
                        name: eptIssueRef
                        simple: "${header.eptIssueRef}"
                    - to:
                        uri: "import-jira-releases:crm-import"
                        parameters:
                          jiraHost: "{{ecos-endpoint:jira-host/url}}"
                          jiraUser: "{{ecos-endpoint:jira-host/credentials/username}}"
                          jiraToken: "{{ecos-endpoint:jira-host/credentials/password}}"
                    #- to: log:importreleases?level=INFO&showBody=true

              - step:
                  # Если настроен плагин 2FA для Jira, то в нем нужно отключить принудительный
                  # 2FA для url /secure/attachment
                  id: import-attachments
                  steps:
                    - set-body:
                        simple: "${exchangeProperty.originalIssue}"
                    - set-header:
                        name: eptIssueRef
                        simple: "${header.eptIssueRef}"
                    - to:
                        uri: "import-jira-attachment:crm-import"
                        parameters:
                          jiraHost: "{{ecos-endpoint:jira-host/url}}"
                          jiraUser: "{{ecos-endpoint:jira-host/credentials/username}}"
                          jiraToken: "{{ecos-endpoint:jira-host/credentials/password}}"
                    #- to: log:importattachments?level=INFO&showBody=true

              - step:
                  id: import-sprint
                  steps:
                    - set-body:
                        simple: "${exchangeProperty.originalIssue}"
                    - set-header:
                        name: eptIssueRef
                        simple: "${header.eptIssueRef}"
                    - to:
                        uri: "import-jira-sprint:crm-import"
                        parameters:
                          # Поле в jira, в котором хранится спринт
                          sprintFieldId: "customfield_10006"
                    #- to: log:importsprint?level=INFO&showBody=true

              - step:
                  id: import-work-logs
                  steps:
                    - set-body:
                        simple: "${exchangeProperty.originalIssue}"
                    - set-header:
                        name: worklogLinkToRecord
                        simple: "${header.eptIssueRef}"
                    - to: "transform-jira-worklog:crm-import"
                    #- to: log:transformworklog?level=INFO&showBody=true
                    - to: "ecos-records-mutate:?sourceId=emodel/ecos-time-tracking-type"
                    #- to: log:importworklogs?level=INFO&showBody=true
Quick setup
Create a project in Citeck. After this, a project workspace should be created.
In Jira, create a user for importing tasks, obtain their token or password.
In the Endpoints journal (Workspace «Admin Section» → Model), create an endpoint, fill in the URL, authentication data with type Basic.
In the Camel DSL journal (Workspace «Admin Section» → Integration), create a route with a context based on the example above. Be sure to specify the Jira connection parameters,
_workspaceandlink-link-project:project.Import logs are available in the Synchronization Log journal (Workspace «Admin Section» → Integration).
You can view the import status and reset it in the Synchronization Status journal (Workspace «Admin Section» → Integration).
After the tasks are imported, turn off the route.
Adjust the task counter generator. To do this, execute the script in the browser console:
const record = Records.get("emodel/num-template-action@");
record.att("type", "set-next-number");
record.att("args",
{
      "templateRef": "emodel/num-template@ept-issue-num-template",
      "counterKey": "emodel/ept-project@767a669f-8455-4cf3-b43f-75b66c6eeb8f",
      "nextNumber": 39
})
record.save();
"nextNumber": 39- the next task number that will be assigned when creating a new task."nextNumber": 39- the next task number that will be assigned when creating a new task."counterKey": "emodel/ept-project@767a669f-8455-4cf3-b43f-75b66c6eeb8f"- the project’s recordRef, similar to thelink-project:projectfield in the import route.
Configuration parameters
Main parameters
jiraHost - Jira server URL
jiraUser - Username for connecting to Jira
jiraToken - User token or password for connecting to Jira
projectKey - Key of the Jira project to import
delay - Interval for checking new tasks in milliseconds
Specifying workspace and project
For the import to work correctly, it is mandatory to specify the workspace and project in Citeck:
- set-property:
    name: _workspace
    constant: "ECOSCRM" # id рабочего пространства
- set-property:
    name: link-project:project
    constant: "emodel/ept-project@eadfe69d-676a-42a5-b21f-2db7d5fc18bf" # recordRef проекта, должен быть связан с рабочим пространством
Setting up value mapping
valuesMapping allows specifying the correspondence of values from Jira to values in Citeck:
{
  "_type": {
    "10000": "emodel/type@ept-issue-epic",
    "10001": "emodel/type@ept-issue-story",
    "10002": "emodel/type@ept-issue-task",
    "10003": "emodel/type@ept-issue-subtask",
    "10004": "emodel/type@ept-issue-bug"
  },
  "priority": {
    "1": "100_urgent",
    "2": "200_high",
    "3": "300_medium",
    "4": "400_low"
  },
  "_status": {
    "1": "backlog",
    "10010": "backlog",
    "3": "in-progress"
  }
}
Value converters
valuesConverter defines the conversion of field values from the Jira format to the Citeck format:
{
  "description": "jiraRenderedFieldToTextArea",
  "_created": "jiraDateToInstant",
  "_modified": "jiraDateToInstant",
  "endDate": "jiraDateToInstant",
  "reporter": "emailToPersonRef",
  "implementer": "emailToPersonRef",
  "epicLink": "issueKeyToRef",
  "remainingEstimateMills": "secondsToMills"
}
Available converters:
jiraRenderedFieldToTextArea - converts rendered HTML content of a Jira field to the TextArea format for Citeck, preserving formatting and links
jiraDateToInstant - converts a date from the Jira format to the Instant format for Citeck
emailToPersonRef - converts a Jira user’s email address into a reference to the user in Citeck
issueKeyToRef - converts a Jira task key (e.g., ECOSCRM-123) into a reference to the corresponding task in Citeck
secondsToMills - converts time in seconds to milliseconds for correct display in Citeck
Attribute mapping
attributesMapping defines the correspondence of Jira fields to entity attributes in Citeck:
{
  "fields.issuetype.id": "_type",
  "fields.priority.id": "priority",
  "fields.summary": "summary",
  "fields.description": "description",
  "fields.resolution.id": "resolution",
  "fields.labels": "tags",
  "fields.resolutiondate": "endDate",
  "fields.status.id": "_status",
  "fields.reporter.emailAddress": "reporter",
  "fields.assignee.emailAddress": "implementer",
  "fields.timetracking.originalEstimate": "estimatedWorks",
  "fields.timetracking.remainingEstimateSeconds": "remainingEstimateMills",
  "fields.created": "_created",
  "fields.updated": "_modified",
  "fields.customfield_10002": "epicLink"
}
Mapping links between tasks
linksMapping defines the correspondence of link types between tasks in Jira to link types in Citeck:
{
  "10000": "issue-links:blocker",
  "10001": "issue-links:clone",
  "10002": "issue-links:duplicate",
  "10300": "issue-links:problem",
  "10003": "issue-links:relates"
}
Static attributes
staticAttributes allows specifying attributes that will be added to all imported entities:
{
  "__disableAudit": true
}
For correct setting of attributes _created, _modified, etc., it is necessary to specify __disableAudit: true
Components and synchronization stages
Importing tasks (Issues)
The main synchronization component, performs loading tasks from Jira and their transformation into Citeck entities. Uses JiraIssuesComponent and TransformJiraIssueComponent for operation.
Importing comments
The TransformJiraCommentComponent component imports task comments from Jira to Citeck, saving them as related records with the type "emodel/type@ecos-comment".
Importing time spent
The TransformJiraWorkLogComponent component imports time spent records (work logs) from Jira to Citeck, saving them as entities with the type "emodel/type@ecos-time-tracking-type".
Importing components
The ImportJiraComponentComponent component imports components assigned to tasks in Jira.
Importing tags
The ImportJiraTagsComponent component imports labels from Jira, converting them into Citeck tags.
Importing releases
The ImportJiraReleasesComponent component imports release information (fixVersions and affectedVersions) from Jira to Citeck.
Importing sprints
The ImportJiraSprintComponent component imports information about sprints to which tasks are assigned in Jira.
Importing attachments
The ImportJiraAttachmentComponent component loads task attachments from Jira and imports them into Citeck.
Additional features
Identifier prefix
For unique identification of imported records, you can set a prefix via the jiraImportedRecordIdPrefix property:
- set-property:
    name: jiraImportedRecordIdPrefix
    constant: "imported-jira"
All records created during the import will use this prefix. Note that if the import is performed multiple times, existing records will be updated and new ones will be created.
If you need to restart the import, you can reset the import state in the Synchronization Status journal (Workspace «Admin Section» → Integration).
Limitations and recommendations
Before setting up the import, ensure the Jira user has the necessary access rights to the project.
When using two-factor authentication in Jira, you must use an API token instead of a password.
For importing attachments, it may be necessary to disable forced 2FA for the URL
/secure/attachmentin Jira settings.It is recommended to start with a small set of tasks to verify the correctness of the import.
When importing a large number of tasks, it is recommended to increase the value of the
delayparameter.Ensure that
_workspaceandlink-project:projectare correctly specified.
Troubleshooting
Problem: Tasks are not imported
Solution: Check the correctness of specifying jiraHost, jiraUser, jiraToken, and projectKey
Problem: Attachments are not imported
Solution: Check the two-factor authentication settings in Jira for the URL
/secure/attachmentProblem: Incorrect mapping of types/statuses
Solution: Check the ID values in Jira and update the corresponding valuesMapping section
Problem: Error “Value mapping for field does not contain value”
Solution: Add the missing value to the corresponding valuesMapping section