Service Desk Module
The Service Desk module provides a solution for processing service requests, incidents, and support tickets.
Business Process Scheme and Implementation Features
The BP is implemented in the internal BPMN business process editor. Details about the BPMN business process editor.
The main process scheme is divided into subprocesses; the trigger (event) for starting a subprocess is a change in the ticket status.
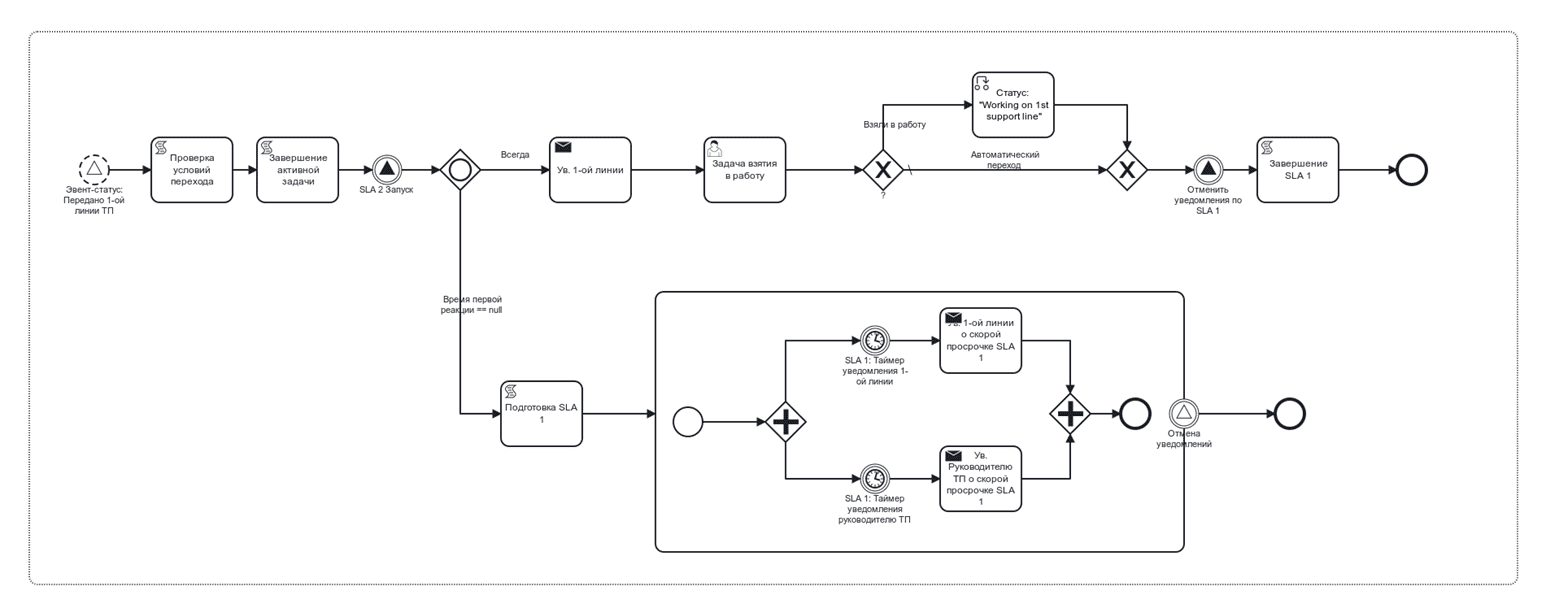
Main process scheme:

Division into a subprocess when the event “Status Transferred to 1st Line Support” is triggered:
Details about BPMN events
Changing the status, entering a comment, or modifying an attribute is accompanied by sending notifications to the interested process participants.
Roles
Initiator |
Determined automatically:
|
1st Line Performer |
Employees belonging to the “1st Line Support” group.
Users assigned tasks for execution on an SD ticket can leave comments on the ticket, add documents, and have full editing rights for the Ticket and reference books.
|
2nd Line Performer |
Employees belonging to the “2nd Line Support” group.
Users assigned tasks for execution on an SD ticket can leave comments on the ticket and add documents.
|
3rd Line Performer |
Employees belonging to the group “3rd Line Support_X” or a specific performer in the task, selected from the users of the “3rd Line Support_X” group. The composition of the “3rd Line Support_X” group depends on the customer/project.
Instead of “X”, the Project, Customer, or another attribute will be specified.
Can leave comments on the ticket and add documents to it.
|
Support Manager |
Employee - head of technical support.
Full editing rights for both tickets and reference books.
|
Additional Participant |
An employee selected from the Organizational Structure when performing the “Add Participant” action.
Can view the ticket they were added to and add a comment in the comments widget
|
Technologist |
An employee or Group with process administrator rights, like the Support Manager - full editing rights for the Ticket and reference books.
Can participate in the process (perform tasks and move the ticket through its lifecycle) but does not receive notifications.
|
Organizational structure groups where users should be added
1st Line Support
2nd Line Support
3rd Line Support
Technologists
Support Manager
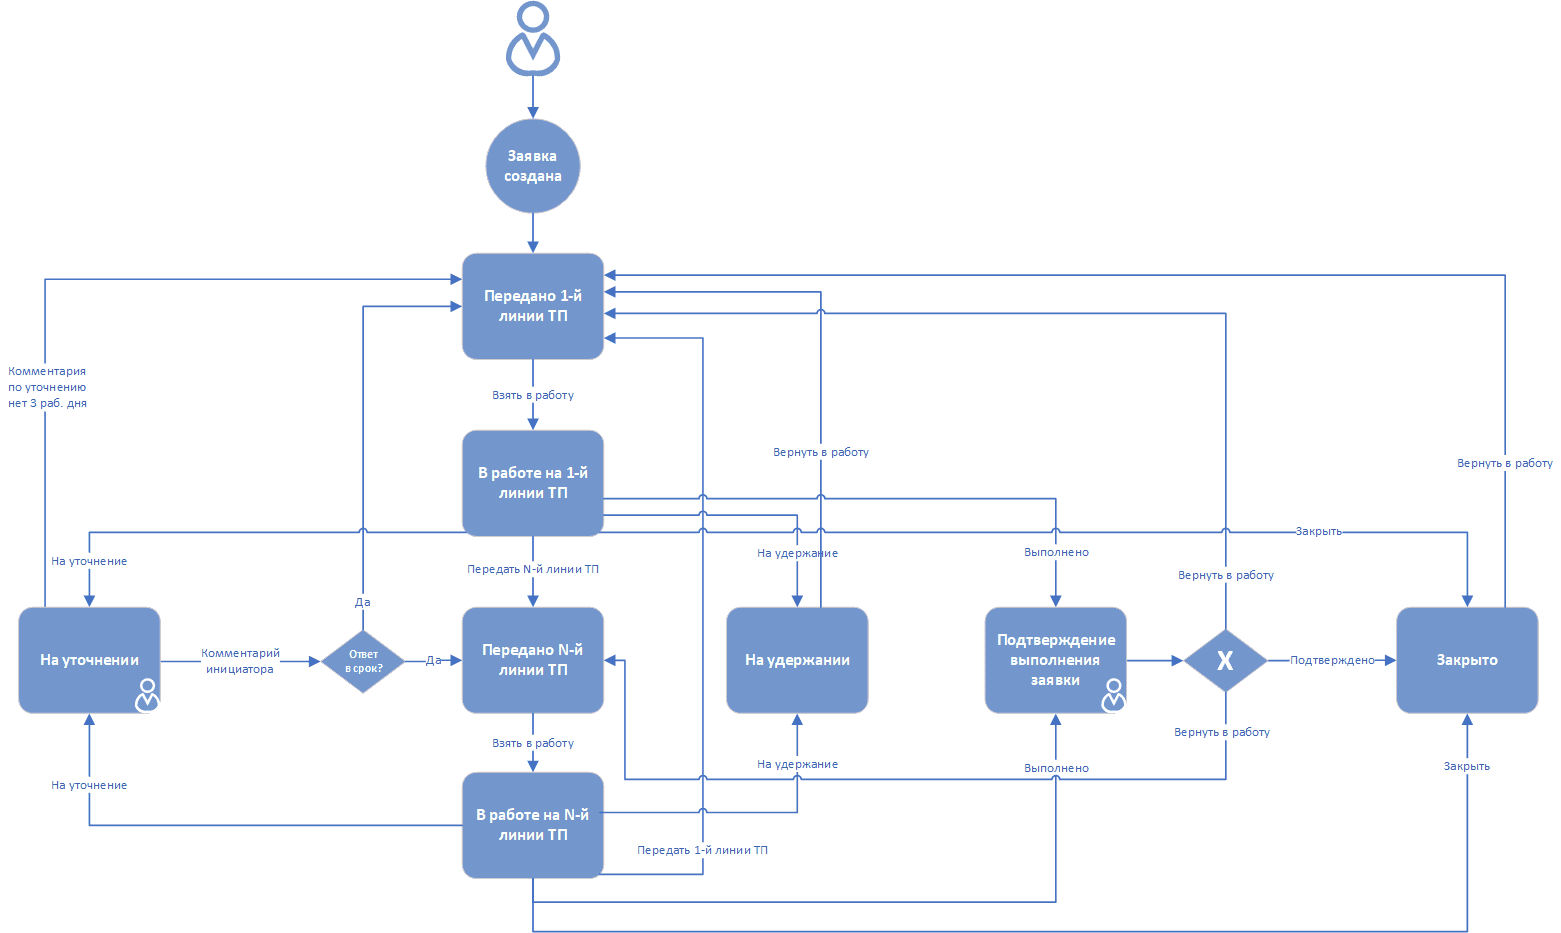
Statuses
Ticket transition through statuses:
Transferred to 1st Line Support |
The Initiator creates an SD ticket card in the System or the Initiator sends an email using a template describing the problem.
The System creates an SD ticket card based on the Initiator’s email using a pre-configured template.
The System starts the ticket processing process, assigns the ticket to the 1st line support user group, or the ticket is returned by Performers of the 2nd, 3rd line Support, or the Initiator.
|
In Progress at 1st Line Support |
The 1st line Support Performer takes over the ticket.
|
Transferred to 2nd Line Support |
The 1st line Support Performer sends it to the 2nd line support, or the Initiator returns the ticket.
|
In Progress at 2nd Line Support |
The 2nd line Support Performer takes over the ticket.
|
Transferred to 3rd Line Support |
The 1st line Support Performer or the 2nd line Support Performer sends it to the 3rd line support, or the Initiator returns the ticket.
|
In Progress at 3rd Line Support |
The 3rd line Support Performer takes over the ticket.
|
Ticket Completion Confirmation |
A Performer from any support line completes the ticket themselves and sends it for completion confirmation to the Initiator.
|
Clarification Needed |
A Performer from any support line sends the ticket for clarification to the Initiator.
|
On Hold |
A Performer from any support line puts the ticket on hold.
Work is suspended because some action is awaited.
For example, work is suspended on the 1st line because a task for the 3rd line was created for this issue. Since the problem is not resolved, no work is being done on the 1st line, and the ticket is moved to On Hold status.
|
Closed |
A Performer from any support line closes the ticket upon its completion and confirmation by the Initiator.
|
Available in which workspace
The module is available in the workspace Service desk.
Journals
Information about tickets is presented in the menu sub-items:
All Open Tickets;
In Progress at 1st Line Support;
In Progress at 2nd Line Support;
In Progress at 3rd Line Support;
All Tickets
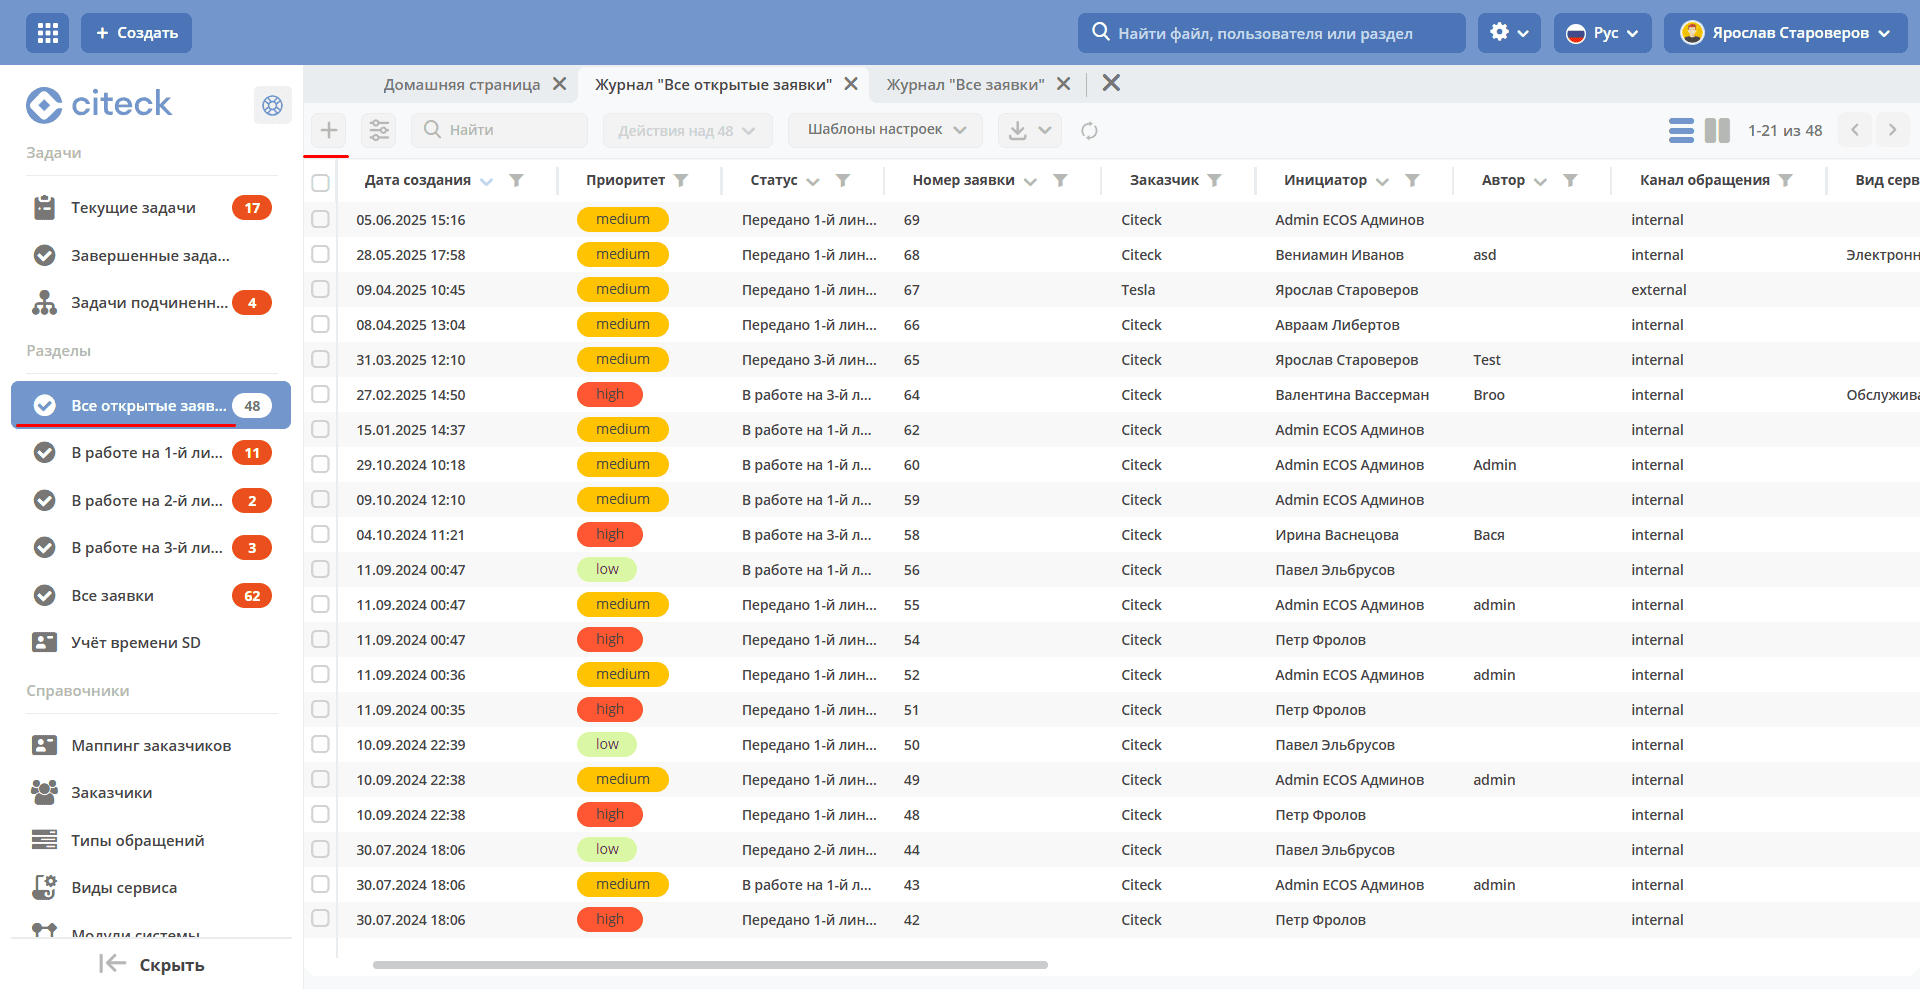
Clicking on a menu item opens a journal containing tickets:
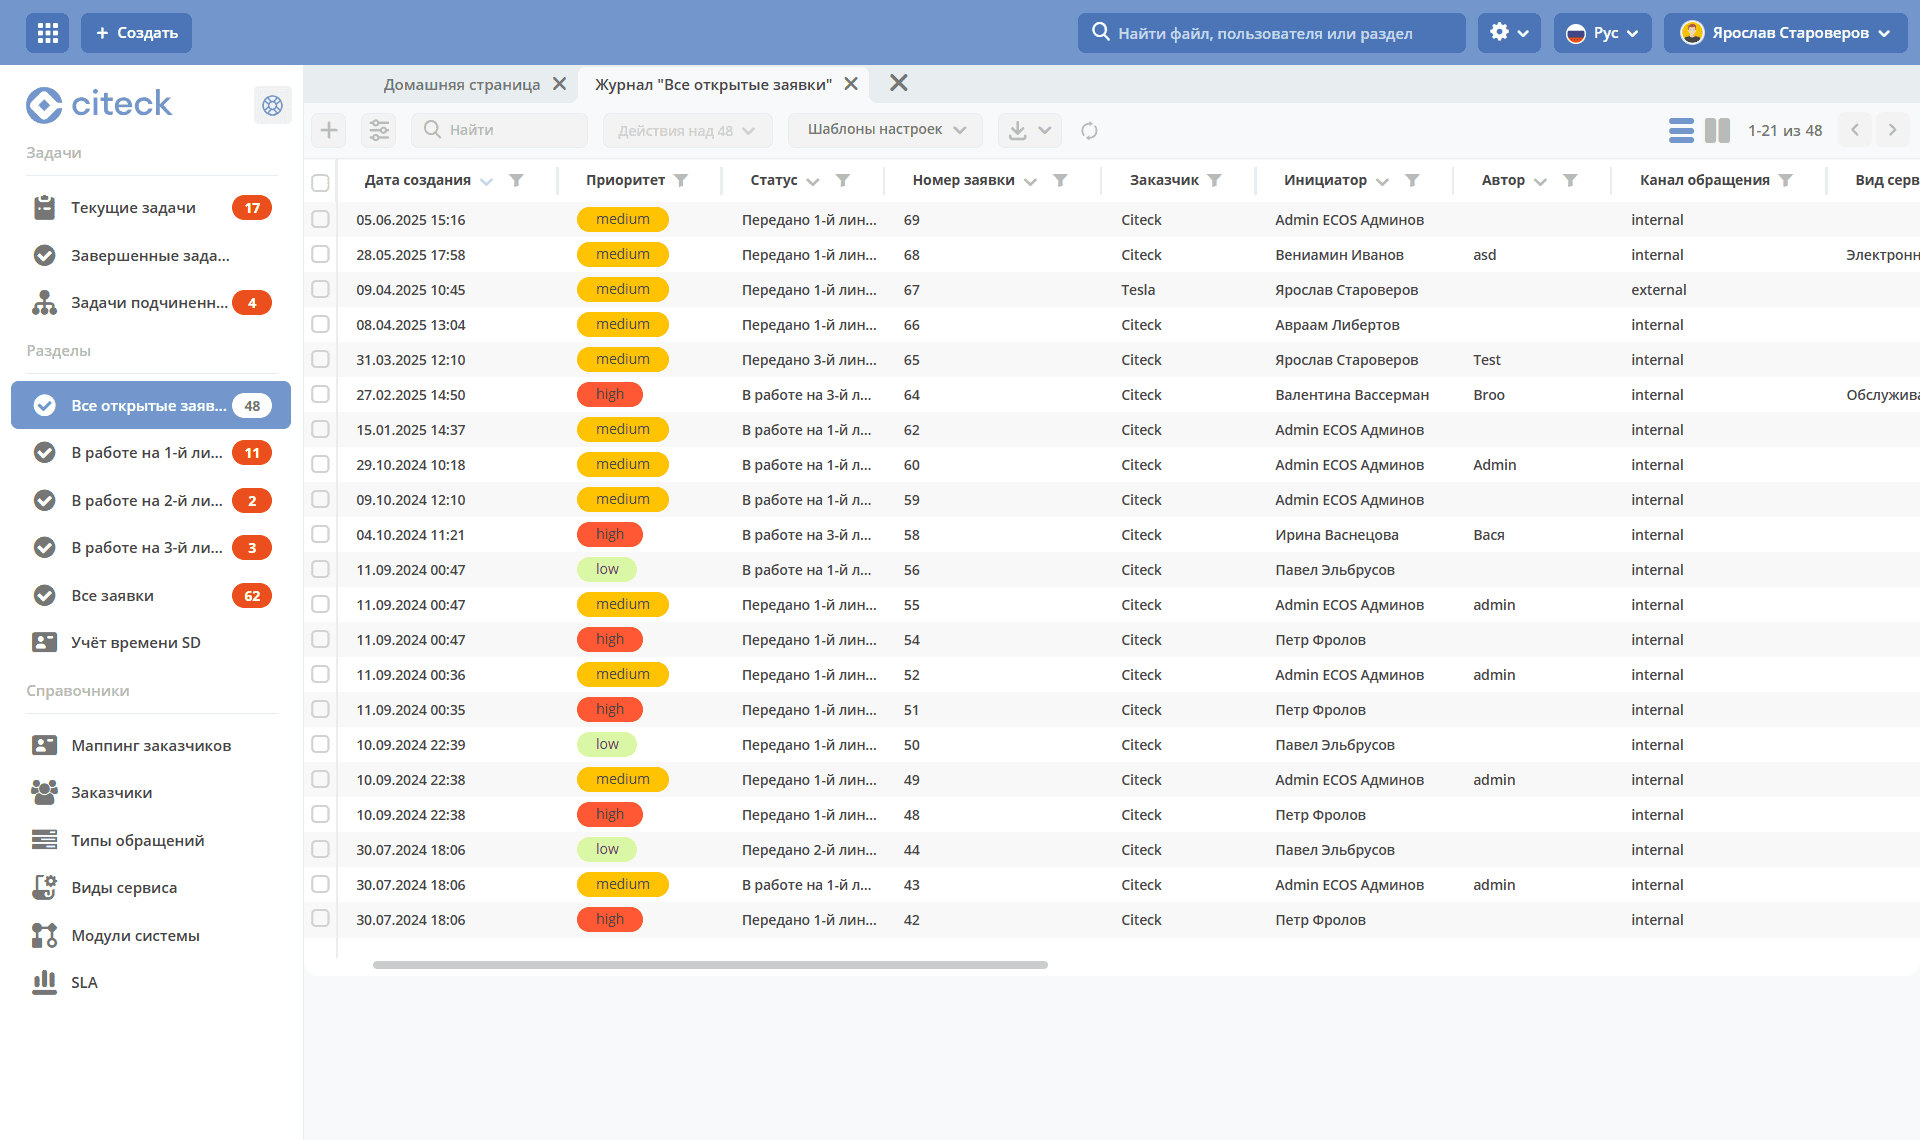
Ticket priority is automatically marked by color:

|
Low |

|
Medium |

|
High |

|
Urgent |
Related journals - reference books:
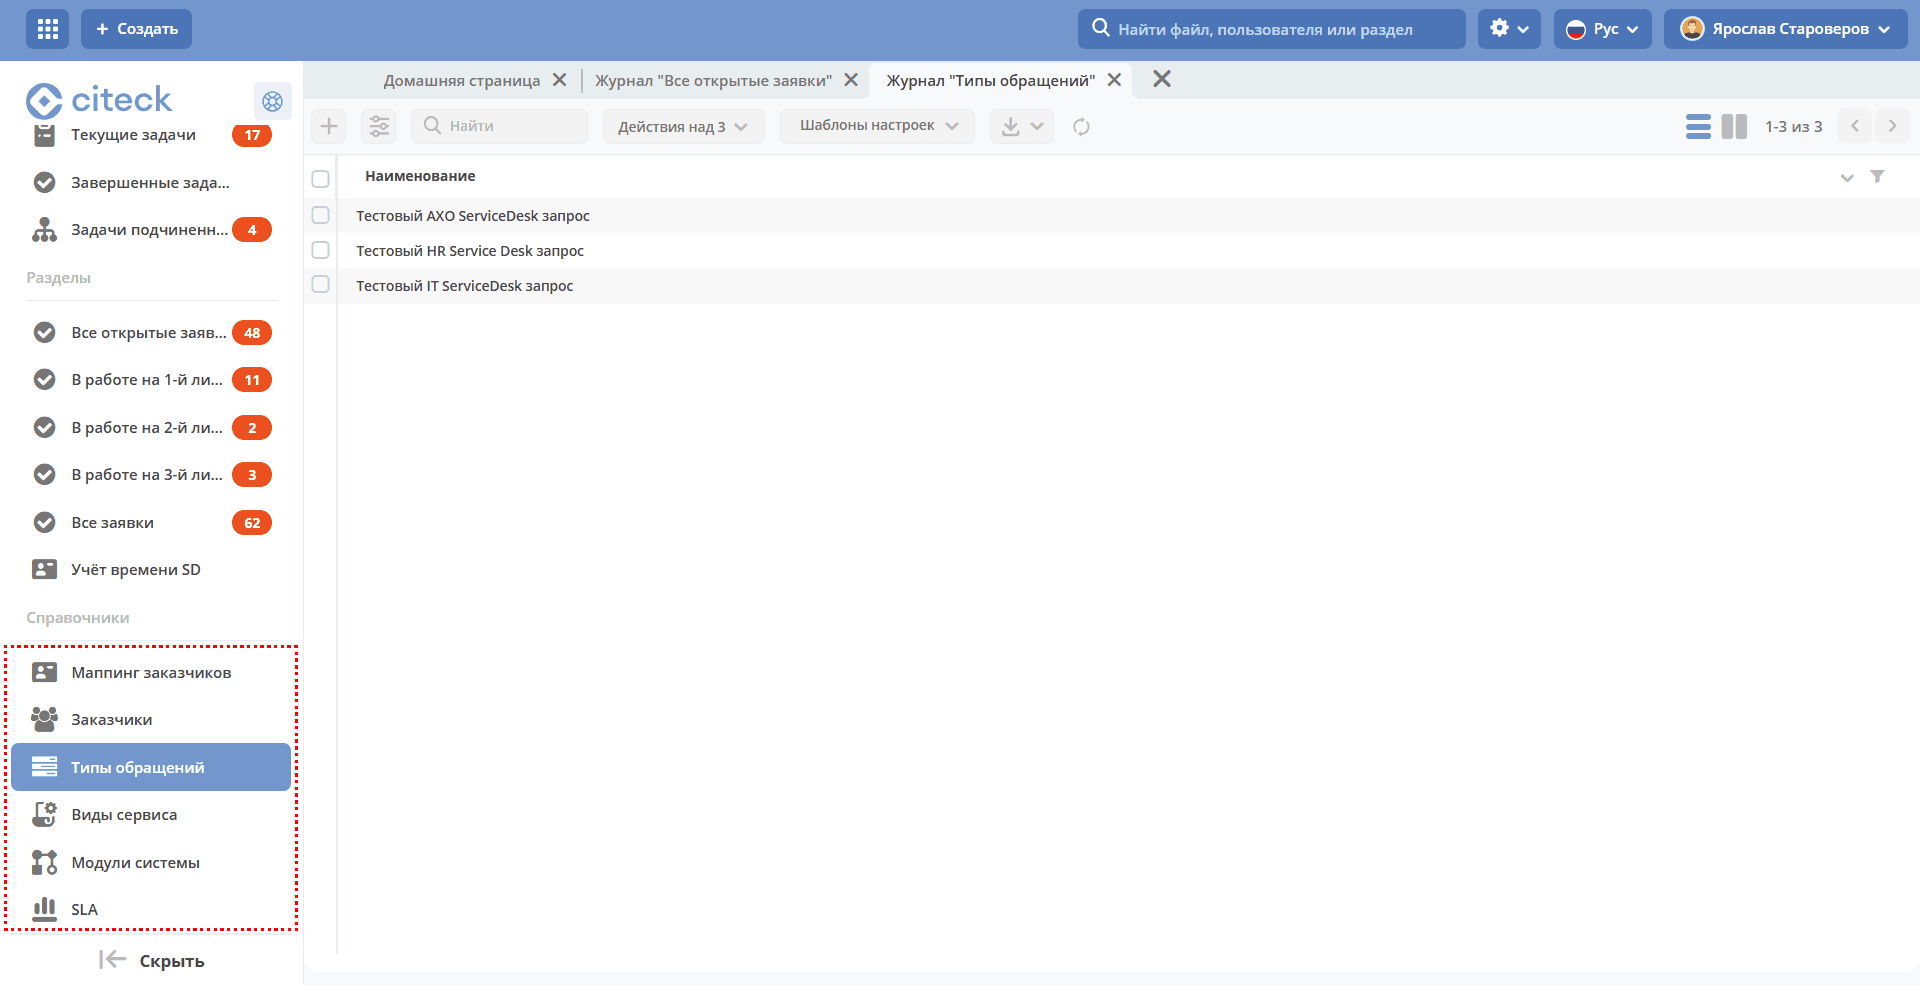
Customer Mapping
v2/journals?journalId=clients-mapping-journal&ws=service-desk-workspaceCustomers -
v2/journals?journalId=sd-clients-journal&ws=service-desk-workspaceRequest Types -
v2/journals?journalId=petition-types-journal&ws=service-desk-workspaceService Types -
v2/journals?journalId=service-types-journal&ws=service-desk-workspaceSystem Modules -
v2/journals?journalId=system-module-journal&ws=service-desk-workspaceSLA
v2/journals?journalId=sd-sla-journal&ws=service-desk-workspaceWorking Schedule
v2/journals?journalId=type$working-schedule&ws=admin$workspace
Kanban
A Kanban board is available for the “All Tickets” journal.
Kanban is a visual representation of tasks as a virtual project board. The mode is accessible by clicking on:
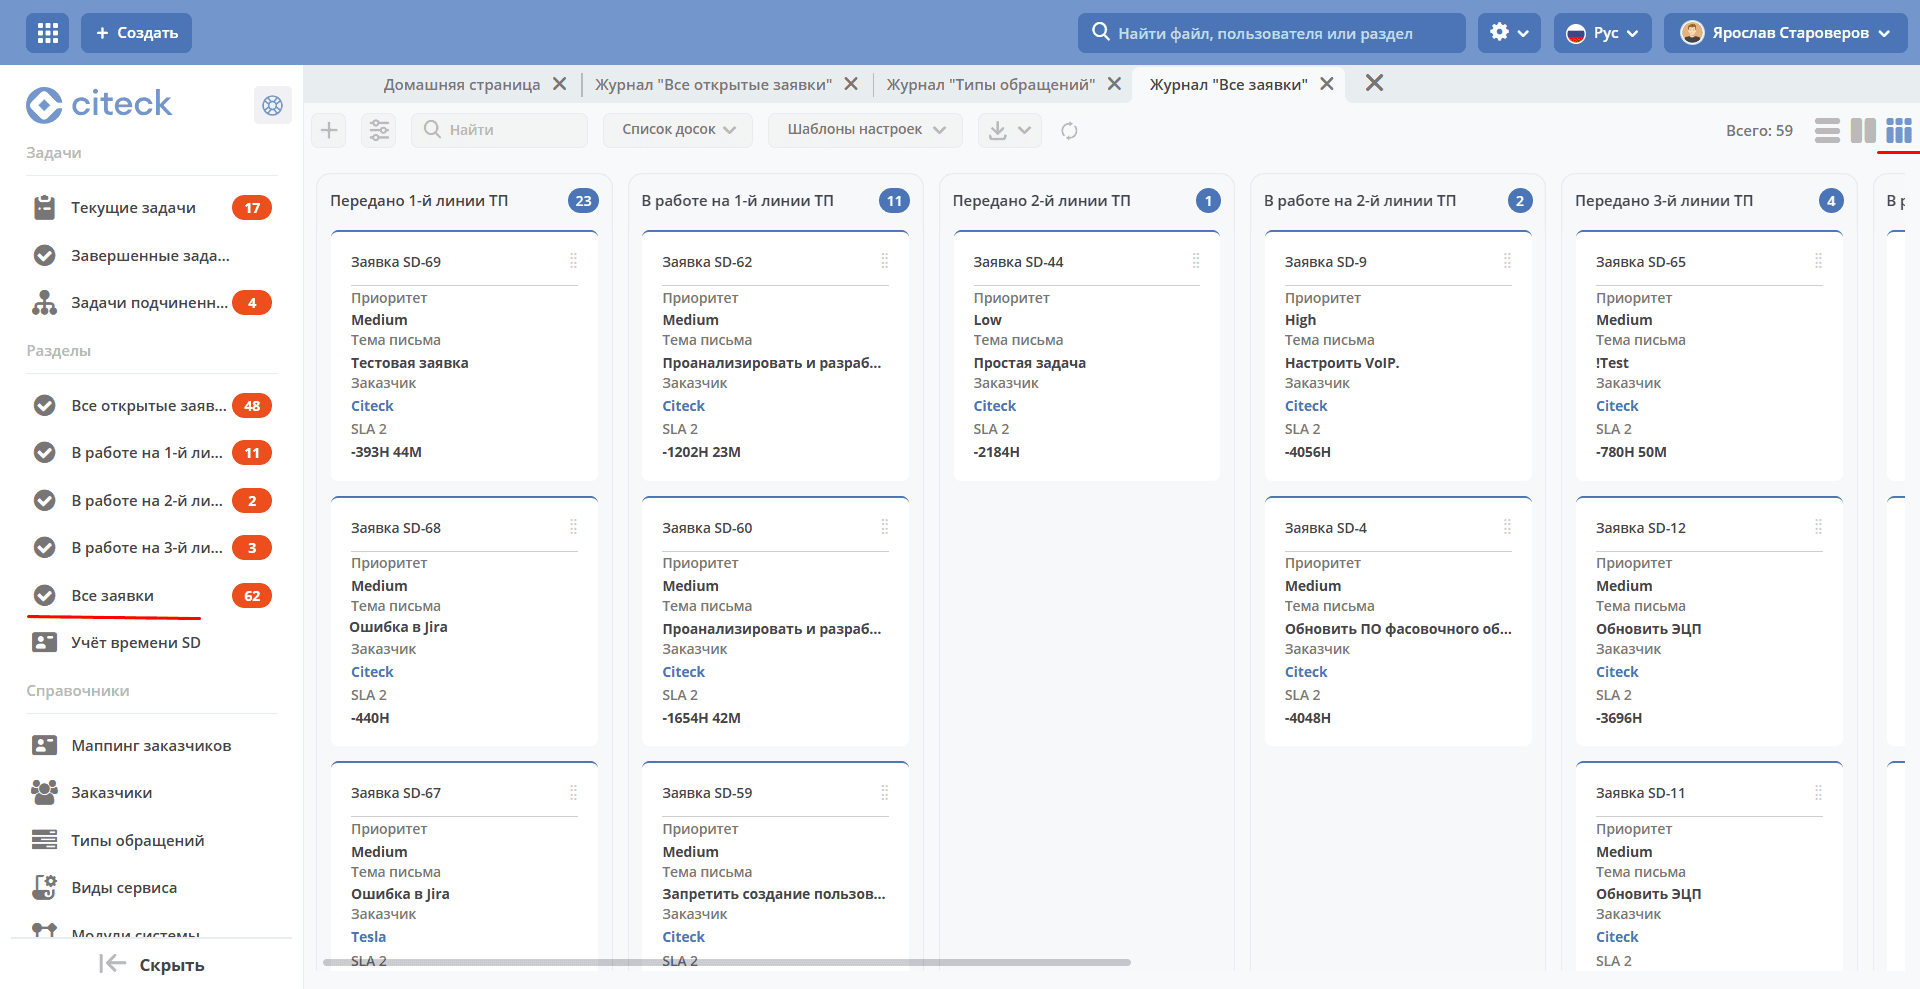
The board columns display ticket statuses; on the board itself, tickets are distributed by status. Clicking on a ticket’s name opens its card.
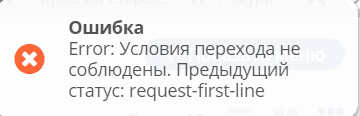
Transition between statuses can be done via the Kanban board by moving the card across columns.

If the conditions for status change are not met, a warning is issued:
Creating a Ticket
A ticket can be created by the System from a customer email or manually by the Initiator - a system user in ECOS.
Creating a ticket in ECOS is possible using the quick create button:
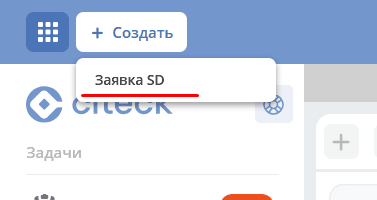
or from the journal of the “Service desk” section:
The ticket creation form becomes available on the screen:
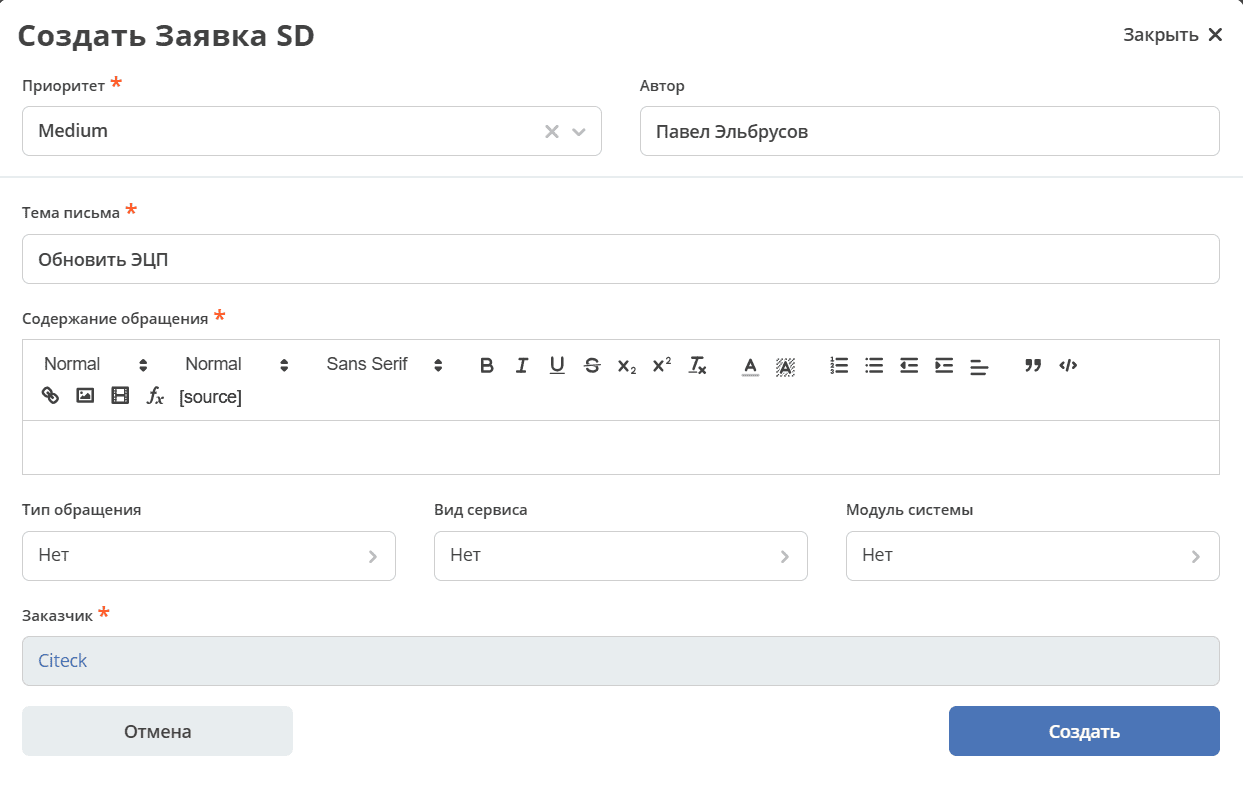
where the mandatory fields must be filled: Priority, Email Subject, Request Content, Customer.
Use the visual editor for text input, which provides a wide range of options for configuring and changing the text appearance, formatting, adding images, links.
Click Create.
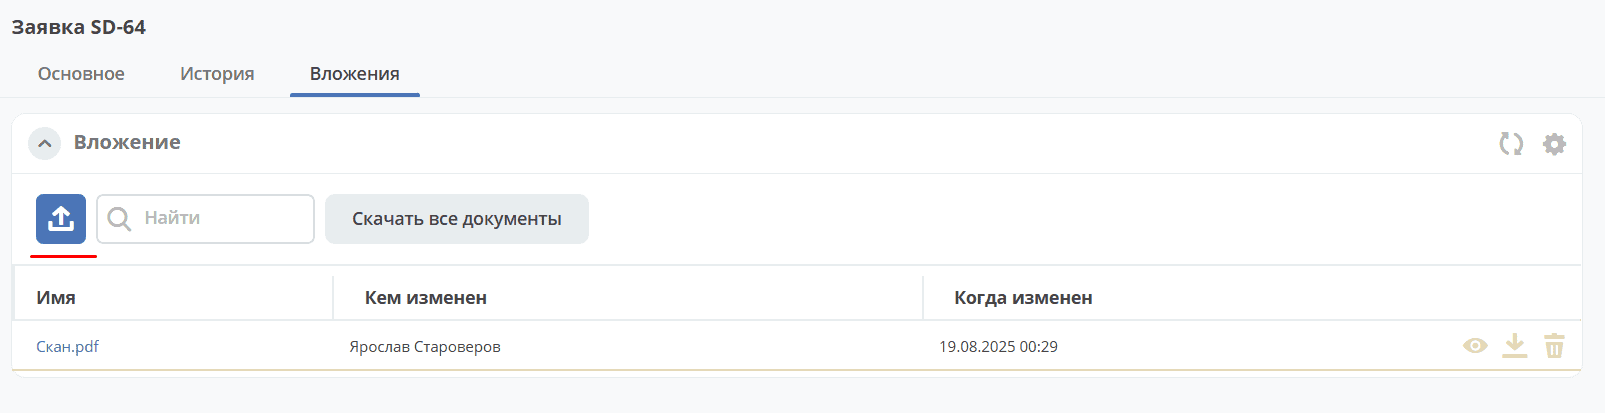
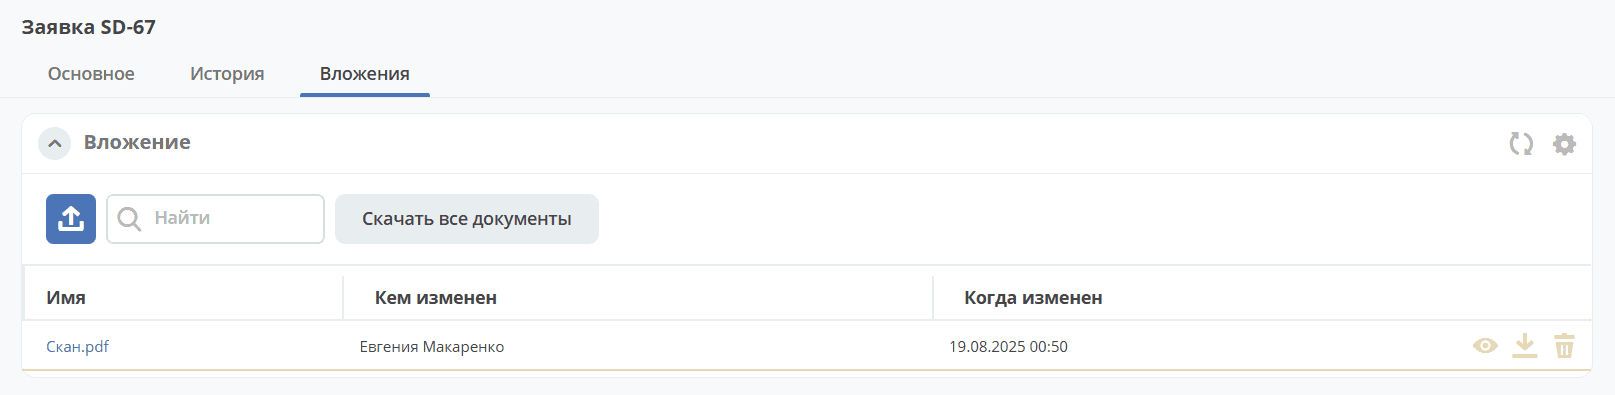
Next, on the Attachments tab, files can be added to the ticket:
Ticket Card with Widgets

The card consists of the following widgets:
The “SD Ticket” widget displays information provided by the Initiator, fields filled by the Performer and the system during the ticket lifecycle. Data filled automatically by the system:

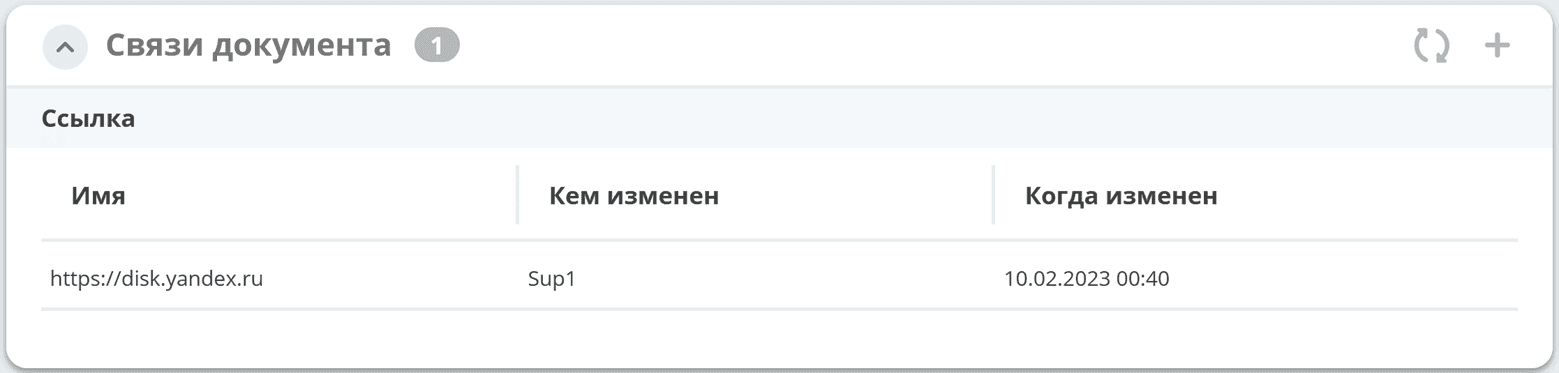
The “Document Links” widget for establishing links between this ticket and others and displaying established links.
The “Comments” widget displays comments on the ticket. Details about the widget.
The “Status” widget displays the current ticket status (determined automatically by the system, not editable by the user).
The “Actions” widget contains a list of available actions for the ticket at its current status.
The “All Tasks” widget displays tasks related to the ticket and their performers.
The SLA Widget displays the main parameters of SLA.
The “Remaining Time” widget, which displays the number of hours and minutes remaining for each support line according to the SLA.
The “Details” widget. Detailed information about the ticket: number, initiator, creation date/time, priority, author, customer.
The “More Fields” widget. Additional ticket fields.
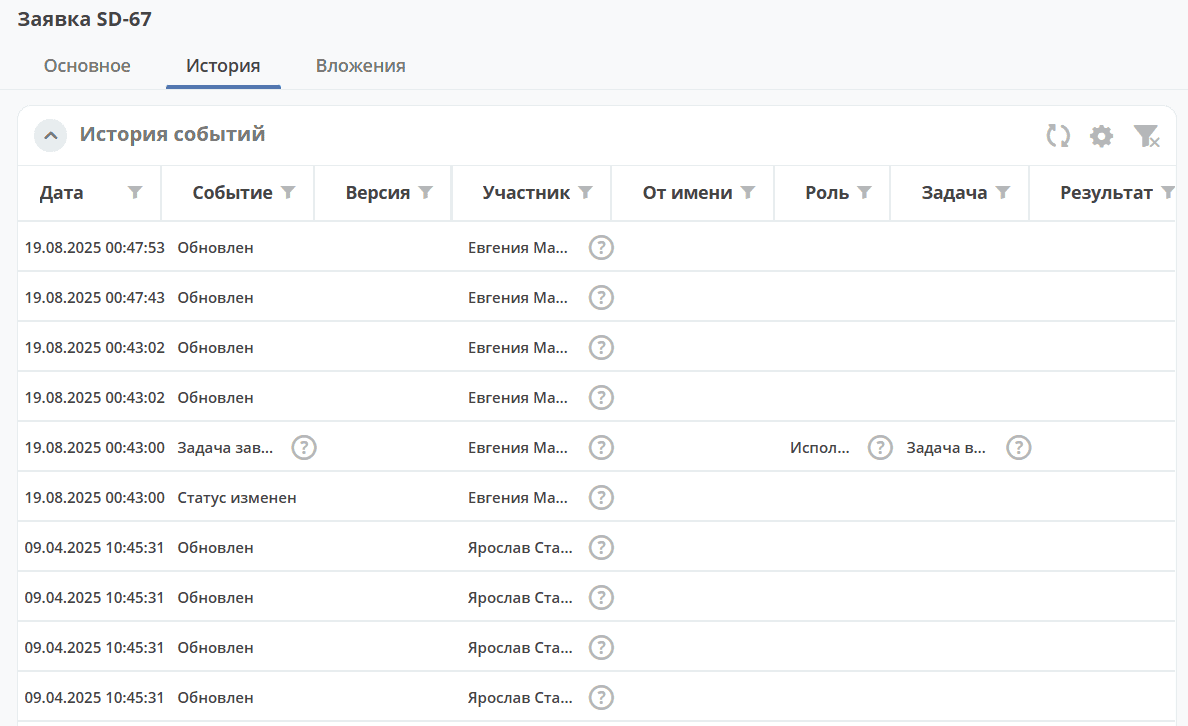
Tab “History”
The “Event History” widget is used to display events such as creation, update, case status change with recording of the date and time of their occurrence, participants, and comments.
Tab “Attachments”
The tab is intended for adding files to the ticket:
Links
A web link can be added as a link:

Actions
Possible process actions are grouped in the “Actions” widget under the item “Complete Task ‘Name of User’s Current Task’”:
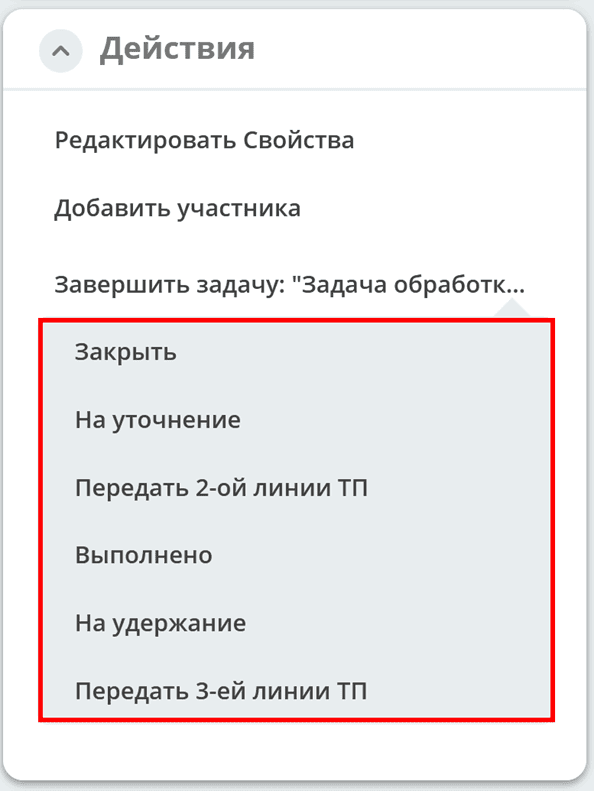
Action execution, task completion requires confirmation. For some actions, a comment can be filled in.
See details in the section Working with a Ticket
Comments
When the Internal comment mark is set, the comment will not be visible to the customer.
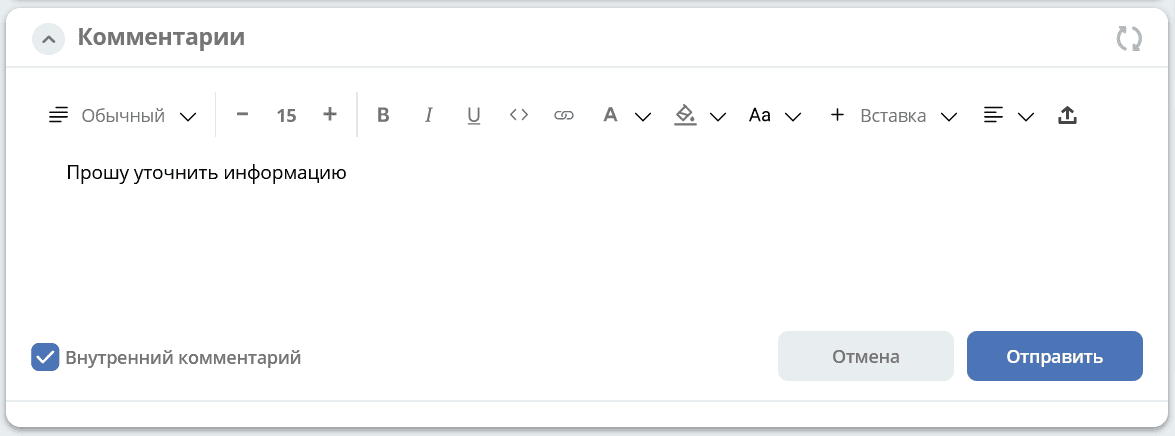
Notifications about comments are sent according to the process in the following cases:
Initiator added a comment - notification sent to 1st, 2nd, 3rd line.
1st, 2nd, 3rd line support added a comment - notification sent to the Initiator.
SLA
SLA (Service Level Agreement) is an external document (existing between the customer and the provider) describing the parameters of the provided service.
For the service provider, a Service Level Agreement is a simple, accessible agreement between them and the customer (internal or external). Such an agreement defines the services provided, the expected response speed, and the method for measuring effectiveness.
The SLA agreement defines the agreed terms of service provision, including uptime and support responsiveness.
The SD module tracks two main parameters:
time to first response,
time to final resolution.
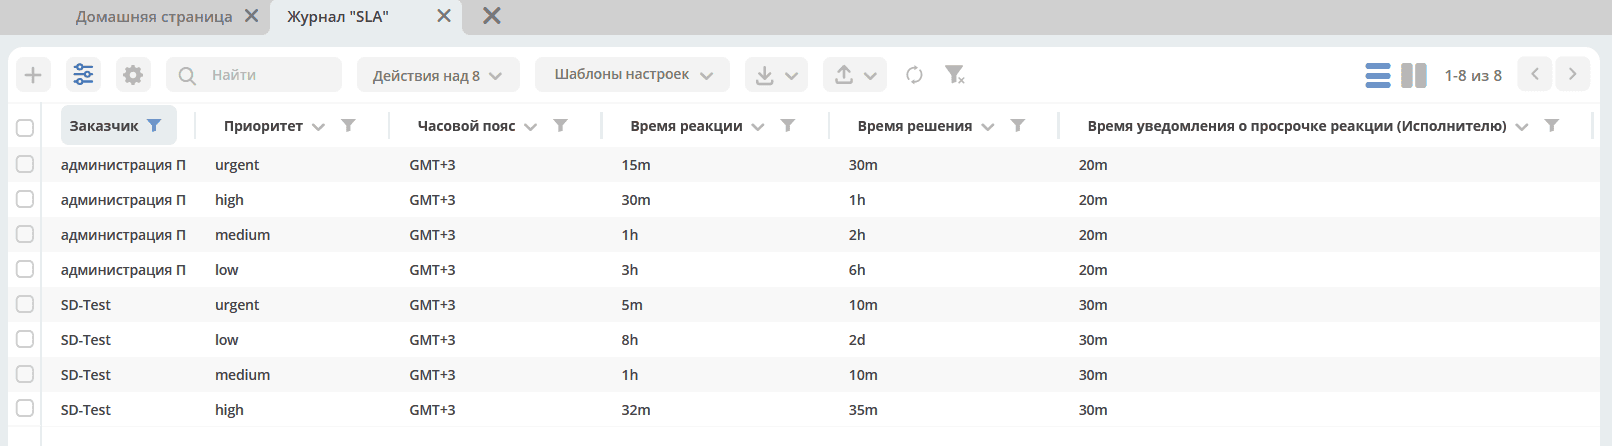
SLA configuration is available in the journal:
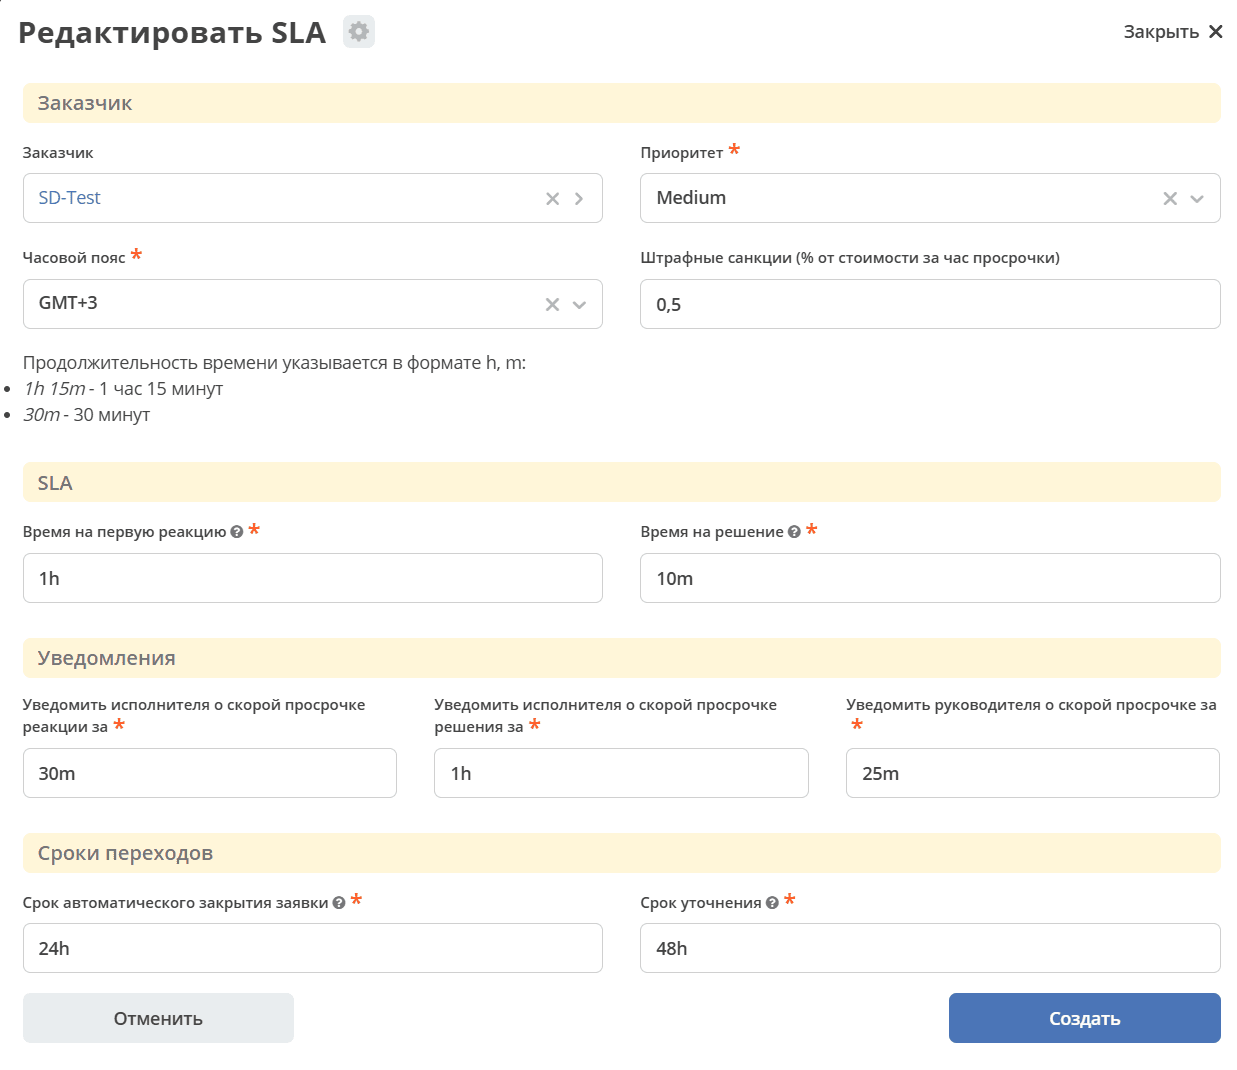
SLA Card:
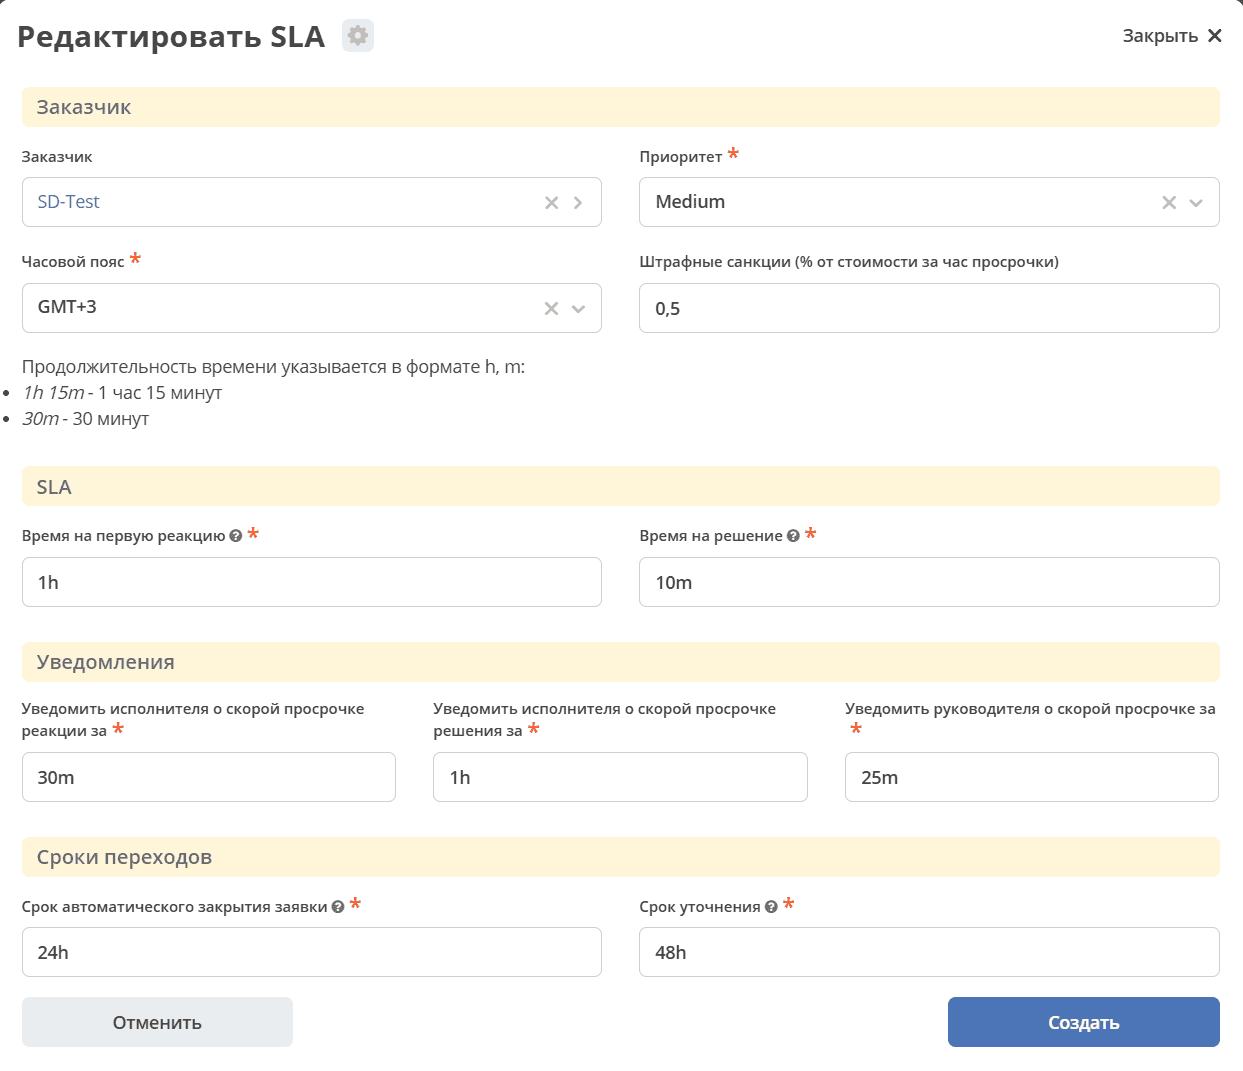
SLA data can be configured for each specific customer. If the customer’s SLA specifies an agreed monthly limit for technical support hours, this limit is indicated in the Customer Mapping card
SLA Widget
The SLA widget displays the main SLA parameters.
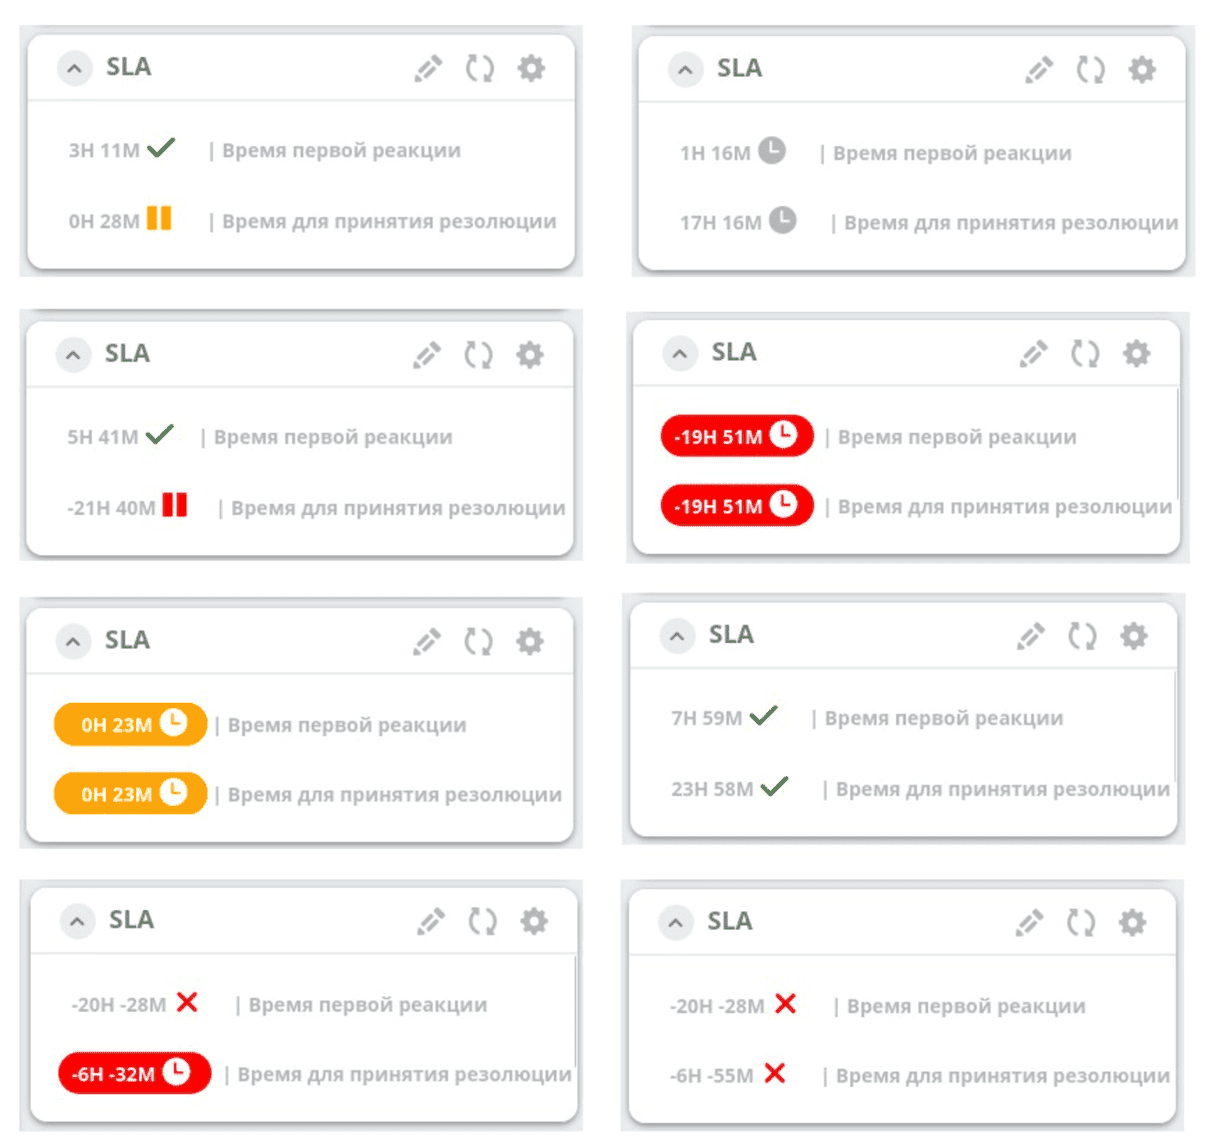
Notations:

|
Process started. |

|
Less than 30 minutes remain before the process becomes overdue. |

|
Process is overdue, indicates by how much. |

|
Process according to SLA is completed and NOT overdue. |

|
When transitioning to statuses “Clarification Needed”, “On Hold”, or “Completion Confirmation”.
Less than 30 minutes remain before the process becomes overdue.
|

|
When transitioning to statuses “Clarification Needed”, “On Hold”, or “Completion Confirmation”.
Process is overdue.
|

|
Process according to SLA is completed and overdue. |
Remaining Time Widget
The widget displays the number of hours and minutes remaining for each support line according to the SLA. The hours used for calculation are specified in the Customer Mapping card

If the remaining time reaches 0 or less, the value in the widget is highlighted in red:

If the limit is exceeded, when creating a new ticket for this customer, the SLA for that ticket is suspended.
SLA can be resumed manually using the “Resume SLA” action. This action is available only to the Technologist and the Support Manager.
Customers
Creation is available in the Customers journal

Specify the code, customer name, project, mail domains, select users, groups on whose behalf tickets will be accepted:
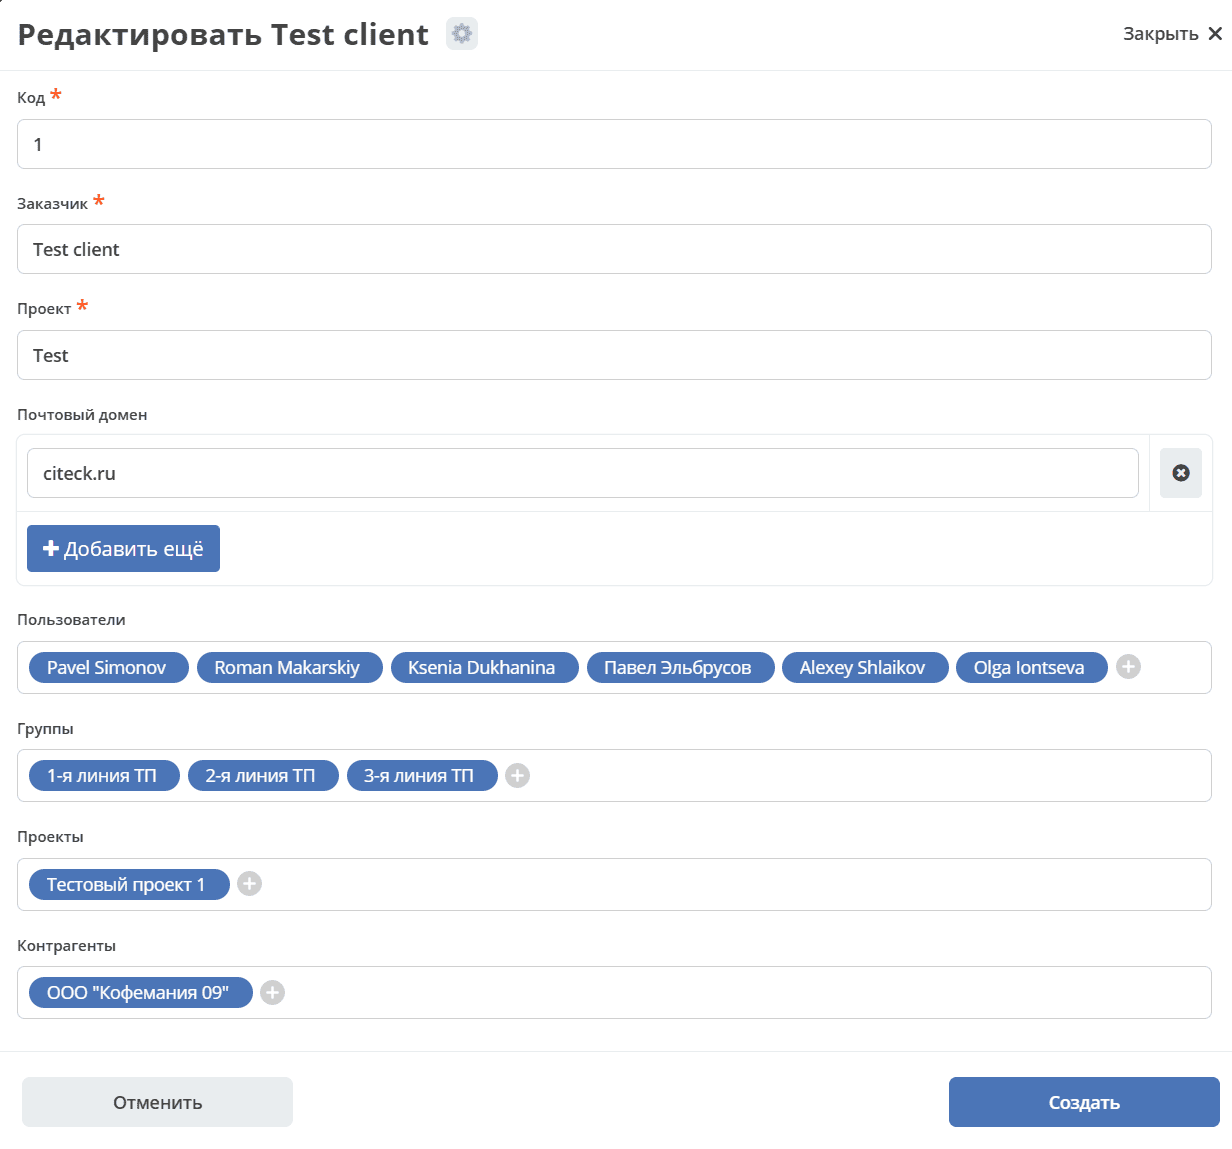
For automatic ticket creation, the mail domain, user, and their email are important.
Note
User data and their email are specified in the Citeck user card in the Users section.
For a newly created customer, you can also configure:
The method for calculating SLA taking into account technical support working hours. For example, if night/evening hours, weekends should not be included in the calculation, or set specific start and end times for work.
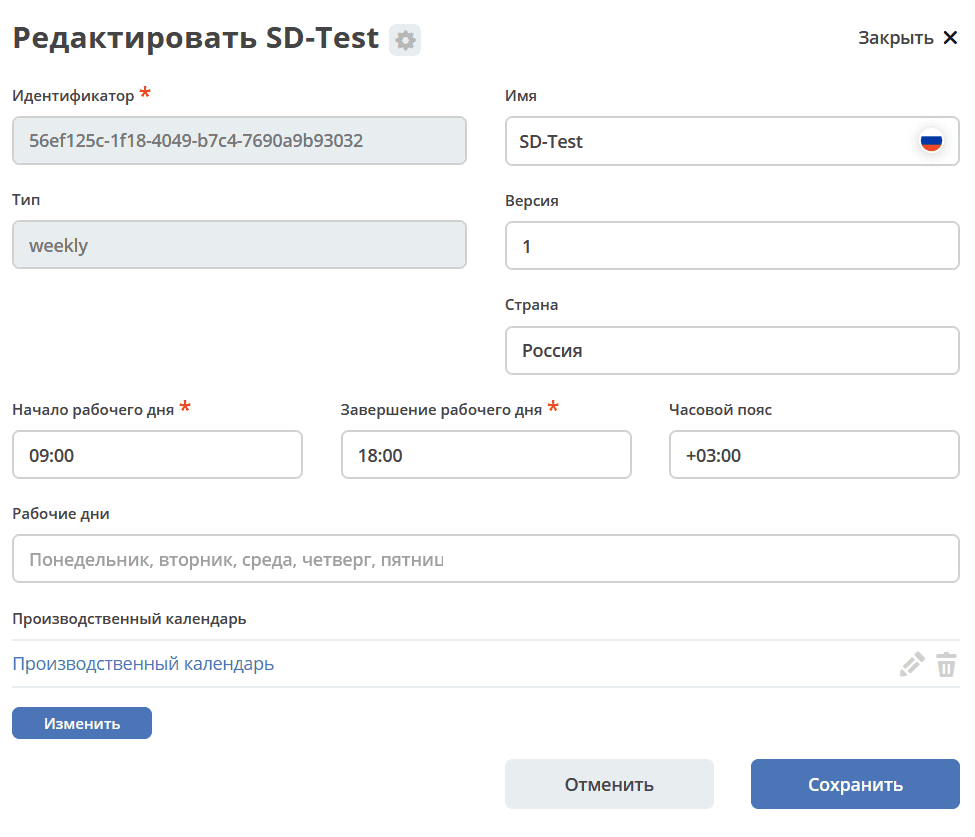
Working Schedule
v2/journals?journalId=type$working-schedule&ws=admin$workspace- tracking working hours of technical support individually for the added customer.
Example of filling:
And select it in the Customer Mapping card
distribution of customer tickets among support line employees:
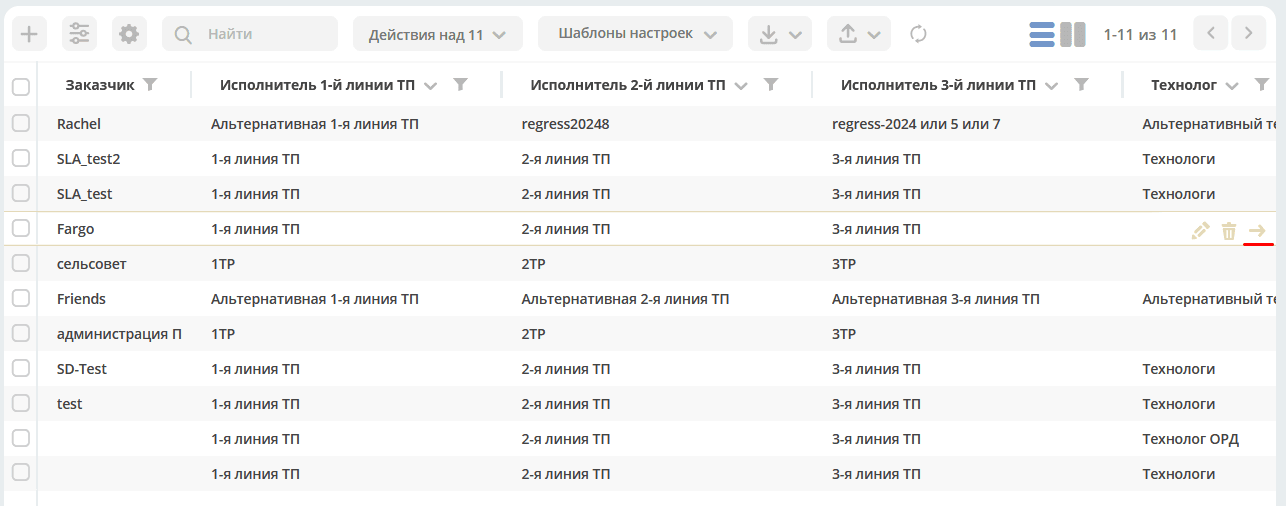
Customer Mapping
v2/journals?journalId=clients-mapping-journal&ws=service-desk-workspace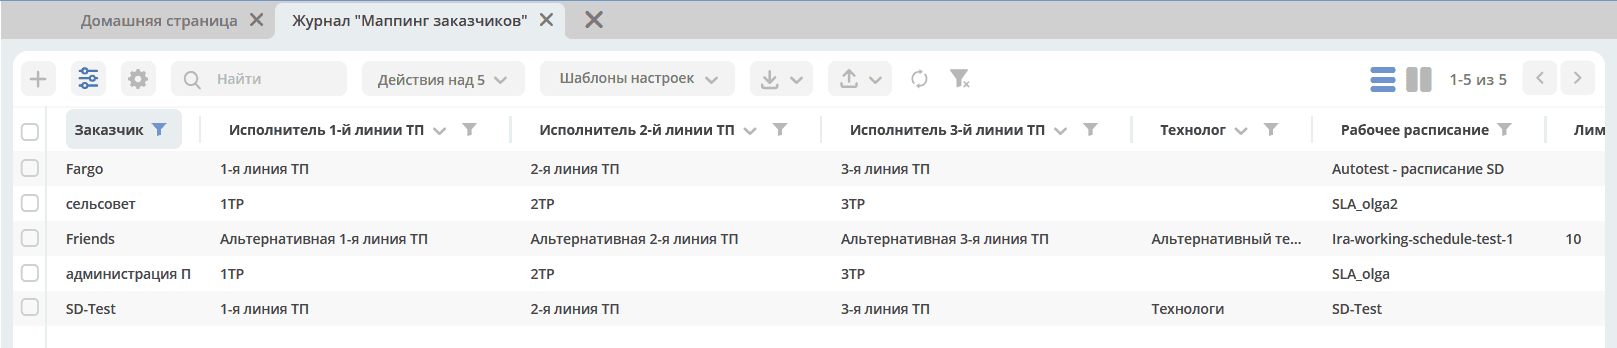
Example of filling:
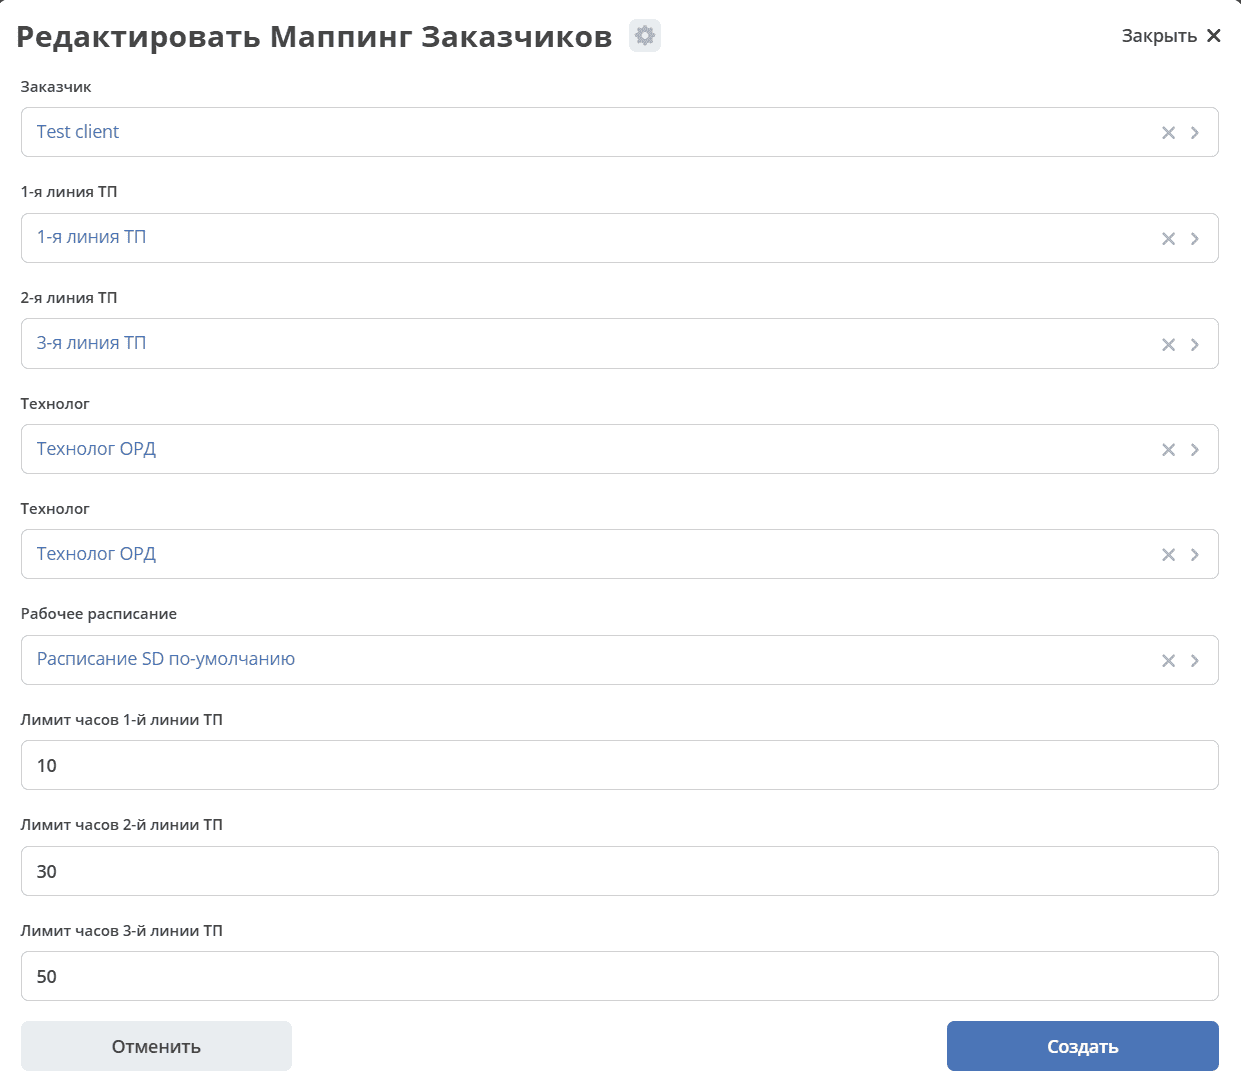
For each client, according to the SLA agreement, there is an established agreed hour limit per month within which technical support is provided.
In the customer mapping, you can also set time limits for each support line. Limits are set in hours. If limits are not set for the customer, the remaining time is not taken into account.
method for calculating SLA for each priority:
SLA
v2/journals?journalId=sd-sla-journal&ws=service-desk-workspace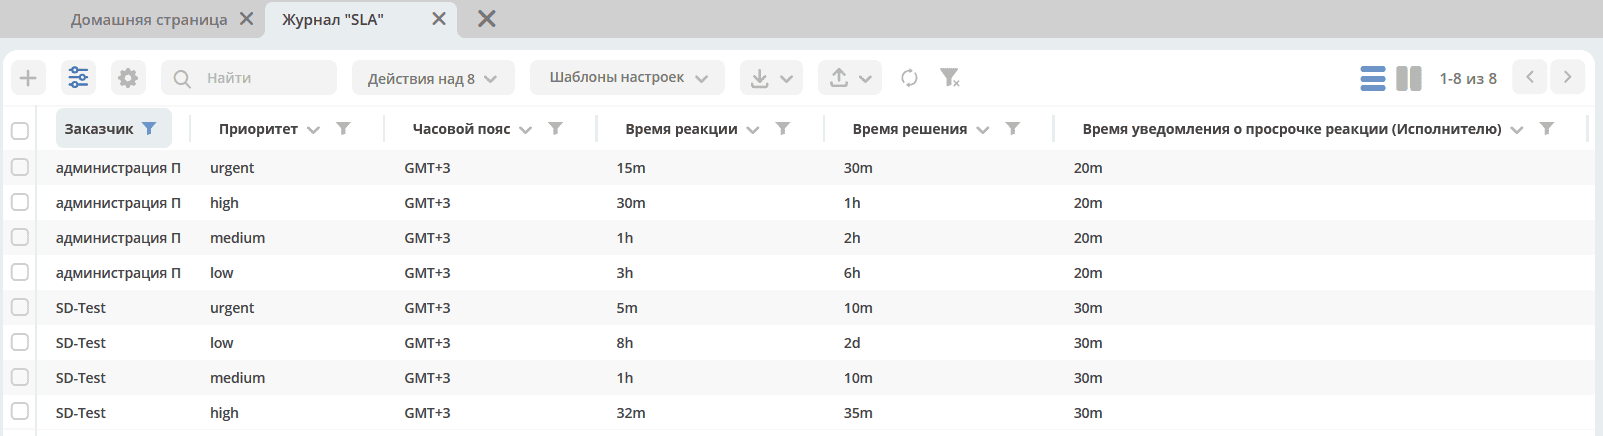
Example of filling:
If the Working Schedule, Customer Mapping, SLA are not individually filled in, then default data is used.
Working with a Ticket
The Performer can navigate to the Ticket in any of the following ways:
from a received notification;
from the “Current Tasks” journal;
by opening a task in the journals of the “Service desk” section.
Details about tasks.
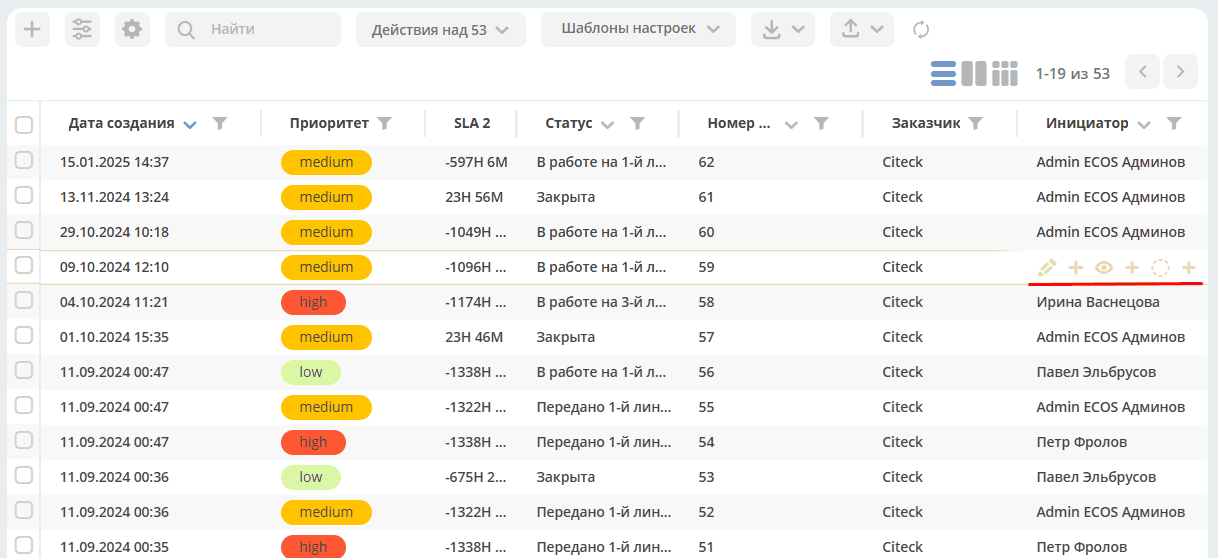
To take a ticket into work, transfer it to the next support lines, etc., use actions.
Actions are also available in the journal in the ticket row:
Action “Take into Work”
With this action, the Support Line Performer takes the ticket into work. The action is available at the statuses “Transferred to 1st Line Support”, “Transferred to 2nd Line Support”, and “Transferred to 3rd Line Support” respectively.
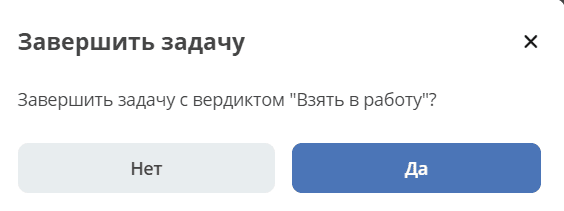
The action must be confirmed by clicking “Yes”.
The ticket transitions to the status “In Progress at 1st Line Support”, “In Progress at 2nd Line Support”, and “In Progress at 3rd Line Support” respectively.
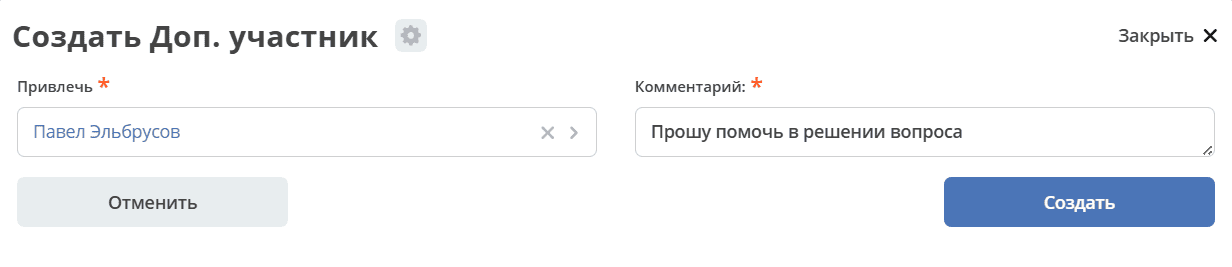
Action “Add Participant”
If additional performers need to be involved in resolving the ticket. The action is available to Performers of any support line at any of the statuses “In Progress at 1st Line Support”, “In Progress at 2nd Line Support”, and “In Progress at 3rd Line Support”.
When selecting the action, in the “Involve” field, you can select a specific user from the Organizational Structure (not a group), and in the “Comment” field, specify the essence of the request to the indicated employee.
Action “For Clarification”
If clarification from the Initiator is needed for the ticket. The action is available to Performers of any support line at any of the statuses “In Progress at 1st Line Support”, “In Progress at 2nd Line Support”, and “In Progress at 3rd Line Support”.
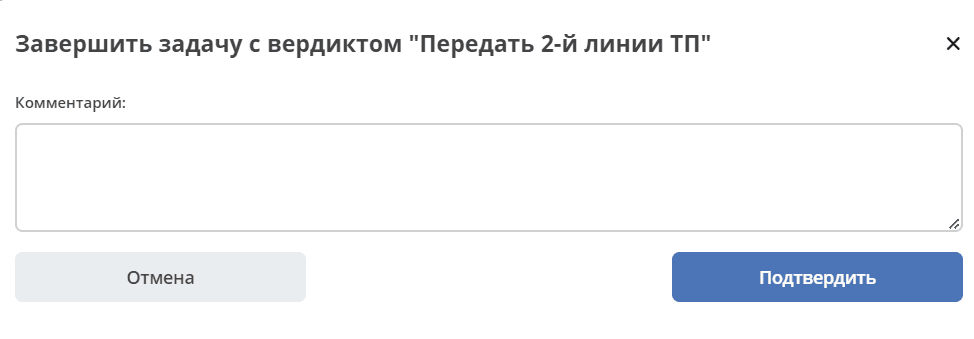
When selecting the action “For Clarification”, it is necessary to enter a comment and confirm:
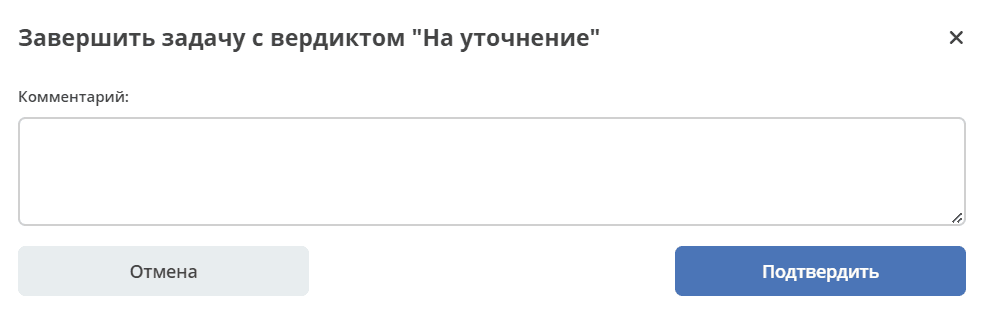
The ticket status will become “Clarification Needed”.
Next, the Initiator specifies a clarifying comment in the ticket, the system recognizes that this comment is from an account belonging to the Initiator and sends the ticket to the status “Transferred to 1st Line Support”.
Action “Put on Hold”
If it is necessary to suspend work on the ticket, for example, awaiting a resolution outside of Support, or at the request of the Initiator.
When selecting the action “Put on Hold” by users of the 1st, 2nd, and 3rd support lines, it is necessary to enter a comment and confirm.
The ticket status will become “On Hold”. SLA calculation for the ticket will not be performed.
To return the ticket to work, use the action “Return to Work” - the status will change to “Transferred to 1st Line Support”.
Action “Transfer to Nth Line Support”
For transferring the ticket to the selected support line.
The action is available to Performers of any support line at any of the statuses “In Progress at Nth Line Support”.
Optionally, you can enter a comment. The ticket status will become “Transferred to Nth Line Support”.
Action “Completed”
Confirmation by the Initiator of the ticket completion.
The action is available to Performers of any support line at any of the statuses “In Progress at 1st Line Support”, “In Progress at 2nd Line Support”, and “In Progress at 3rd Line Support”.
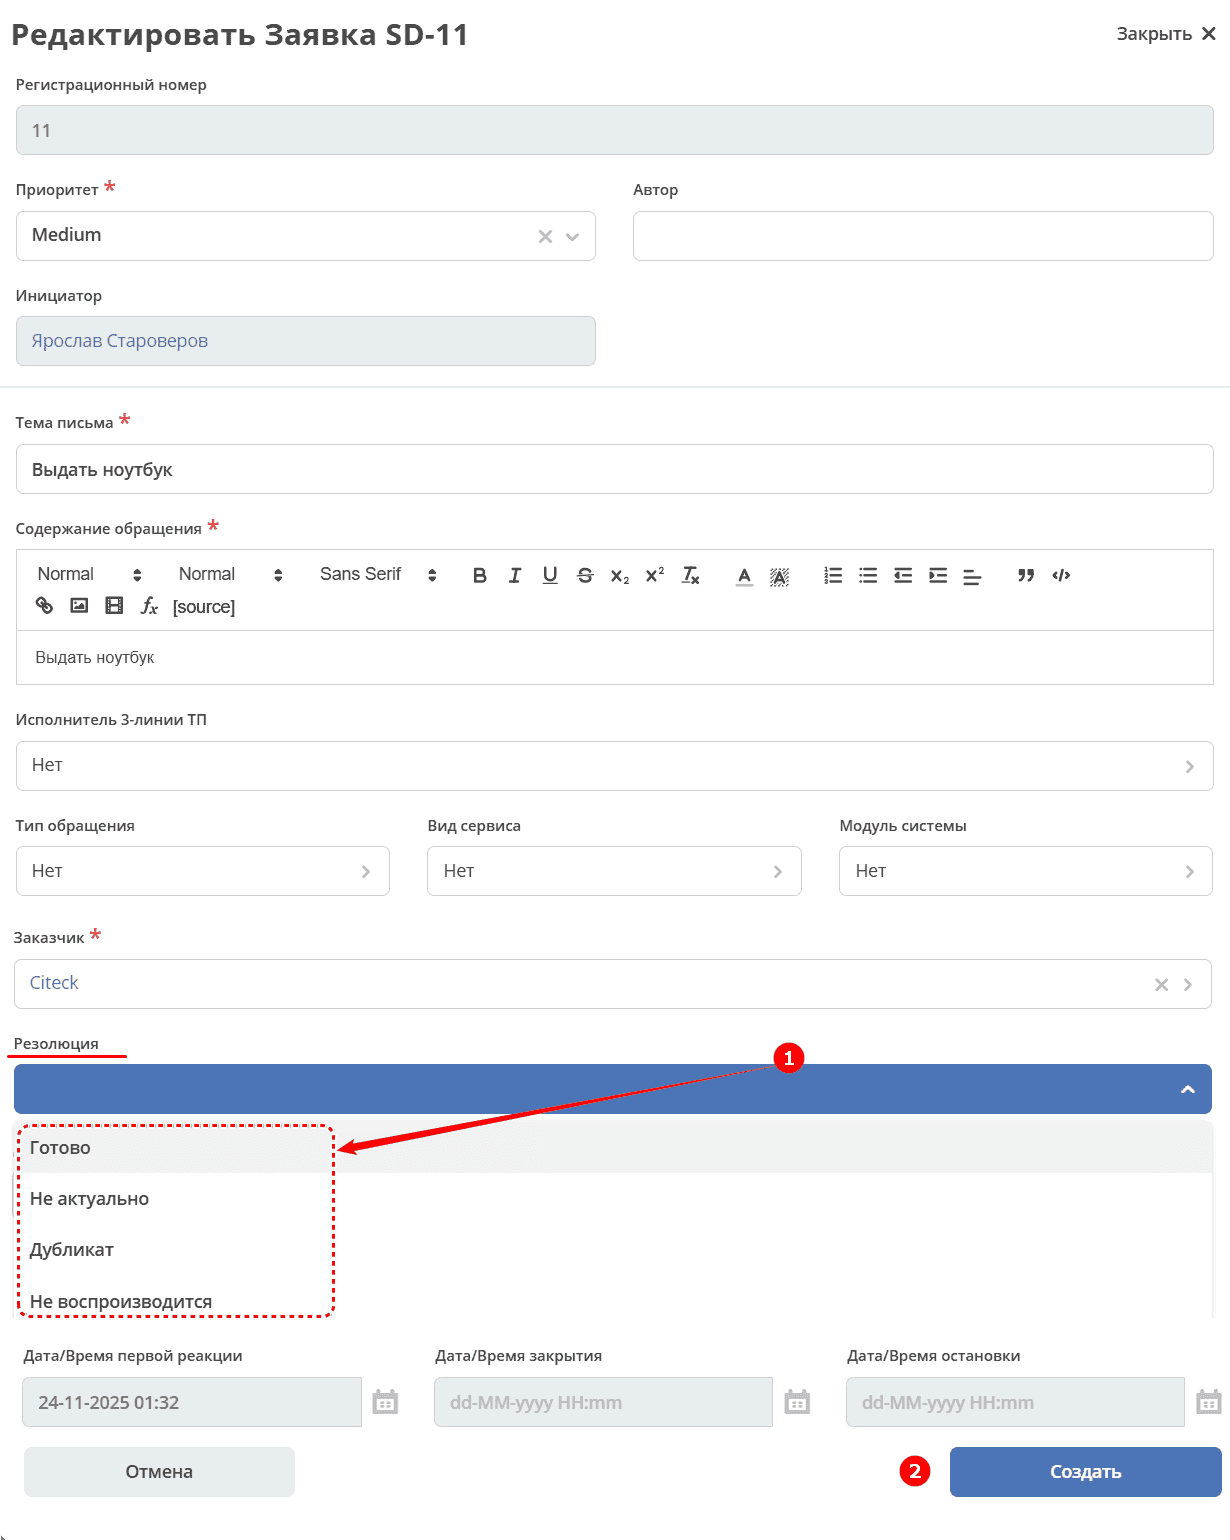
First, in the card, you need to switch to edit mode:
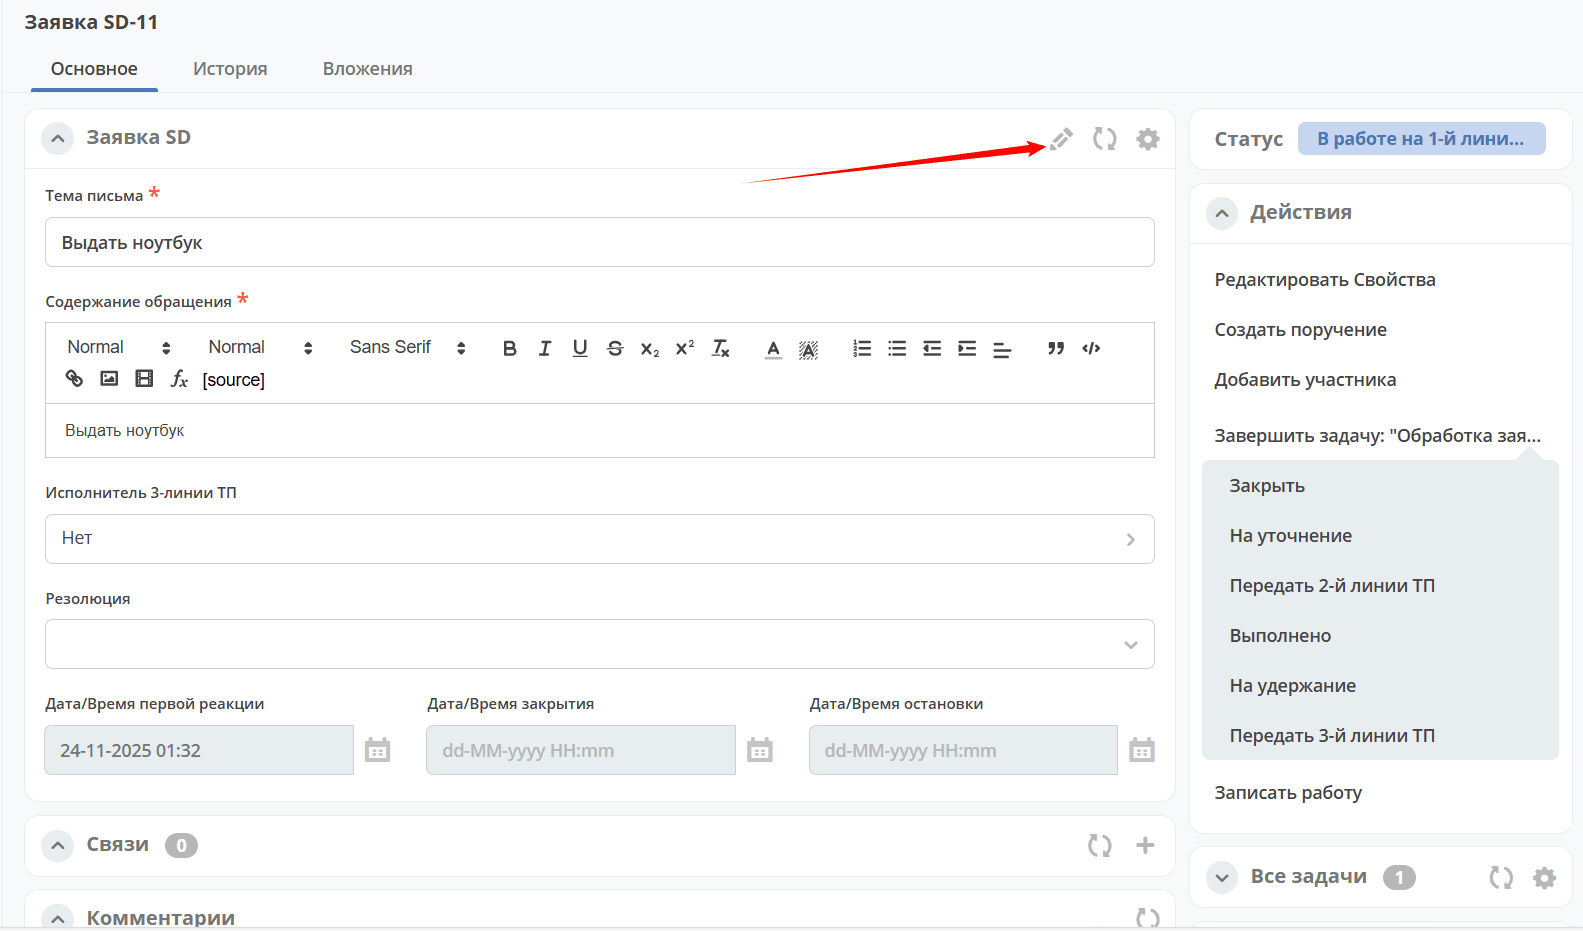
Select a resolution (1) from the list, save the data (2):
and then select the action “Completed”.
Optionally, you can enter a comment. The ticket status will become “Completion Confirmation”.
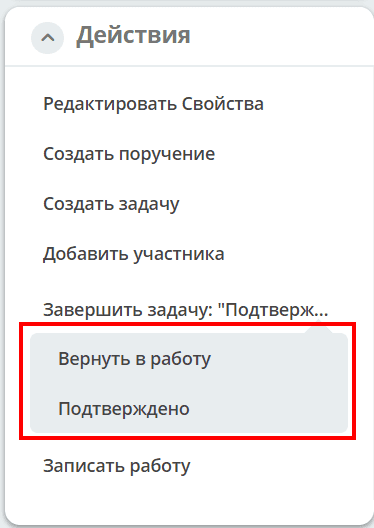
The Initiator of the ticket will have 2 actions available - “Return to Work” and “Confirmed”:
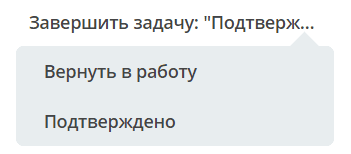
When selecting “Return to Work”, the Initiator needs to enter a comment and confirm - the ticket status will become “Transferred to Nth Line Support”, where N is the support line that was working on the ticket.
When selecting “Confirmed” - the resolution will automatically be filled with the value “Done”, and the ticket status will become “Closed”.
Action “Close”
For closing the ticket upon its actual completion and confirmation by the Initiator.
The action “Close” is available to Performers of any support line at any of the statuses “In Progress at 1st Line Support”, “In Progress at 2nd Line Support”, and “In Progress at 3rd Line Support” respectively.
First, in the card, you need to switch to edit mode:
Select a resolution (1) from the list, save the data (2):
and then select the action “Close”.
The ticket status will become “Closed”.
Action “Return to Work”
The action “Return to Work” is available to 1st line support employees at the ticket statuses “Closed” and “On Hold”. When this action is launched, the ticket transitions to the status “Transferred to 1st Line Support”.
Action “Reset Remaining Time”
On the 1st of every month, a job is launched that resets all remaining time to the original limit values. It also reviews all tickets with suspended SLA and resumes it automatically.
Remaining time can be reset manually without waiting for the job to execute using the action “Reset Remaining Time” in the Customer Mapping journal. This action is also available only to the Technologist and the Support Manager.
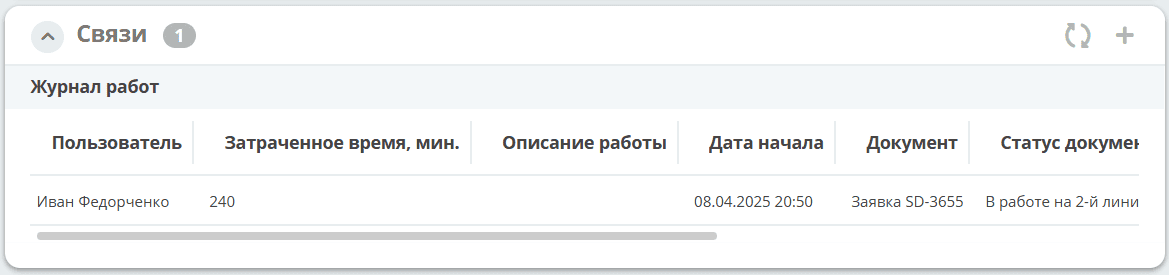
Log Work
The functionality for tracking time spent by an employee on a specific task is described in the section Time Tracking
Time spent on the task is displayed in the “Links” widget in the “Work Log” section:
Create Assignment
An assignment can be created from a document card by selecting the action “Create Assignment”. See details Creating an assignment from a card
Ticket Reports
In the Enterprise version, you can generate and export ticket reports to Excel from any journal of the module:
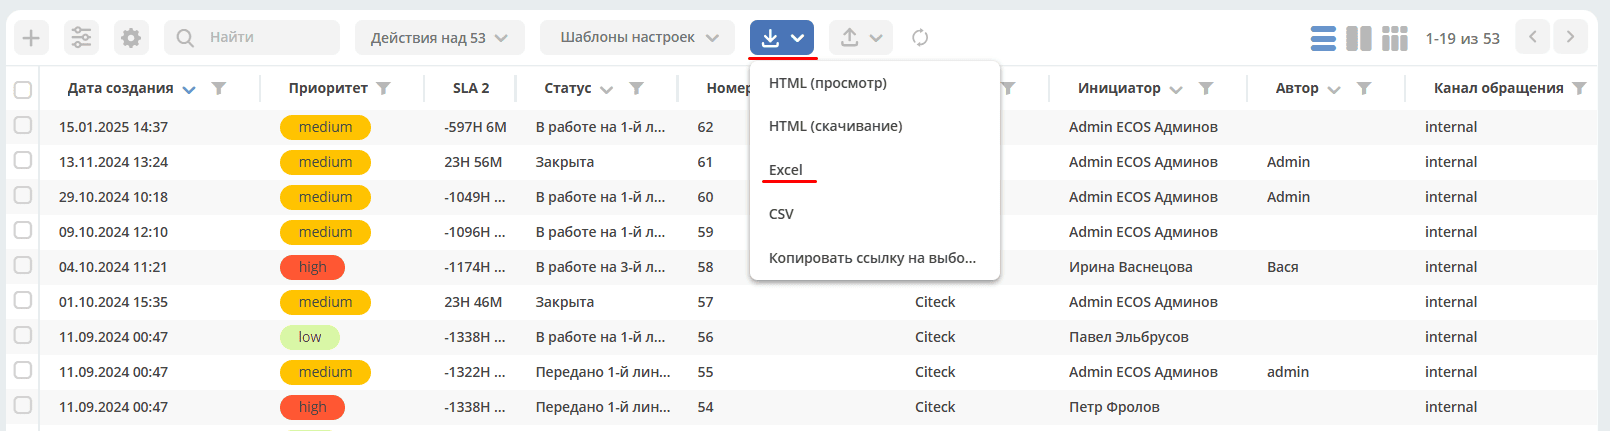
In the report from the All Tickets journal, the Closing Line of the ticket is displayed:

Creating a Ticket from an Email
The module can be configured to create SD tickets from email messages. For this, it is necessary to create customer cards and configure the mailbox for reading emails.
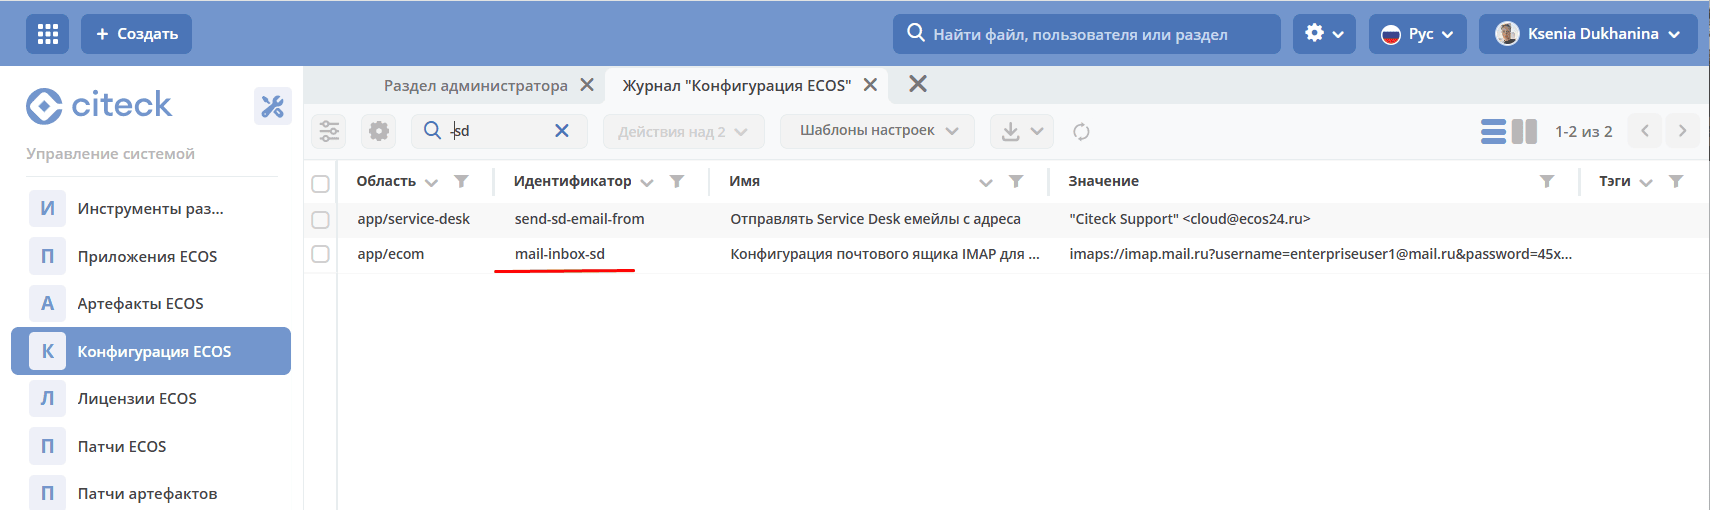
Configuration for Email Parsing
Mailbox configuration is done in ECOS Configuration mail-inbox-sd (IMAP mailbox configuration for reading emails in SD Camel route):
In the value field, the following must be entered:
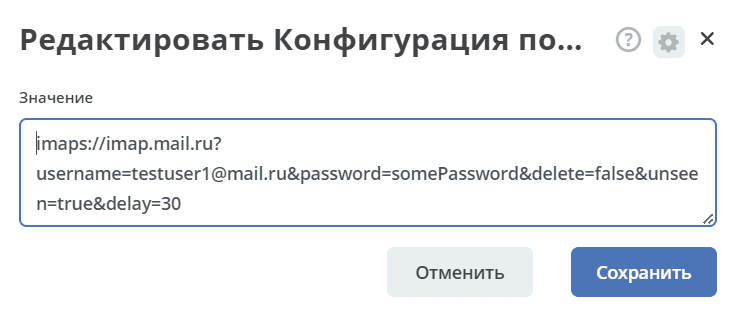
imaps://imap.mail.ru?username=testuser1@mail.ru&password=somePassword&delete=false&unseen=true&delay=30
Where:
username |
email address that will handle message processing |
password |
password for connection |
delete |
whether to delete messages in the mailbox after processing. This is done by setting the DELETED flag on the email message. If false, the SEEN flag is set instead. |
unseen |
whether to limit to unread emails only. |
delay |
mailbox check frequency (specified in milliseconds) |
Warning
Значение конфигурации mail-inbox-sd считывается микросервисом ecom один раз — при старте приложения (Camel-маршрут собирается на этапе инициализации Spring-контекста).
После любого изменения настройки (включая переключение значения с disabled на реальный IMAP URI и обратно) необходимо перезапустить микросервис ecom, иначе новые параметры подключения не применятся.
The customer search logic is as follows:
Search for potential customers based on the domain from the email author’s address.
Among the potential customers, search for one that has the email author in its user list (compare by the user’s email field). If found, it is returned.
If a default customer is set AND it is among the potential customers, then search for the user among all users in the system by email (regardless of whether they are added to the customer or not). If found, it is returned.
If no result is returned from the previous steps, then consider that the customer and user are not found, and the ticket is not created.
Automatically, the following ticket fields will be filled from the received email:
Email subject;
Request content;
Author;
Initiator.
When a ticket moves through the business process, the ticket author receives emails of this format:
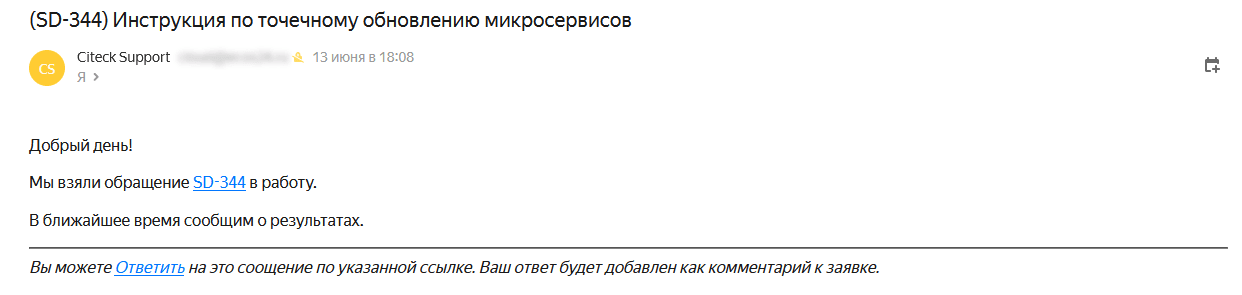
The ticket author clicks on the “Reply” link, writes an email. The information from the email body will be transferred to the ticket comment.
Rules for processing such an email and transferring information from it:
Attachments are removed.
Protection against style changes, link additions - tags are removed, only the email text remains in the comment.
Script execution blocking.